Action Center not Opening in Windows 10: Why & How to Fix
Encompassing and surefire solutions to restore the Action Center
![]() 15 min. read
15 min. read
![]() Updated on
Updated on
Share this article

Improve this guide
Read our disclosure page to find out how can you help Windows Report sustain the editorial team Read more
Key notes
- If the Action Center is not opening on Windows 10, it might be because your PC is outdated.
- You can fix this issue quickly by running the Disk Clean up tool.
- Repairing and restoring some corrupt system files is another way to solve this problem.
Action Center allows you to see and open important notifications in Windows 10. However, some users report that this important feature is not opening on their PCs.
This takes away the ease of accessing your notifications. Fortunately, there are surefire fixes that can help you solve this problem, and we will show them to you in this guide.
Why can’t I open Action Center in Windows 10?
Below are some of the factors that can cause the Action Center not to open on Windows 10:
- Corrupt system files: Sometimes, this issue might be because your system files are faulty or missing. The solution to this is to repair and restore these corrupt files.
- Outdated PC: If your PC is outdated, the Action Center might not open. The only way around this is to update your operating system to the latest version.
- Excessive junk files: In some cases, this issue can be caused by too many junk files on your hard disk. You need to run the Disk Clean-up feature to clear them.
- Interference from third-party apps: Some third-party apps might be running programs blocking the Action Center. You need to disable these apps from starting up with your PC to fix this.
What to do if Action Center won’t open in Windows 10
1. Use ShellExView
- Download and run ShellExView.
- When the application starts, locate Security & Maintenance.cpl and Windows Management Instrumentation.cpl. Disable these options.
- Wait for a few seconds and enable them again. Save changes and close ShellExView. If you can’t find these options, uncheck the Hide all Microsoft services checkbox.
- Now restart your PC.
According to users, sometimes the Action Center not opening issue can be caused by context menu items. To fix this problem, you need to use ShellExView or any other similar application that can edit context menu items.
2. Turn off your computer
You can fix this problem simply by turning off your PC. By default Windows 10 uses the Fast Startup option that doesn’t fully turn off your PC.
Therefore you need to turn off your PC by holding the power button for several seconds. Turn your PC on again and check if the Action Center is now opening on Windows 10.
Some users also suggest simply logging off and logging back in to fix this problem. To do that, follow these steps:
- Open the Start Menu.
- Click the User icon and choose the Sign Out option from the menu.

- Now log back again to Windows 10.
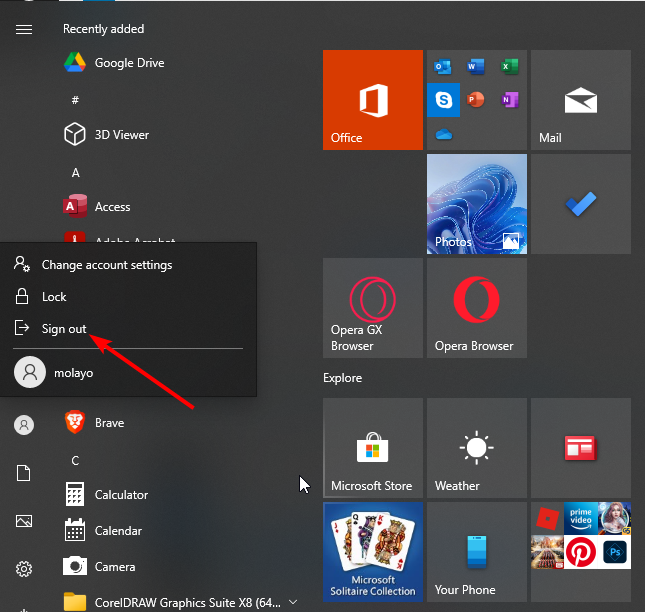
After doing that, check if the problem is resolved.
3. Delete Arial Narrow font
- Press Windows key + S and enter fonts. Choose Fonts from the menu.

- Fonts window will now appear with the list of all installed fonts. Navigate to Arial.

- Finally, locate Arial Narrow, right-click it, and choose Delete from the menu.


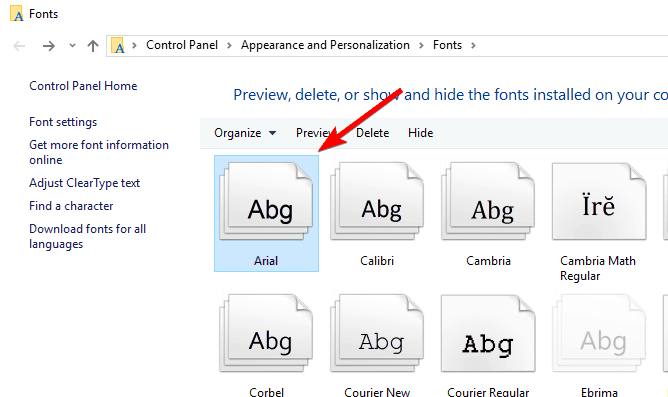
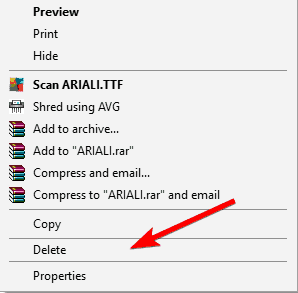
Several users reported that the Action Center not opening on Windows 10 issue was caused by the Arial Narrow font. The font file can become corrupted, and that can cause certain Windows components, such as Action Center, to stop working.
To fix the problem, you need to remove the Arial Narrow font.
After deleting the font Action Center should start working again without issues. If you need the font, you might have to get it from a working PC and install it again.
4. Use PowerShell
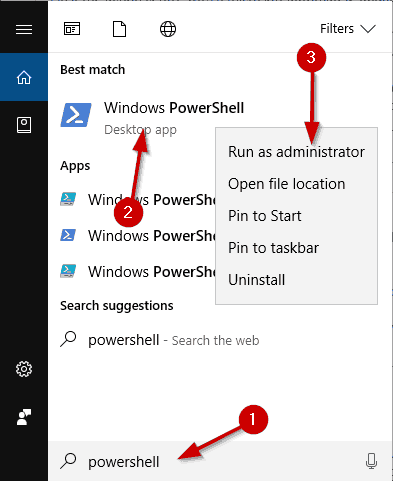
- Press the Windows key + S and type powershell.
- Locate Windows PowerShell, right-click it and choose Run as administrator.

- Now, paste the following line into PowerShell:
Get-AppXPackage -AllUsers |Where-Object {$_.InstallLocation -like "*SystemApps*"} | Foreach {Add-AppxPackage -DisableDevelopmentMode -Register "$($_.InstallLocation)AppXManifest.xml"}
- Finally, press Enter to run the command.
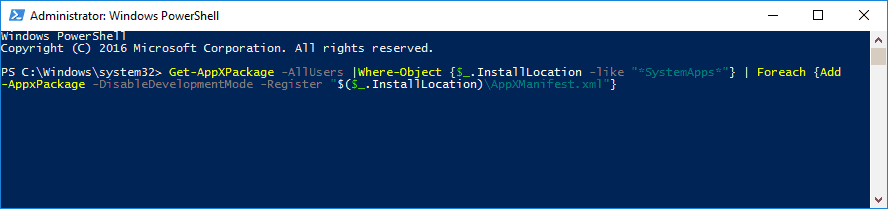
A few users managed to get the Action Center to open on Windows 10 by reinstalling the feature using PowerShell.
This is a powerful and advanced command line tool. Therefore, we strongly advise that you create a System Restore point and backup in case anything goes wrong.
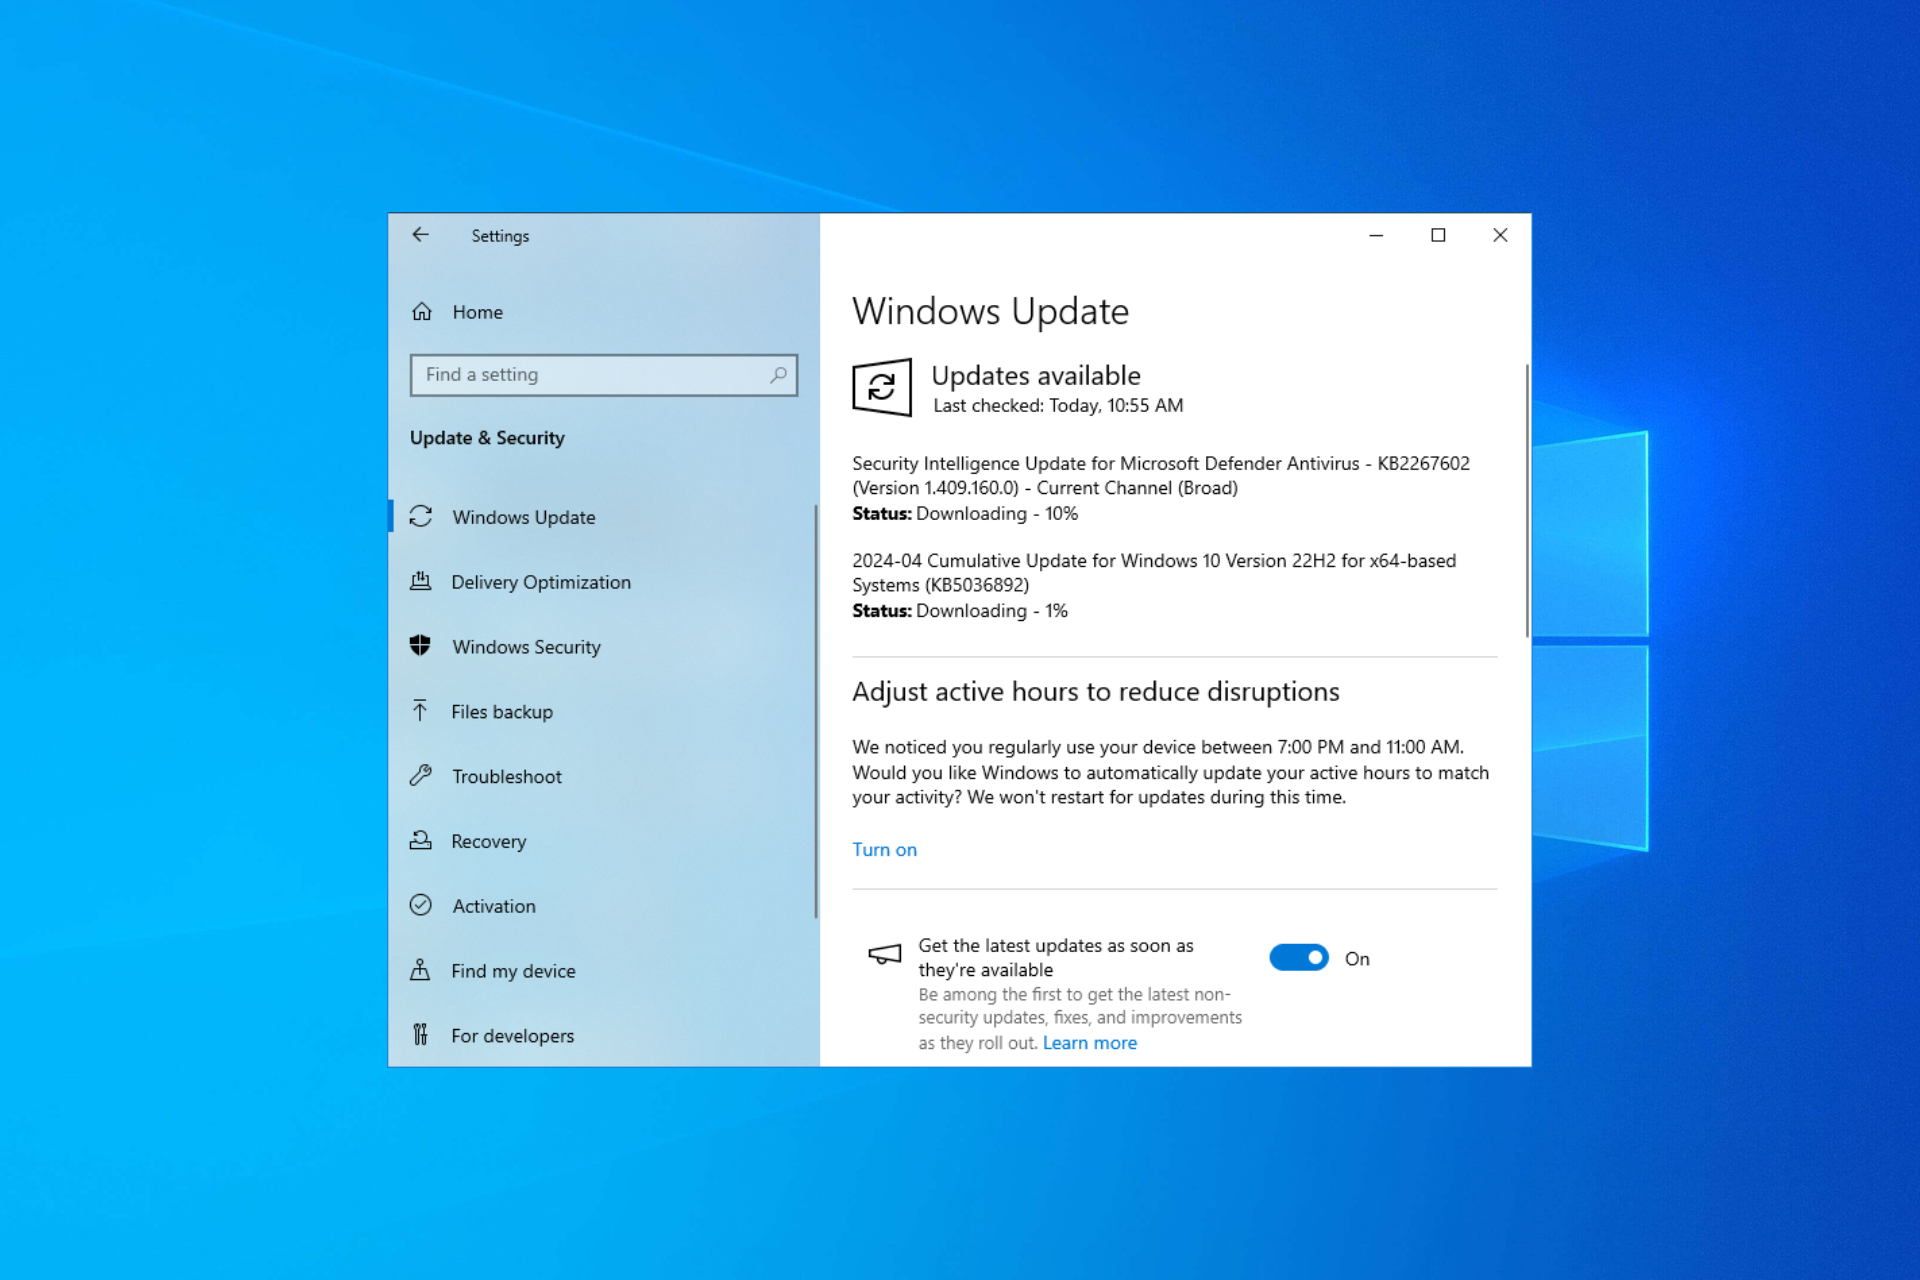
5. Download the latest Windows update
- Press the Windows key + I to open the Settings app.
- Go to Update & security section.
- Now, click the Check for updates button. If any updates are available, Windows 10 will download and install them automatically.

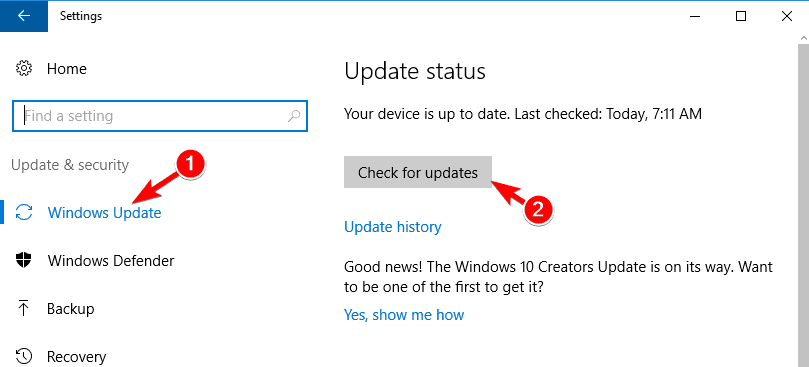
You can fix the Action Center not opening on Windows 10 issue by installing the latest Windows updates. Microsoft frequently releases new updates to improve stability and fix certain issues.
In most cases, Windows 10 will automatically install all updates, but you can also check for updates manually.
6. Disable Outlook 2016 notifications
According to users, the issue with Action Center is caused by Outlook 2016. It seems that Outlook notifications are responsible for this problem.
The Outlook notifications will stop appearing after a while and eventually prevent Action Center from opening on Windows 10. To fix the issue, you need to disable Outlook 2016 notifications.
7. Scan your C drive
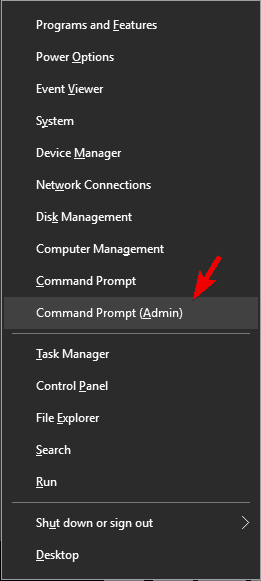
- Press the Windows key + X and choose Command Prompt (Admin) or Windows PowerShell (Admin).

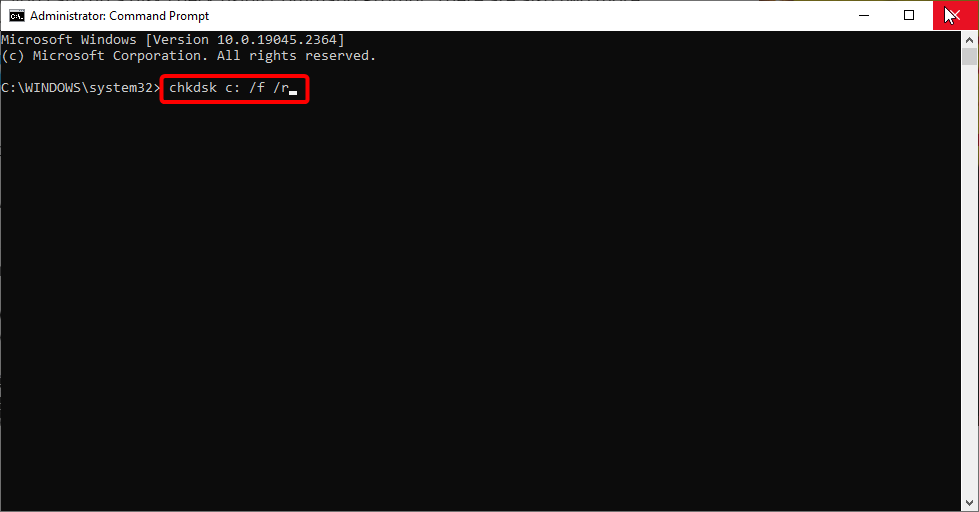
- Now, type the command below and hit Enter:
chkdsk c: /f /r
- Finally, press Y when prompted and restart your PC.
Sometimes, Action Center might stop opening on Windows 10 if your files are corrupted. If that’s the case, the best choice of action would be to scan your C drive.
After the scan is completed, check if the problem is resolved.
8. Start Windows 10 in Safe Mode
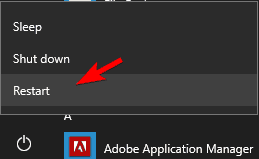
- Press the Windows key and click the Power button.
- Now, press and hold the Shift key and choose Restart from the menu.

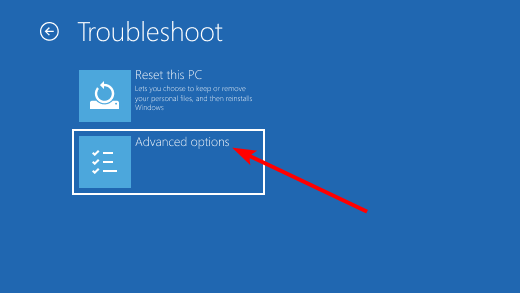
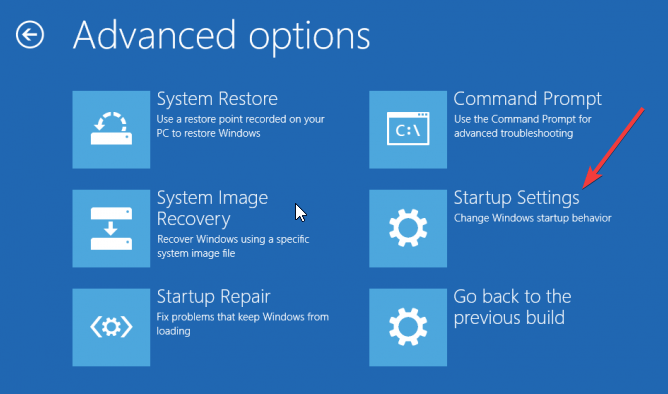
- After your PC restarts, choose Troubleshoot > Advanced options.

- Now, select Startup Settings.

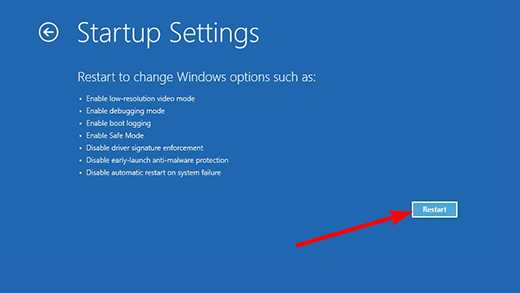
- Click the Restart button.
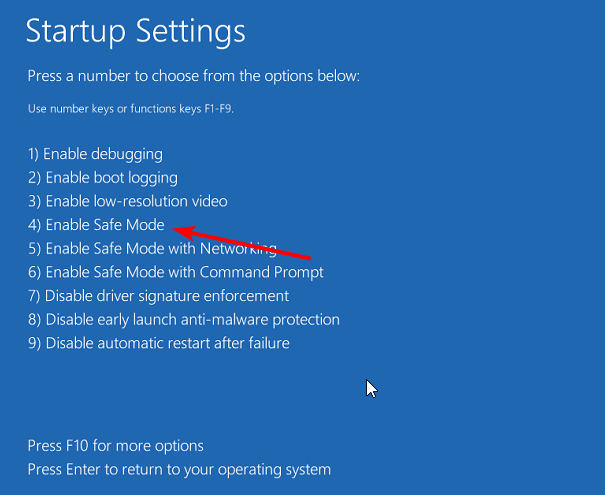
- After your PC restarts, press the corresponding button to Enable Safe Mode.

A few users reported that they managed to fix the Action Center not opening on Windows 10 problem simply by starting Windows 10 in Safe Mode.
9. Restart Windows Explorer
- Press Ctrl + Shift + Esc to start Task Manager.
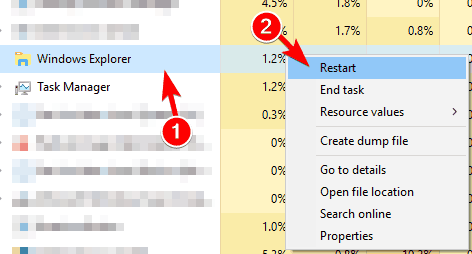
- When Task Manager starts, locate the Windows Explorer process.
- Now, right-click it and choose Restart from the menu.

Alternatively, you can close Windows Explorer and restart it manually. To do that, follow these steps:
- Open Task Manager.
- Locate the Windows Explorer process and right-click it.
- Now, choose End Task from the menu.

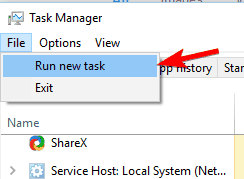
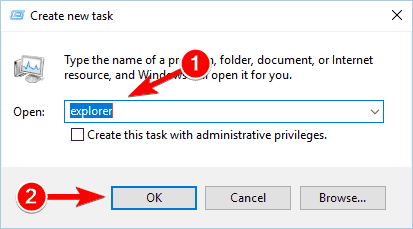
- After closing Windows Explorer in Task Manager, click on File > Run new task.

- Finally, type explorer and click OK to start Windows Explorer again.


Another possible solution to the Action Center not opening on Windows 10 issue is to restart Windows Explorer.
After doing this, check if the problem is resolved. This might not be the permanent solution, so you’ll have to repeat it every time the issue occurs.
10. Use Group Policy Editor
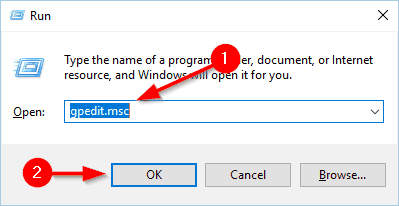
- Press Windows key + R and enter gpedit.msc. Press Enter or click OK.

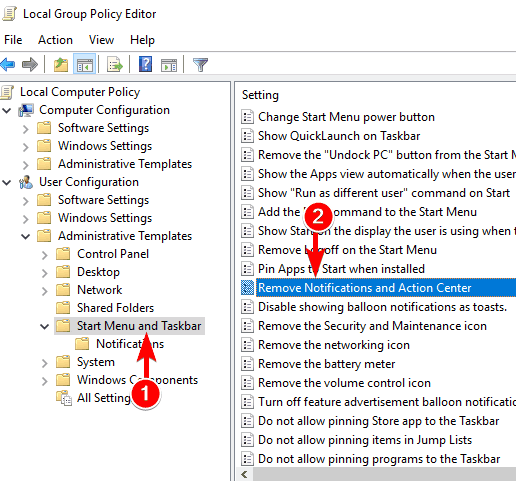
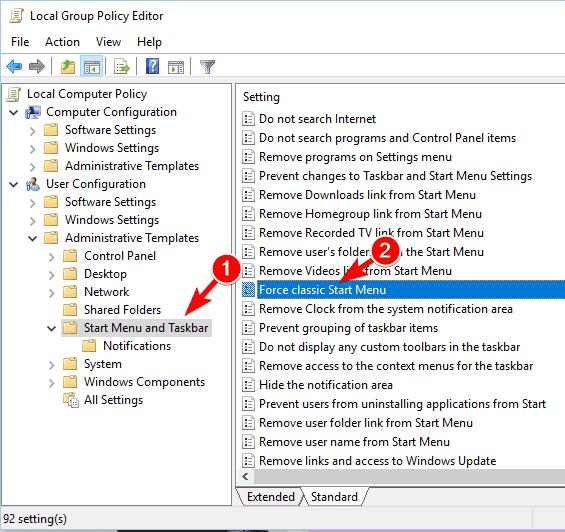
- In the left pane, navigate to Local Computer Policy > User Configuration > Administrative Templates > Start Menu and Taskbar.
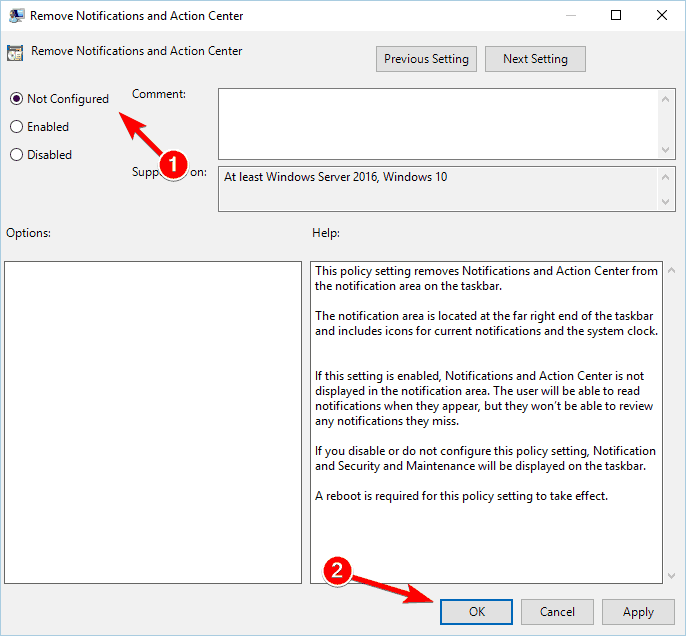
- In the right pane, double-click on the Remove Notifications and Action Center option.

- Select the Not Configured or Disabled option and click Apply and OK to save changes.

According to a few users, you can fix this issue simply by changing the few options in Group Policy Editor. After that, check if the Action Center is opening on Windows 10.
There’s also another solution that involves Group Policy Editor. This solution requires changing two values, and you can perform it by following these steps:
- Open Group Policy Editor.
- In the left pane, navigate to the path below:
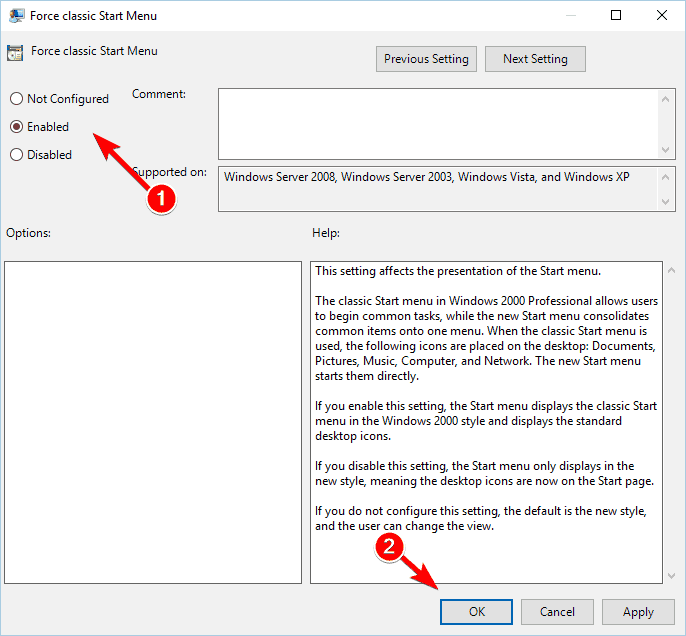
Local Computer Policy > User Configuration > Administrative Templates > Start Menu and Taskbar - In the right pane, locate and double-click Force classic Start Menu.

- Select the Enabled option and click on OK.
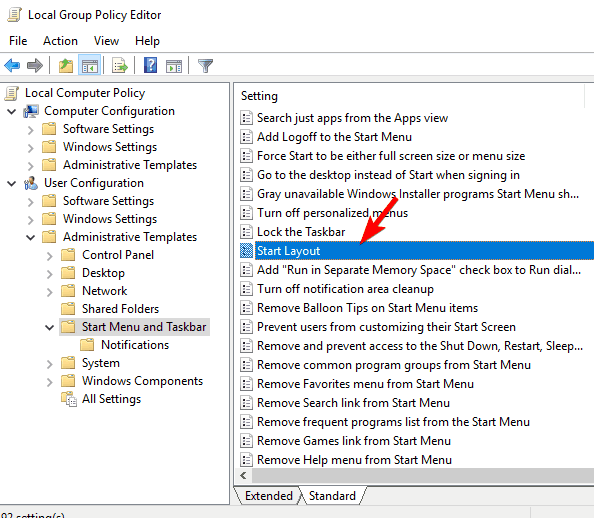
- Now, locate the Start Layout option and double-click it.

- Next, select Disabled and click Apply and OK to save changes.
- Finally, close everything and restart your PC.
After your PC restarts, check if the problem is resolved.
11. Edit your registry
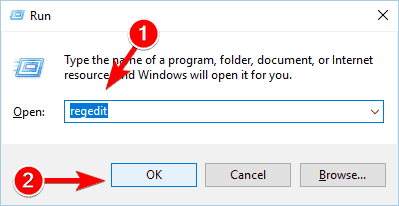
- Press the Windows key + R, type regedit, and click the OK button.
- After Registry Editor opens, go to the path below in the left pane:
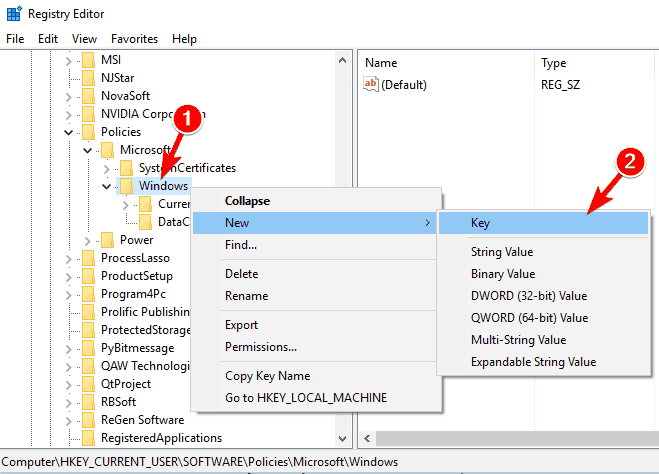
HKEY_CURRENT_USER\SOFTWARE\Policies\Microsoft\Windows - Now, expand the Windows key and look for the Explorer key. If you don’t have this key available, you need to create it.
- To do that, right-click the Windows key and choose New > Key.
- Enter Explorer as the name of the new key.

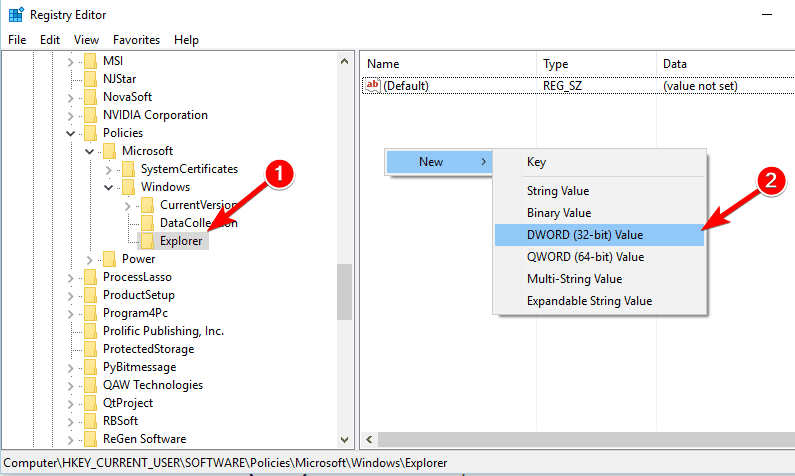
- Now, select the Explorer key. Right-click the space in the right pane and choose New > DWORD (32-bit) Value.
- Enter DisableNotificationCenter as the name of the new DWORD.

- Double-click DisableNotificationCenter DWORD and set the Value data to 0.
- Finally, click OK to save changes and restart your PC.


If you can’t open Action Center on Windows 10, you might have to make a few changes to your registry. Modifying the registry can lead to stability issues. Therefore, we advise you to create a backup of your registry, just in case anything goes wrong.
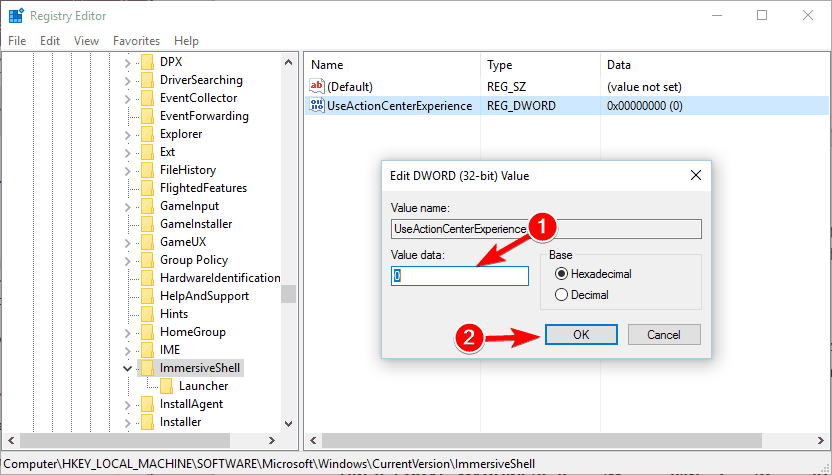
There’s also another registry edit that might help you with this problem. According to users, you need to disable the new Action Center from Registry Editor: To do that, follow these steps:
- Open Registry Editor.
- In the left pane, navigate to:
HKEY_LOCAL_MACHINE\Software\Microsoft\Windows\CurrentVersion\ImmersiveShell - Create a new DWORD and name it UseActionCenterExperience.
- Now, open the new DWORD and set the Value data to 0.
- Click OK to save changes.

- Finally, close the Registry Editor and restart your PC.
After making the changes, Action Center should now open on Windows 10. Users reported that Outlook notifications caused this issue, so be sure to remove them from Action Center.
After doing that, disable Outlook notifications and remove UseActionCenterExperience DWORD from the registry.
12. Run Disk Cleanup
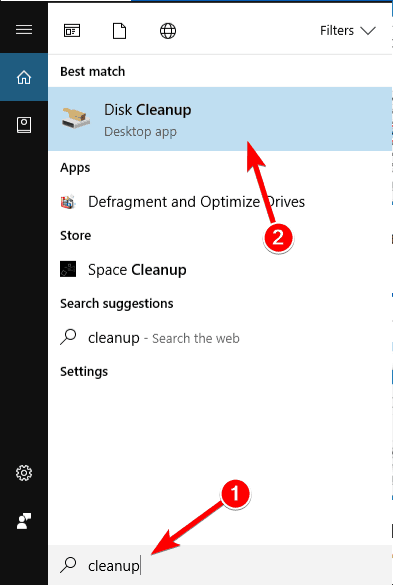
- Press the Windows key + S and enter cleanup.
- Select Disk Cleanup from the menu.

- Now, select your System drive; by default, it should be C, and click the OK button.

- Disk Cleanup will now analyze your drive. Wait for the process to finish.
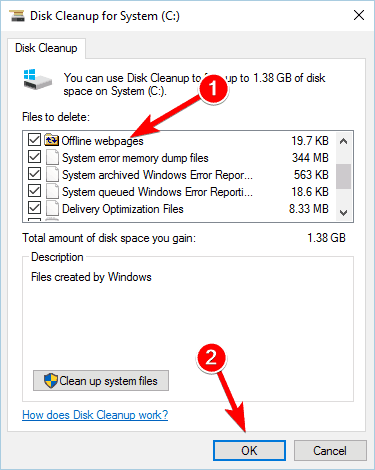
- Select the files that you want to remove. In most cases, you can select all files. Now click the OK button.

- Finally, wait while Disk Cleanup removes the selected files.

Sometimes temporary or leftover files can cause issues with Windows 10. A few users reported that they solved the issue by removing old and temporary files.
After the process, try to open Action Center on Windows 10 and check if the problem is resolved.
13. Use the Advanced SystemCare tool
Some users managed to fix the Action Center not opening on Windows 10 issue simply by using the Advanced SystemCare tool. This application has a small tool called Smart Defrag that can optimize applications.
A few users reported that using the Smart Defrag feature in the Advanced SystemCare tool fixed the problem for them, so you might want to try using this application.
14. Remove problematic applications
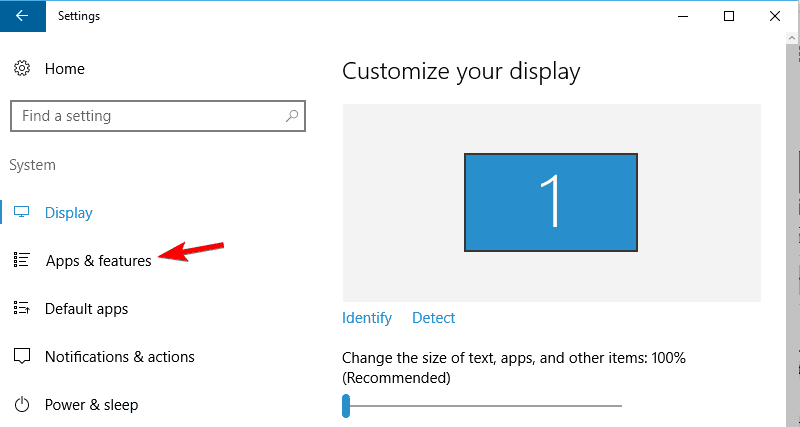
- Press the Windows key + I to open the Settings app and select the System option.
- Select the Apps & features tab.

- List of all installed applications will now appear. Locate Akami NetSession, select it, and click the Uninstall button.
- Finally, follow the onscreen instructions to complete the process.
Sometimes third-party applications can cause problems with Action Center. Users reported that Akami NetSession caused this problem on their PC. If you have this application installed, we strongly suggest you remove it.
Keep in mind that other applications can also cause this problem to occur. You might have to remove additional applications to fix this problem.
Several users reported that removing Dropbox and Apple applications fixed the issue for them, so be sure to try that as well.
15. Use SFC and DISM scan
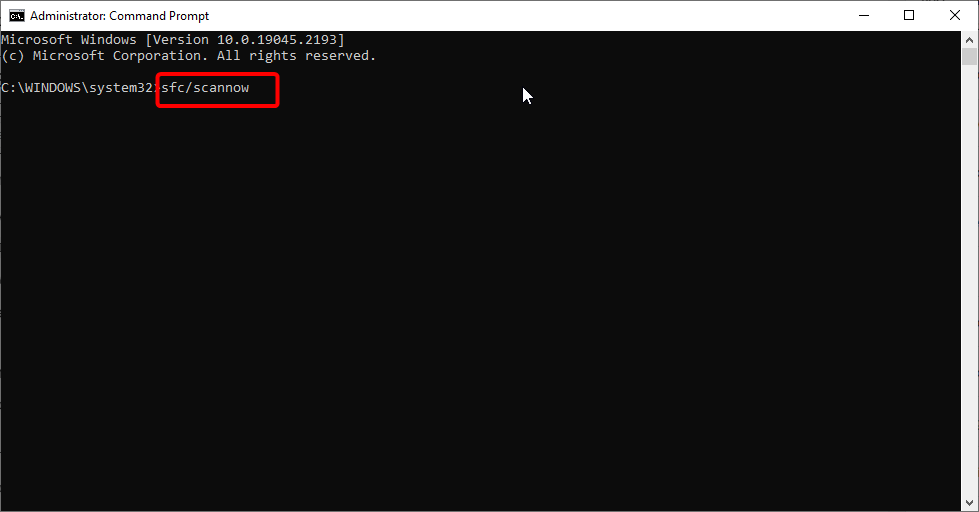
- Open Command Prompt as administrator.
- When Command Prompt starts, enter the command below and hit Enter:
sfc /scannow - Finally, wait for the scan to complete and restart your PC.
If the issue persists, you might need to run a DISM scan. To do that, follow these steps:
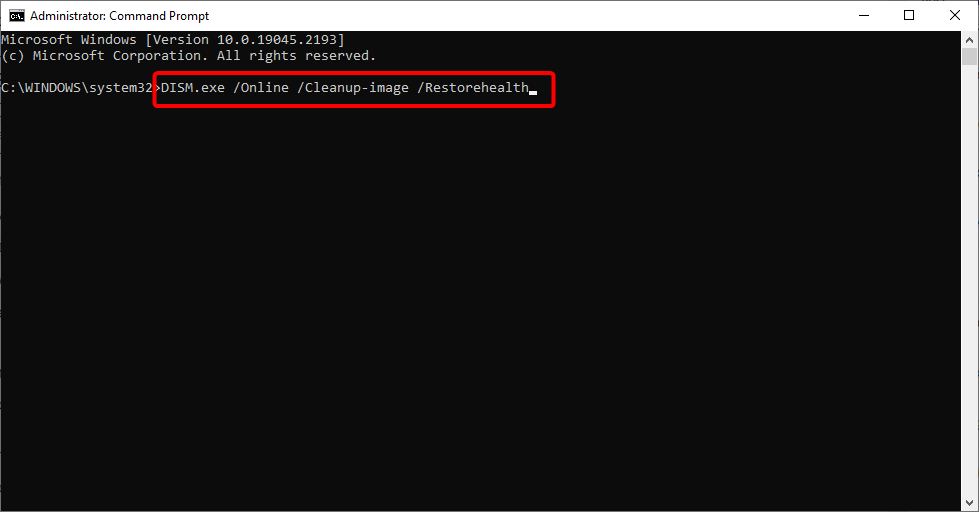
- Open Command Prompt as administrator.
- Now, type the following commands and hit Enter after each:
DISM.exe /Online /Cleanup-image /Scanhealth DISM.exe /Online /Cleanup-image /Restorehealth - Wait for the commands to finish. The DISM process can take 15 or more minutes, so be sure not to interrupt it.

If Action Center is not opening on your Windows 10 PC, that might be because core Windows components are corrupted or damaged. If that’s the case, you might have to use an SFC scan to fix the problem.
16. Switch to High Contrast theme
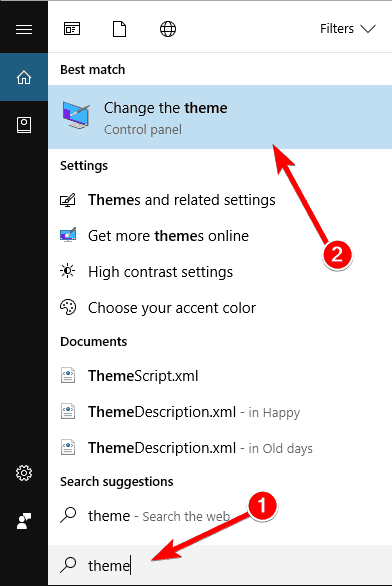
- Press Windows key + S and type theme. Select the Change the theme option.

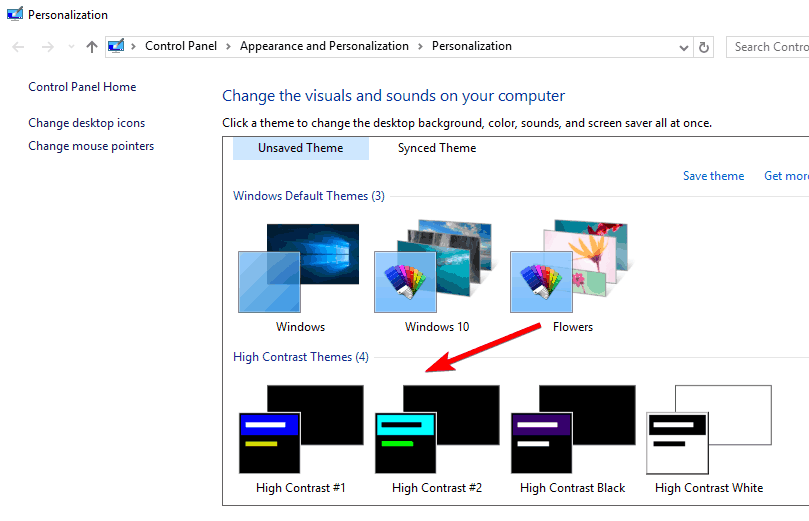
- Scroll down and select one of the available High Contrast Themes.

- After doing that, check if Action Center is working properly. If so, revert back to the original theme.
A few users reported that you could fix the Action Center problem by switching to the High Contrast theme. This is a simple solution, but it might work for some users, so try it out.
17. Rename the Usrclass file
- Go to the Settings app and click on Accounts.
- Go to the Family & other people section.
- In the Other people section, click on Add someone else to this PC.

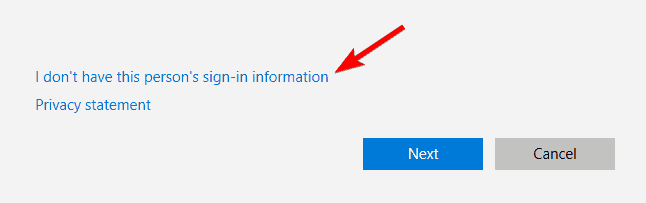
- Click on I don’t have this person’s sign-in information.

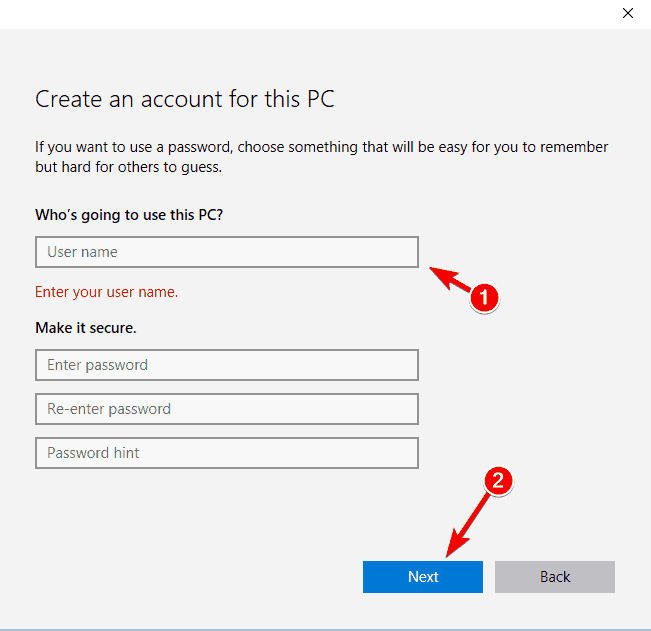
- Now, choose Add a user without a Microsoft account.

- Enter the username for your new account and click Next to finish the creation process.

- Log out of your current account and switch to the new one.


According to a few users, you might be able to fix the problem with Action Center simply by renaming the Usrclass file. Keep in mind that this solution will remove all tiles from Start Menu.
In addition, this solution will change your theme to a High Contrast theme, so you’ll have to revert it to the original. To change the Usrclass file, you need to create a new administrator account, as shown above.
After switching to a new account, you need to find the Usrclass file on your old account. To do that, follow these steps:
- Navigate to:
C\:User\sYour_old_user_account_name\AppData\Local\Microsoft\Windows - If this folder isn’t available, you’ll have to reveal hidden files in order to access it. To do that, click the View menu and check Hidden items.

- Now, rename the file from Usrclass.dat to Usrclass.dat.old.
- Finally, sign off of your account and log back into the old account.

After doing that, the issue should be completely resolved, and everything should start working again. If that doesn’t work, you might want to move all your files and switch to the new account.
18. Set Taskbar to the auto-hide mode
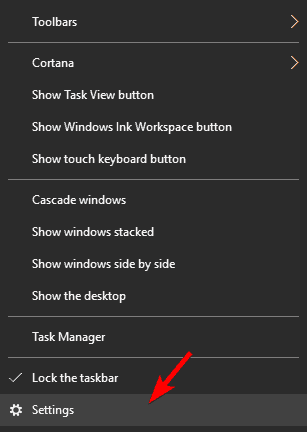
- Right-click the Taskbar and choose Settings from the menu.

- Turn on the Automatically hide the taskbar in desktop mode and Automatically hide the taskbar in tablet mode options.

- Now, check if Action Center is working properly.

If Action Center is not opening on Windows 10, you might be able to fix it simply by enabling auto-hide mode. Should this restore normalcy, you can disable auto-hide options and check if the Action Center still works.
19. Disable and enable Action Center
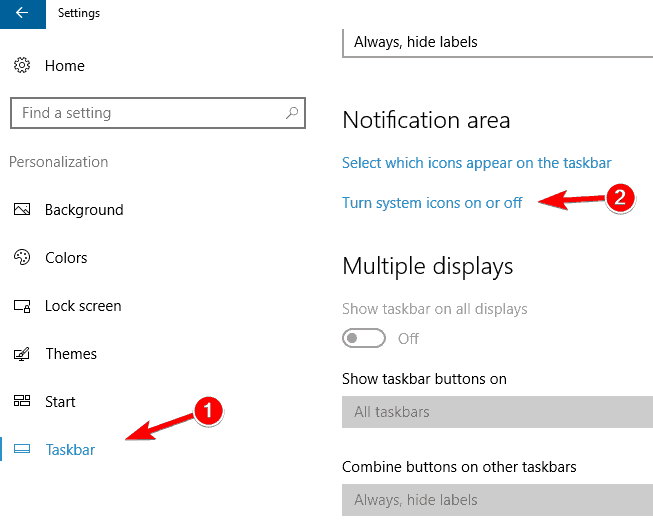
- Open the Settings app and go to the Personalization section.
- Select the Taskbar tab and choose Turn system icons on or off.

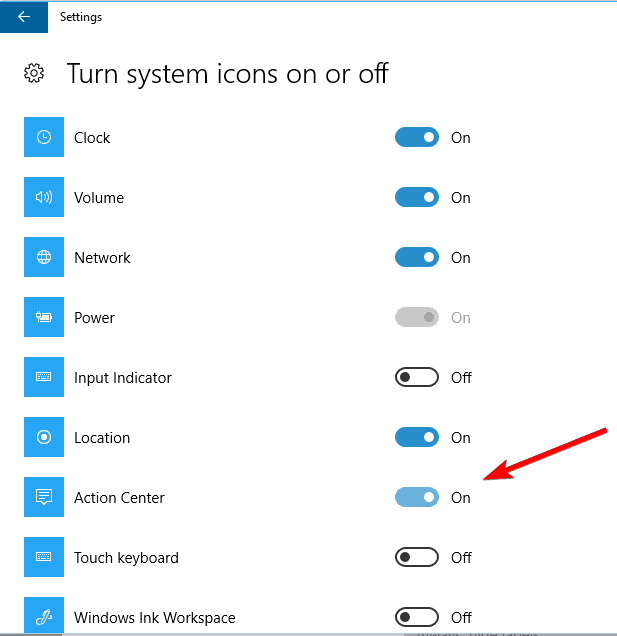
- Now, locate Action Center on the list and turn it off.

- After doing that, restart your PC.
- Finally, repeat the same steps and turn on Action Center again.
According to users, disabling and enabling Action Center from the Settings app can sometimes fix this problem.
20. Disable certain startup items
- Open Task Manager.
- Navigate to the Startup tab.
- Now, look for startup items that have High startup impact.
- Right-click them and choose Disable from the menu.


According to users, sometimes demanding startup items can prevent Action Center from opening on Windows 10. To fix the problem, you might want to try disabling those items.
If the issue persists after doing this, you might want to disable all startup applications and check if that solves the problem.
21. Perform System Restore
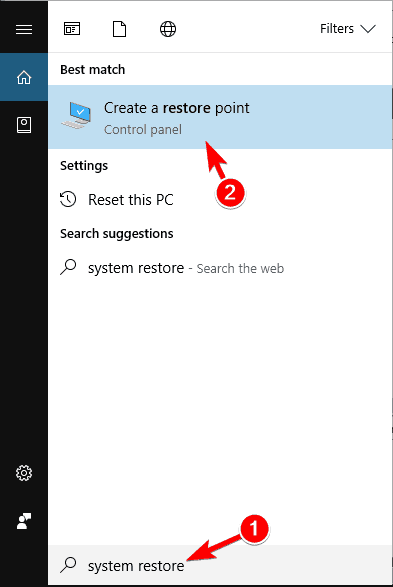
- Press the Windows key + S and enter system restore.
- Select Create a restore point from the menu.

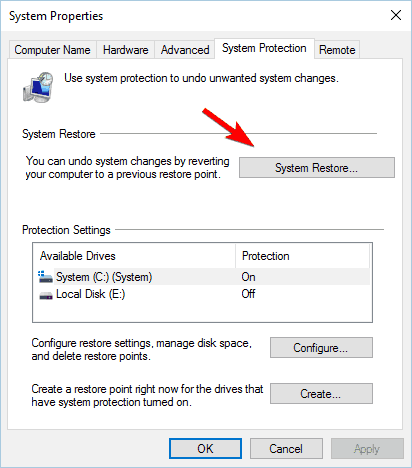
- Now, click the System Restore button.

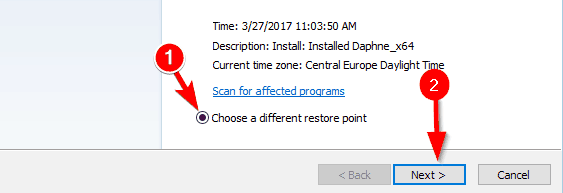
- When the System Restore window opens, select Choose a different restore point option.
- Now, click the Next button.

- Check the Show more restore points option.
- Select the desired restore point and click Next.
- Finally, follow the instructions on the screen to complete the process.
According to users, you might be able to fix this problem simply by performing a System Restore.
22. Perform an in-place upgrade
If you still have issues with Action Center, you might have to perform an in-place upgrade. You need to download Windows 10 ISO file from Microsoft’s website to do that. After doing that, mount the ISO file and run setup.exe.
Follow the instructions on the screen to perform an upgrade. Keep in mind that performing in-place upgrades can remove some of your files. Therefore, we advise you to create a backup.
The in-place upgrade also allows you to keep your files, so be sure to select this option during the installation.
Action Center is a major part of Windows 10, but if it’s not opening on your PC, try some of our solutions.
If you are facing other issues, like the Action Center shortcut missing on Windows 10, check our detailed guide to fix it.
Feel free to let us know the solution that helped you fix this issue in the comments below.