The app Didn't Start in the Required Time: 7 Fixes to use
Updating the app is often a good solution
![]() 6 min. read
6 min. read
![]() Updated on
Updated on
Share this article

Improve this guide
Read our disclosure page to find out how can you help Windows Report sustain the editorial team Read more
Key notes
- Applications are an integral part of Windows, but some users reported The app didn't start in the required time error while trying to run certain apps.
- To fix this error, try updating or reinstalling the problematic application. It would be best if you also ensured that the application isn't blocked in your firewall.
You must have received the notification that the app didn’t start in time. This affects some apps that you need to launch. Let us tell you all about this problem.
Apps are an integral part of Windows 10, and we all use many apps on our PCs. This error is not specific to any app, and even though they may be triggered more with some apps, they cut across the board.
This sounds like a significant problem, but fortunately, there are solutions. But first, let us consider some common triggers of this error.
Why does The app didn’t start in the required time message appear?
From user experience, we gather that there are a few triggers, and at the top of this list are the following:
- Outdated programs – If you are trying to run an outdated app, it may take too long to launch and may trigger this error.
- Permissions issues – Most of the time, the error will be triggered if necessary file permissions for running an app are omitted.
- OS update issues – If you have pending updates on Windows, they may affect how applications are launched.
Let us now explore the most powerful solutions for the error The app didn’t start in the required time.
How do I fix The app didn’t start in the required time error message?
- Update the problematic app
- Allow the app through the firewall
- Make sure your internet settings are correct
- Change your file permissions
- Change registry permissions
- Install the latest OS and Windows Store updates
- Run the Windows Store Apps Troubleshooter
1. Update the problematic app
If a specific app is giving you The app didn’t start in the required time error message, you might want to update it.
Users reported having issues with the Photos app on Windows 10 and updating it from the Windows Store app fixed the problem for them.
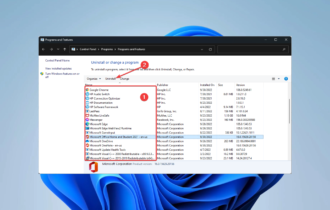
Sometimes, you will have to uninstall and reinstall a newer version from the official website.
If you have problems with the Photos app on Windows 10, you might want to look at some of our older articles.
It’s worth mentioning that The app didn’t start in the required time error message can affect almost any application, so make sure that all of your applications are up to date.
2. Allow the app through the firewall
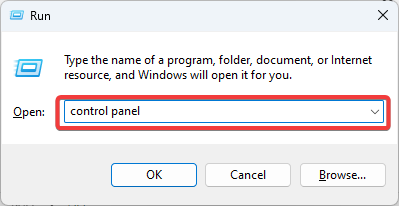
- Press Windows + R, type control panel, and hit Enter.

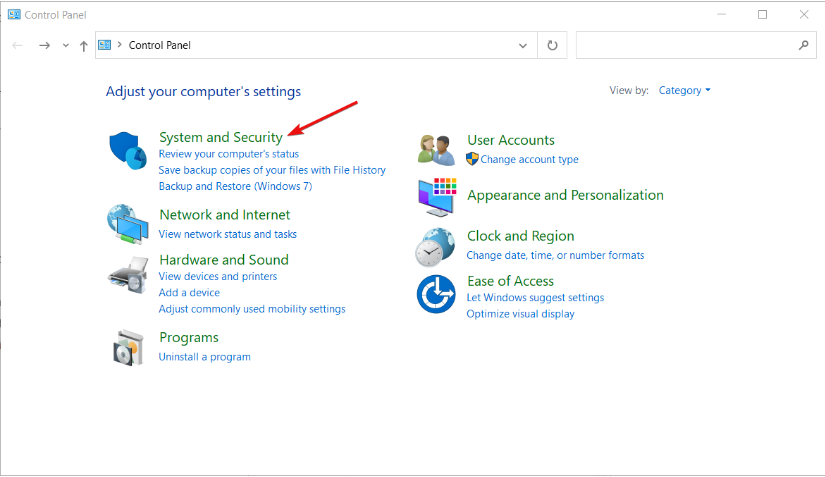
- Select System & Security.

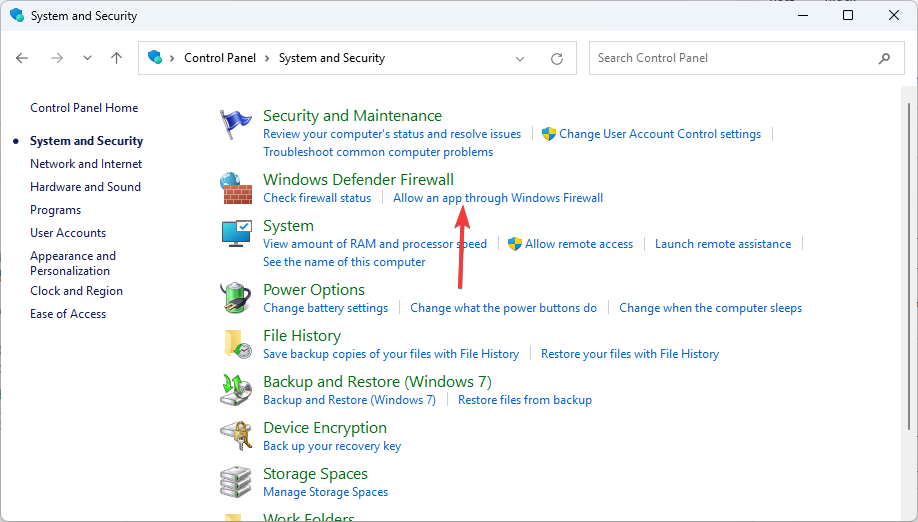
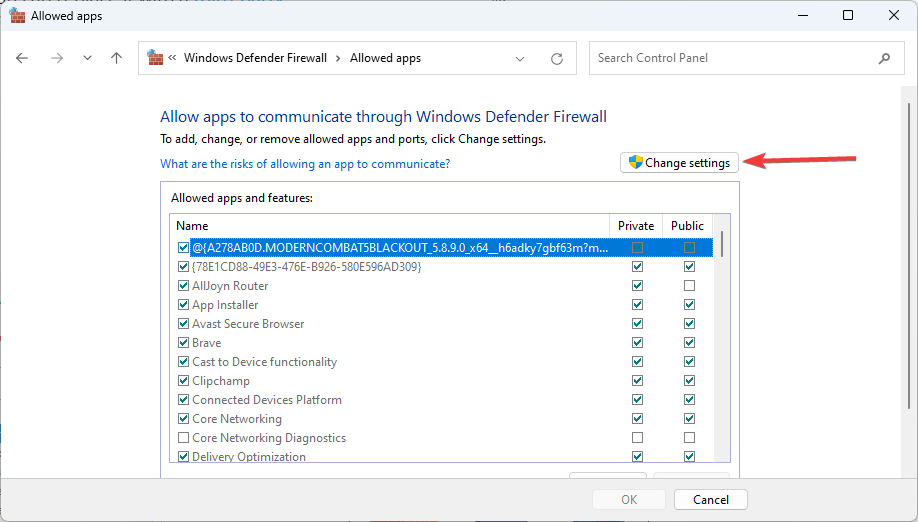
- Click Allow and app through Windows Firewall.

- Select the Change settings button to adjust the options.
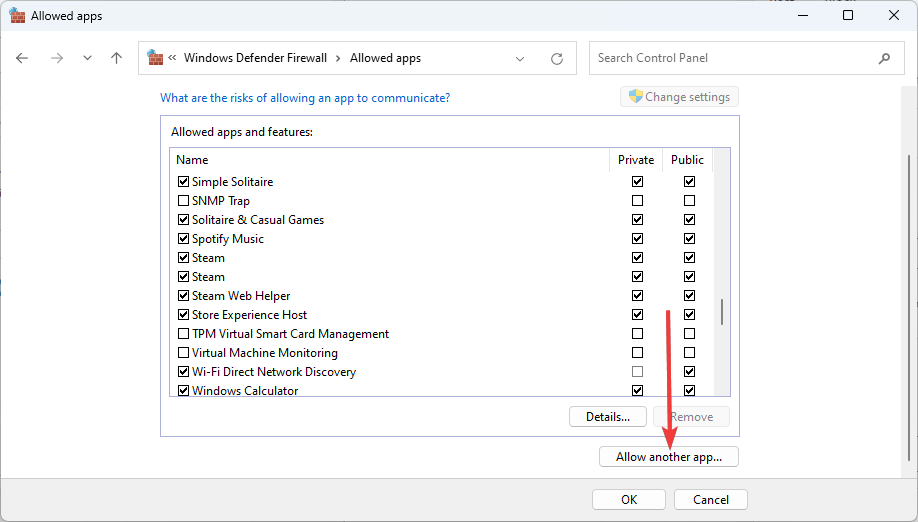
- Click the Allow another app button and select the app you need to let through.
Try rerunning the app to see if the problem is restored. If you get an error message the app didn’t start in the required time, move to a different solution.
3. Make sure your internet settings are correct
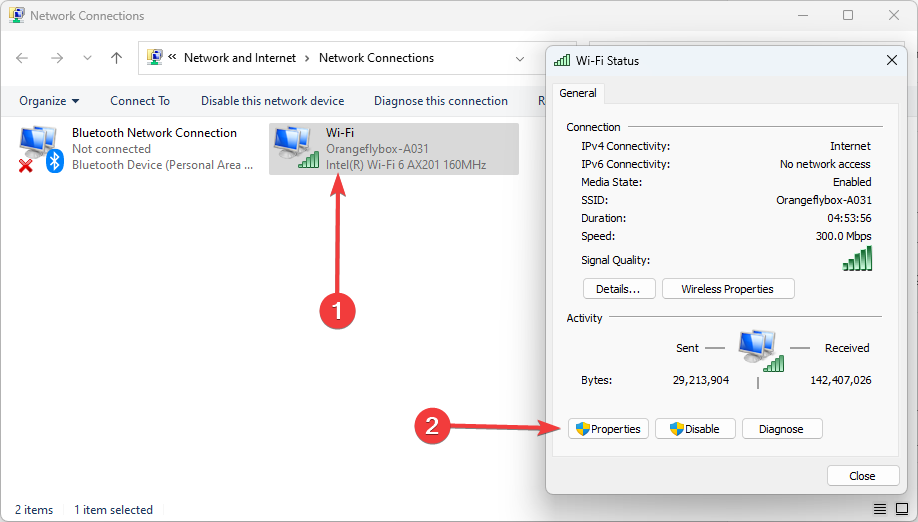
- Press Windows Key + S, type Network and Sharing, then choose View network connections from the results list.

- Double-click your connection and select Properties.
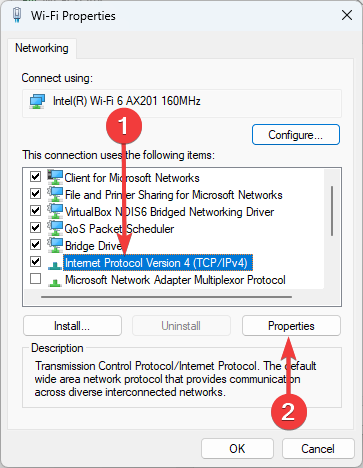
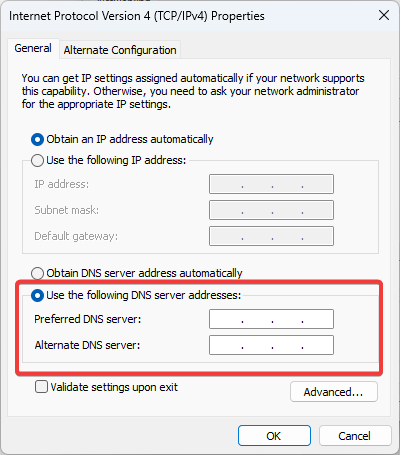
- Select Internet Protocol Version 4 (TCP/IPv4) from the list and click the Properties button.

- Tick Use the following DNS server addresses checkbox and enter 8.8.8.8 as a Preferred DNS server and 8.8.8.4 as an Alternate DNS server.

- Click OK to save changes.

After changing your DNS, the issues with The app didn’t start in the required time error should be resolved.
4. Change your file permissions
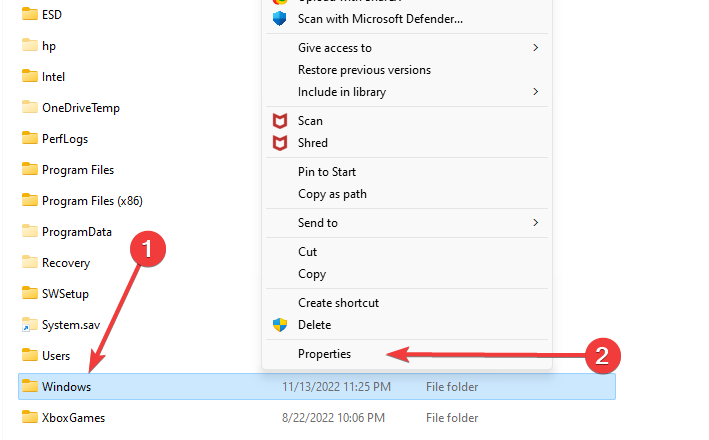
- Open File Explorer using Windows + E, and navigate to the C partition.
- Right-click on Windows and choose Properties.

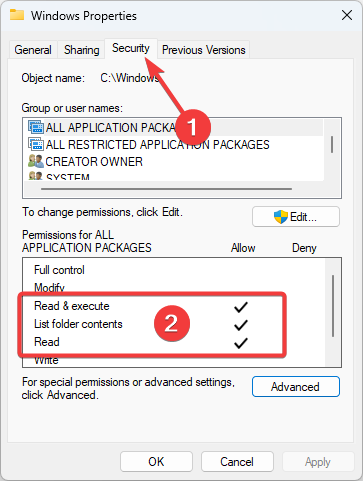
- Navigate to the Security tab. In Group or user names section, select ALL APPLICATION PACKAGES. Check the permissions for the selected group. Read & execute, List folder contents, and Read should be enabled by default.

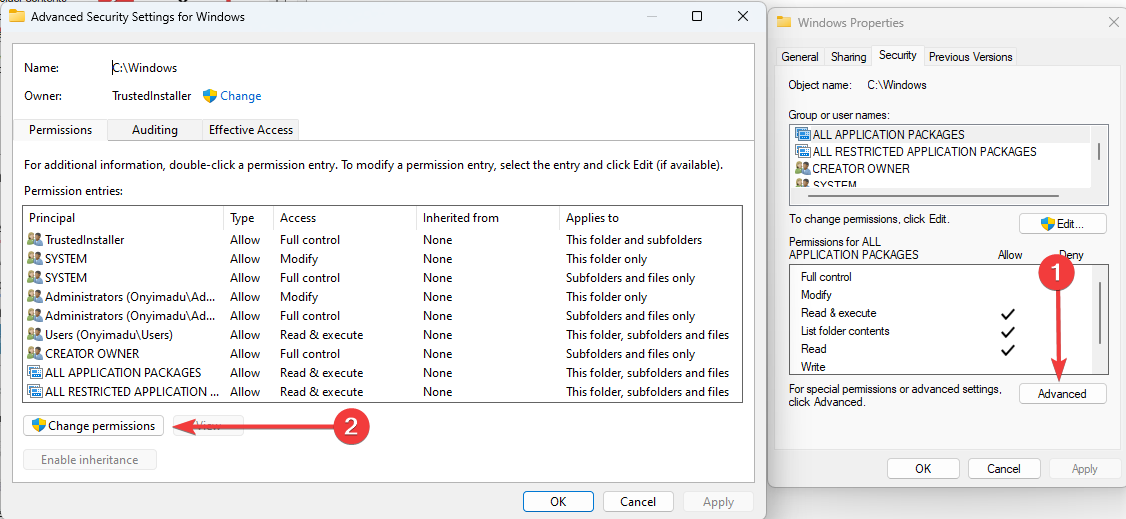
- Click the Advanced button and then click the Change permissions button.

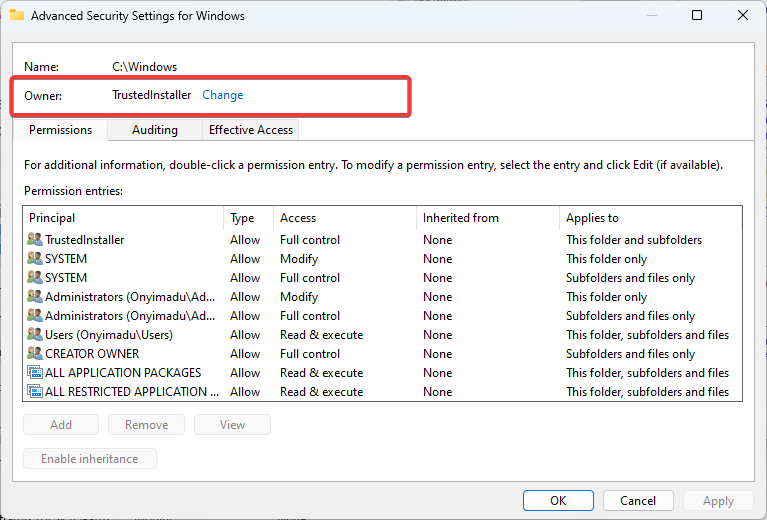
- When the Advanced Security Settings for Windows window opens, you need to check the Owner. By default, it should be TrustedInstaller. If the owner is set to TrustedInstaller, you’ll have to change it. If the owner isn’t set to TrustedInstaller, navigate to Step 10.

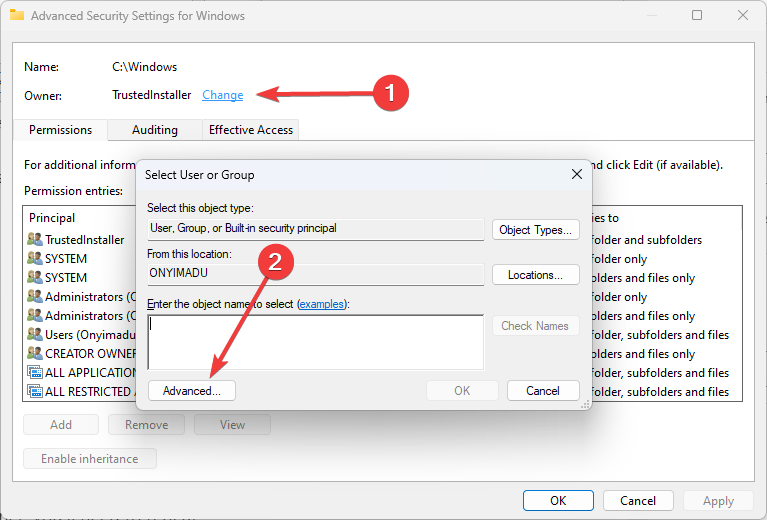
- Click the Change link next to the owner’s name, and select the Advanced button.
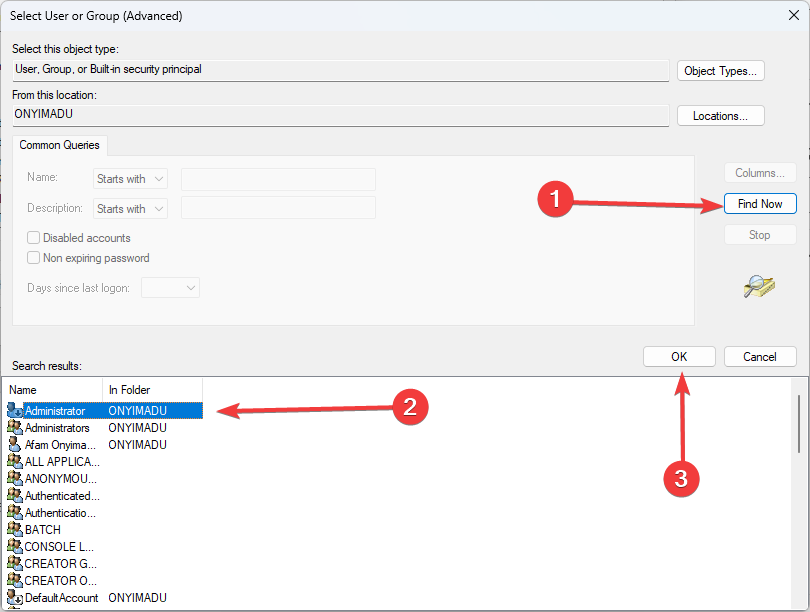
- Click the Find now button. A list of users should appear. If you’re using an administrator account, select Administrators from the list and click OK.

- Now, click OK again to add the Administrators group.

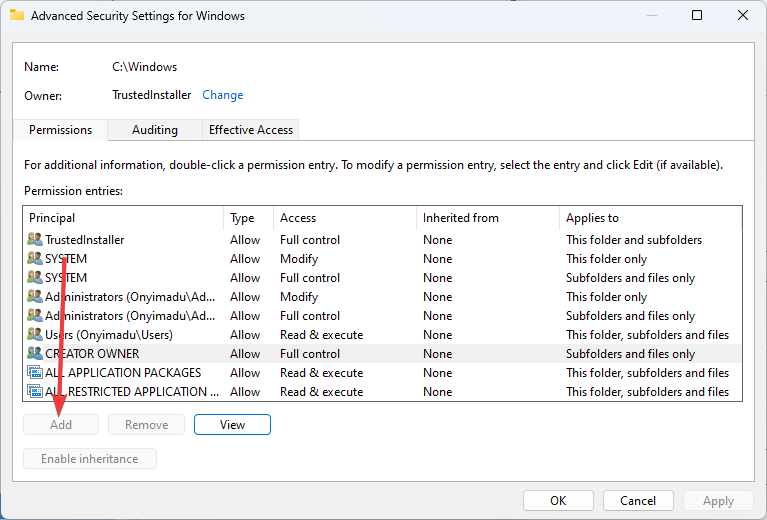
- Click Apply and OK to change the owner. After you’ve changed the owner, you’ll need to repeat Step 3.
- Select Add.
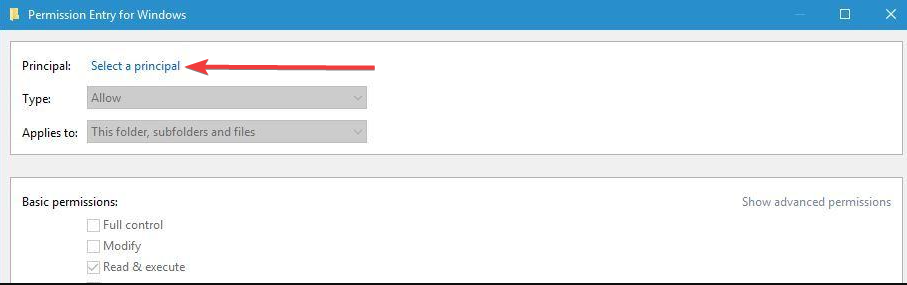
- Click on Select a principal.

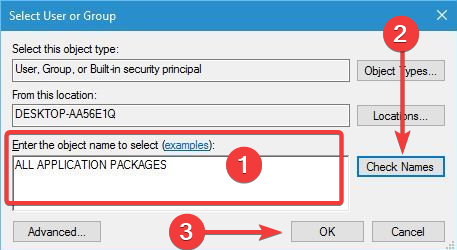
- In the Enter the object name to select section, enter ALL APPLICATION PACKAGES and click Check Names and OK.

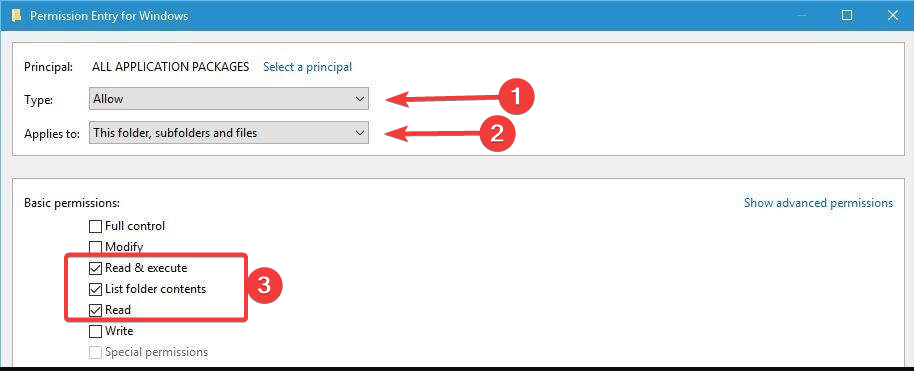
- Set Type to Allow. Set the Applies to value to This folder, subfolders and files. Tick Read & execute, List folder contents, and Read in the Basic permissions section, and finally click OK.

- Tick Replace all child object permission entries and click Apply and OK.

- Lastly, repeat all these steps for Users, Program Files, and Program Files (x86) folders.


Check if the issue of the app didn’t start in the required time is fixed.
5. Change registry permissions
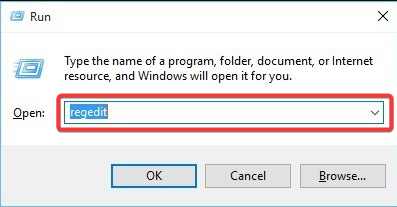
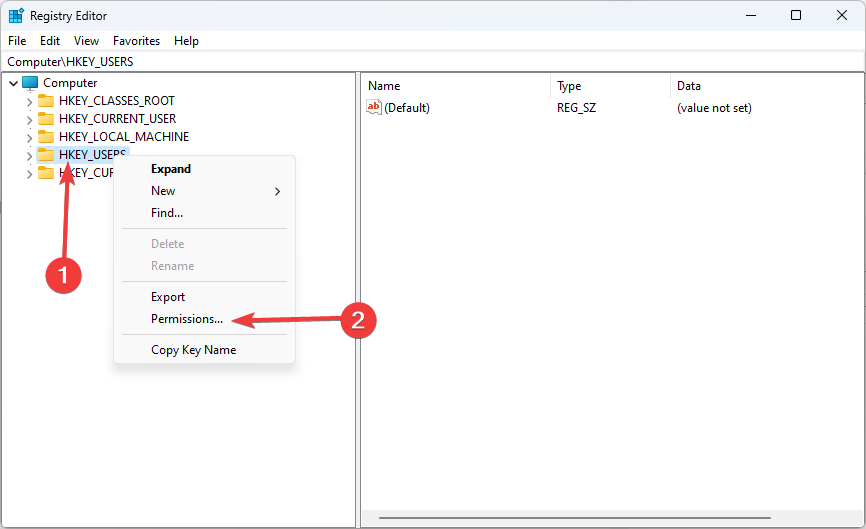
- Press Windows Key + R, type regedit, and hit Enter.

- Once Registry Editor starts, locate HKEY_USERS, right-click it and choose Permissions.

- Select ALL APPLICATION PACKAGES from the list and ensure that permission to Read is set to Allow.

- Repeat the same process for the HKEY_CLASSES_ROOT key.
- Navigate to the HKEY_LOCAL_MACHINE key and check HARDWARE, SAM, SOFTWARE, and SYSTEM permissions, just like in Step 3.

After doing that, check if The app didn’t start in the required time error is still there.
6. Install the latest OS and Windows Store updates
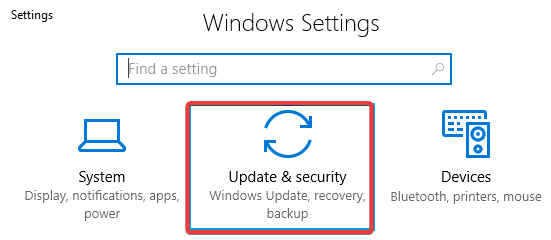
- Press Windows + I to open the Settings app.
- Navigate to Update & Security.

- Click Windows Update, and select the Check for updates button.


7. Run the Windows Store Apps Troubleshooter
- Press Windows + I to open the Settings app.
- Navigate to Update & Security.
- Select Troubleshoot, scroll down, and select Windows Store Apps.

- Launch the troubleshooter and wait until it completes the scan.

The app didn’t start in the required time error message can be somewhat inconvenient, but fortunately, this issue can be quickly resolved by using one of our solutions.
Note that we have not written these in any particular order. Instead, we recommend using what seems the most appropriate for you.