Fix: Application.exe has Stopped Working Error
Give a try to these quick methods now
![]() 11 min. read
11 min. read
![]() Updated on
Updated on
Share this article

Improve this guide
Read our disclosure page to find out how can you help Windows Report sustain the editorial team Read more
Key notes
- One of the most common problems that occur on Windows PCs is an application crash. So, for some applications, it’s wise to clear your registry of the remaining values or reinstall the program.
- A great tool that should help you resolve these types of issues, by restoring them to their original state is Deployment Image Servicing and Management. Take a look at the next article for a complete solution.

One of the most common problems that occur on Windows PCs is an application crash. This issue has been present over the years.
The symptoms have changed, the configurations have changed, but the problem is still there just to break your nerves from time to time.
We can assure you that Windows 10 isn’t an exception. The well-known application.exe has stopped working message is still making an appearance in Microsoft’s OS.
For that purpose, we conducted a thorough search to provide you with the solutions to the problem at hand. So, if you have experienced sudden crashes, you should consider these workarounds:
How can I fix application.exe crashes in Windows 10?
1. Restart the troubled program
The first thing you should do is close the dialog app crash report and try starting the program again. This may be a one-time error due to some unexpected corruption or just a temporary lack of system resources.
So make sure to close the program properly before you start it again. Namely, even though you close the dialog box, there’s a chance its respective processes are still running in the background.
Because of that, make sure to navigate to Task Manager, kill the process, and start the application again. On the other hand, if the program doesn’t start with the system, you can also restart your PC and try running it again.
If you’re not sure how to do it, follow the instructions below closely:
- Close the dialog message that informs you of the crash.
- Right-click on the taskbar and open Task Manager.
- Make sure to kill the main and related processes related to a crashed app.
- Now, try starting the app again and look for changes.
That’s just the thing with the software: it’s not always as stable as one would expect. And, if the problem is still there, make sure to check the other steps in the list.
Can’t open Task Manager? Don’t worry, we’ve got the right solution for you.
Windows won’t end a task in Task Manager? Check out this amazing guide to fix the issue in no time.
2. Change compatibility settings
Another thing you can do, especially if we’re talking about older software, is to change the compatibility settings. Some older programs you may have used with ease on older OS versions might provoke issues in Windows 10.
That occurs due to compatibility issues, especially if the program we’re referring to is as old as time. Luckily, you can change the compatibility mode and set the compatibility to some older Windows version.
If Windows 10 is unable to run the program seamlessly, you can switch to, let’s say, Windows 7, and have an easy time running the program. Additionally, that way you’ll probably get rid of the further crashes.
If you’re not sure how to do it, you’ll find these instructions helpful:
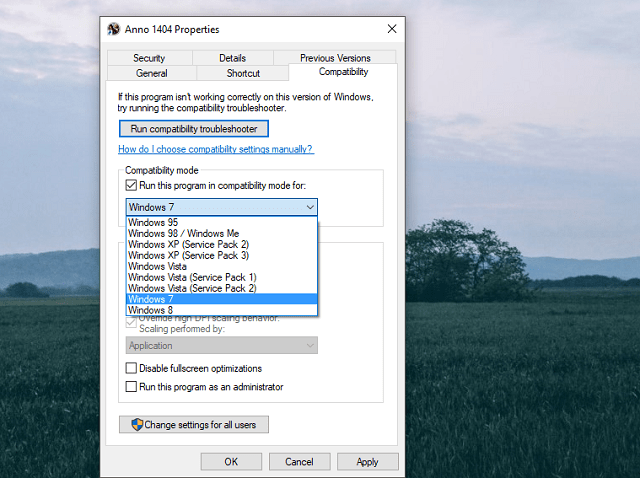
- Navigate to the installation folder of the troubled app.
- Locate the .exe file, right-click and open Properties.
- Under the Compatibility tab, check the box beside ”Run this program in compatibility mode for”.

- Choose the preferred Windows version and click OK to confirm changes.
That should address some of the possible stops caused by the system’s inability to read the program as intended.
3. Run the program as administrator
Besides the Compatibility mode, some programs thrive (read: work properly) only with the Administrative permission. It’s not unusual for certain applications to make some system changes that are only permitted to an administrator.
Moreover, the User Account Control prompts that occur once the program tries to make changes, can stall the execution of the program and thus, cause the crash.
We won’t advise you to disable those completely because of the security risks, but you can at least disable them for the individual program that has a problem.
So, besides the compatibility, we have another common tweak, and the instructions are below:
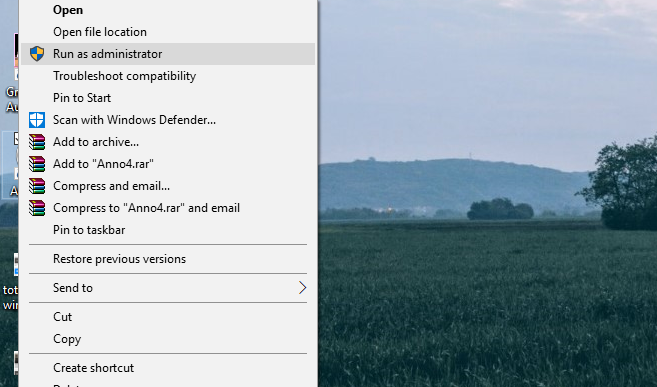
- Navigate to the installation folder of the troubled app.
- Locate the .exe file, right-click, and open Properties.

- In the Compatibility tab, check the box beside the ”Run as Administrator” box.
- Click OK.
With that, you should resolve certain issues. However, if the problem is going deeper, make sure to turn to other steps.
Learn everything there is to know about the administrator account and how you can enable/disable it right here!
4. Scan for malware
Another reason for sudden crashes can be the malware infection. Those pesky viruses can certainly cause a lot of issues, and the disrupted use of certain applications is firmly at the top of the list.
What they tend to do, and that’s an awfully common occurrence, is to infect the installation files and corrupt the program. There are various reasons why the virus may attack a certain application, but you can be sure it’s up to no good.
So, make sure your PC is clean before we get to some other, slightly complicated workarounds. Sometimes viruses pass through the real-time protection, so it’s advisable to scan your hard disk from time to time.
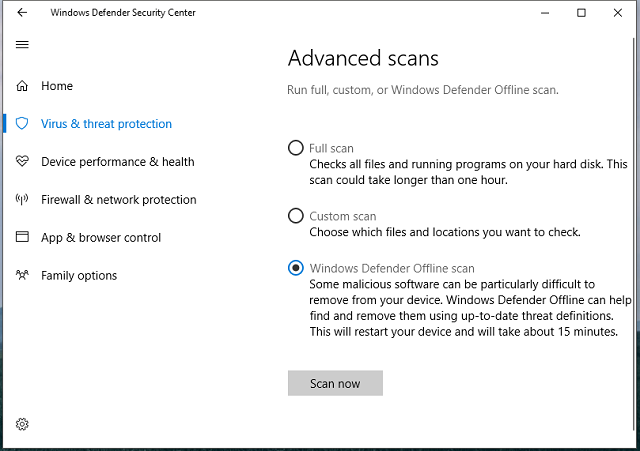
The procedure is different for 3rd-party solutions, but we offer you an insight into how to perform a deep scan with Windows’ native security solution, Windows Defender. The instructions are below:
- Open the Windows Defender icon from the notification area and choose Advanced Scans.
- Save everything to prevent data loss because your PC will restart after the next step.
- Locate Windows Defender Offline and click Scan Offline.

- Your PC will restart and the scanning procedure will last for approximately 15-20 minutes.
If you need additional info on how to perform a full system scan with Windows Defender, read this dedicated article.
However, if Windows Defender cannot provide maximum security for your PC, you can rely on dedicated antivirus programs as it has powerful engines against all types of cyber threats.
⇒ Get ESET HOME Security Essential
Do you want to check if your firewall is blocking a certain program? Follow the simple steps from this guide to find out.
5. Clean Registry values
There’s a great chance that you’ve installed one program for more than a few times. Now, that’s just a usual thing and it shouldn’t cause any problems.
But it’s not always the case. Namely, once you uninstall the program within the Add/Remove Programs section of the Control Panel, some files remain on your PC.
And in the Registry, which is of greater importance. So, for some applications, it’s wise to clear your registry of the remaining values and reinstall your program.
Moreover, we advise you to delete all the remaining files from the installation folder which is, most of the time, placed in the C: partition. The additional folder you should check out is the App Data folder.
To access it, just type %appdata% in the Windows Search bar. For cleanup purposes, you can use CCleaner or some similar 3rd-party solution. However, keep in mind that the Registry is dangerous ground, so back it up before the cleansing begins.
6. Clean temporary files
Temporary files are a necessity for some time, but then they become redundant and can create problems within the system. We highly recommend cleaning them up from time to time.
For that purpose, you can use a large variety of 3rd-party tools, including CCleaner. However, don’t take system tools for granted. You can delete temporary files with system tools, as well.
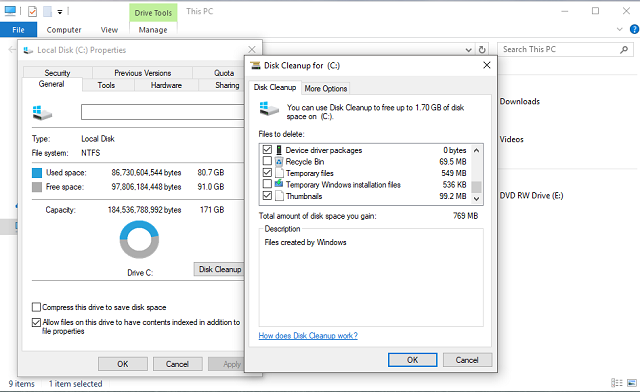
Follow these instructions to perform a disk cleanup and get rid of the system’s temporary files:
- Open This PC.
- Right-click the system partition and open Properties.
- Choose Disk Cleanup.
- Check the boxes beside Temporary files.

- Confirm the selection and clean temporary files.
After that, it should be easier to run some of the programs. However, if the program is still crashing unexpectedly, there are some other things you can do.
Can’t delete the temporary files? After following these easy steps, you’ll delete them like a pro.
7. Run SFC and DISM
For some system-related programs, the problem might lie in the corrupted or incomplete system files. It’s not an unusual occurrence, especially since frequent updates or malware can easily inflict these errors.
For that purpose, it’s safest to turn to the elevated Command Prompt and one essential tool that should scan and resolve common issues with system files. The SFC tool is the first obvious choice, even though you can try DISM for more advanced scanning.
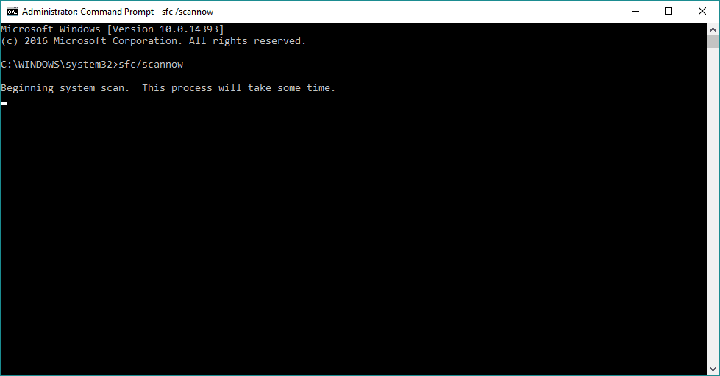
If you’re unsure how to run the SFC tool through the elevated Command Prompt, follow the instructions below:
- Right-click the Start menu and open Command Prompt (Admin).
- In the command line type the following command and press Enter:
- sfc/scannow

- sfc/scannow
- After the procedure is finished, restart your PC.
As we already mentioned, the SFC scan is the first troubleshooting step when you want to check the system files’ integrity.
Scannow command has stopped before the process finished? Don’t worry, we’ve got an easy fix for you.
However, if SFC fails, you can always turn to DISM. Deployment Image Servicing and Management is a great tool that should help you resolve issues with system files by restoring them to their original state.
If you’re unsure how to run DISM, follow these instructions:
- Right-click on Start and open Command Prompt (Admin).
- In the command line type the following command:
- DISM.exe /Online /Cleanup-image /Restorehealth
- The process should scan and resolve possible file corruption and fix related issues.
There is more than one way to use DISM, and for additional information, you can check this article for a thorough explanation.
If you’re having trouble accessing Command Prompt as an admin, then you better take a closer look at this guide.
Executing the DISM command to restore your Windows system image can also help you fix the Pbid.exe Application Error; read this guide to learn about other solutions.
8. Change Permissions
Another thing that’s worth checking is Data Execution Prevention. Most of the programs are initially blocked before the first use.
But, as you start an application, and provide it with the permission to change the system settings, DEP won’t bother you. Of course, not most of the time.
Sadly, due to frequent updates, especially major updates, the given permissions can be revoked. And that may just block your application and cause sudden crashes from time to time.
For that purpose, you should navigate deep into System Properties and create an exception for the troubled app. Follow the steps below to do so:
- Open This PC and click on System Properties.
- Under the Advanced tab > Performance, click on Settings.
- Click on the Data Execution Prevention tab.
- Choose ”Turn on DEP for all programs and services except those I select”.
- Click Add and browse to the installation folder of the troubled app and locate the .exe file.
- Set an exception and confirm changes.
That should resolve some of the problems, but it still may not be enough to get you out of the slump.
9. Check drivers
This, of course, primarily affects games. If your game is crashing suddenly, you should check these two things first:
- If additional programs and versions are present(like DirectX, redistributables, NET Framework or some 3rd-party clients)
- GPU drivers.
Once you’re certain that everything the game requires is installed, you should tend to drivers. Drivers are essential and they may as well be the reason for crashes in the first place.
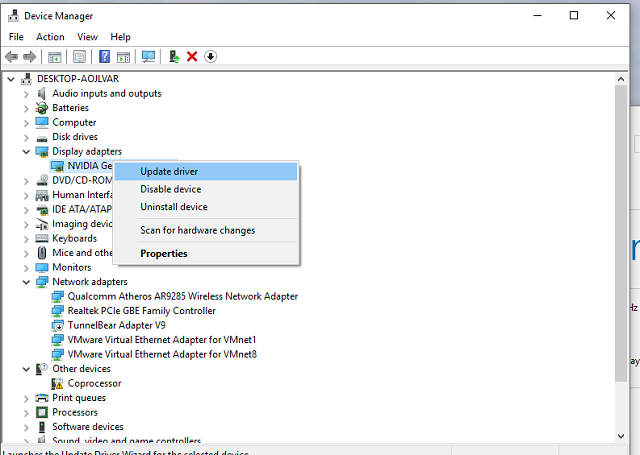
If you’re unsure how to install or update GPU drivers, the instructions below should work in your favor:
- Right-click Start and open Device Manager.
- Navigate to Display drivers, right-click on your GPU and Update Driver.

- Also, you can navigate to the OEM’s site and download the official drivers since some cards have specific software support.
It’s paramount to install appropriate drivers provided by the OEM for many reasons. Don’t download suspicious drivers.
That should do it. In case you have any questions or suggestions, we advise you to post them in the comments below. We’ll be glad to help.