Battle NET Not Opening: How to Fix and Launch it Properly
Your antivirus and firewall might be causing the app not to open
![]() 6 min. read
6 min. read
![]() Updated on
Updated on
Share this article
This article is translated in


Improve this guide
Read our disclosure page to find out how can you help Windows Report sustain the editorial team Read more
Key notes
- If the Battle.net launcher is not opening, it's possible that your cache or installation is corrupted.
- Check your firewall settings and make sure that the app is allowed to access the Internet.
- Third-party applications and services can cause this problem, so try disabling them temporarily.
Blizzard’s Battle.net client is a reliable piece of software. It’s been there for ages and is the best indicator of the remarkable approach Blizzard takes when it comes to game distribution.
However, even this top-notch game launcher/desktop client runs into problems occasionally.
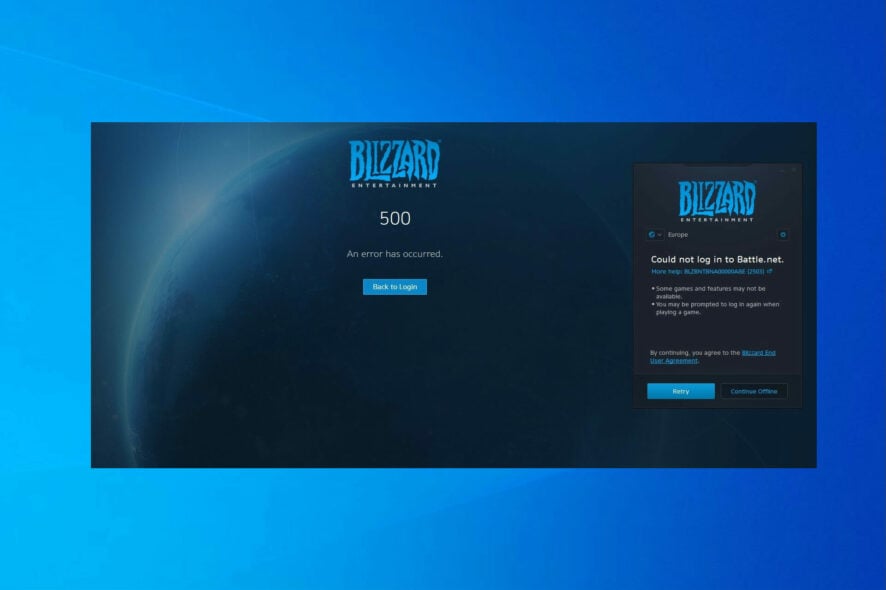
Some users reported that the Battle.net launcher won’t even start or crashes unexpectedly while initializing. If the Battle.net launcher won’t open after several tries, don’t worry – you’re at the right place.
Why won’t Battle.net open?
There are various reasons for the Battle net not opening issue. Below are some of the common ones as reported by users:
- Corrupt files: This issue can sometimes be caused by corrupt game files. In this case, you need to delete the Battle.net cache to solve this problem.
- Interference from other apps: If you have too many background apps open, it can cause the Battle net not opening issue. Also, your antivirus software can interfere with the program. You need to disable these apps to fix this issue.
- Lack of privileges: If the Battle.net app is not opening on your PC, it might be because you don’t have administrative permission. The solution here is to launch the app as admin.
How can I fix Battle.net launcher if it’s not opening?
Before exploring the surefire fixes in this guide, there are some troubleshooting fixes you should that might solve the problem for you.
- Do not hesitate to disable proxies.
- Restart your computer and see if the problem persists. If your Windows 11 PC fails to restart, refer to our quick solutions.
1. Run Battle.net launcher as admin
The step-by-step guide below can be used to successfully launch the game with administrator rights and fix Battle.net not opening issues.
- Open File Explorer and navigate to:
C:\Program Files (x86)\Battle.net
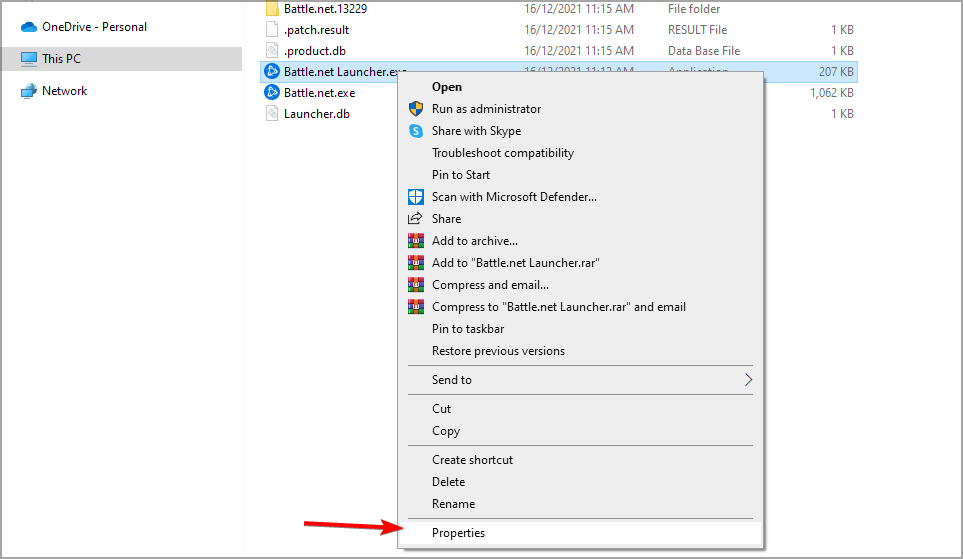
2. Right-click on the Battle.net Launcher.exe and open Properties.
3. Choose the Compatibility tab. Check the Run this program as an administrator and click Apply and OK to save changes.
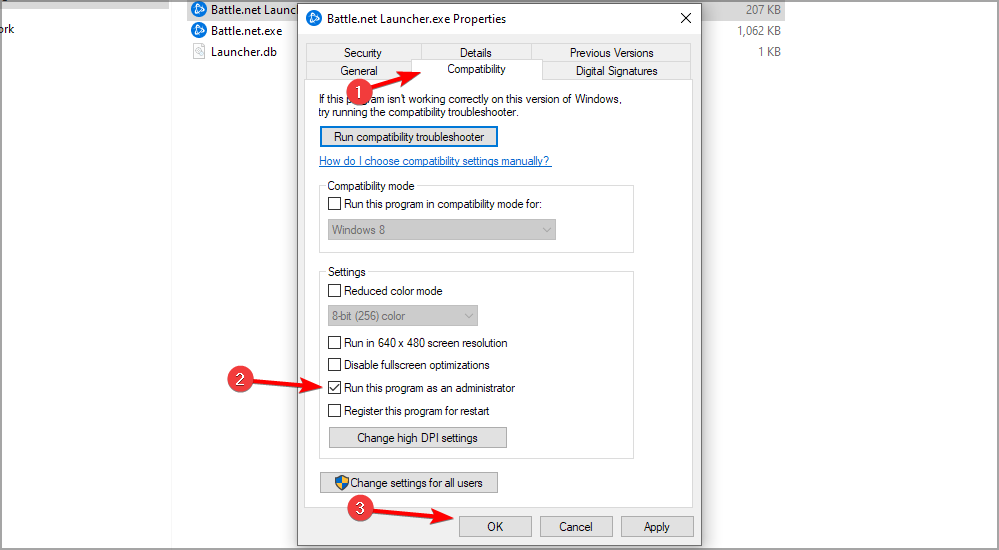
4. Now start the application again and check if the problem is still there.
2. Scan for malware
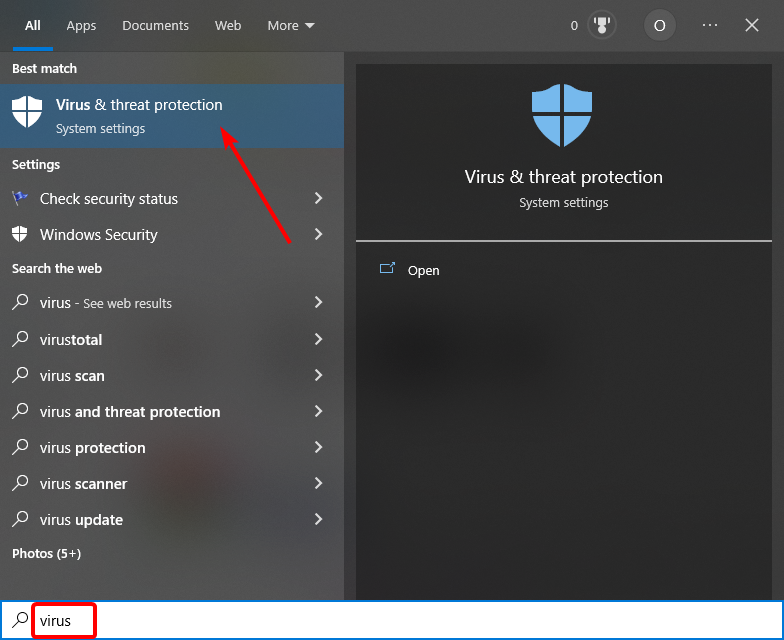
- Press the Windows key, type virus, and select Virus & threat protection.

- Choose Scan options.

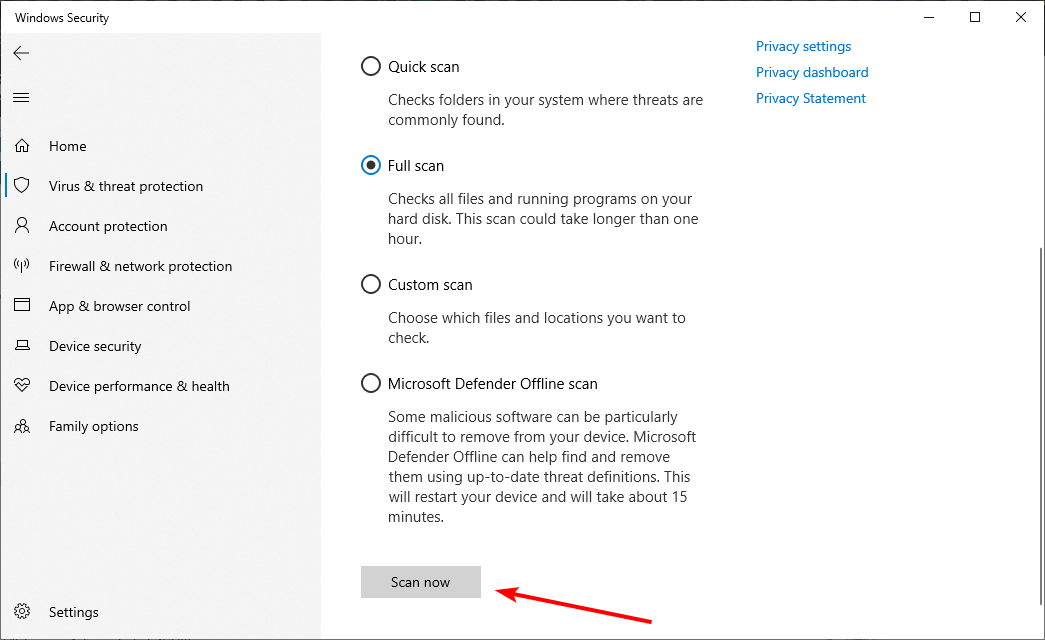
- Now, choose your preferred scan option and click the Scan now button.
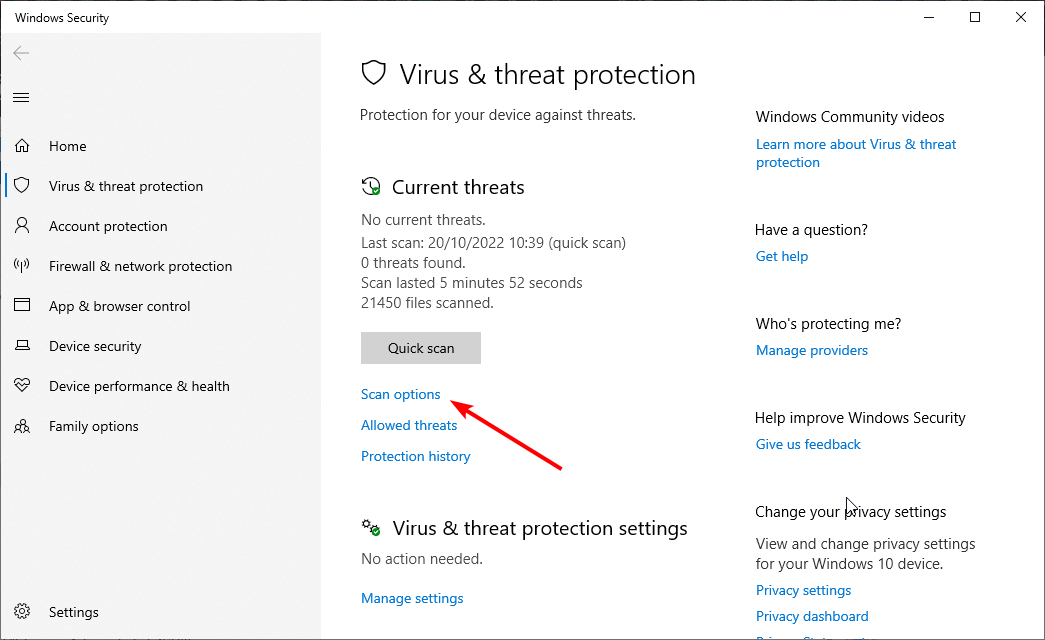
Viruses can cause a series of issues, including the Battle net launcher window not showing error. In this case, you only need to perform a virus scan to eliminate the malware.
To perform a deep scan that will eliminate even the most stubborn virus, we recommend using a dedicated antivirus in ESET NOD32.
This software is known for providing assured protection online and offline against all types of insecurities. It does all these without disturbing your activities.

ESET NOD32
Get rid of all cyber threats from your device without any effort with ESET NOD32.3. Check your network connection
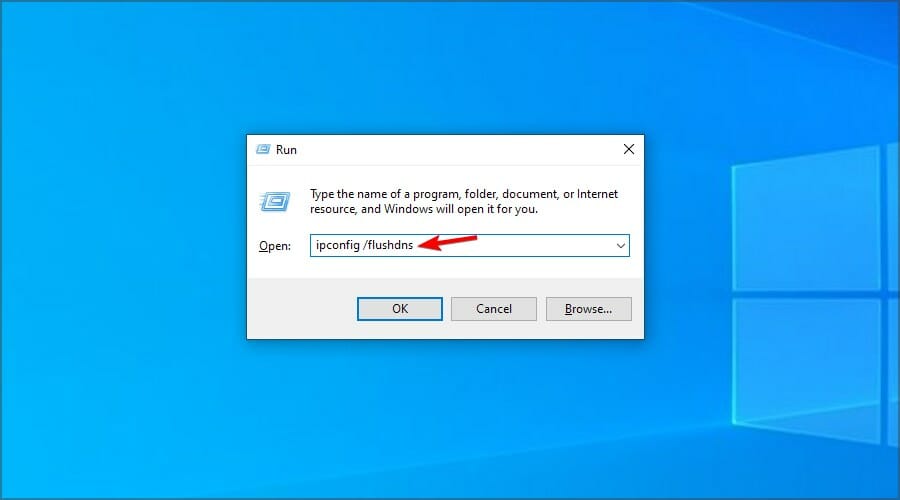
- Press Windows key + R, type ipconfig /flushdns and press Enter.

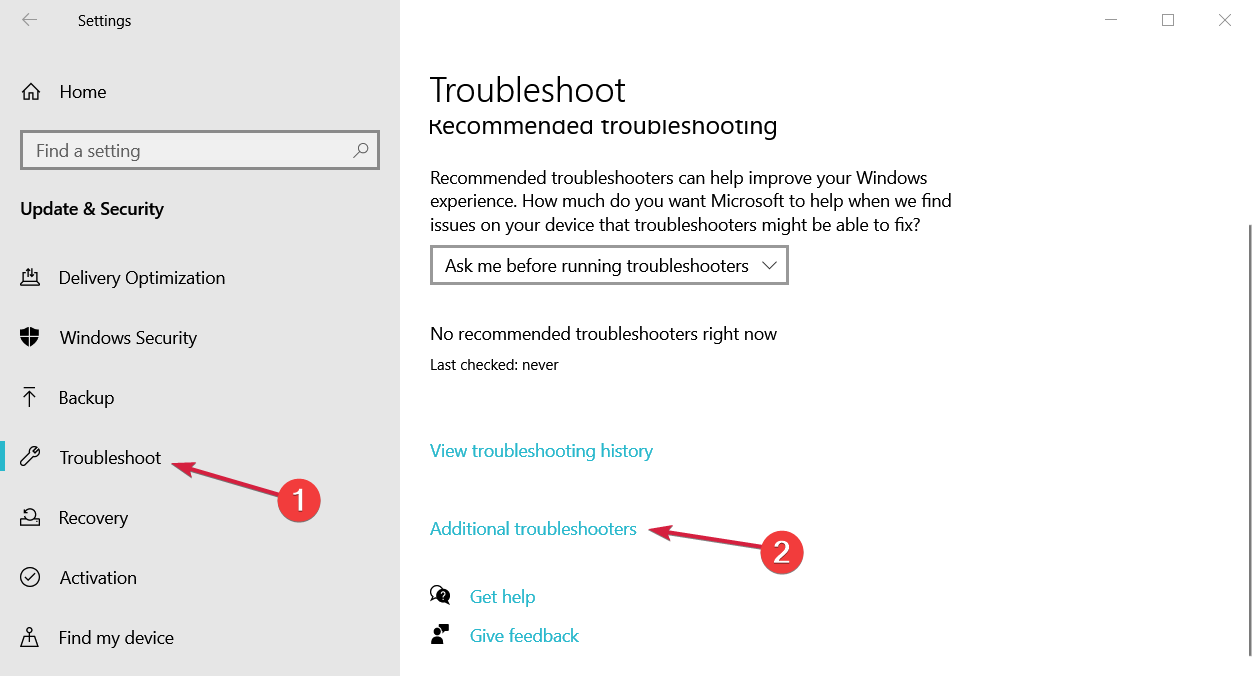
- Press Windows key + I and navigate to Update & Security section.

- In the left pane, select Troubleshoot. In the right pane click on Additional troubleshooters.

- Select Internet Connections and click on Run the troubleshooter.
- Wait for the process to finish.


4. Clear launcher’s cache and delete Tools folder
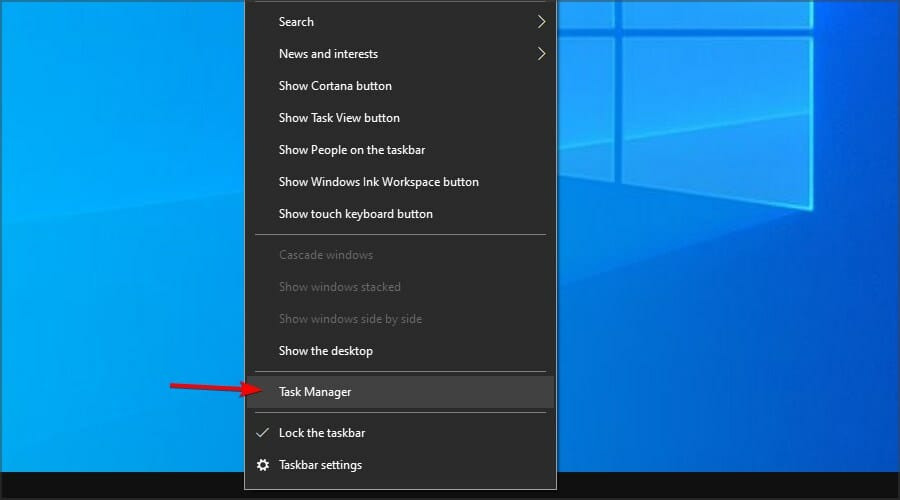
- Right-click on the Taskbar and select Task Manager.
- Locate and end the following processes:
- Game process
- Agent.exe or Blizzard Update Agent.exe
- Blizzard Battle.net
- Close Task Manager.
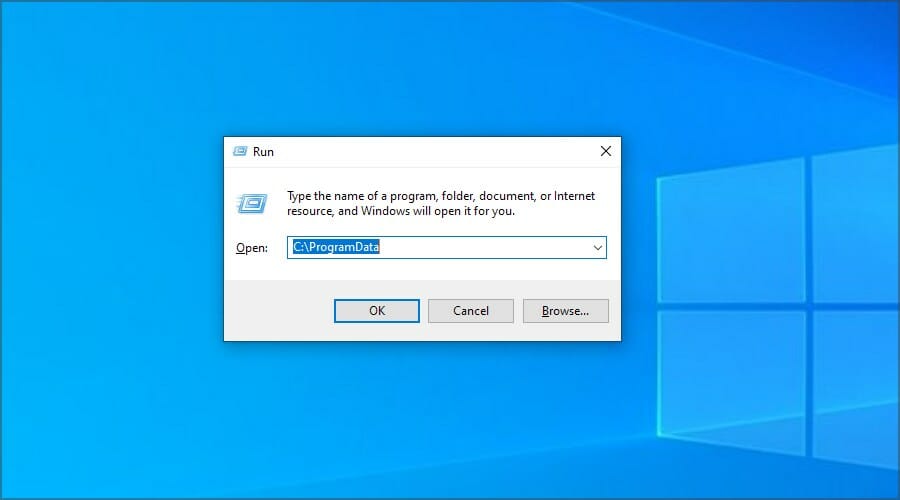
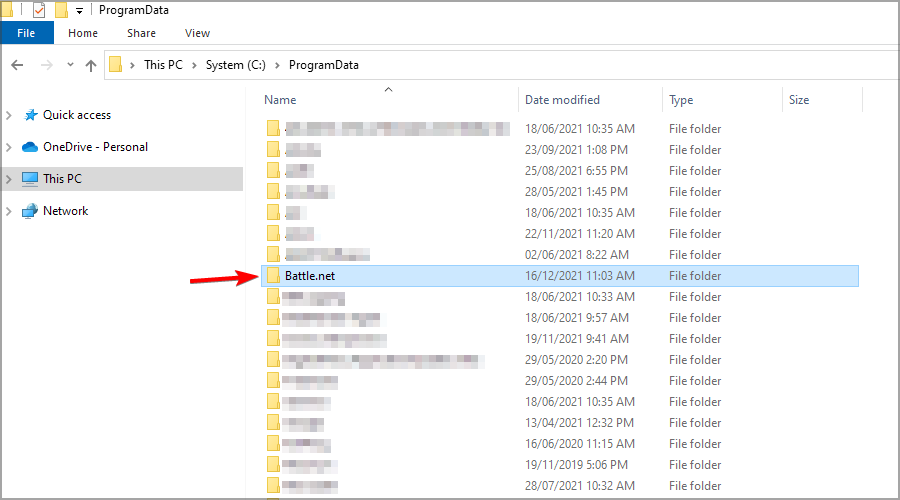
- Press Windows key + R to and run the following command:
C:\ProgramData - Find Battle.net folder and delete it.
- Start Battle.net again and look for changes.
By performing these steps, you should be able to fix the problem and stop Battle.net from crashing on startup.
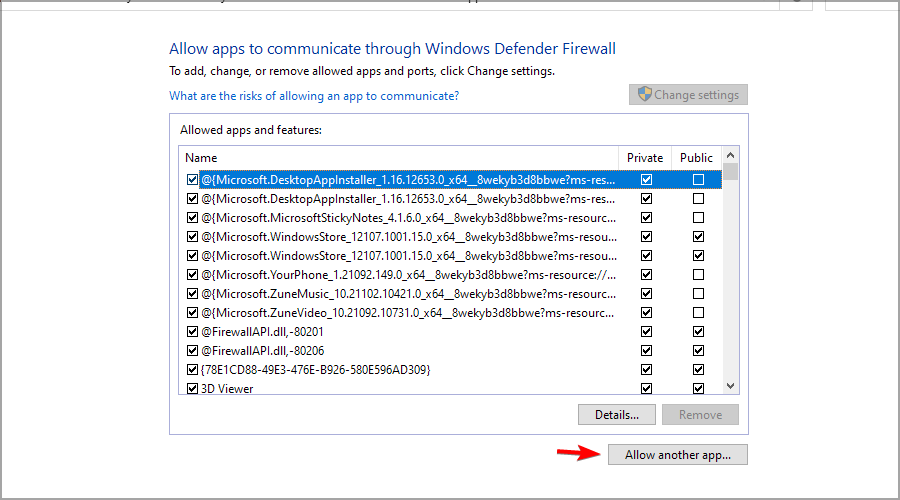
5. Check the antivirus and firewall
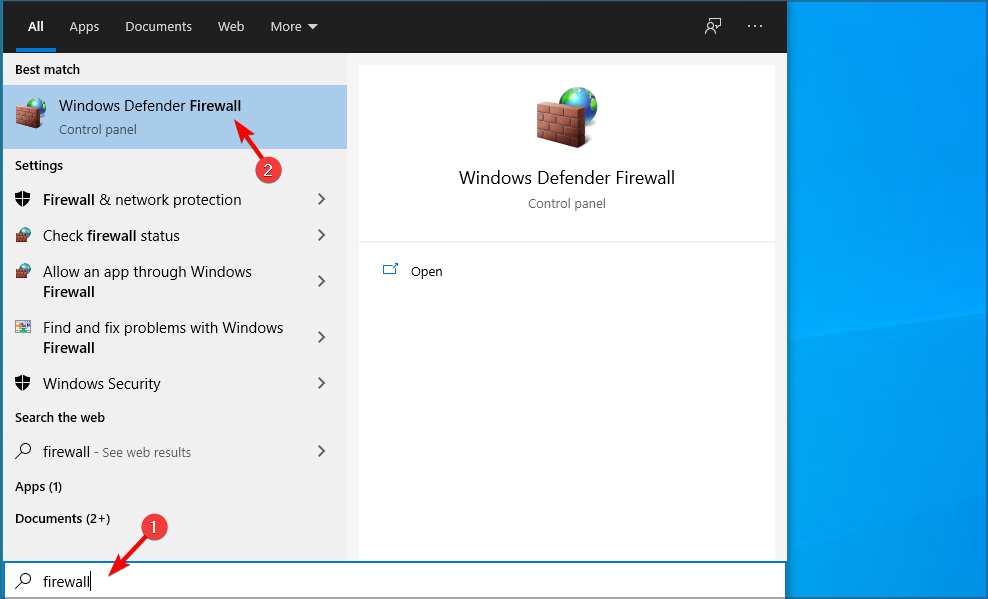
- Type firewall in the Windows Search bar, and open Windows Defender Firewall.

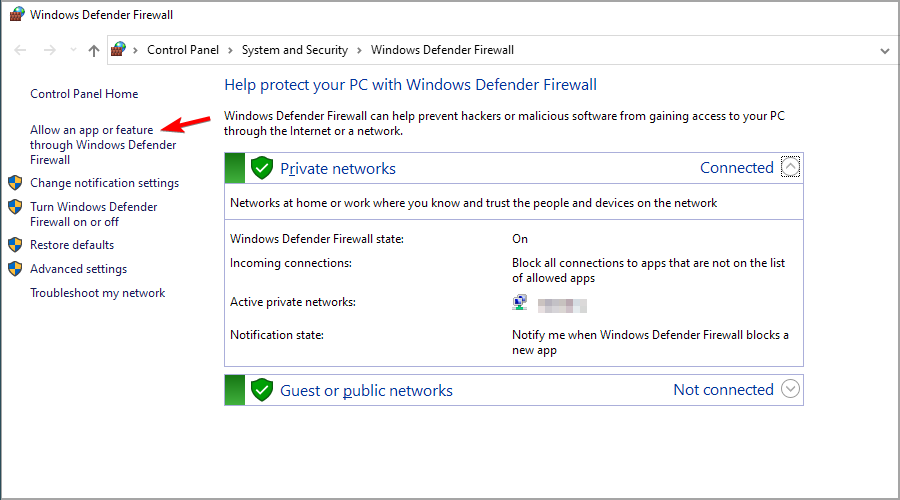
- Click on the Allow an app or feature through Windows Firewall in the left pane.
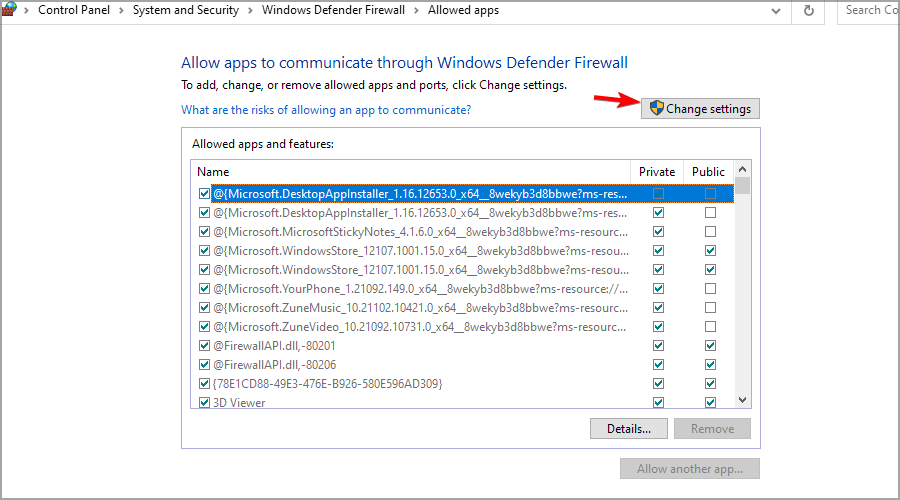
- Choose to Change settings.
- Click on the Allow another app button.
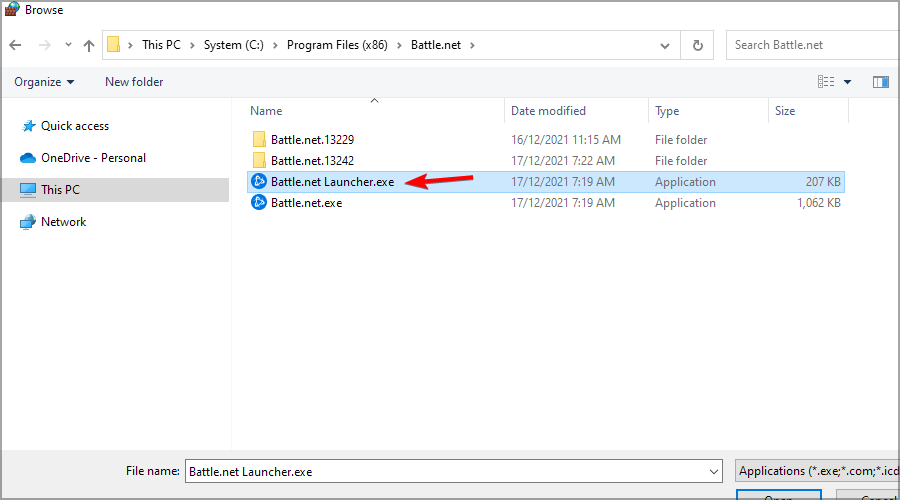
- Click on Browse and navigate to:
C:\Program Files (x86)\Battle.net - Add Battle.net Launcher.exe and confirm the changes.
This is a simple solution, and it will help you with the issue if Battle.net links break your browser.
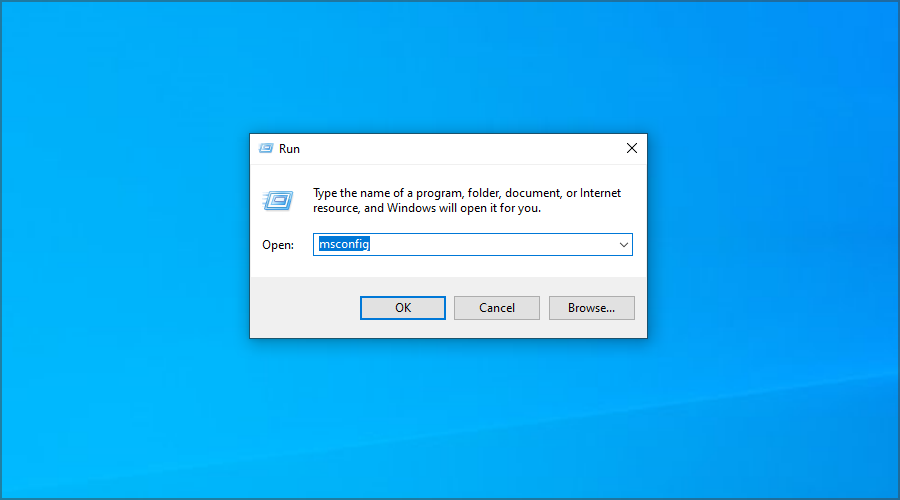
6. Disable background programs
- Press Windows key + R, type msconfig, and click OK.
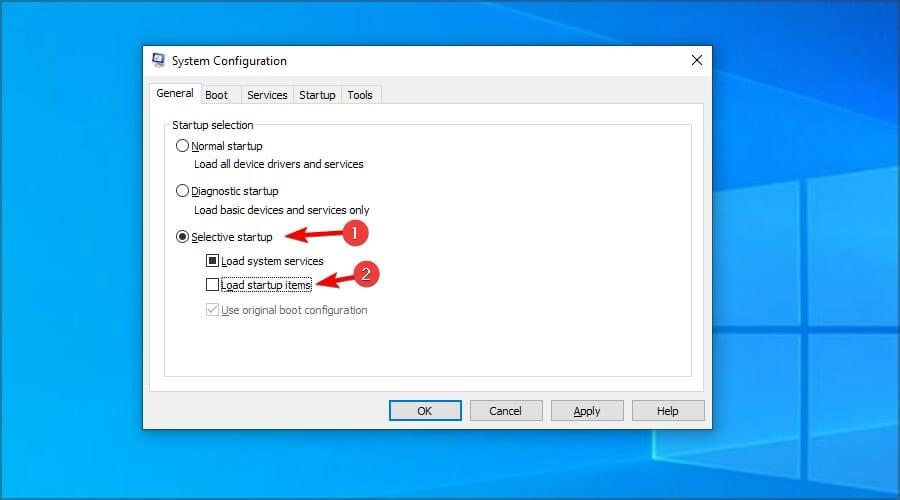
- Select the Selective startup. Uncheck the Load startup items box.
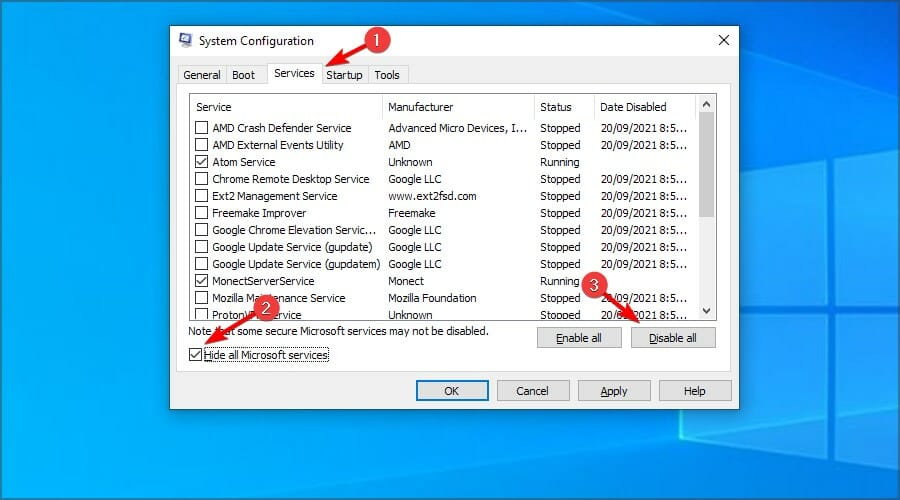
- Now, navigate to the Services tab. Check the Hide all Microsoft services box. Now, click on Disable all and then OK to confirm changes.
- Finally, restart your PC and check if the problem is resolved.
If the Battle net not opening issue is resolved, you need to enable services one by one, until you manage to find the cause of the problem.
7. Enable the Secondary Logon service
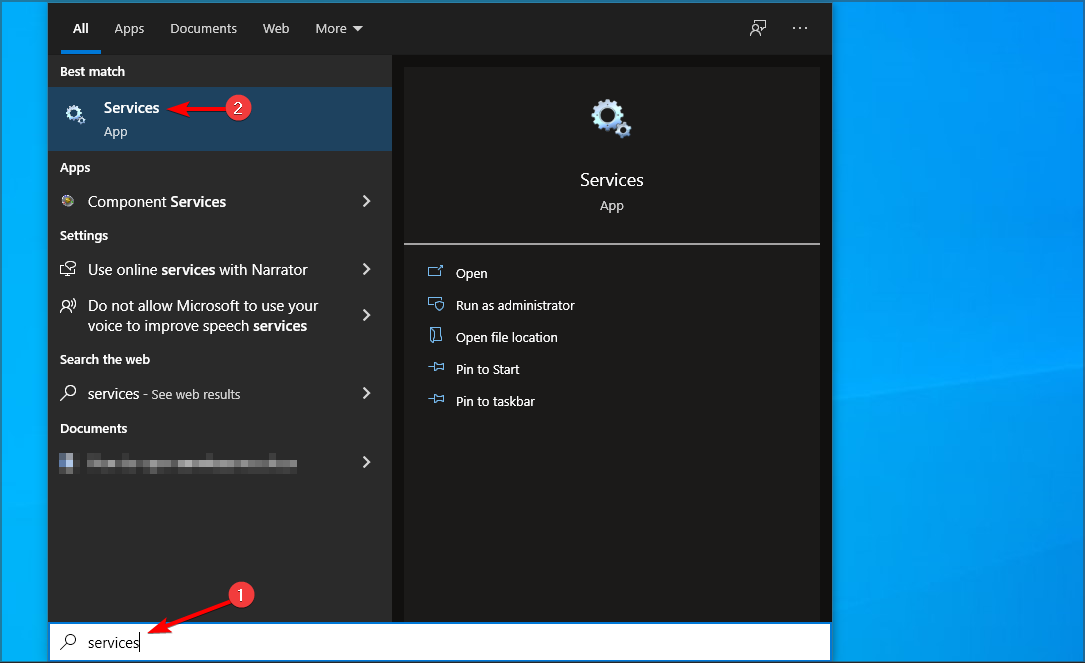
- Type services in the Search bar and open Services.

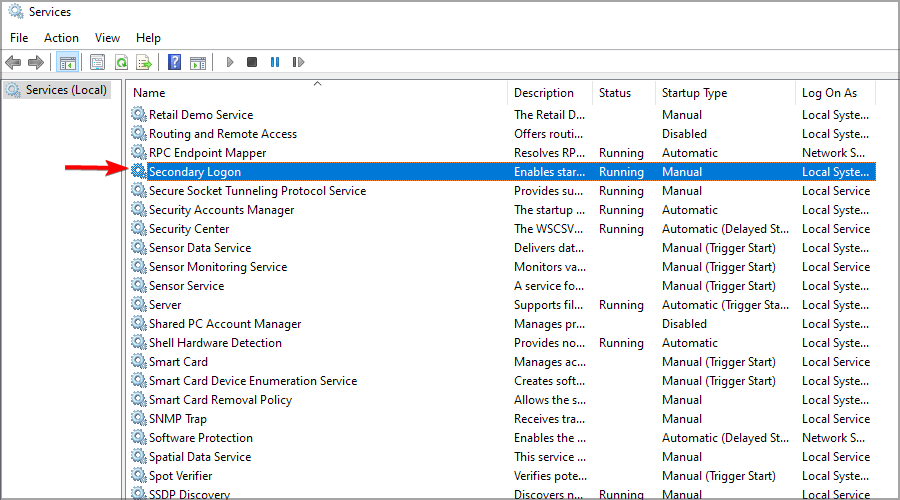
- Navigate to the Secondary Logon service, and double-click it.
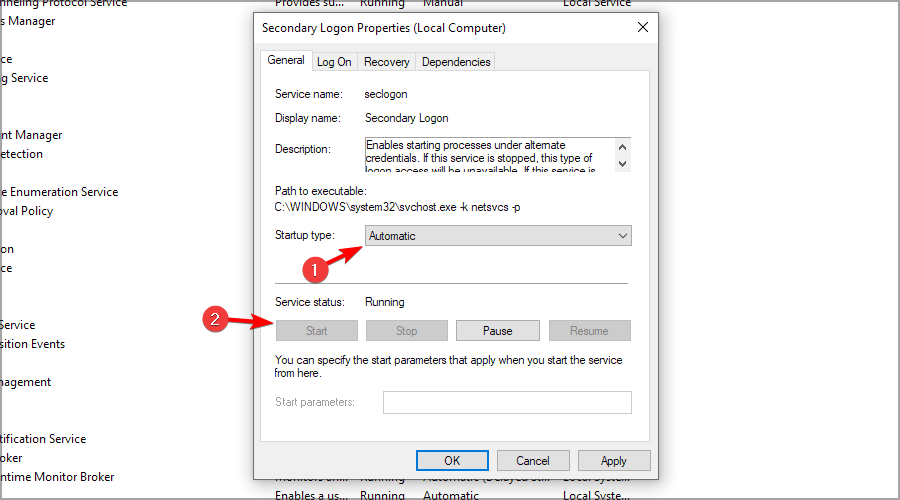
- Change the Startup type to Automatic. Now click Start to initiate the service.
- Restart your PC in order to apply changes.
8. Reinstall the Battle.net launcher
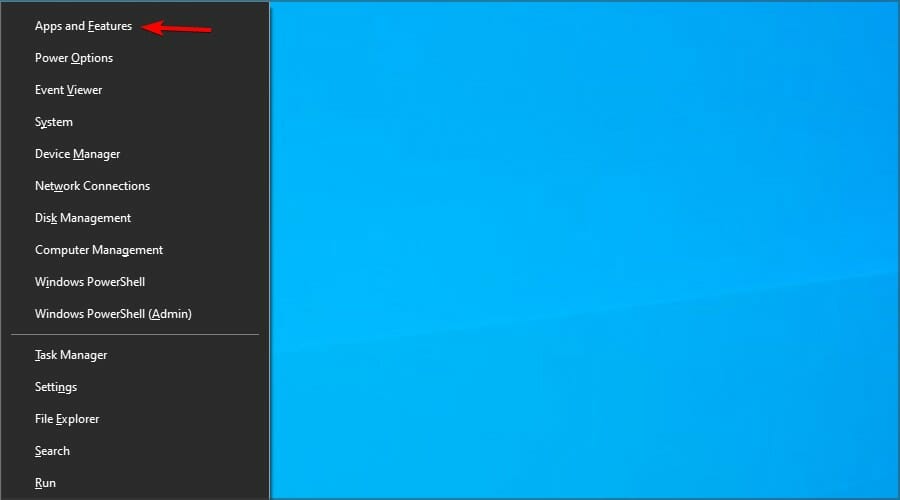
- Press Windows key + X and choose Apps and Features.
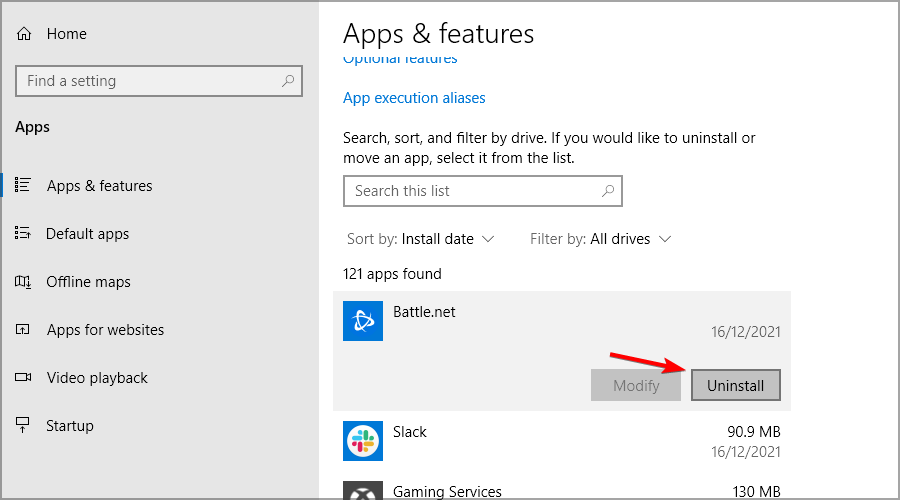
- Select Battle.net and click on Uninstall.
- Follow the instructions on the screen to remove the app.
- Now, press the Windows key + R and run the following code:
C:\ProgramData - Delete the Battle.net folder.
- Restart your PC and download the latest version of Battle.net.
To completely remove Battle.net or any other software from your PC, we suggest using uninstaller software that will automatically remove all of the associated files and registry entries.
What to do if Blizzard app won’t open on Windows 11?
Reinstall Battle.net and remove all of its files
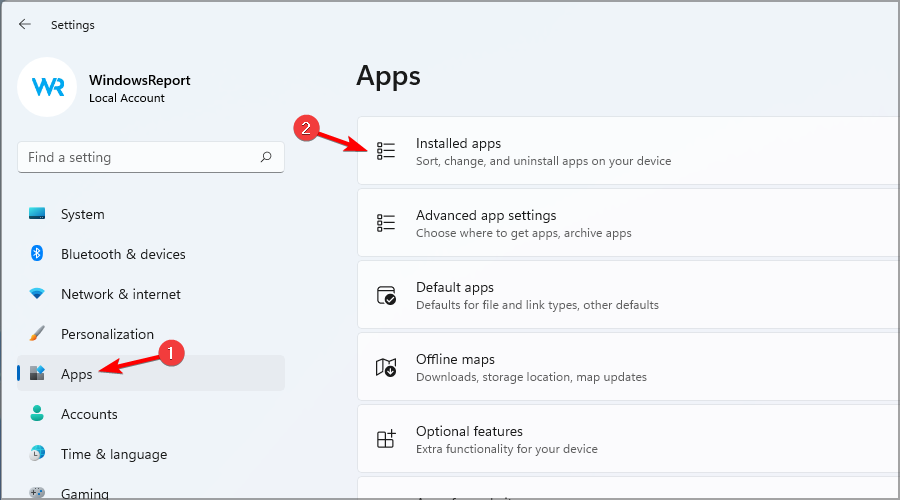
- Press Windows key + I to open the Settings app.
- Navigate to Apps and select Installed apps.
- Locate Battle.net on the list, click three dots next to it and choose Uninstall.
- Follow the instructions on the screen to remove the app.
- Delete Battle.net directory from the following location:
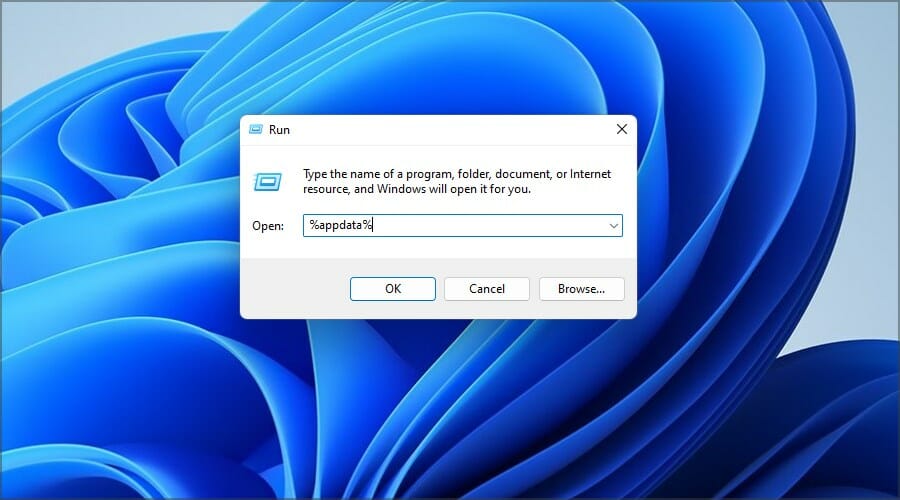
C:\Program Files (x86) - Press Windows key + R and enter %appdata%.
- Delete Battle.net and Blizzard directories if available.
- Repeat the steps 6 and 7 for the following values:
- %PROGRAMDATA%
- %LOCALAPPDATA%
- %TEMP%
- After removing all instances of Battle.net, download and install the latest version.

In case you’re still stuck with the Battle net not opening issue or the app is not working even with VPN, we advise you to check our guide on Battle.net crashes for more useful solutions.
If you have questions regarding the Battle.net launcher or alternative solutions, feel free to tell us in the comments section below.