How to block UWP apps in Windows 10
![]() 5 min. read
5 min. read
![]() Updated on
Updated on
Share this article

Read our disclosure page to find out how can you help Windows Report sustain the editorial team Read more
If you’re a parent, sharing a computer with your kids, or a team manager who wants his colleagues to focus on their work, there surely are some apps or programs you’d like to forbid them to use. We’re not going to ask for a reason, as we’re sure you have one, since you searched for this kind of article.
Anyway, in Windows 10 there are a couple of ways to prevent users from opening certain apps, depending on your current version of the system. Unfortunately, none of them is quite easy, and straightforward, as each method requires some work.
Depending on your needs, you can block apps for your employees, or children. So in this article, we’re going to show you all three ways, and you can choose the one that meets your needs.
Block apps in Windows 10
Method 1 – Block apps in Windows 10 Enterprise/Education
In Windows 10 Enterprise and Education versions, you can completely block any app you want. You can block apps using Local Security Policy, which is the most effective way of blocking apps in Windows 10. Unfortunately this method is ONLY available in Enterprise and Education, as users of Windows 10 Pro and Home versions do not have access to this feature.
In other words, if you use this method in Windows 10 Home, it won’t have any effects. However, since you’re working with security policy, you can create a security policy on a Windows 10 Home computer, and later export it to another computer, that supports this action.
Without any further ado, here’s how to block apps in Windows 10 Enterprise or Education:
First thing you need to do is to make sure the Application Identity process is running. To do that, follow these steps:
- Right-click the Start Menu button, and go to Command Prompt (Admin)
- Enter the following command, and press Enter: sc config appidsvc start=auto
Now that you’ve made sure the Application Identity process is running, it’s time to block some apps. Here’s what you need to do:
- Go to Search, type secpol.msc, and open Local Security Policy as an administrator.
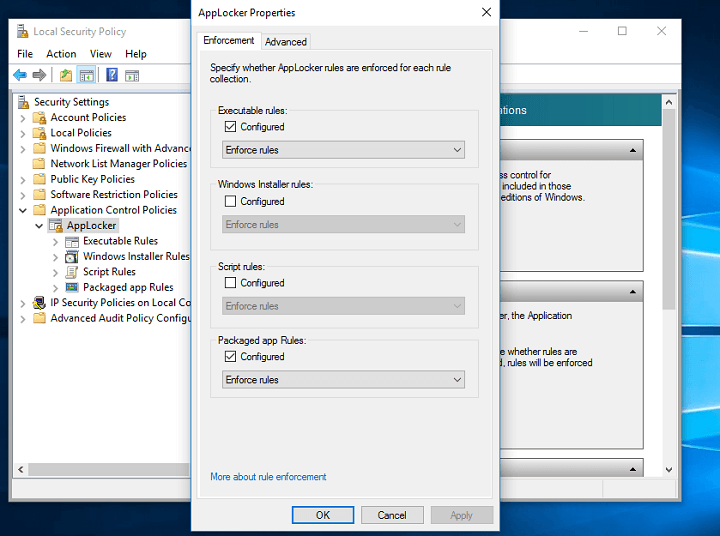
- Go to Security Settings > Application Control Policies > AppLocker, and select Configure rule enforcement.

- Check Configured under Packaged app rules, and then click OK
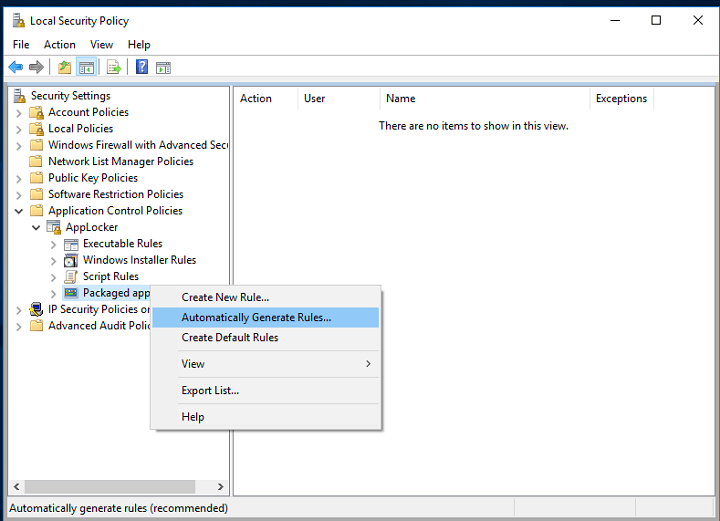
- Right-click on Packaged app Rules, and then go to Automatically generate rules.

- Select the folder that contains the apps that you want to permit. You probably won’t have to touch anything here, because C: folder is usually selected automatically.
- Type a name to identify this set of rules, and then click Next.
- On the Rule Preferences page, click Next (the process may take a while)
- On the Review Rules page, click Create. The wizard will now create a set of rules allowing the installed set of apps.
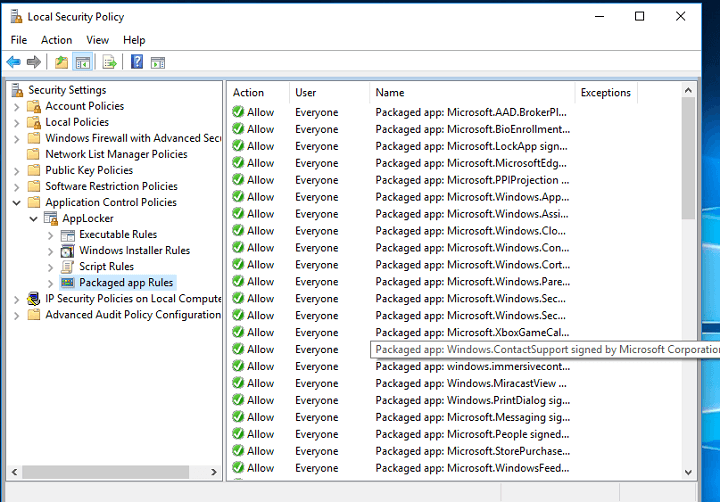
- You’ll now see a list of all your installed apps, under Packaged apps Rules

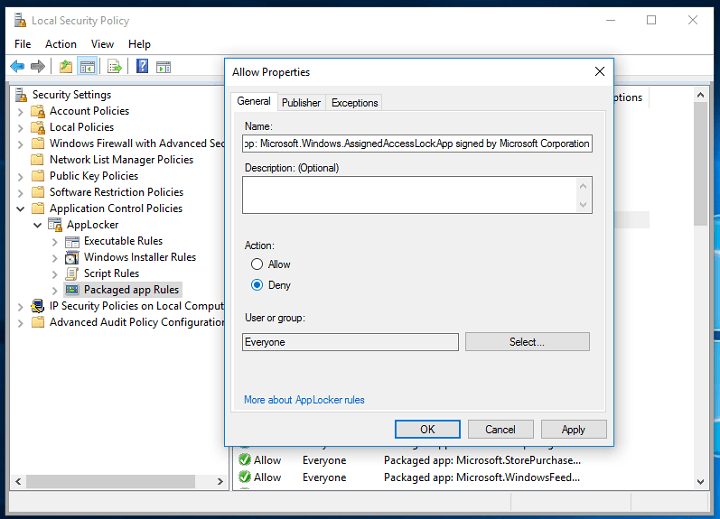
- Just right-click on the app you want to block, go to Properties, and select Deny, under Action:

- Restart your computer
There you go, after performing these steps, all the apps you’ve selected will be blocked from other users from now on. As you’ve now created a set of rules, you can come back any time, and change the app permission settings.
Method 2 – Block apps using Parental Control
If you’re on Windows 10 Pro or Home version, and you want to forbid your kid from using inappropriate apps and content, the obvious solution is the Parental Control feature. With this feature, you can block any app, or website you want, so you don’t have to worry about your child using something he/she shouldn’t.
Here’s how to block apps with Parental Control in Windows 10:
First things first, you need to create a child account for your kid. To do that, follow these steps:
- Go to the Settings app > Accounts > Family & other people > Add a family member
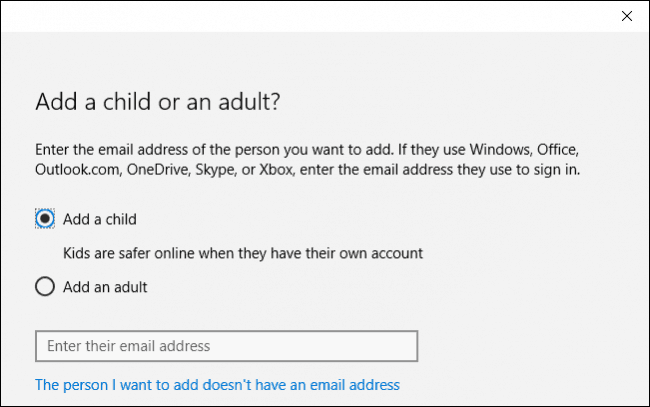
- On the next screen, click Add a child. It’s advised for your child to have its own Microsoft Account, so enter his/her account credentials, or create a new Account.

- Enter further required details, like a phone number, and your child’s name
- Once you’ve created an Account, an invitation will be send to your child’s account
- Once your child logs into his/her account, and confirms the invitation, you’ll be able to manage his/her account
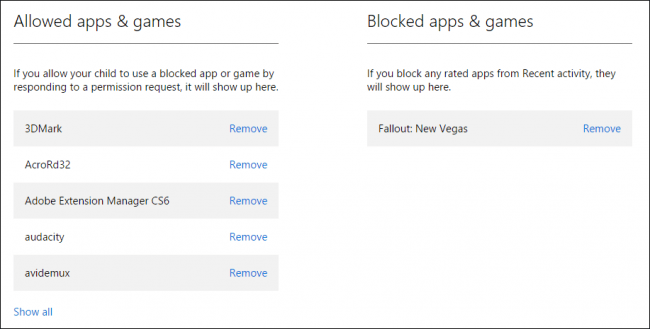
After you’ve created your child’s account, it’s time to decide which apps are appropriate to use. To do that, go to Microsoft’s Family & safety website.
From here, you’ll be able to explicitly allow and block websites, apps and other content. If you select to “only see websites on the allowed list,” then this will be where you will add websites to the “Always allow these” list. Same goes for apps. You can choose to block all apps depending on their age rating, or each app individually, it’s completely up to you.
Once you’re done with blocking websites and apps, just save the changes, and you no longer have to worry about your child using inappropriate apps or websites.
There you go, unfortunately, there’s no straightforward way to block UWP apps in Windows 10 Pro, as Microsoft didn’t want to enable security policies for this version of the system. In case you want to block a whole folder, you can simply encrypt it, and protect it with password. To find out how to do that, check out this article.
If you have any comments, questions, or you’ve found an alternative way of blocking apps in Windows 10, feel free to let us know in the comment section below.
RELATED STORIES YOU NEED TO CHECK OUT: