Windows 10 Sync Settings Not Working: 4 Ways to Force Them
If your laptop is not syncing, adjust the diagnostic settings
![]() 3 min. read
3 min. read
![]() Updated on
Updated on
Share this article

Improve this guide
Read our disclosure page to find out how can you help Windows Report sustain the editorial team Read more
Key notes
- Note that certain system settings related to diagnostics can interfere with this feature.
- In this case, you may choose to run a DISM scan, as described below. And this isn't the only solution.
Having a Microsoft account and syncing your settings can be useful, but many reported that the sync settings feature is not working in Windows 10.
This isn’t the only issue with settings, and we already wrote about the Settings app not opening in the past. However, today we’re going to focus solely on syncing issues.
Why are sync settings not working on Windows 10?
- Certain system settings related to diagnostics can interfere with this feature.
- Problems with your Microsoft account can cause this issue.
- Corrupted system files can lead to many issues, including this one.
- Outdated versions of Windows can experience syncing glitches.
How do I force Windows settings to sync?
Before we start fixing this issue, there are a few preliminary checks you can perform:
- Make sure that Windows is up to date in order to avoid any syncing bugs.
- Temporarily disable antivirus software since it can interfere with syncing process.
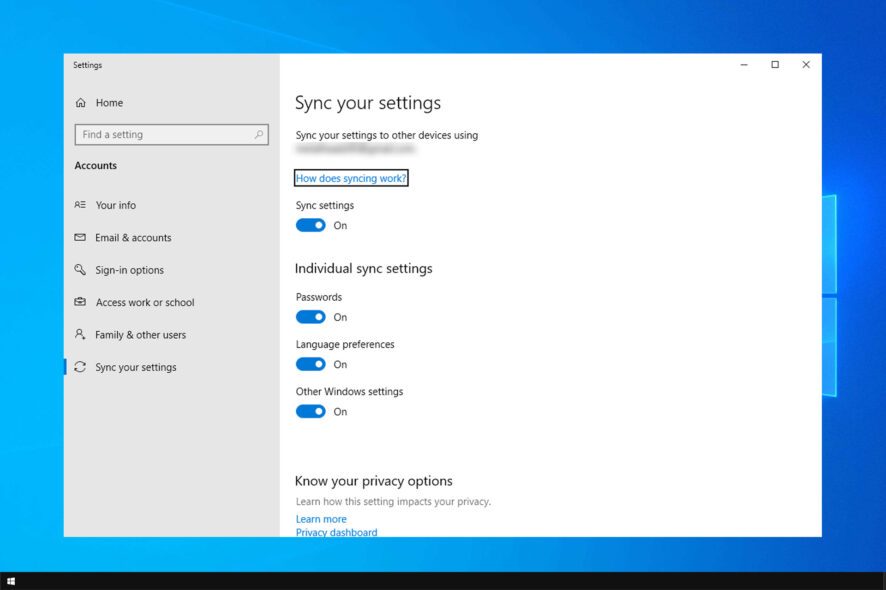
1. Change Feedback and Diagnostics settings
- Open Settings
- Go to Privacy, Feedback & diagnostics
- Your Diagnostics and usage data settings are probably set to Basic. Just change it to Enhanced or higher

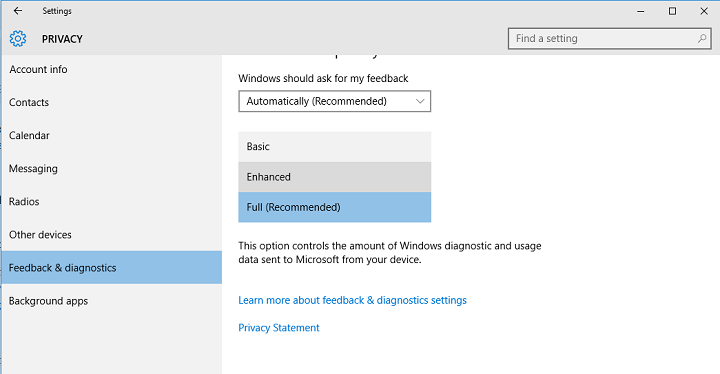
Changing Feedback and Diagnostics settings should solve the sync problem.
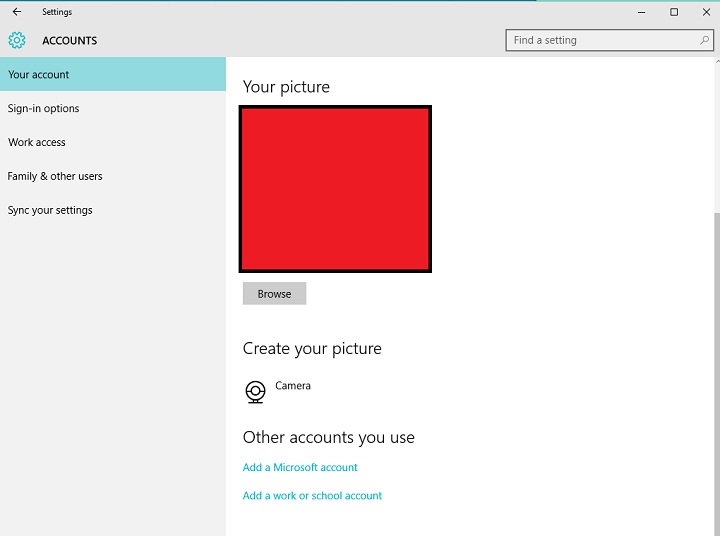
2. Sign in with a different Microsoft account
- Go to Settings, Accounts
- Go to Add Microsoft Account

- Enter login info of your new account and follow further instructions
- Once you login to the new Microsoft account, check if you’re able to sync your settings now. If you are, problem was definitely in your previous account.
3. Run a SFC scan
1. Go to Start > type cmd > right-click Command Prompt > select Run as Administrator
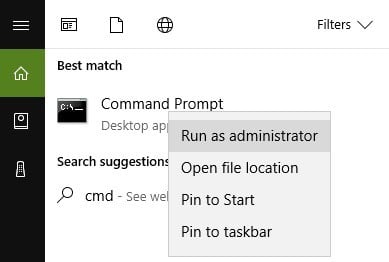
2. Now type the sfc /scannow
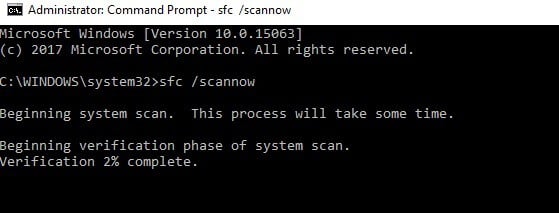
3. Wait for the scanning process to complete and then restart your computer. All corrupted files will be replaced on reboot.
If you’re having trouble accessing Command Prompt as an admin, then our can’t run Command Prompt as administrator guide should be able to help you.
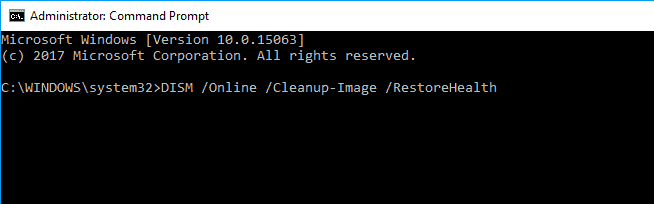
4. Run a DISM scan
- Start Command Prompt as administrator.
- Enter the following command:
DISM /Online /Cleanup-Image /RestoreHealth
- It is worth mentioning that the scan can sometimes take up to 30 minutes or more to complete. Wait patiently until the whole process finishes and don’t press any key.
Sometimes this process can encounter issues, and we have a great guide on what to do if DISM fails on your PC, so be sure to check it out.
That should be all. We hope these solutions helped you to solve the sync settings not working issue on Windows 10.
In case you have more problems, check our guide on how to transfer Windows settings to a new computer.
If you have any comments, questions, or suggestions, just reach for the comment section below.