How To Install Cisco VPN Client on Windows 10 [Full Guide]
Make sure you run Citrix DNE Update and that you have admin rights.
![]() 2 min. read
2 min. read
![]() Updated on
Updated on
Share this article

Improve this guide
Read our disclosure page to find out how can you help Windows Report sustain the editorial team Read more
Key notes
- Cisco Systems is sometimes synonymous with communication and networking hardware and software solutions.
- Installing the Cisco VPN client on Windows 10 involves making some registry changes.
- Before anything else, make sure to create a backup to secure your system.
- Ready? Go ahead and check this guide to see how to modify the Display Name value easily.
If you are a person who wants to make sure that nothing bad will happen while being connected to an unsecured network, then you’ve most likely heard of VPN.
VPN stands for virtual private network and can help protect your Internet connection by tunneling the connection between the two endpoints and encrypting all sent or received data.
Also, an additional layer of security is included as you will need to authenticate in order to access data.
There are many companies offering VPN servers, but one of the most secure and popular is Cisco.


How can I install and enable the Cisco VPN client on Windows 10?
Here are the requirements for running the Cisco VPN client:
Requirements:
- A PC that runs on Windows 10
- Cisco VPN Client v5.0.07.0440 (check with your network administrator)
- Citrix Deterministic Network Enhancer (DNE) Update
- Administrative credentials
Without further ado, let’s see how to go about the process and deploy the Cisco VPN client easily.
How to install Cisco VPN client on Windows 10 using Registry Editor
Should you meet the requirements for the Cisco VPN client (see the list above), you can easily install it on your Windows 10 PC using the Registry Editor.
If you have a previously installed version of Cisco VPN client, you will need to uninstall it before installing the new one to ensure a clean installation.
1. Uninstall the previous version of Cisco VPN that you have on your PC, then reboot the node.
2. After that, install the Citrix DNE Update software. Choose the version that matches your computer’s architecture (32-bit or 64-bit).
3. Download Cisco VPN client version 5.0.07.0440.
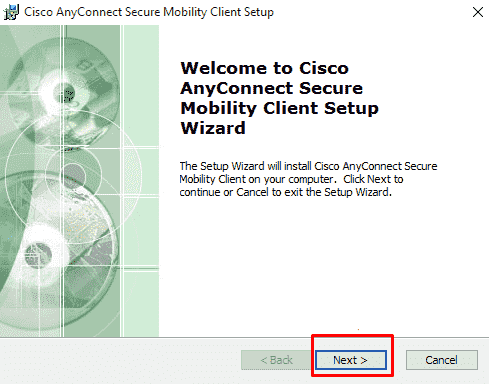
4. Launch the installer and select Next when the installation wizard opens.
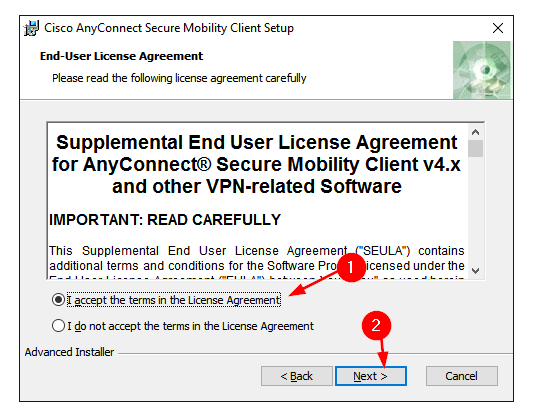
5. Select I accept the terms in the License Agreement and click Next.
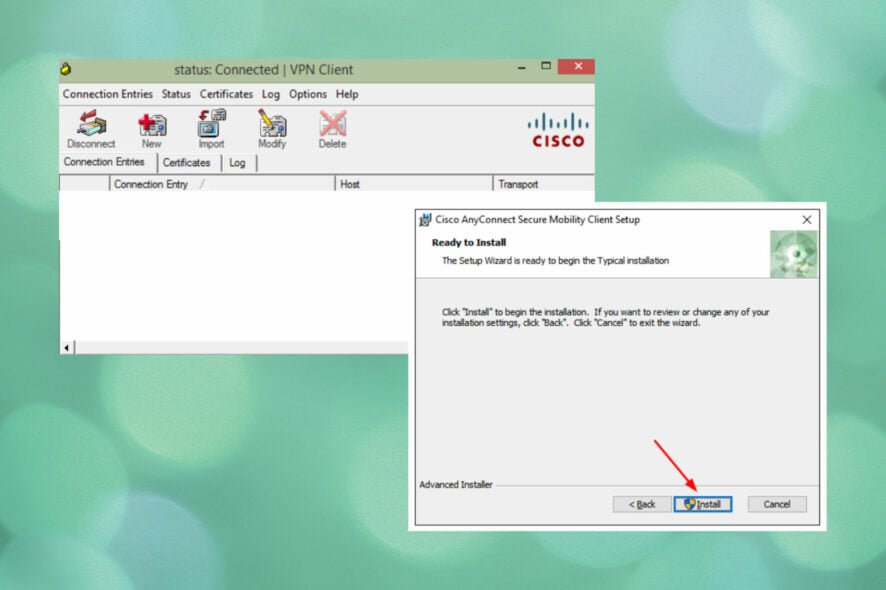
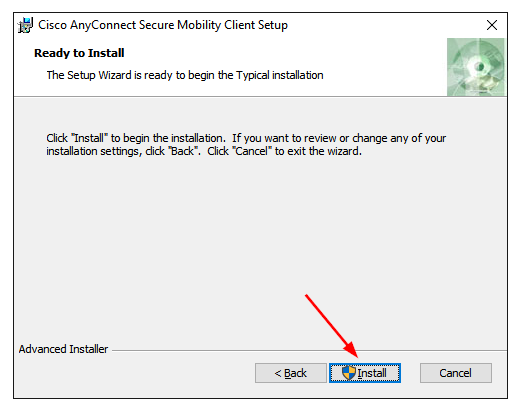
6. Press the Install button to begin the installation.
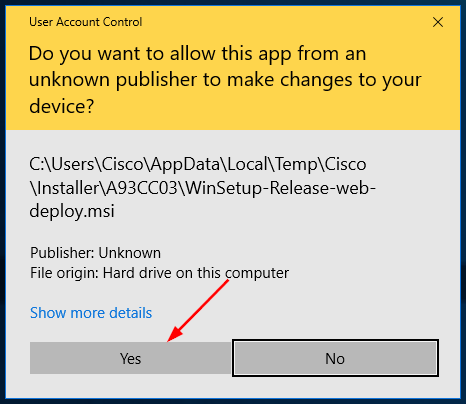
7. You will be prompted by UAC to allow permission to install Cisco VPN Client. Select Yes from the options.
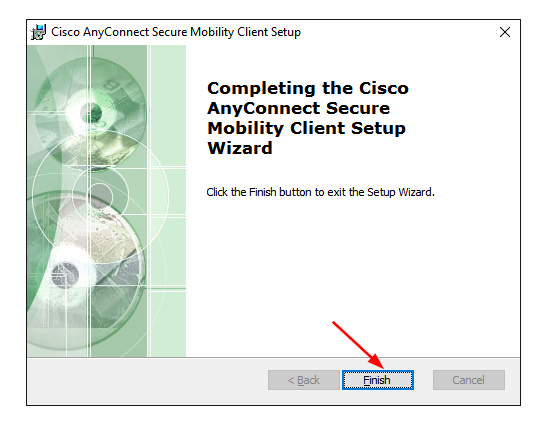
8. Click Finish to close the installation wizard.
9. You will now have to launch the registry editor. To do this, press the Windows button, write regedit and right click on it.

10. Once Regedit is open, head to: HKEY_LOCAL_MACHINE\SYSTEM\CurrentControlSet\Services\CVirtA
11. Search for the Display Name key, and double-click it to edit the entry.
12. Change it from @oem8.ifn,%CVirtA_Desc%;Cisco Systems VPN Adapter to Cisco Systems VPN Adapter.
13. Now you will have to close the Registry Editor and launch the Cisco VPN Client Software.
14. Configure the Cisco VPN software to connect to your VPN server.
Keep in mind that from time to time, you might notice that Windows 10 is flagging the application as unsupported and disabling the service.
We also have a speedy solution for these situations. So make sure you don’t miss out!
- You can fix this by launching the Services.msc.
- Now, find the service entry named Cisco Systems, Inc. VPN Service.
- Right-click on it and select Start.
If the latest Windows updates prevent the app from working as it should, Cisco recommends using their AnyConnect Mobility client, which offers a VPN client and other solutions in one package.
The software is also available for Windows 11, and you can easily download Cisco AnyConnect on Windows 11.
Let us know in the comments section if you have any questions about this subject. We hope that our solution helped you install and configure the Cisco VPN client without too much hassle.