17 Easy Fixes for VPN Error 691 in Windows 10/11
Error 691 is often the result of incorrect username or password
![]() 8 min. read
8 min. read
![]() Updated on
Updated on
Share this article

Improve this guide
Read our disclosure page to find out how can you help Windows Report sustain the editorial team Read more
Key notes
- Windows 10 built-in VPN tool can come in handy, but Connection failed with error 691 might spoil your fun.
- While VPNs are excellent tools to protect your privacy, sometimes they might fail.
- If your VPN fails, you may become vulnerable to attacks and privacy violations.
- Check out the solutions below to fix error 691 or consider an upgrade and go for a full-scale premium VPN instead.
Many use VPNs in order to protect their privacy online. VPN tools are a great thing to have these days, and Windows 10 also supports VPN natively, so you won’t need any third-party software.
Issues with VPN can still occur and users reported Connection failed with error 691 error message. This can be a problem if you want to use a VPN, but there are a few ways to solve it.


How to fix the VPN connection failed with error 691?
1. Install Private Internet Access

While the native Windows solution is fairly easy to use and covers basic VPN needs, if you rely extensively on VPN usage you might want to consider upgrading to premium software.
By coupling your PC with PIA you will definitely enjoy a myriad of features and never have to worry about failed connection errors. If anything, this well-rounded VPN will streamline your connection, eliminate server buffering and ISP throttling and enhance your download speeds.
Packed with unlimited bandwidth and more than 3292 servers strategically placed across the globe, PIA will let you choose the server closest to you, and route your traffic towards it via highly encrypted VPN tunnels.
2. Use Microsoft CHAP Version 2
VPN uses different protocols, and in order to fix Connection failed with error 691, you need to use Microsoft CHAP Version 2. To do that, follow these steps:
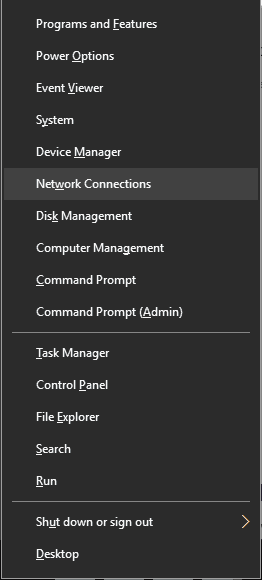
- Press the Windows key + X to open the WinX menu. Choose Network Connections from the menu.

- When the Network Connections window opens, locate your VPN connection, right-click it and choose Properties from the menu.
- Navigate to the Security tab.
- Select Allow these protocols and check Microsoft CHAP Version 2 (MS-CHAP v2).
- Click OK to save changes.
After enabling Microsoft CHAP Version 2, check if the problem still appears.
3. Uncheck the Include Windows logon domain option
Sometimes Connection failed with error 691 messages can appear if your VPN connection isn’t configured properly, but you can fix that problem by disabling the Include Windows logon domain option.
To do that, follow these steps:
- Open Network Connections. For detailed instructions on how to do that, check the previous solution.
- Locate your VPN connection, right-click it, and choose Properties from the menu.
- Navigate to the Options tab and uncheck the Include Windows logon domain option.
- Click OK to save changes.
4. Change the LANMAN parameters
According to users, you can fix the VPN error 691 on your PC by simply changing the LANMAN parameters.
This can be done via the Group Policy Editor, a built-in tool on your Windows device. It is easy and perfectly safe to use.
1. Press the Windows + R keys to open the Run dialog and type gpedit.msc in it.
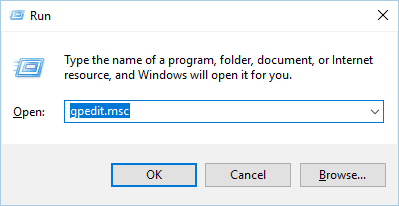
2. Click on OK to run the command.
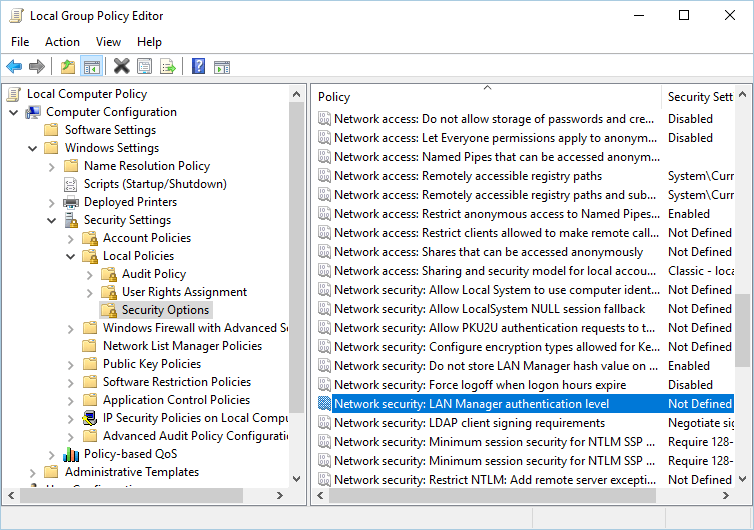
3. The Local Group Policy Editor will now start. In the left pane, go to Computer Configuration > Windows Settings > Security Settings > Local Policies > Security Options.
4. In the right pane, locate and double-click on Network security: LAN Manager authentication level.
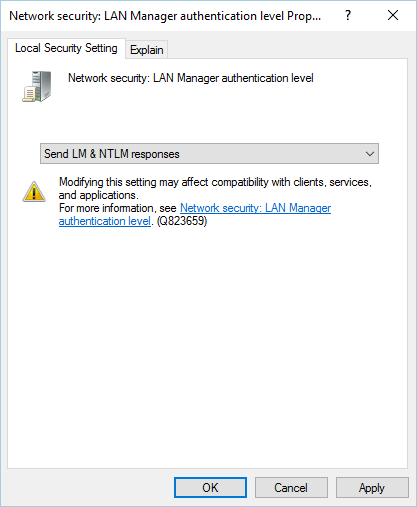
5. Go to the Local Security Setting tab. Choose to Send LM & NTLM responses from the list. Click Apply and OK to save the changes.
6. Now double-click on Network Security: Minimum Session Security for NTLM SSP.
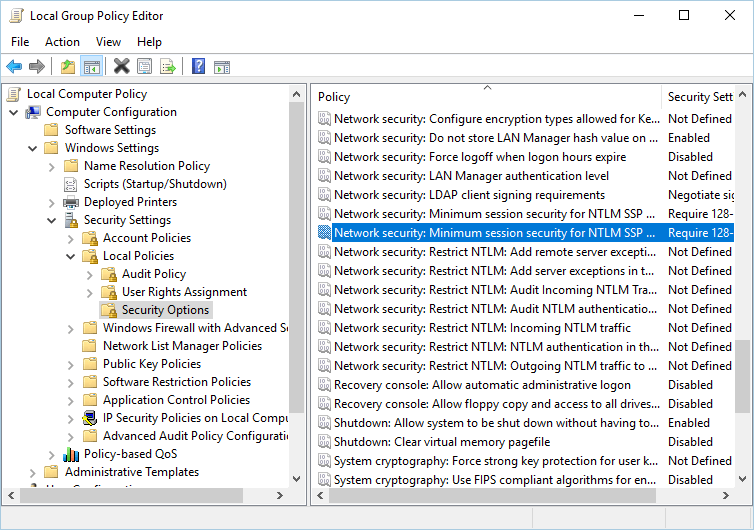
7. Be sure to disable Require 128-bit encryption option and enable the Require NTLMv2 session security option.
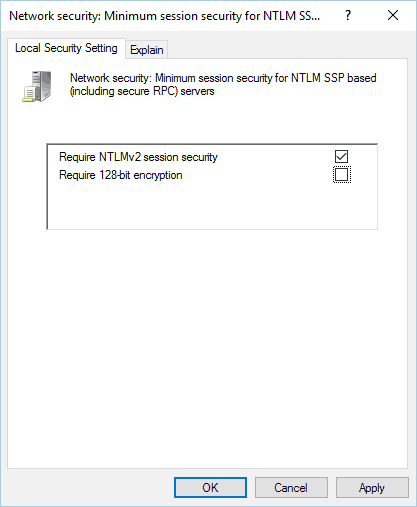
8. Click Apply and OK to save the changes.
9. Restart your PC.
5. Check if your username and password are correct
Sometimes Connection failed with error 691 messages can appear if your username or password isn’t correct. To ensure that your password is correct, we advise you to check if you have the CAPS LOCK option turned on.
In addition, be sure to enter your email address as your username.
6. Update Network drivers
The next thing we’re going to try is updating your network drivers. Here’s how to do that:
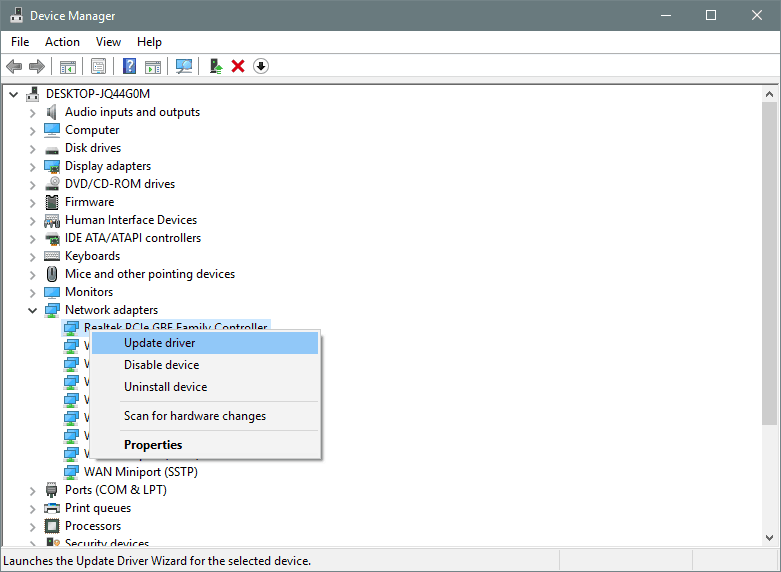
- Go to Search, type devicemngr, and open the Device Manager.
- Expand Network adapters, and find your router.
- Right-click your router and go to Update driver.

- Follow further on-screen instructions and finish installing drivers.
- Restart your computer.
Update drivers automatically
If you don’t want the hassle of searching for drivers on your own, you can use a tool that will do this for you automatically. Of course, as you’re not able to connect to the internet at the moment, this tool won’t be useful.
However, once you get online, it will help you to keep all your drivers up to date, so you won’t be in this situation anymore.
An automatic driver updater tool will help you update drivers automatically and prevent PC damage caused by installing the wrong driver versions.
After several tests, our team concluded that this is the best-automatized solution.
7. Check your connection’s security settings
Connection failed with error 691 messages that can appear if your security settings aren’t properly configured.
To fix this problem, you need to check your connection’s security settings by following these steps:
- Open the Network Connections window.
- Locate your connection, right-click it, and choose Properties from the menu.
- Navigate to the Security tab and make sure that the Typical (recommended settings) option is selected.
- In Validate my identity as follows section, make sure that Allow unsecured password is selected.
- Go to the Options tab and make sure that the Include Windows logon domain option isn’t checked. Click OK to save changes.
After making the necessary changes, check if the problem is resolved.
8. Leave the domain name blank for the outside connection
Users reported that their VPN works while using the internal network, however, Connection failed with error 691 appearing when trying to connect to VPN via an Internet connection.
This is a strange problem, but it seems that the solution is rather simple. According to users, they fixed the issue simply by leaving the domain name blank for the outside connection.
To fix the problem just enter your username and password and leave the domain name blank. Click the Connect button and everything should work without problems.
9. Use the rasphone command
If you have problems connecting to the VPN, you might be able to fix them by using rasphone command. You can run this command by following these steps:
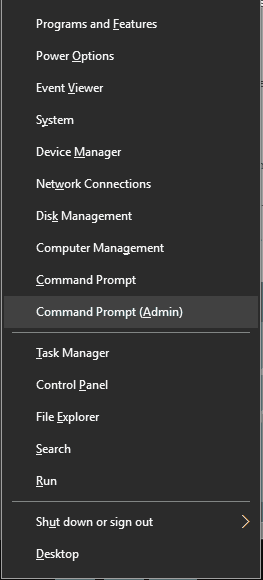
- Press Windows key + X and choose Command Prompt (Admin) from the menu.

- When Command Prompt starts, enter rasphone -d Name of your VPN connection.
- Press Enter to run the command.
10. Check if there are other active VPN connections
Connection failed with error 691 messages can appear if there are active connections. To fix this problem, be sure to check if there are any other VPN connections running.
If so, be sure to disable these connections and check if that solves the problem.
11. Check your domain name
A few users reported that this issue occurs because your domain name isn’t correct. According to users, the issue appears if your domain name uses the company.local format.
In order to fix the problem, you need to remove .local from the domain name. For example, if your domain name is Company.local switch it to Company and check if that fixes the issue.
12. Use a different Logon ID
Sometimes Connection failed with error 691 messages can appear if your Logon ID profile is damaged. If that’s the case, create a new Logon ID and try using it instead.
13. Change your username
A few users reported that Connection failed with error 691 message appearing due to their username. According to them, both username and password are correct, but the issue still appears. If you have the same problem, you might want to try adding the domain name to your username.
To do that, simply add @YourDomainName to your user name. For example, if your current username is Username, you need to change it to Username@YourDomainName. After doing that, try to connect to the VPN again.
14. Delete and add your VPN connection to fix error 691
If you’re getting a Connection failed with error 691 messages, you can fix it simply by deleting and creating your VPN connection again. This is quite simple in Windows 10, and you can do it by following these steps:
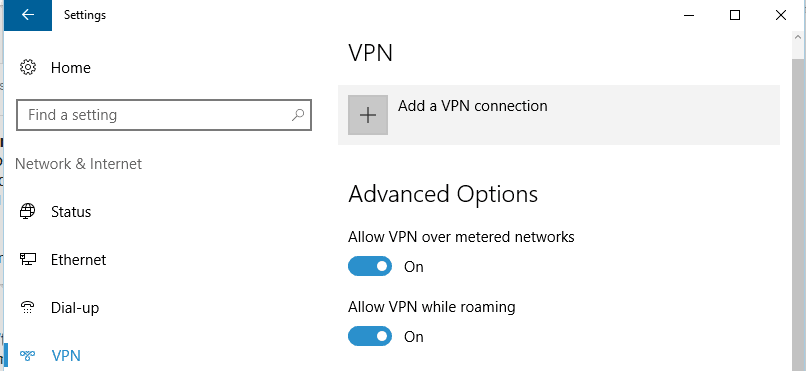
- Press the Windows key + I to open the Settings app.
- When the Settings app opens, go to the Network & Internet section. Now navigate to the VPN tab.
- In the VPN section, you should see all your available VPN connections. Select the connection you want to remove and click the Remove button.
- Now you need to add a new VPN connection. To do that, click Add a VPN connection button.

- After doing that, enter the necessary information to set up your VPN connection.
After creating a new VPN connection, try to connect to it and check if the issue still persists.
15. Use PAP instead of LDAP
Users reported that you can’t use the MS-CHAP v2 protocol with an LDAP server setup. By doing so, you’ll cause Connection failed with error 691 messages to appear.
To avoid this problem, simply switch from the LDAP server setup to PAP and the problem will be fixed.
16. Add ports to WAN/virtual server port forwarding
This error can appear if you’re trying to use a VPN in your network. According to some users, you can fix Connection failed with error 691 error message by adding ports to the WAN/virtual server port forwarding.
If you’re not a network administrator, be sure to contact your network administrator and ask him to make the necessary changes.
17. Contact your ISP
Sometimes Connection failed with error 691 messages can be caused by problems with your ISP. A few users reported that the error was caused by their ISP, but after contacting the ISP the issue was resolved.
Connection failed with error 691 messages can prevent you from using your VPN, and if you have this problem, we encourage you to try some of our solutions.
Let us know how it worked for you in the comments section below.