Windows requires a digitally signed driver [Quick Guide]
![]() 4 min. read
4 min. read
![]() Updated on
Updated on
Share this article

Improve this guide
Read our disclosure page to find out how can you help Windows Report sustain the editorial team Read more
If you are receiving an error message which is blocking the installation process of a new device driver or any other similar software, don’t panic. Your Windows 10 system still runs properly and you are not facing a system malfunction.
However, it means that the implied driver cannot be ‘verified’ by Windows 10 and, for security reasons, the installation process has been blocked by default.
Usually, the error message that appears is Windows requires a digitally signed driver and it means that Windows needs a verified driver by the Signing Authority.
To be specific, vendors are signing the drivers to ensure their integrity and to be certain that the file wasn’t modified in any way. If you try to install an unsigned driver, Windows will always let you know that that specific file is unsafe and it comes from an unknown source.
The good news is that there are some solutions that you can use to fix this error and resume the driver installation process. Here’s what you can do if Windows requires a digitally signed driver.
How can I fix Windows requires a digitally signed driver error?
1. Install the required drivers automatically
The easiest way to install the drivers you need is to use professional driver updater software that installs all the unsigned drivers in seconds. By choosing a dedicated tool you are safe from errors.
Outbyte is a lightweight driver updater software that will safely keep your drivers in check. You can use it to schedule regular updates to prevent errors related to out-of-date drivers to occur again.
You can prevent these problems by using an automatic tool that will search and install the correct drivers on your computer with just a few clicks. That's why we recommend you use Outbyte Driver Updater. Here's how to do it:
- Download and install the Outbyte Driver Updater app.
- Launch the software.
- Wait for the app to detect all incompatible drivers.

- Afterward, it will show you a list of the drivers found to select the ones to Update or Ignore.
- Click on Update & Apply Selected to download and install the newest versions.
- Restart your PC to ensure the applied changes.


Outbyte Driver Updater
Use this software and solve all driver-related issues from your PC.2. Disable driver signing
- On your computer open Local Group Policy Editor: press the Win+R hotkeys and in the Run box enter gpedit.msc.

- In Local Group Policy Editor, from the left panel, click on User Configuration option.
- Then, from the main window double-click on Administrative Templates.
- From the menu that will open double-click on System and then go to Driver Installation.
- Next, select the Code signing for device drivers entry.
- Select Enabled and from the dropdown located beneath, change to Ignore.
- Click Ok and apply your changes.
- Restart your Windows 10 system in the end.

Most Windows 10 users have no idea how to edit the Group Policy. Learn how you can do it by reading this simple article.
3. Put Windows in test mode
If the above method isn’t working for you, or if you don’t want to disable driver signing, you can choose to enter Windows 10 test mode.
In test mode you can install any drivers you want without experiencing any problems. Of course, go to normal Windows 10 mode afterwards:
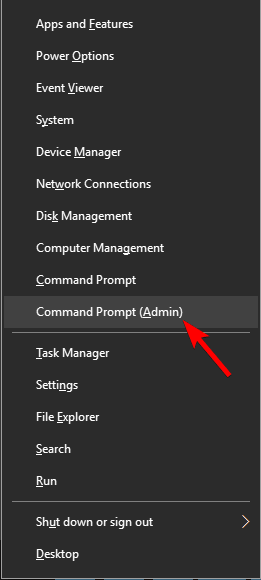
- Open an elevated command prompt window on your PC: right-click on the Windows Start icon and select Command prompt (Admin).

- In cmd type bcdedit /set TESTSIGNING OFF.
- Close the cmd window and restart your computer.
- Install your drivers.
- Revert back to normal mode: open elevated cmd, enter bcdedit /set TESTSIGNING ON and restart your Windows 10 system.
4. Permanently disable driver signature enforcement
- Open an elevated command prompt window as explained above.
- In the cmd window type bcdedit.exe /set nointegritychecks on and press Enter.
- This will disable the driver signature enforcement in Windows 10 permanently.
- You can restore this operation by tapping into cmd: bcdedit.exe /set nointegritychecks off.
Well, these are the troubleshooting solutions that can help you fix the issue where a digitally signed driver is required.
Tell us more about your experience in the comments field below. Let us know if the problem is still there we will try to find the perfect solution for your particular situation.
READ ALSO: