Could Not Initialize Direct3D: Why and How to Fix
![]() 9 min. read
9 min. read
![]() Updated on
Updated on
Share this article

Improve this guide
Read our disclosure page to find out how can you help Windows Report sustain the editorial team Read more
Key notes
- One of the worst things that can happen to you if you’re a PC gamer is that you cannot start your favorite video game.
- Run the inbuilt Hardware & Device troubleshooter First, press Windows + S keys on your keyboard to open the search option.
- Direct3D could not be correctly initialized – Another error that can occur with Direct3D.
- This error can be a big problem since it will prevent you from accessing the desired applications.
One of the worst things that can happen to you if you’re a PC gamer is that you cannot start your favorite video game.
Some users have reported an error message saying that there has been a problem initializing Direct3D in Windows 10.
If you’re a gamer with this problem, you might want to check the following solutions.
What can I do if I can’t initialize Direct3D on Windows 10?
- Update drivers automatically
- Run the inbuilt Hardware & Device troubleshooter
- Update your graphics card driver
- Check for display driver updates in Optional Updates
- Uninstall and reinstall the display driver
- Install an older driver
- Change the game’s resolution
- Reinstall Visual C++ Redistributables
- Remove the problematic update
- Rename the problematic DLL file
1. Update drivers automatically
Suppose you need to initialize Direct3D in Windows 10, but you don’t know what causes the issue that prevents you from doing so. First of all, you’re entitled to suspect graphics card driver issues.
How to solve them easily? Well, Outbyte Driver Updater is your safest choice since it has a growing database of drivers for a wide variety of devices.
In case you don’t have the necessary skills to update your drivers manually and you fear of damaging your computer by downloading the wrong driver version, let Outbyte Driver Updater do its magic.

This tool is the best-automatized solution since it can update all your drivers at once or only the ones that you select, not to mention that you can create backups before any update.
2. Run the inbuilt Hardware & Device troubleshooter
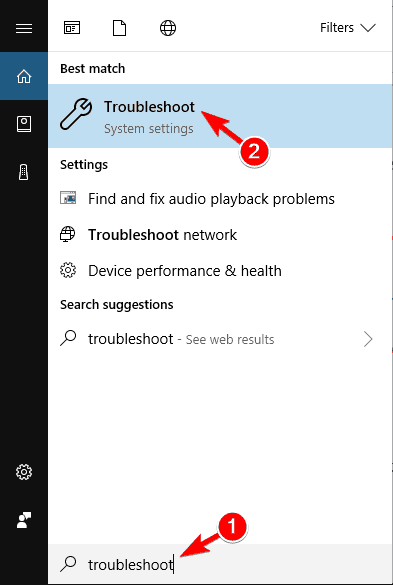
- First, press Windows + S keys on your keyboard to open the search option.
- Enter Troubleshoot and click Troubleshoot.

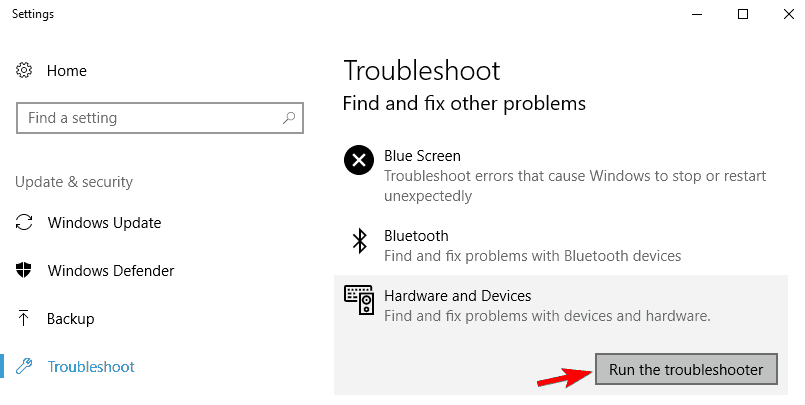
- Click on Hardware and Devices and then click on Run the troubleshooter button.

- Follow the instructions on the screen to complete the troubleshooter.
This is a pretty simple solution, and it will automatically check if your new hardware installed properly. After the troubleshooter is finished, check if the issue still persists.
3. Manually update your graphics card driver
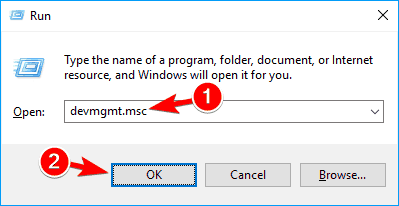
- Press Windows Key + R. In the Run prompt, enter devmgmt.msc and then press OK button.

- In Device Manager, you need to find Display adapters section and click it to expand it.
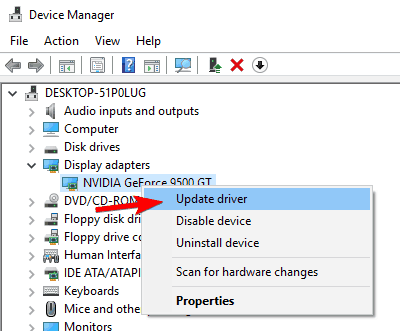
- Find your display driver from the list, it should be the only one available, and right-click the display driver and then click Update driver.

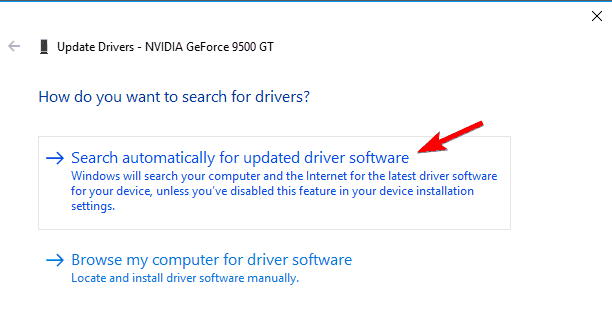
- Select Search Automatically for Updated Driver Software.

- Windows will now search and update the selected driver automatically.
As already said, problems with initializing Direct3D can be caused by your graphics card driver. To fix the issue, you can also update your driver by following the above steps.
Once your driver is updated, the problem with Direct3D should be fixed.
4. Check for display driver updates in Optional Updates

- Open the Start screen/menu and type Windows Update.
- Click on Settings on the right side and then select Install optional updates from the left results.
- Windows Update control panel should open and then all you need to do is to click Check for Updates on the top left corner in order to receive the latest updates.
After downloading the necessary updates, the issue should be fixed.
5. Uninstall and reinstall the display driver
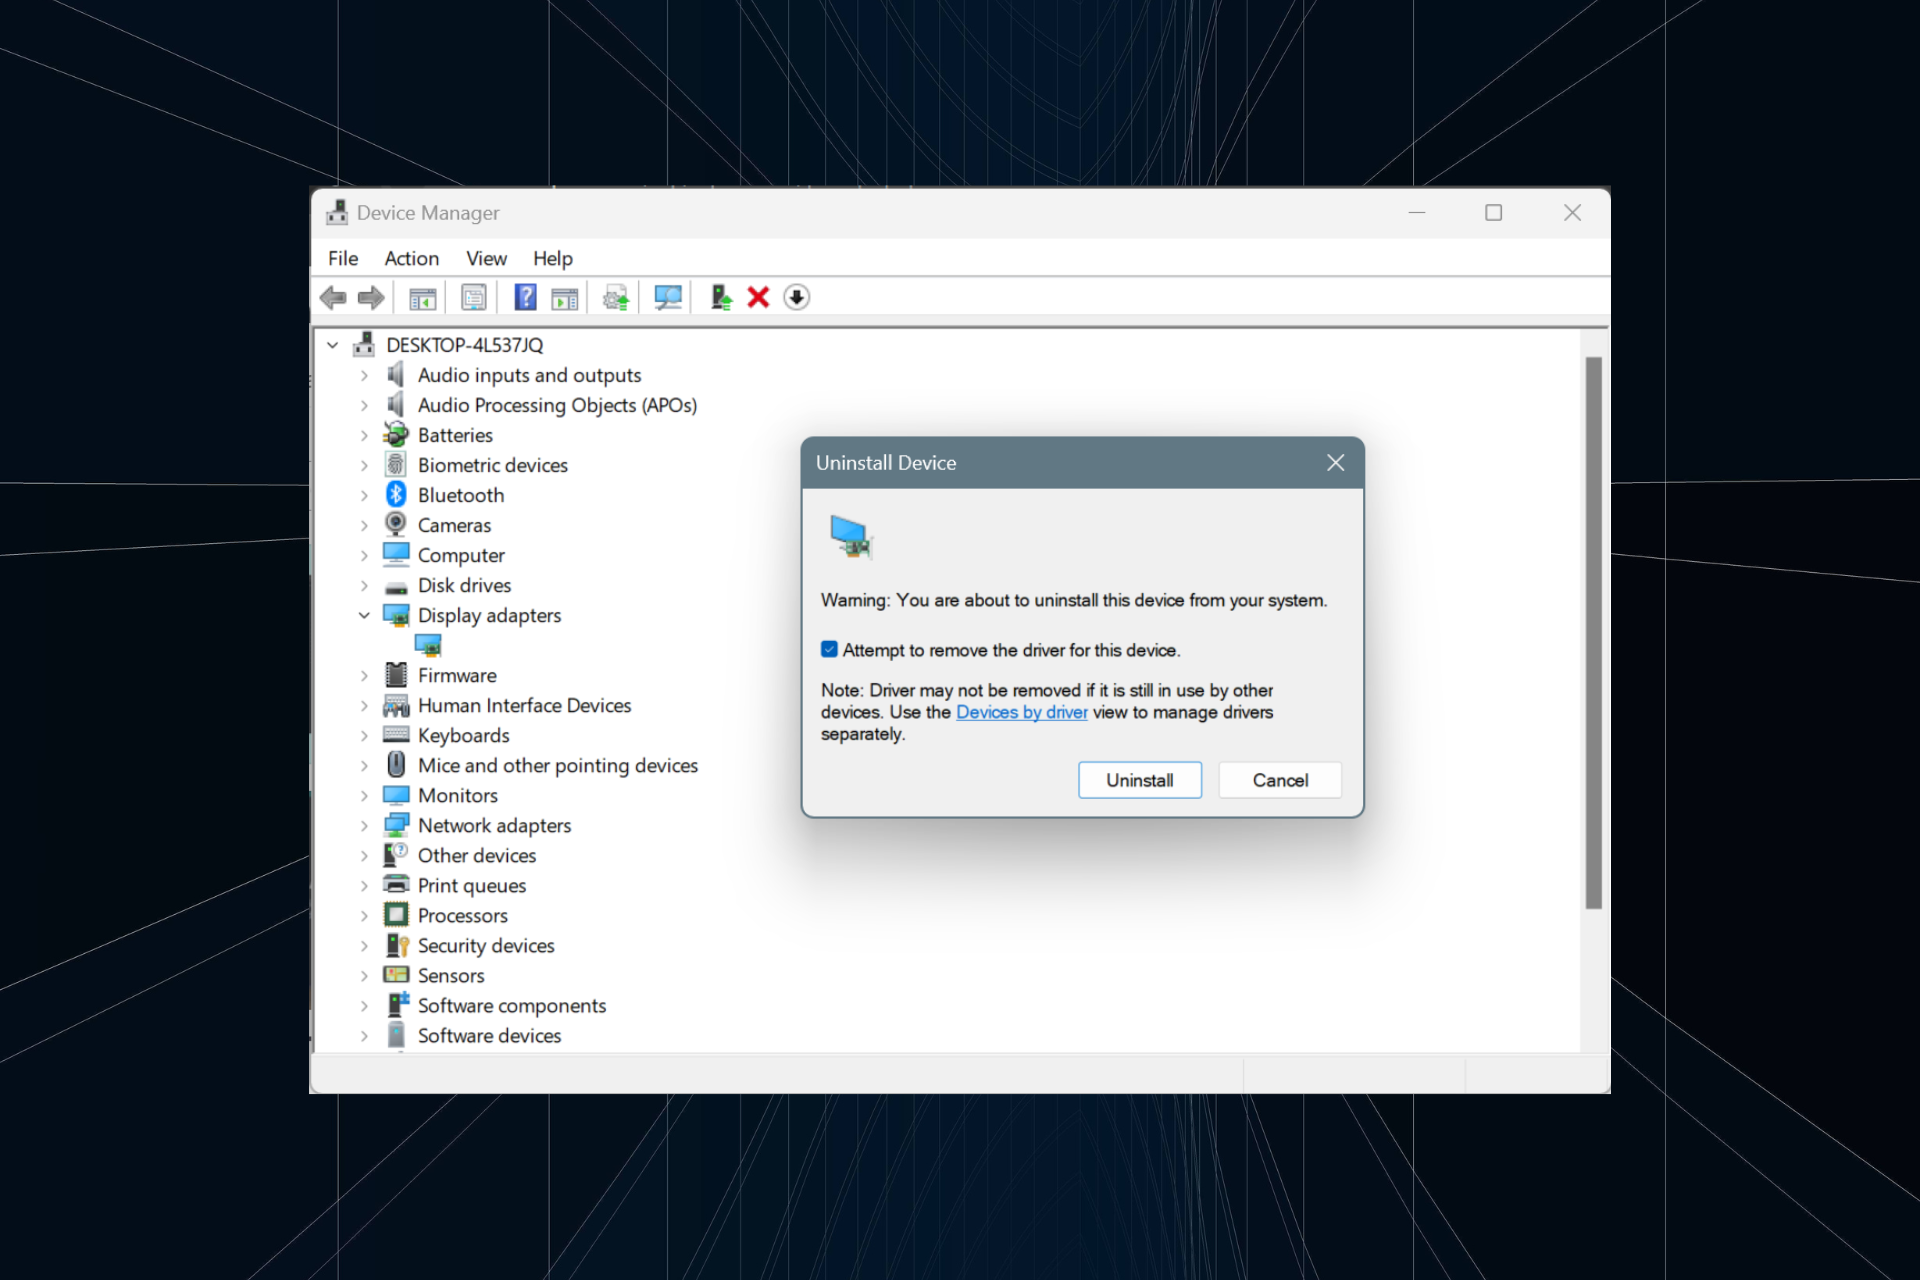
- First, open Device Manager.
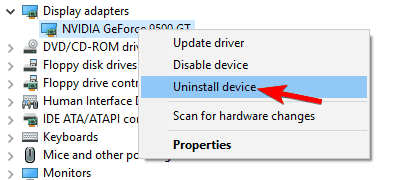
- Find Display adapters and click to expand it.
- Right-click the display card driver and click Uninstall device in the context menu.

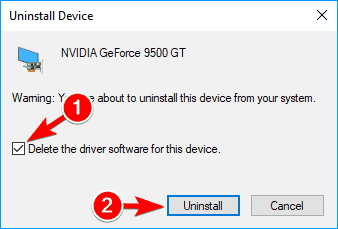
- Windows will ask you to confirm the removal of the device, so click Uninstall to remove the driver. If available, be sure to check Delete the driver software for this device option before you uninstall your driver.

- After the uninstallation is complete, you’ll need to restart the computer in order to load the default display drivers.
- Now you just need to visit your graphics card manufacturer’s website and install the driver for your graphics card.
If you want to completely delete all files associated with your graphics card, you might want to check our guide on how to use Display Driver Uninstaller.
This is a free tool that will remove all files and registry entries associated with your display driver.
6. Install an older driver
If you have problems initializing Direct3D while trying to run certain games, you might want to install an older driver for your graphics card.
Simply uninstall the currently installed driver and download the older version from the manufacturer’s website.
Installing the latest drivers is usually better, but some older games might have issues with them, so try installing older drivers and see if that helps. This is a simple solution, so be sure to try it out.
7. Change the game’s resolution
Sometimes problems with initializing Direct3D can be caused by your game’s configuration. Several users reported that they were unable to start their game while using a specific resolution.
To fix the problem, simply change the game’s resolution from its configuration app and try to run it again. If that game doesn’t have a configuration app, try changing its resolution in configuration files or in the registry.
This isn’t the most user-friendly solution, but few users reported that they solved the problem by using this method.
Several users also reported that they fixed the problem by setting the game to run in Windowed mode. After enabling Windowed mode the issue should be completely resolved.
8. Reinstall Visual C++ Redistributables
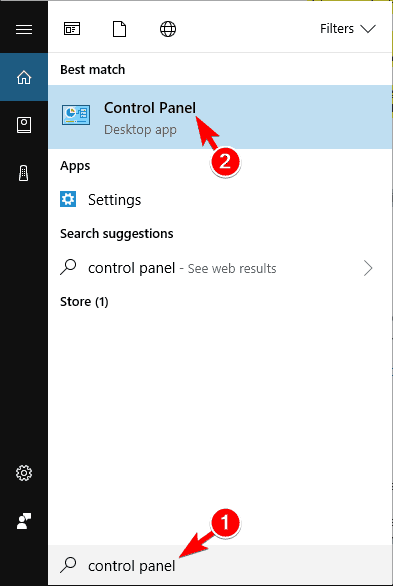
- Press Windows Key + S and enter Control panel. Select Control Panel from the list of results.

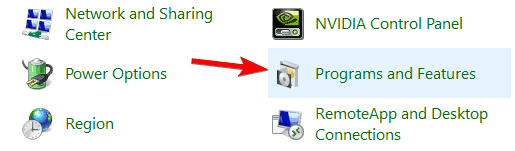
- When Control Panel opens, click on Programs and Features.

- List of all installed applications will now appear. Double click the desired Redistributable in order to remove it.

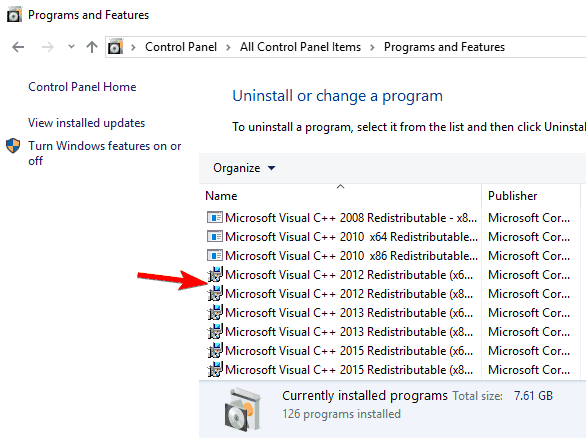
To fix this problem many users are recommending to reinstall your Visual C++ Redistributables. This is relatively simple, and you can do it by following the above procedure.
After removing the problematic Redistributable, you need to reinstall it again. You can download all Visual C++ Redistributables from Microsoft’s website for free.
Many games also come with Visual C++ setup files, so you don’t have to download anything.
Simply open the installation directory of the game you want to run, locate the vcredist directory, and install all files from it. After doing that, the issue with Direct3D should be resolved.
It’s also worth mentioning that sometimes you don’t have to reinstall Visual C++ Redistributables.
Sometimes you might not have the necessary Redistributable installed, and you just need to download it or install it from the vcredist directory to fix the problem.
You can’t open Control Panel? Take a look at this step-by-step guide to find a solution.
In order to always download and install the latest Visual C++ Redistributables, check out this dedicated article.
9. Remove the problematic update
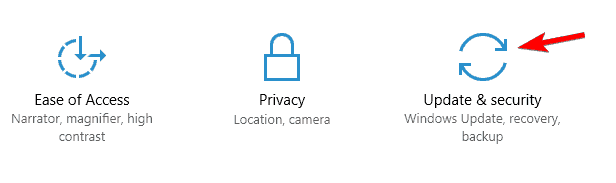
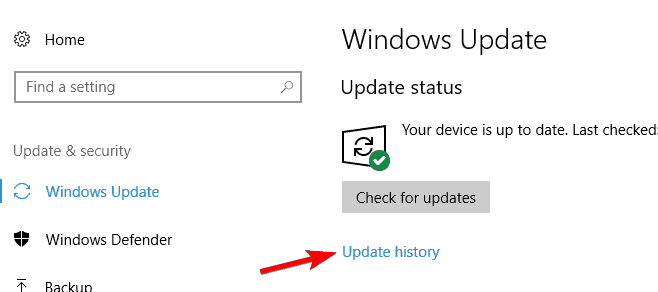
- Press Windows Key + I to open the Settings app.
- Now navigate to the Update & security section.

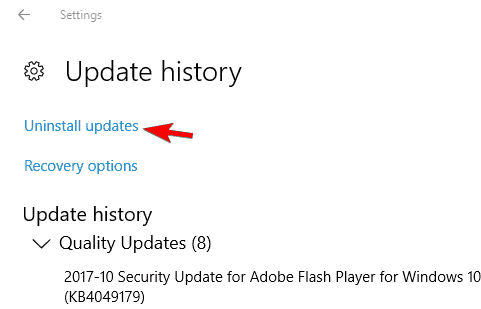
- Click on Update history.

- Now click on Uninstall updates.

- Locate the problematic update and double click it to uninstall it.

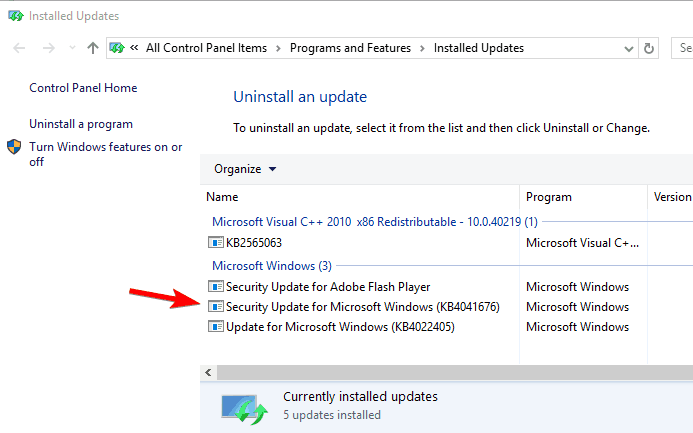
Sometimes you might have problems initializing Direct3D due to problematic updates. If this error started occurring after installing a Windows 10 update, be sure to remove it.
If removing the update fixes the issue, you might want to prevent this update from installing automatically.
We already wrote a guide on how to block automatic Windows updates, so be sure to check it out for detailed instructions.
If you’re having trouble opening the Setting app, take a look at this detailed article to solve the issue.
10. Rename the problematic DLL file
- Go to the game’s installation directory and locate d3d9.dll and d3d11.dll.
- Right-click d3d9.dll and rename it to oldd3d9.dll.
After doing that, the game will be forced to use d3d11.dll and the issue should be resolved. Keep in mind that this is a crude workaround, so it won’t work with all games.
If you have issues initializing Direct3D, the problem might be a specific DLL file. Users reported this error while trying to run certain games.
In order to fix this issue, you just need to rename a single file. To do that, follow the above steps.
Problems with Direct3D prevent you from enjoying your favorite video games. There are various Direct3D problems that can occur, and in this article, we’ve covered the following issues:
- Initialization of Direct3D device failed – This is a common problem with Direct3D on Windows. However, you can easily fix this issue by using one of our solutions.
- Failed to initialize Direct3D with current settings – Another common error that can occur with Direct3D. To fix the problem you might have to reinstall the necessary Visual C++ Redistributables.
- Error initializing Direct3D device is not available – Few users reported a message saying that the Direct3D device isn’t available. This problem usually appears due to issues with your drivers.
- Cannot initialize Direct3D device – This is just a variation of the previous error, and it’s most likely caused by your drivers.
- Initializing Direct3D VirtualBox – This error can appear in Windows, but it can also appear while using virtualization apps such as VirtualBox.
- Direct3D error code 38 – Several users reported Error code 38. This can be a big problem, but you should be able to fix it by using one of our solutions.
- Direct3D unable to create the device, set display mode – Some users reported that Direct3D is unable to create a device or to set display mode. To fix this issue, be sure to check your graphics card drivers.
- Direct3D out of memory – This is also a relatively common problem with Direct3D. If you’re getting this error, make sure that the application you’re trying to run is installed properly.
- Direct3D could not be correctly initialized – Another error that can occur with Direct3D. This error can be a big problem since it will prevent you from accessing the desired applications.
Just like many other issues, initializing Direct3D in Windows 10 problem is probably caused by incompatibility between a graphics driver, so refer to our below tips.
For any more suggestions and questions, go to the comments section below. You’ll find us there, so do share your opinion with us.