DISM Failed on a Windows PC? 9 Quick Fixes
Get back to fixing corrupt files on your PC with the built-in tool
![]() 9 min. read
9 min. read
![]() Updated on
Updated on
Share this article

Improve this guide
Read our disclosure page to find out how can you help Windows Report sustain the editorial team Read more
Key notes
- DISM.exe (Deployment Image Servicing and Management) is a useful command-line tool for Windows images and Windows Recovery Environment.
- The DISM failed issue might be caused by interference from your antivirus software.
- A quick fix for DISM not working is to clean up system image components or disable your proxy.
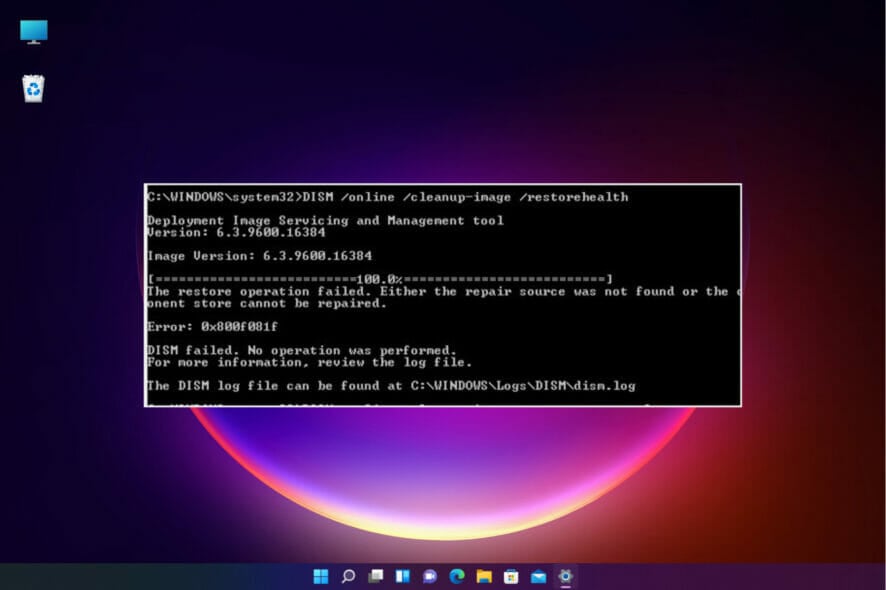
The DISM command comes in very handy when it comes to repairing your Windows PC. For example, if your Windows 10 installation is corrupt, you can usually fix it using the built-in SFC /scannow command, followed by DISM.
However, the DISM can fail. In this case, you cannot use it to repair your PC, and the problems will not be fixed.
If DISM failed on your device, we will show you how to fix the tool in this guide and return to keeping your PC in top shape.
What causes the DISM failed issue?
There are various reasons for the DISM command not working on your Windows PC. Below are some of the variations of the DISM error and the causes:
- DISM failed no operation was performed – This is a relatively common problem with DISM. However, you might be able to fix the problem by performing the DISM can using the Windows ISO file. The full error message reads: DISM failed. no operation was performed. for more information, review the log file.
- DISM failed to load the provider, unload offline registry, flush file buffers, set the windows directory, and mount the image – These are some common problems you can encounter with DISM scan. However, you should be able to fix most of them using our solutions.
- DISM failed 0x8000ffff, 0x800f0954, 0x800f081f, 0x800f0827 – If you’re getting any of these errors, try copying the install.wim file from Windows 10 ISO and use it to perform a DISM scan.
- DISM failed while processing command cleanup-image, add-package – These are some common problems with DISM, but they can be solved using one of our solutions.
- DISM failure when attempting to copy boot files – This is another common problem with DISM, but you might be able to fix it by cleaning up system image components.
- Dism.exe failed validating command line to load wim manager – If you’re having any of these problems, restart Windows update components and check if that helps.
- DISM failed error 0x800f0905 – This is the case when users try running the DISM tool on encountering the 0x800f0905 update error.
- DISM failed no operation was performed Windows 11 – The DISM tool often fails with this error message in the latest iteration of Windows as well. The solution from above should do the trick.
- Dism /online /cleanup-image /restorehealth not working – While the other commands work, this one is not working for some users.
How can I fix the DISM not working issue?
1. Check your antivirus
In some rare instances, the DISM command not working issue can be caused by your antivirus. Your antivirus can interfere with your system and cause this problem.
If DISM failed on your system, you might be able to fix the problem simply by disabling certain antivirus features or the app. You also try to remove the antivirus software if disabling it does not solve the problem.
Should this fix the problem, you might need to consider one of the best modern antivirus software in ESET NOD 32.
This software uses cutting-edge technology to keep your PC secure without causing errors. What’s more, it provides both offline and online security and ensures your privacy. So, let it take care of your security while you worry about other things.
2. Enter the correct location of Install.wim file
If DISM is giving you the Can’t find source files message, you need to mount Windows 10 ISO file and specify the location of the Install.wim file.
To specify the location of the file, type the following command in Command Prompt and press Enter to run it: DISM /Online /Cleanup-Image /RestoreHealth /source:WIM:X:SourcesInstall.wim:1 /LimitAccess
Remember that you need to replace X with the letter that matches the drive where Windows 10 ISO file is mounted.
3. Copy the Install.wim file
Few users suggested that you can fix this problem by copying the Install.wim to the root directory of your hard drive.
To get Install.wim file, download Windows 10 ISO, mount it, and locate Install.wim file.
After copying the Install.wim file, be sure to enter the correct location of the Install.wim file before running the DISM scan.
Also, remember that the DISM command is case sensitive, and users reported entering install.wim instead of Install.wim caused the DISM to fail. Therefore, enter the correct file name before starting the DISM scan.
Few users also reported that DISM doesn’t support spaces in the source location. So, be sure that the containing folder doesn’t have any spaces in its name.
4. Clean up system image components
1. Open Command Prompt as administrator.
2. Type the command below and press Enter. Dism.exe /online /Cleanup-Image /StartComponentCleanup
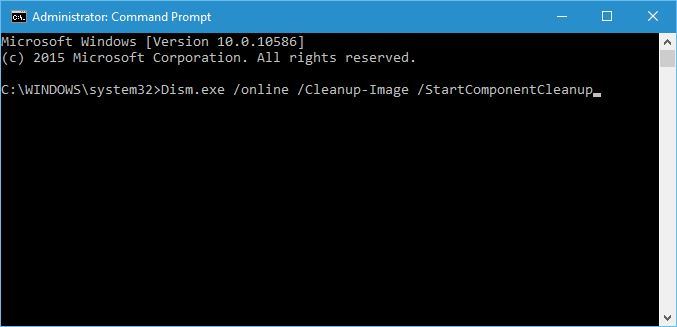
3. Wait for the process to finish.
4. Try to perform the DISM scan again after running these commands.
5. In addition, if DISM still isn’t working, you can also run the following commands:
DISM /Online /Cleanup-Image /StartComponentCleanup
DISM /Online /Cleanup-Image /AnalyzeComponentStore
Dism.exe /online /Cleanup-Image /StartComponentCleanup
Dism.exe /online /Cleanup-Image /StartComponentCleanup /ResetBase
If you’re facing DISM error 193, 740, 14098, 3017, and similar variations, you might be able to fix those problems by cleaning up the system image components.
This is simple, provided you follow the steps above. All you need is to run Command Prompt as an administrator and run a few commands with privileges.
There are many repair tools for Windows that can be used to fix broken or corrupted files. Check out our dedicated article to find out which are the best.
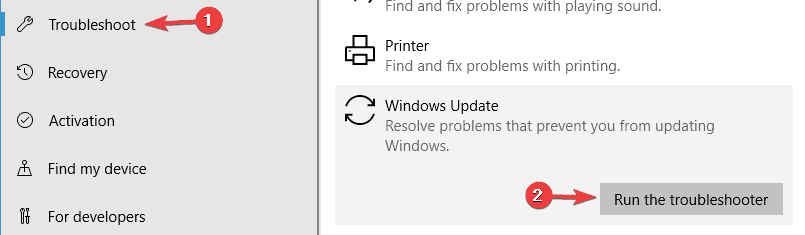
5. Run the Windows Update troubleshooter
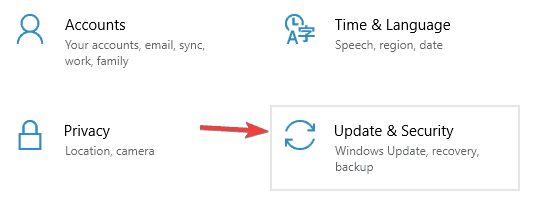
- Press the Windows key + I to open the Settings app.
- Select the Update & Security option.

- Choose Troubleshoot from the menu on the left.
- Select Windows Update and click Run the troubleshooter.

- Follow the instructions on the screen to complete the troubleshooter.
According to users, sometimes DISM problems can occur due to Windows Update issues.
If DISM failed to complete or run on your system, you might be able to fix the problem by running the Windows Update troubleshooter.
Once the troubleshooter is finished, try to rerun the DISM scan, and it should be able to complete.
6. Reset Windows Update services
- Open Command Prompt as an administrator.
- When Command Prompt starts, run the following commands:
net stop wuauservcd %systemroot%SoftwareDistributionren Download Download.oldnet start wuauservnet stop bitsnet start bitsnet stop cryptsvccd %systemroot%system32ren catroot2 catroot2oldnet start cryptsvc
If DISM failed to complete, showing a DISM does not support servicing on Windows PC, the problem might be Windows Update services.
However, you can fix the problem simply by resetting Windows Update services. After these commands are executed, Windows Update components should restart, and the issue will be resolved.
7. Disable proxy
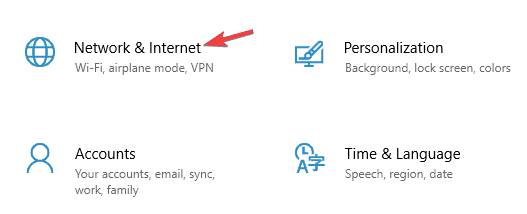
- Open the Settings app.
- Choose the Network & Internet option.

- Select Proxy from the menu on the left. In the right pane, disable all settings.

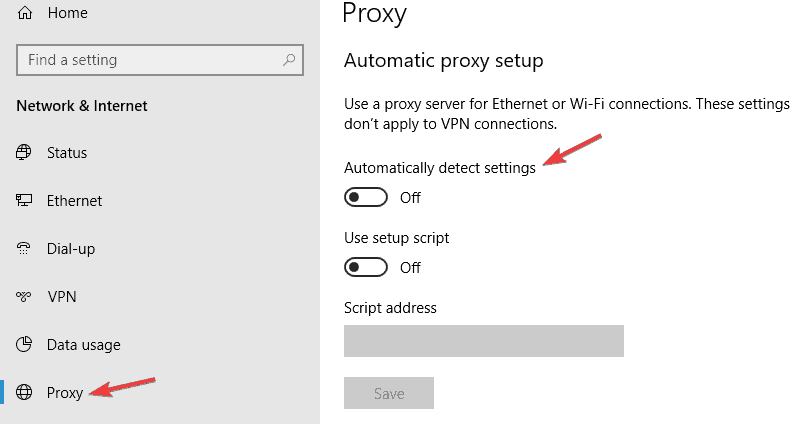
If DISM failed to complete or run on your PC, the problem might be your proxy. Many users use proxy to protect their privacy online, but sometimes your proxy can interfere with your system and lead to this and other issues.
After disabling your proxy, check if the problem is resolved. Although a proxy is a great way to protect your privacy online, many users prefer using a VPN over a proxy.
If you want to protect your privacy online and you’re looking for a good VPN, we strongly suggest you consider PIA.
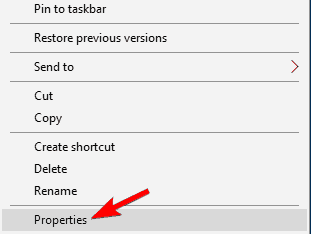
8. Make sure that your .wim isn’t set to read-only
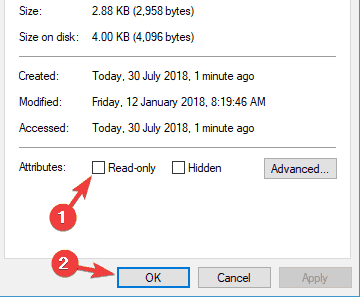
- Locate install.wim file on your hard drive, right-click it, and choose Properties.

- When the Properties window opens, make sure to uncheck the Read-only option. Now click Apply and OK to save changes.

Many users copy the install.wim file from Windows 10 installation ISO to run the DISM scan offline.
However, several users reported that DISM is not working because of the install.wim file was set as a read-only file.
If that happens, your PC won’t be able to write anything to the install.wim file and the DISM scan won’t complete. So, changing the properties of install.wim file should solve the issue in this case.
After making these changes, try to rerun the DISM scan.
9. Perform an in-place upgrade
- Download and run Media Creation Tool.
- Now select the Upgrade this PC now option.
- The setup will prepare the necessary files, so you’ll need to wait.
- Select Download and install updates (recommended) and click Next.
- Wait while the updates are downloaded.
- Follow the instructions on the screen. On the Ready to install screen, click the Change what to keep option.
- Select Keep personal files and apps and click Next.
- Follow the instructions on the screen to complete the in-place upgrade process.
If the DISM scan failed to complete on your PC, your final solution might be an in-place upgrade. This process will reinstall Windows 10 and force it to upgrade to the latest version.
Unlike reinstallation, this process will keep all your files and installed applications, so you can continue where you left off.
How do you know if DISM is working?
DISM does not take much time to scan your PC for errors. It is usually around 10 to 30 minutes but can sometimes take hours.
Users sometimes report that it hangs at around the 20% progress mark. But that does not mean it is not working, as this is normal. So far, it is showing progress, but the command is still working.
What can I do if DISM failed on Windows 11?
If you’ve upgraded to the new OS, you know by now that it’s not so different from Windows 10 apart from some new features and improved design.
And yes, DISM can fail on Windows 11 as often as on the older OSes, so you have to be prepared for this.
Luckily, all the solutions we listed above will work seamlessly on the new OS, and it will be even more accessible.
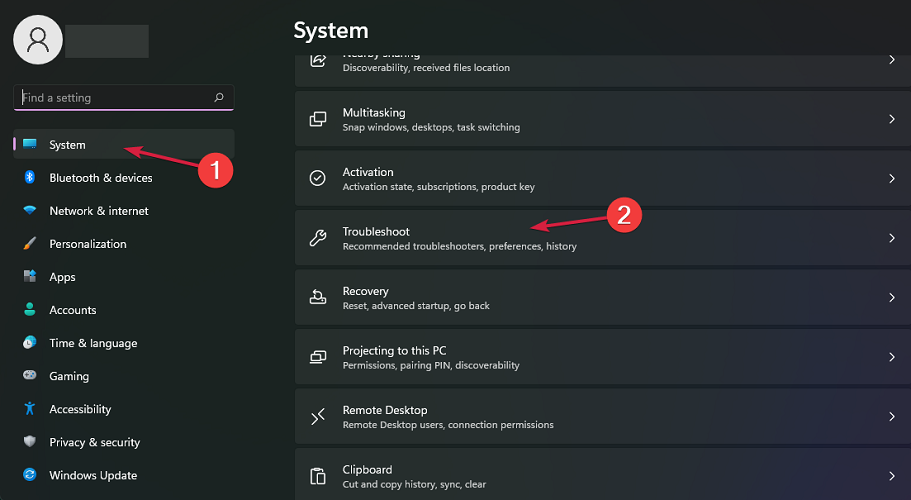
As you can see from our screenshot above, in Windows 11, the Troubleshoot option is right in the System settings, will be fewer clicks to access.
Does DISM delete files?
DISM works basically to repair broken and corrupt files on a PC. It keeps a log of the errors found on your PC, and the fixes applied.
It does not delete your files, app, or data. So you don’t have anything to worry about. DISM cannot harm your computer.
The DISM failed on Windows 10 or Windows 11 error can deprive you of an essential built-in tool to repair your PC for free. But with the fixes in this guide, you should be able to get it working again.
Are you facing other errors like the DISM error 2 on Windows 10? Then, check our guide to solve the problem quickly.
To learn more about DISM, we have a guide on DismHost.exe, so don’t miss it for more information. We also have a guide on Elevated permissions are required to run DISM message, so don’t miss it.
Feel free to let us know if you were able to get DISM working again on Windows in the comments below.