Download Kyocera Printer Drivers for Windows 10 + Install Steps
![]() 3 min. read
3 min. read
![]() Updated on
Updated on
Share this article

Improve this guide
Read our disclosure page to find out how can you help Windows Report sustain the editorial team Read more
Key notes
- An essential step on how to install your Kyocera printer on Windows 10 is to get its correct drivers.
- One way of getting them is by using Device Manager and its settings.
- You can also update them by using a dedicated tool that will do it automatically.
- Another great idea is to visit the manufacturer’s support website and download them.
Windows Update usually automatically updates printer drivers. However, that won’t be the case if you’ve switched off Windows Update.
If that’s so, then your Kyocera printer driver might need updating. If your Kyocera printer isn’t printing correctly, updating an outdated driver could fix it.
This is how to install your Kyocera printer on Windows 10 and how to get the drivers for the device.
How can I update Kyocera printer drivers?
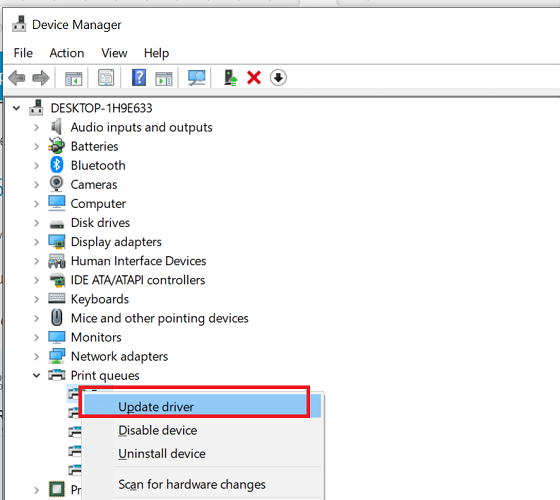
1. Update drivers from Device Manager
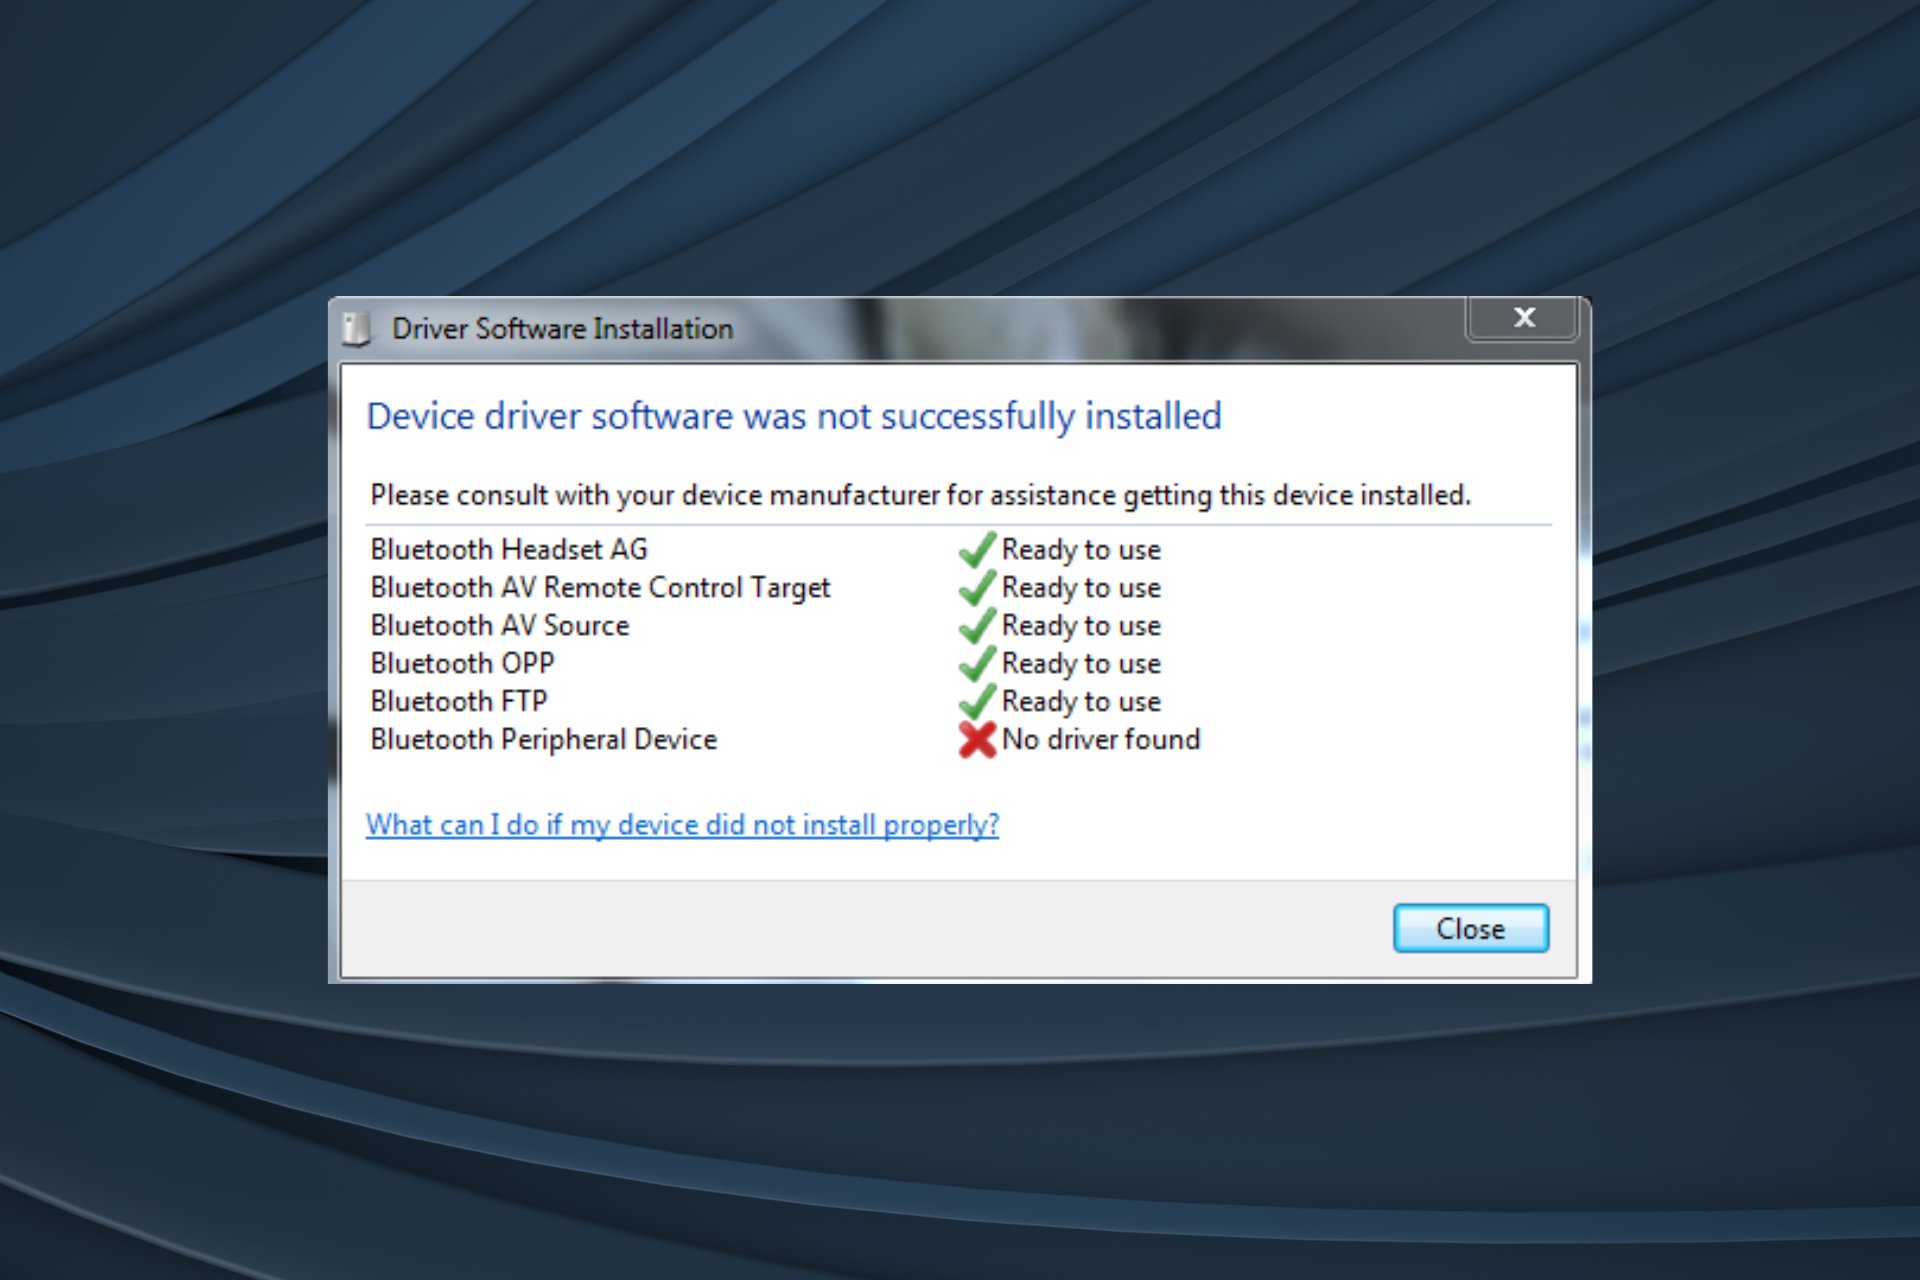
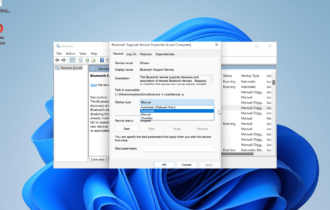
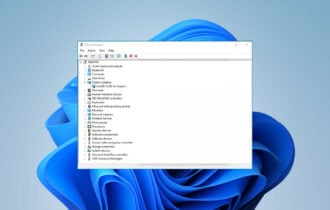
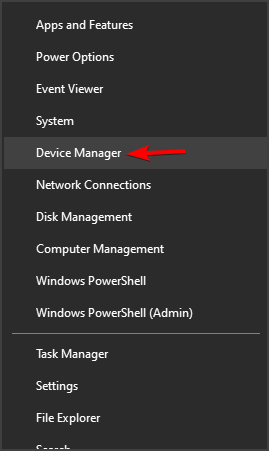
- You can update Kyocera printer drivers with Device Manager by pressing the Win key + X hotkey and selecting Device Manager from the menu.

- Now click Printers, right-click the Kyocera printer. Select Update driver.

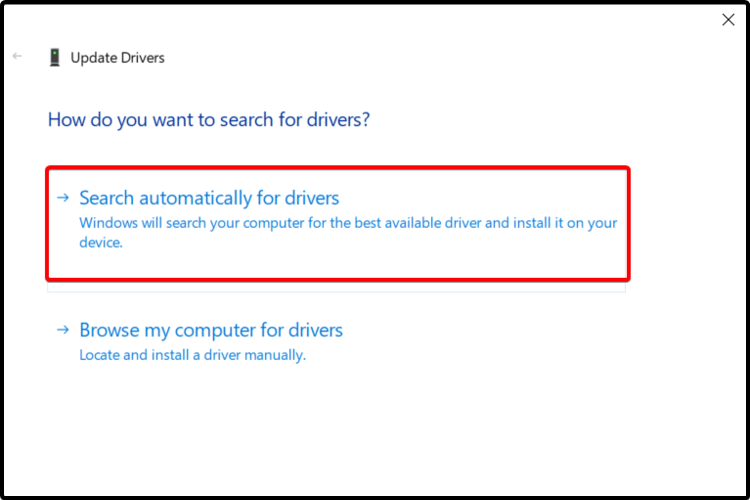
- Select the Search automatically for updated driver software option on the Update Driver Software window.

- Windows might then find a more updated Kyocera printer driver to download.
The Windows Device Manager lists devices and provides driver details for them so follow the steps above to update it.
You should also be able to get the latest available driver by using Windows Update. It’s not exactly an automatic approach, but it’s the simplest way to obtain missing drivers.
2. Update Kyocera Printer Drivers automatically
You can also update Kyocera printer drivers with the help of a professional driver updater tool.
Using a dedicated tool, you can automatically scan for out-of-date or missing Kyocera printer drivers in order to avoid serious malfunctions.
3. Manually updating Kyocera printer drivers
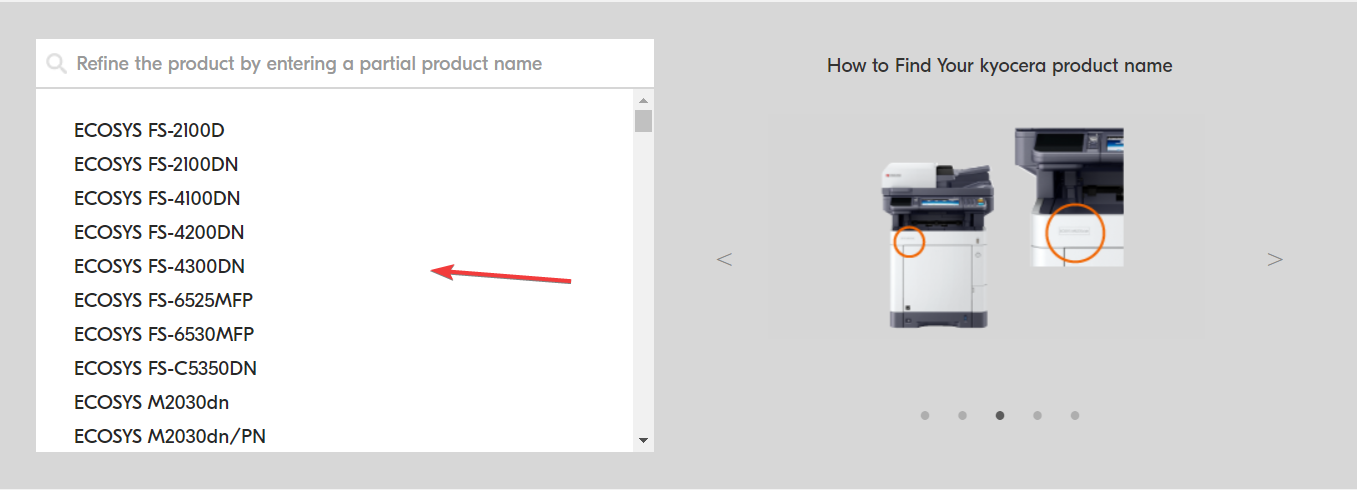
- You can save Kyocera drivers to Windows from the manufacturer’s support website.
- Click Download under your country or region.
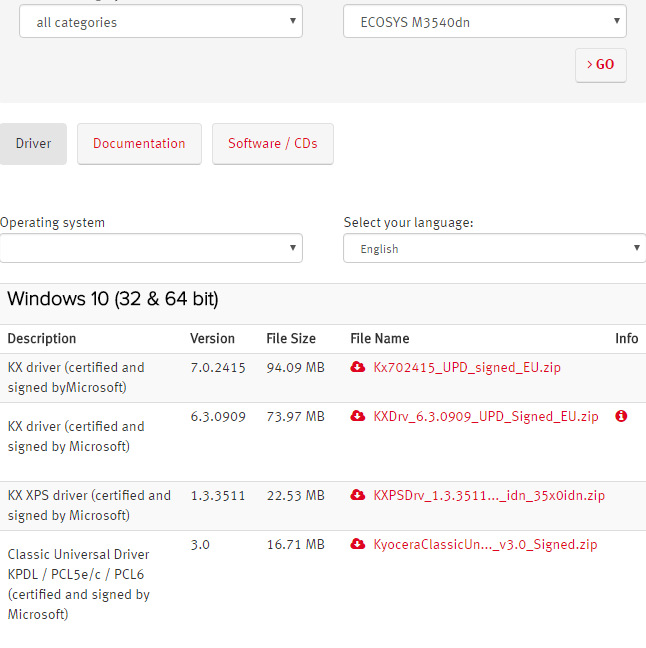
- Then select Print from the Product Category drop-down menu.
- Next, click the Product drop-down menu and select your Kyocera printer model number from there.

- Press the Go button to open a list of drivers for the Kyocera printer.
- Then you can click a Windows 10 driver listed there to download it.

- Note that the U.S. drop-down menus on the site aren’t entirely the same as the other countries. In the U.S. Download Center, you select slightly more specific printer categories, Technical Resources from a Resource Category drop-down menu, and Print Drivers from a Sub-Category menu.
- Alternatively, you can also download drivers from driver database sites. For example, open the DriverGuide site that includes Kyocera printer drivers.
- Then you can click the Free Download button beside the required Kyocera printer driver to save it to Windows.
Or you can search for and download a Kyocera printer driver yourself. First, note down your exact Kyocera printer model number, which will be in its manual.
In addition, you’ll also need details for whether your Windows platform is 64 or 32-bit, which you can check by entering system into the Cortana search box and selecting to open the System tab.
We hope that our step-by-step guide helped you install the correct drivers for your Kyocera printer and now it’s functioning perfectly.
If this appeared a little too difficult, we have a more detailed article on how to update drivers in Windows 10.
For any other suggestions or comments, don’t forget to drop us a line in the comments section below and tell us all about it.