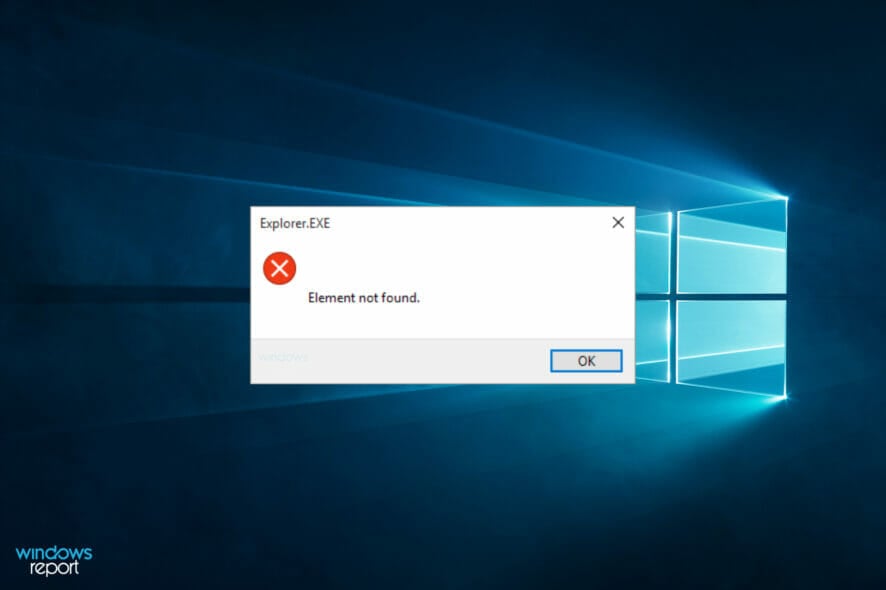
Element Not Found error in Windows 10/11 [Quick Fix]
![]() 9 min. read
9 min. read
![]() Updated on
Updated on
Share this article

Improve this guide
Read our disclosure page to find out how can you help Windows Report sustain the editorial team Read more
Key notes
- Have you encountered the Element Not Found error too? According to different situations, the answers to how to fix it vary.
- These include uninstalling Lenovo CAPSOD and OneKey or quickly restarting explorer.exe.
- Find the working solutions in your case by checking out these great uninstaller software tools.
- Whenever needing PC expertise, feel free to take a look at our Windows 10 Errors Hub.
Windows 10 has been released for some time, and although it’s the latest version of Windows, it doesn’t mean it doesn’t have its flaws.
Speaking of flaws and Windows 10, some users have reported getting Element Not Found error on Windows 10.
Element Not Found is a relatively common error on Windows, and in this article, we’re going to cover the following issues:
- Element Not Found Windows 10 pictures – This error message usually occurs when you try to view pictures on your Windows 10 PC. The issue is most likely caused by your default photo viewer app, and to fix the problem, you just need to replace the default photo viewer application.
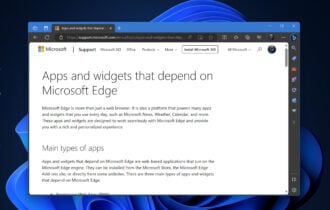
- Element Not Found Microsoft Edge – This error can appear in Microsoft Edge as well, and it’s most likely caused by file corruption. However, you should be able to fix it using one of our solutions.
- Element Not Found Explorer.exe – Sometimes this error message can appear while using File Explorer. However, you can fix the problem simply by restarting the explorer.exe process.
- Element Not Found Windows 10 update – Many users reported this problem after a Windows update. However, you can fix the issue simply by finding and uninstalling the problematic update.
- Element Not Found jpg – Element Not Found error is relatively common with jpg images, but it can also appear with other files. If you have this problem on your PC, be sure to try some of our solutions.
This error can affect the functionality of your Windows 10, and it can prevent you from accessing Settings, Universal apps, it can even occur when you’re trying to open .jpeg images.
As you can see, this can be a big problem for Windows 10 users, but fortunately for you, we have a few solutions that might be helpful.
How can I fix Element Not Found error in Windows 10?
1. Uninstall recent updates
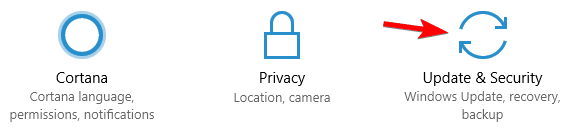
- Open the Settings app.
- Now navigate to the Update & Security section.

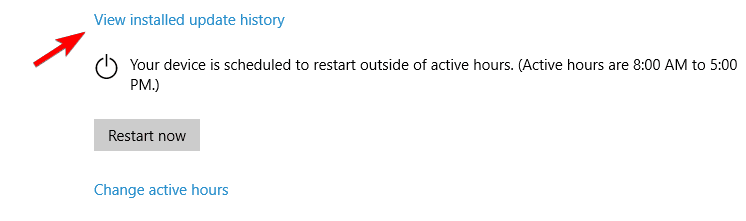
- Click on View installed update history.

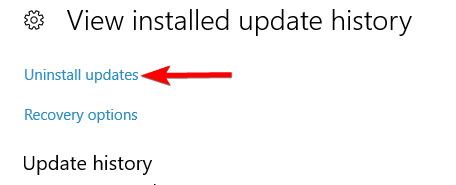
- Now click on Uninstall updates.

- List of installed updates will appear. Now you need to remove recently installed updates and check if that solves your issue. Several users reported that they removed all updates and that resolved the issue for them.
According to users, sometimes recent Windows updates can cause Element Not Found error to appear. In order to fix the issue, you need to find and remove the problematic updates.
This is rather simple and you can do it by following the above steps.
If uninstalling the problematic update fixes the problem, you need to prevent that update from installing in the future.
Windows 10 automatically installs the missing updates, but we wrote a simple guide on how to prevent certain Windows updates from installing, and we strongly recommend you to check it out.
Many users reported that removing the problematic updates fixed the issue for them, so be sure to try that.
If you’re having trouble opening the Setting app, we can quickly help you solve the issue.
2. Temporarily disable your antivirus
Sometimes your antivirus can interfere with your system casing Element Not Found error to appear. To check if your antivirus is the problem, disable it and try running the application again.
If that doesn’t work, you might have to uninstall and switch to a different antivirus solution.
For the Norton users, we’ve got a dedicated guide on how to completely remove it from your PC. There’s a similar guide for McAffe users, as well.
There are many great antivirus applications on the market, but be sure you try one that provides the best protection for all your devices against the latest malware.
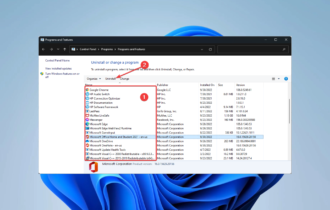
3. Uninstall Lenovo software from your computer
If you’re using a Lenovo laptop, you should know that certain Lenovo software can cause this issue, so the best solution is to remove this software from your laptop.
The software piece that is causing the Element not found error is most likely Lenovo CAPSOD and OneKey Theater. Just remove this software from your laptop and this issue should be resolved.
Also, keep in mind that you need to remove all files associated with the problematic software.
Doing this task manually is an advanced process, but there are tools that can help you easily get rid of all associated files and registry entries.
Don’t refuse the advantage of a free download and use an efficient tool to remove Lenovo CAPSOD and OneKey Theater. The problem should be completely solved in no time.
4. Restart explorer.exe
- When Windows 10 starts press Ctrl + Shift + Esc to open Task Manager.

- Locate explorer.exe (Windows Explorer) in the list of processes. Right-click it and choose End task.

- Next, go to File > Run new task.

- The Run window will open. Now just type explorer.exe into it and press Enter to run it.
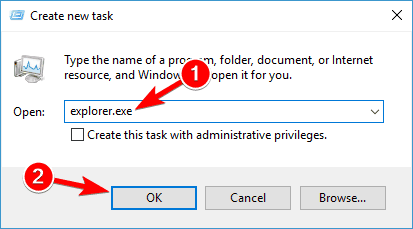


This is a simple workaround, but it actually might work for you. Use the above procedure in order to restart the explorer.exe process.
Windows Explorer should now start, and the problem will be resolved. Keep in mind that this is just a workaround, so you might have to repeat it if the issue reappears.
Windows won’t end a task in Task Manager? Count on us to solve the problem.
5. Set a different picture viewer
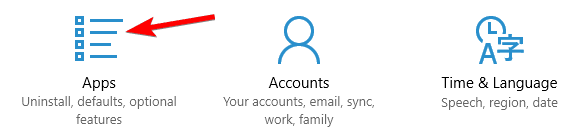
- Press Windows Key + I to open the Settings app.
- When the Settings app opens, navigate to the Apps section.

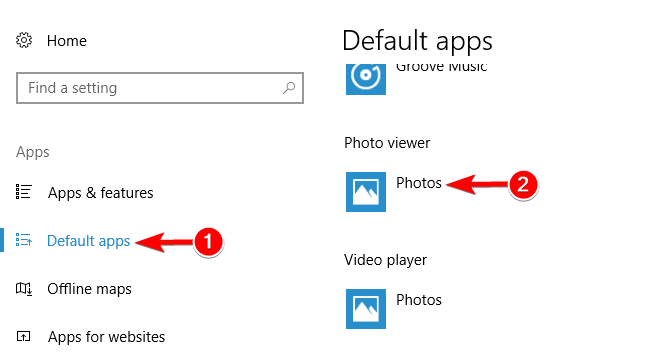
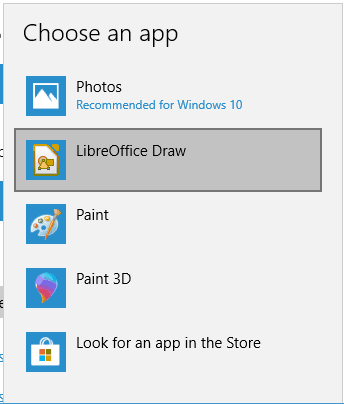
- In the left pane, click on Default apps. In the right pane, locate Photo viewer and click it.

- Select an application that you want to use as a default Photo viewer. Many users recommend using Windows Picture Viewer, but you can also use any other application instead.

Many users reported that Element Not Found error appeared on their PC while trying to view photos.
According to users, you might be able to fix this issue simply by going to the Settings app and choosing a different image viewer.
After changing your default photo viewer, the issue should be completely resolved. This error message occurs due to problems with the Photos app.
To fix the problem, you just need to change your default photo viewer.
If you don’t have a third-party photo viewer, we covered some of the best photo viewers for Windows 10, so be sure to check that article for some great software.
6. Perform an SFC scan
- Press Windows Key + X to open Win + X menu. Now choose Command Prompt (Admin) from the list.

- When Command Prompt opens, enter sfc /scannow and press Enter.


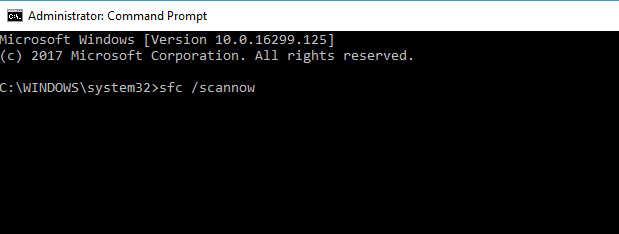
Element Not Found error message can appear due to file corruption. However, you can easily fix corrupted files by using an SFC scan. To run an SFC scan, do as described above.
SFC scan will now start. Keep in mind that this scan can take about 10-15 minutes, so don’t interrupt it. Once the scan is finished, check if the problem still appears.
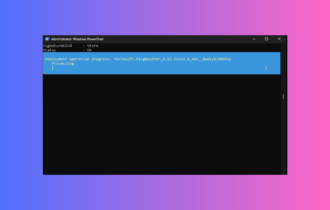
If the issue still persists, or if you were unable to run an SFC scan, you might want to try running a DISM scan instead. To do that, follow these steps:
- Start Command Prompt as administrator.
- Enter
DISM /Online /Cleanup-Image /RestoreHealth
- DISM scan will now start. This process can take about 20 minutes or more, so don’t interrupt it.
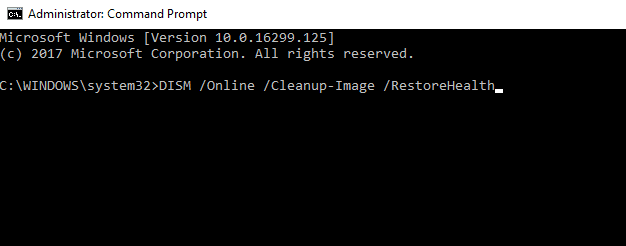
Once the scan is finished, check if the error still persists. If you were unable to run an SFC scan before, try running it now. After both SFC and DISM scans are completed, check if the issue still persists.
If you’re having trouble accessing Command Prompt as an admin, then you better take a closer look at this handy guide.
Does it seem that everything is lost when DISM fails on Windows? Check out this quick guide and get rid of the worries.
7. Disable your integrated graphics
Many PCs come with both dedicated and integrated graphics cards, however, sometimes issues can occur if both graphics cards are enabled.
Many users reported that Element Not Found error was caused by their graphics card, and in order to fix the issue, you need to disable integrated graphics.
There are several ways to do that, and you can do it from Nvidia Control Panel or Catalyst Control Center.
If you can’t open the Nvidia Control Panel on Windows 10, we’ve covered this pesky problem in this dedicated guide. Also, we’ve got a similar article about Catalyst Control Center.
If that doesn’t work, or if you can’t find the way to disable integrated graphics from these applications, you might want to try disabling it from BIOS.
To see how to access BIOS and how to disable your integrated graphics card, we strongly recommend that you check your motherboard manual for detailed instructions.
Once you disable your integrated graphics, the problem should be completely resolved.
Accessing BIOS seems too big of a task? Let us make things easier for you with the help of this amazing guide.
8. Reset your PC
- Press Start and click the Power Options button.
- Then hold the Shift key and press the Restart button.
- Now you will boot to advanced startup options screen. Make sure that your Windows 10 installation disc or USB flash drive is connected.
- Click on Troubleshoot. After that choose Reset this PC.
- Now you have the option to keep your files or not. Choose Keep my files.
- Next, you’ll be asked what version of Windows you wish to reset. There should be just one option available, so click it.
- Next, you just need to follow the instructions and wait until the setup process is completed.
To do this, you’ll need Windows 10 installation disc or USB flash drive with Windows 10 setup files on it.
This process will reinstall Windows 10, but it will allow you to keep your personal files, although it will delete your installed applications.
Use this solution as a last resort if nothing else seems to work. To do so, you need to do as described above.
That would be all. We hope at least one of these solutions helped you to solve the problem with this error.
If you have any questions, comments, or maybe some other solution for this problem, reach to the comments section below.
We’re sure our readers would like to know even more about this issue.