How to Factory Reset Windows 10 PCs
Learn how to hard reset your device
![]() 6 min. read
6 min. read
![]() Updated on
Updated on
Share this article

Improve this guide
Read our disclosure page to find out how can you help Windows Report sustain the editorial team Read more
Key notes
- Microsoft offers a built-in solution to reset Windows 10 back to the initial state, almost like when you had the computer for the first time installed.
- Since it is a very useful option instead of performing a clean install, we show you 4 different ways to do this, depending on which is easier for you.
- You can perform a total factory reset while removing all your files, or you can save some important ones.
Problems with your operating system will appear sooner or later, and if that happens you’ll need to know how to deal with them.
You can usually fix most major problems with your PC by performing a factory reset, so today we’re going to show you how to factory reset your Windows 10 PC.
The factory reset option was available in Windows 8, and since it was a useful feature, Microsoft decided to enhance it even further.
Unlike Windows 8, Windows 10 doesn’t have a recovery partition available that works as an installation media.
If you don’t know how to create a Windows 10 UEFI bootable USB, check out our dedicated article.
However, by removing the recovery partition, users now have more storage space on their primary partition, and this is especially important for tablets or devices that use only SSD storage.
With the recovery drive option removed, the only way to fix problems on your PC is to factory reset Windows 10, and there are several different ways to do that.
How can I perform a Windows 10 factory reset?
1. Via Settings
1. Open the Settings app by pressing Windows Key + I keyboard shortcut.
2. Navigate to Update & security section.
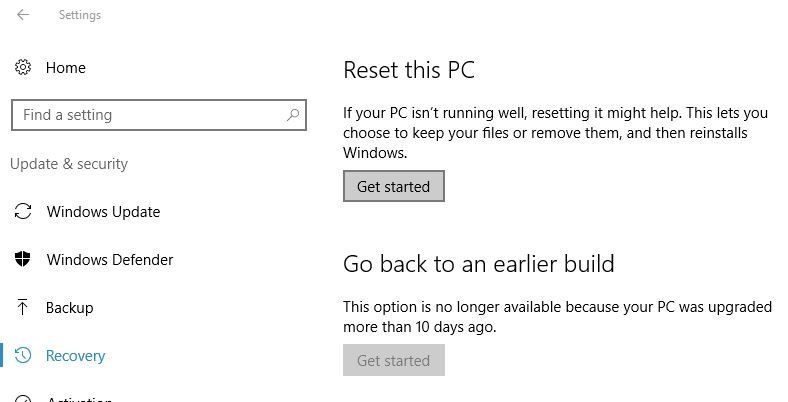
3. Go to Recovery tab and in Reset this PC section click on Get started button.
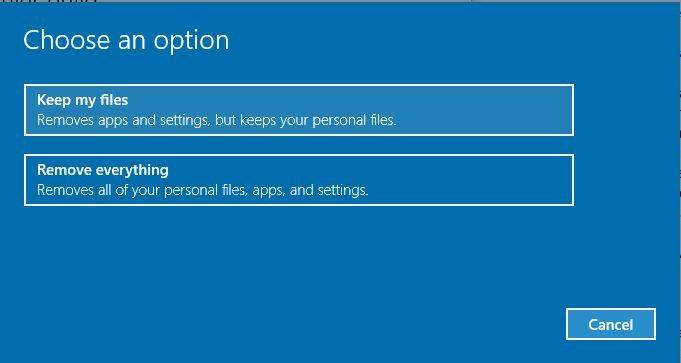
4. You’ll see two options available, Keep my files and Remove everything. The first option will remove all your installed applications, but it will keep your personal files.
You’ll even get the list of all removed applications on your Desktop so you can download them again.
5. If you choose Keep my files option, follow the instructions on the screen to complete the reset.
If you have any major PC problems, you should always use the Keep my files option first, but bear in mind that this option will remove your installed applications, so you might want to back up some of your files.
Although this option is great, it doesn’t always fix problems with Windows 10. If problems still persist, you need to use Remove everything option. To do that, follow these steps:
1. Open the Settings app, go to Update & security > Recovery and click the Get started button in Reset this PC section.
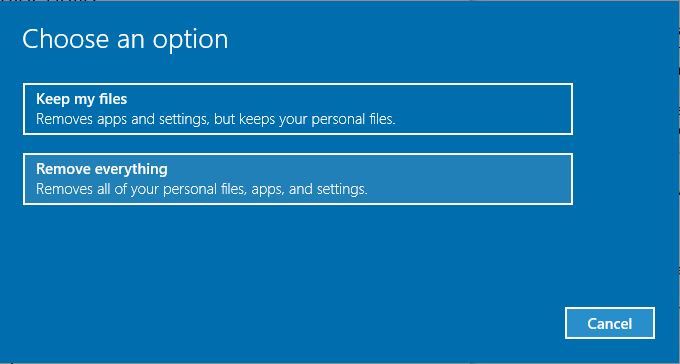
2. From the list of options choose Remove everything.
3. Now you can choose between two options, Just remove my files and Remove files and clean the drive. The first option will remove all your files and applications from the installation drive, but your files won’t be permanently removed, and some files might be recovered by special software.
Most users use this option because it’s faster, so feel free to use it on your PC. If you choose this option, we strongly recommend to back up all your important files to an external storage device.
Remove the files and clean the drive option will basically do the same thing, it will remove all your files and applications from the installation drive, with one small difference.
By choosing this option, Windows will delete all your files and write zeros at their location, so you won’t be able to recover your files in any way.
Settings app allows you to change all sorts of system settings easily, but it also allows you to perform a factory reset and fix any major problems that you have with your PC. Resetting Windows 10 is fairly simple, and you can do it by following the steps above.
Keep in mind that the Remove everything option doesn’t affect your hard drive negatively in any way, it just writes zeroes instead of your data, thus making your data impossible to recover. This option is useful if you want to sell your PC, and you want to be sure that your personal files can’t be recovered.
This option allows you to clean only the installation drive or all drives that you have on your PC. If you plan to keep your PC, be sure to clean only the drive where Windows is installed.
Some users might have the Restore factory settings option and this option will revert your PC to the factory settings. Your PC will revert to the initial state your Windows came without any updates installed.
2. Use Advanced Startup options
If you want, you can also factory reset Windows 10 by using Advanced Startup options. This method is useful if you can’t access Windows 10 due to constant crashing.
This mode will automatically start after your PC restarts a couple of times during the boot, but you can also enter Advanced Startup from Windows 10 by doing the following:
- Open the Start Menu and click the Power button. Hold the Shift key and click the Restart option. In addition, you can also start Advanced Startup by holding the Shift key and choosing the Restart option from the Windows 10 login screen.
- Now you’ll see several options available, choose Troubleshoot.
- Now choose the Reset this PC option.
- You’ll now see similar options that we mentioned in Solution 1. Choose Keep my files if you don’t want to remove all files from your PC or choose to Remove everything to perform a complete reset. If you choose the latter, be sure to only remove the files from the drive that has Windows 10 installed.
We have to mention that some branded PCs might have a Factory Image Restore option available from Advanced Startup, and you can also use this option to reset your Windows 10.
By using this option, you’ll reset Windows 10 to its original state with certain applications from the PC manufacturer installed. Keep in mind that not all PCs have this option available.
3. Use a Recovery Drive
If you want to reset Windows 10, you can do so by using a Recovery Drive. In most cases, you’ll be able to reset Windows 10 by using one of the previous methods, but if you can’t access Windows 10 and if you can’t open Advanced Startup, you might want to consider using a Recovery Drive.
Before you can use the Recovery Drive, you’ll need to create it. Keep in mind that you’ll need a working version of Windows 10 in order to create the Recovery Drive.
We have to mention that 64-bit Recovery Drives work only with 64-bit versions of Windows 10. The same goes for the 32-bit version.
To create a Recovery Drive on Windows 10, do the following:
- Press Windows Key + S and enter recovery drive. Select Create a recovery drive from the list of options.

- When Recovery Drive window opens, check Back up system files to the recovery drive and click Next.
- Make sure that your USB flash drive is connected to your PC. Select it from the list and click Next. Keep in mind that you’ll need a USB flash drive that is 8GB or larger in order to create a Recovery Drive.
- Follow the instructions on the screen to complete the Recovery Drive creation process. Bear in mind that all your files from USB flash drive will be deleted when you create the Recovery Drive.

After creating the Recovery Drive, you can boot your PC from it and use the Recover from a drive option. If you want, you can also open access Advanced options or the Reset option.
4. Use a system image
Some computer manufacturers allow you to use the Factory Restore Image option to reset your PC, but often these Factory Images are filled with applications from the computer manufacturer that you don’t really use.
To fix this problem, you can create your own system image and use it to reset your PC.
By creating a system image you’ll create your own backup with desired applications and settings and use it to reset Windows 10. To create a system image, do the following:
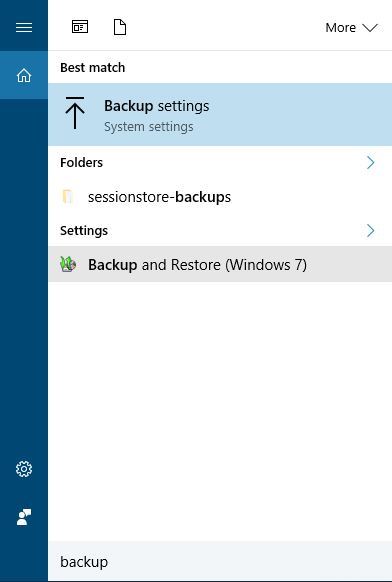
- Press Windows Key + S and enter backup. Select the Backup and Restore option.

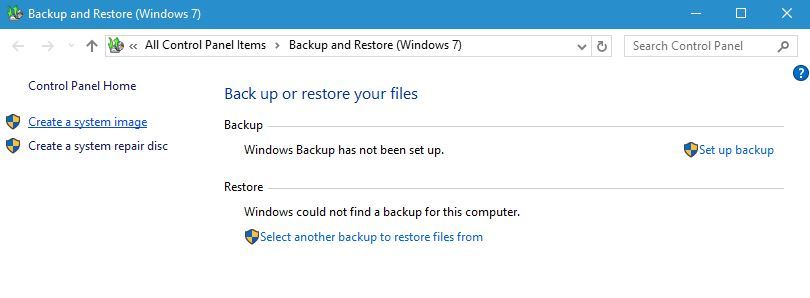
- When Backup and Restore window opens, select Create a system image option from the menu on the left.

- Select where you want to store the system image and click Next. Follow the instructions on the screen to complete the process.

Keep in mind that system the image can be quite large and take up more than 10GB on your drive, so it might be better to store them on a USB flash drive or a portable hard drive. After creating a system image, you can reset your PC with it by following these steps:
- Start Advanced Startup.
- Select Troubleshoot > Advanced options > System Image Recovery.
- Select your system image and follow the instructions on the screen.
We have to mention that by using a system image all the files that you created after making the image will be removed, so it might be a good idea to back up all your important files.
Even though this option isn’t as same as factory reset, it’s quite similar to it.
If you want to achieve similar results to a factory reset, be sure to create a system image as soon as you install your operating system and the necessary programs.
Moreover, if for any reason you are unable to perform the factory reset procedure on Windows 10, you can count on our nifty tips to get it done in no time.