“File in use” error on Windows 10 [Fix]
![]() 13 min. read
13 min. read
![]() Updated on
Updated on
Share this article

Improve this guide
Read our disclosure page to find out how can you help Windows Report sustain the editorial team Read more
Key notes
- Sometimes you cannot delete or modify a file because you get the File in use error.
- The article below acts as a troubleshooting guide for when you encounter this issue on your PC.
- It is one of many similar articles included in our dedicated Uninstall Hub.
- For more interesting guides and tutorials, take a look at our expanded How-To page.

The File in use error message usually appears when you try to delete a certain file while it’s being used by a different application or a user. This can be an annoying error, so today we’re going to show you how to fix it on Windows 10.
How do I fix the file in use error?
1. File in use error
1.1. Uninstall the problematic applications
Third-party applications can sometimes cause the File in use error to appear. Users reported that this problem occurred while working with ISO files. According to them, the cause of the problem was an application called Virtual Clone Drive.
After removing the Virtual Clone Drive, the error was resolved completely.
One way to instantly get rid of any kind of software from your PC is to go for a professional uninstaller.
While you have the option to remove anything from the Add or remove programs in Windows, we suggest you to use dedicated uninstaller software.
Removing from Windows will leave behind some files associated with the problematic application. This will prevent a future reinstallation and cause all sorts of issues.
Dedicated software can find and successfully remove all files related to the app you want to delete. They can also completely uninstall stubborn apps that can’t be removed using the Add or remove panel.
1.2. Close all running applications
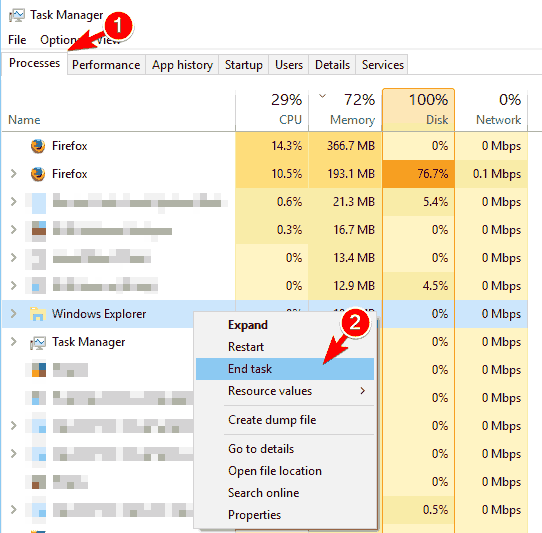
- Press Ctrl + Shift + Esc to open Task Manager.
- When Task Manager opens, navigate to Processes tab.
- Locate Windows Explorer on the list, right click it and choose End Task.

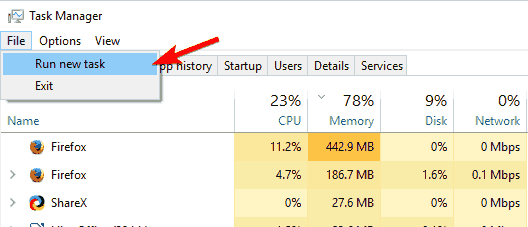
- Once Windows Explorer closes, select File > Run a new task.

- The Create new task window will now appear. Enter explorer and click OK to start Windows Explorer again.


If you’re getting the File in use error, it’s most likely that the file is being used by a different application. Sometimes, certain apps can use files in the background and cause this error to appear.
To fix the issue, be sure to close all running applications and try to delete the file. In addition, restart your PC and try to delete the file again.
If that doesn’t work, you might want to try moving all other files to a different folder. After doing that, try to delete the folder that has the problematic file in it. Lastly, you can try restarting File Explorer.
Once Windows Explorer starts, try to delete the file again. If that doesn’t work, you can try to terminate the process that’s related to the problematic file. For example, if you can’t delete a PDF file, try terminating your PDF application from Task Manager.
1.3. Try to delete the file from Safe Mode
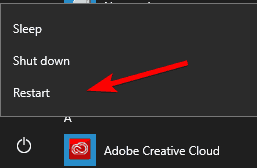
- Click the Start button.
- Now click on Power button. Hold the Shift key on your keyboard and choose the Restart option from the menu.

- Once your PC restarts, you’ll see a list of options. Select Troubleshoot from the menu.
- Select Advanced options > Startup Settings and click the Restart button.
- A list of options will appear. Choose any version of Safe Mode by pressing the appropriate key.
If you can’t delete a file due to the File in use error, you might want to try removing it from Safe Mode. Once the Safe Mode starts, try to delete the file again.
1.4. Use Command Prompt
- Open Command Prompt as administrator. To do that, press Windows Key + X to open Win + X menu and choose Command Prompt (Admin).

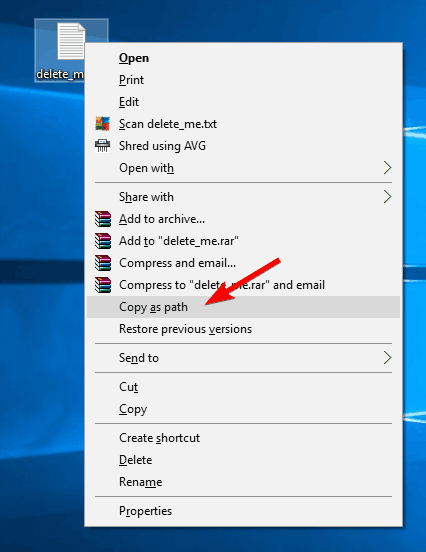
- Once the Command Prompt opens, find the problematic file, hold the Shift key, and right-click it. Now choose Copy as path from the menu.

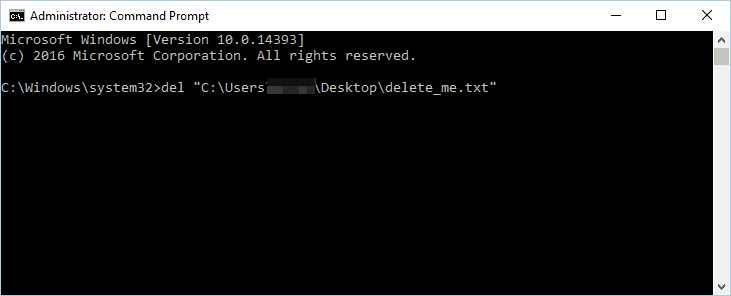
- In Command Prompt, enter del and press Ctrl + V to paste the file path. Don’t run the command yet.

- Use Task Manager to close Windows Explorer. We explained how to do that in Solution 1, so be sure to check it out. In order to successfully remove the file, it’s important not to restart Windows Explorer.
- Switch back to Command Prompt and press Enter to run the command that you entered in Step 2.
- After the command is executed, you can close Command Prompt and restart Windows Explorer

If you don’t want to rely on third-party solutions to fix this problem, you can use Command Prompt instead.
1.5. Change the file extension of the problematic file
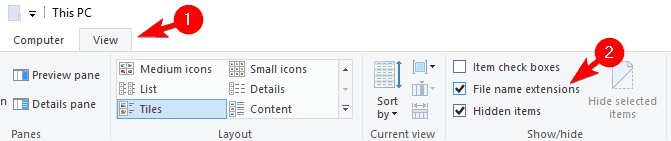
According to users, you might be able to fix this problem simply by changing the file extension of the problematic file. In order to do that, first you need to turn on the option to show file extensions. To do that, follow these steps:
- Open File Explorer.
- Click the View tab and check File name extensions option.

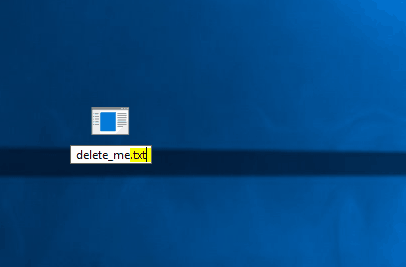
- After doing that, you need to find the problematic file, select it and press F2 on your keyboard.
- Change the file extension to .txt or any other extension.

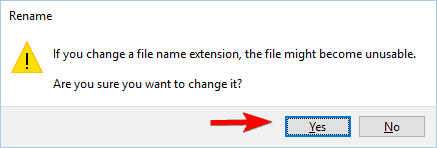
- A warning message will appear. Click Yes.

After you change the file extension, try to delete the file again.
1.6. Switch to Details view
- Open File Explorer and locate the problematic file.
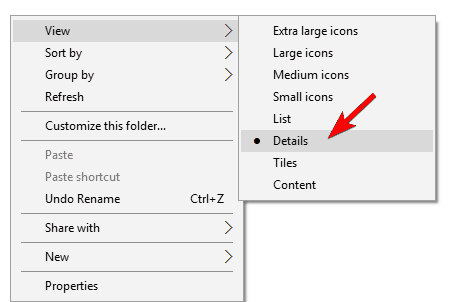
- Right-click the empty space and choose View > Details.

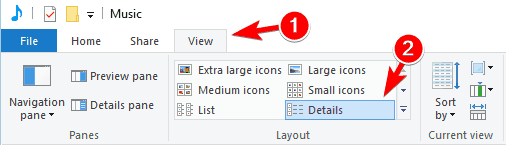
- Optional: You can do the same thing by navigating to the View tab and clicking on Details.

According to users, the File in use error can appear due to your thumbnails. Sometimes, Windows has issues unloading thumbnails, preventing you from deleting your files.
To fix the problem, you just have to switch to Details view in File Explorer and you should be able to delete the file.
After switching to Details view, all thumbnails will be disabled and you should be able to delete the file. Users suggest moving the file to Desktop and closing the File Explorer window.
By doing so, the preview pane won’t be available and you should be able to delete the problematic file with ease.
1.7. Disable thumbnail generation
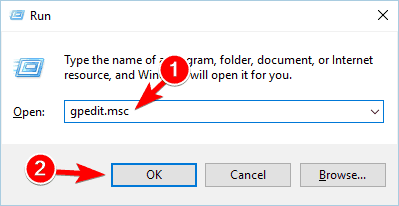
- Press Windows Key + R and enter gpedit.msc. Click OK or press Enter.

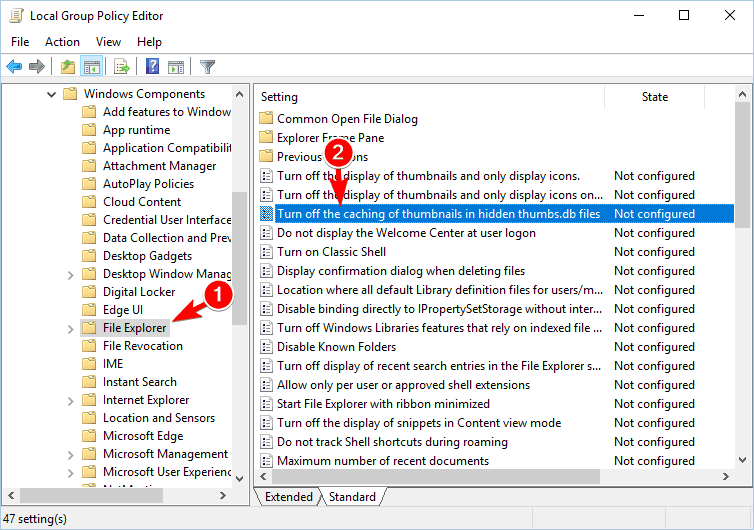
- When the Group Policy Editor opens, navigate to User Configuration > Administrative Templates > Windows Components > File Explorer in the left pane.
- In the right pane double click on Turn off caching of thumbnails in hidden thumbs.db files.

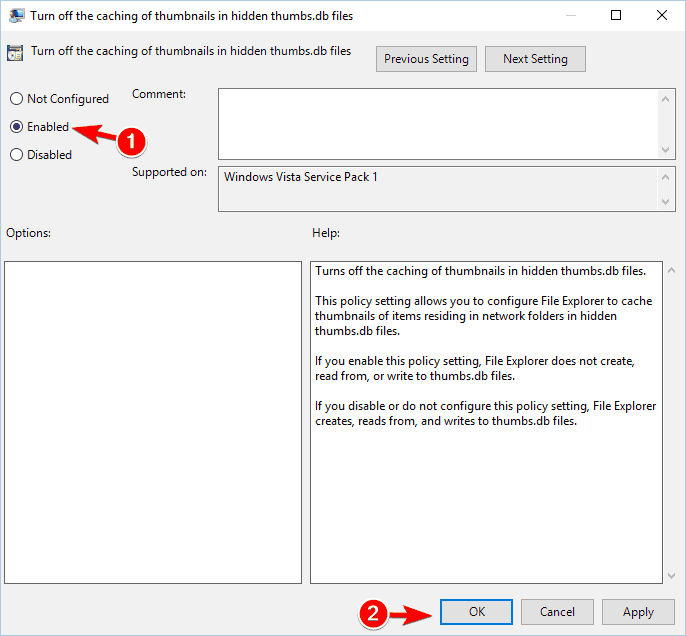
- Select the Enabled option and clickApply and OK to save changes.

If you can’t access Group Policy Editor, you can disable thumbnail generation using Registry Editor. To do that, follow these steps:
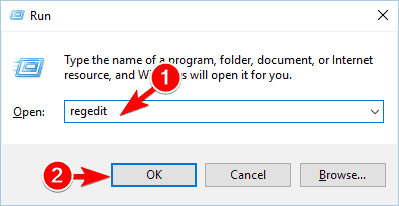
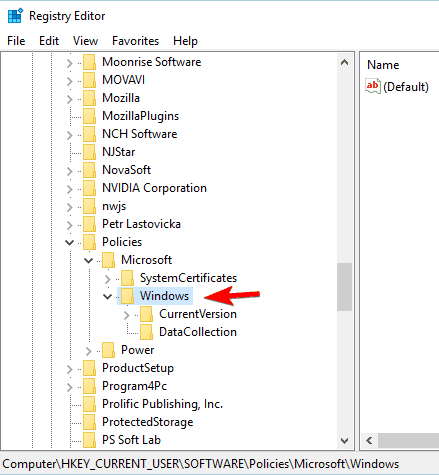
- Press Windows Key + R and enter regedit. Press Enter or click OK.
- When the Registry Editor opens, navigate to
HKEY_CURRENT_USERSOFTWAREPoliciesMicrosoftWindowskey in the left pane.
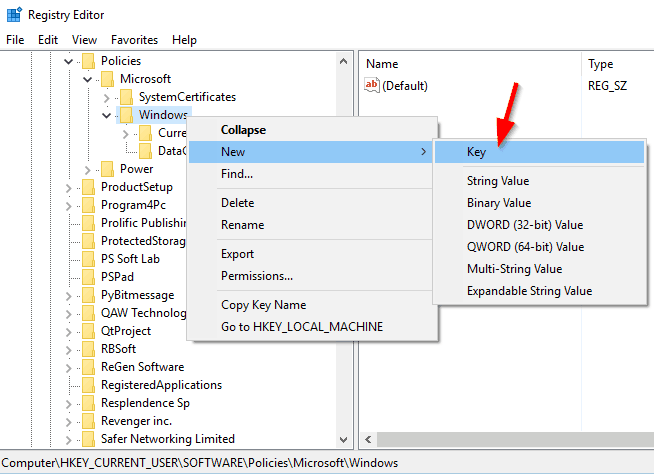
- Right-click the Windows key and choose New > Key. Enter Explorer as the name of the new key.

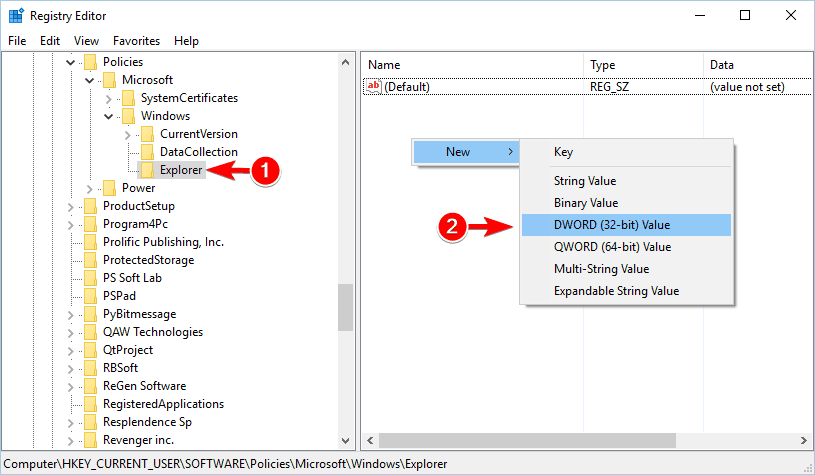
- Navigate to the Explorer key and right-click the empty space in the right pane.
- Choose New > DWORD (32-bit) Value. Enter DisableThumbsDBOnNetworkFolders as the name of the new DWORD.

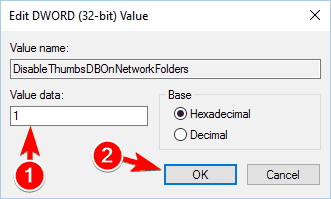
- Double-click newly created DisableThumbsDBOnNetworkFolders DWORD to open its properties.
- Set Value data to 1 and click OK to save changes.

- After you’re done, close Registry Editor and check if the problem is resolved.
If you’re having problems with this error, you might be able to fix it by disabling thumbnail generation. You can do that by using the Group Policy Editor. This solution applies to network drives, but it might work for your local drive as well.
1.8. Use OpenFilesView tool
- Download OpenFilesView tool.
- Start the application. A list of active files will now appear.
- Locate the problematic file on the list, right-click it and choose Kill Processes of Selected Files. By doing so, you’ll terminate processes that are associated with that file.

- After doing that, try to delete the file again.

Another third-party application that can help you with this problem is OpenFilesView tools. The application is simple to use.
This is a simple application that allows you to close all processes related to a specific file. If the problematic file isn’t available on the list, you might have to try a different solution.
1.9. Use Process Explorer
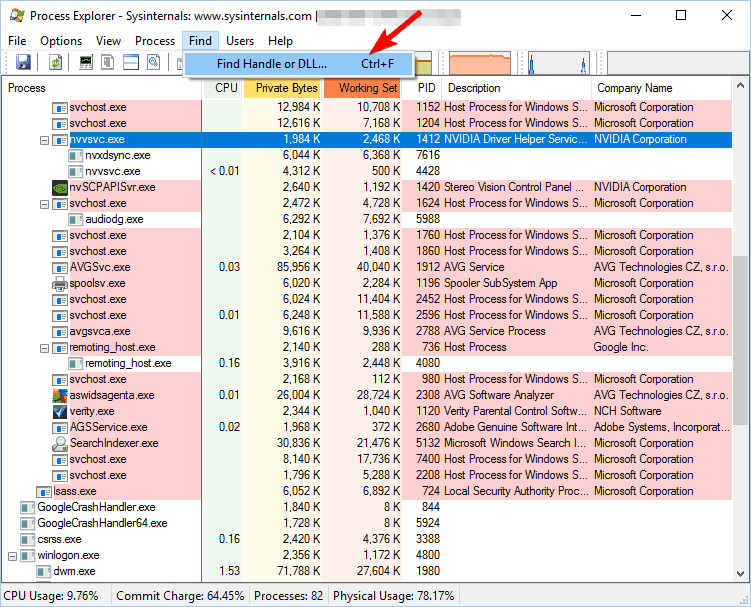
- Download Process Explorer.
- When the application opens, go to Find > Find Handle or DLL.

- In the Handle or DLL substring field, enter the name of the problematic file and click the Search button.

- A list of associated applications and DLLs should appear. Locate the application associated with the file, right-click it and choose the Close Handle option.

Several users reported that you might be able to fix the problem by using Process Explorer.
Keep in mind that you might have to repeat this process few times in order to close all related applications. We have to mention that Process Explorer is an advanced tool, so you might find it hard to use if you’re a novice user.
1.10. Make sure that file isn’t blocked
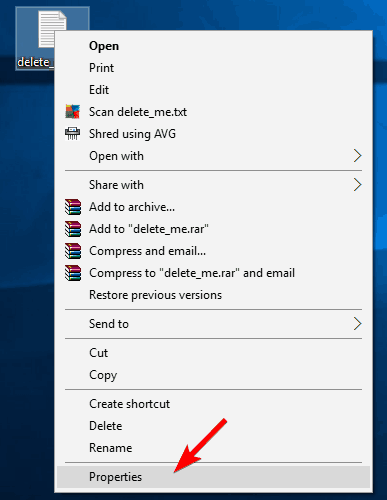
- Right-click the problematic file and choose Properties from the menu.

- Go to the General tab and click the Unblock button in Security section. Click OK and Apply to save changes.
Sometimes, the File in use error can appear if the file you’re trying to delete is blocked. Windows sometimes blocks downloaded files in order to protect you from malware. Although this feature can be useful, it can also prevent you from removing certain files.
After unblocking the file, try to delete it again. If you can’t find the Unblock button in the Properties window, it means that the file is already unblocked, so you should try a different solution.
1.11. Remove the virtual hard drive
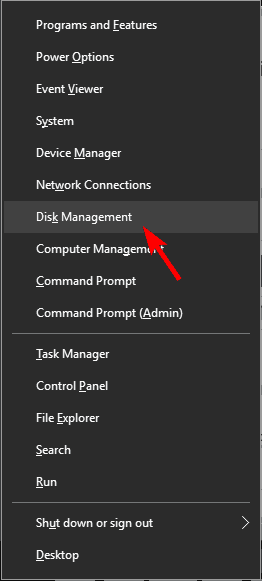
- Press Windows Key + X and choose Disk Management from the list.
- The Disk Management tool will now appear. Locate your virtual hard drive, right-click it and choose Detach VHD.
- A confirmation message will now appear. Click OK. After you detach the drive, it will disappear from Disk Management tool.
- After doing that, close Disk Management and try to delete the .vhdx file again.
A few users reported that the File in use error appears while trying to remove a virtual hard drive .vhdx file. To fix this problem, you need to remove the virtual hard drive from your PC.
Keep in mind that this solution only applies when deleting virtual hard drive files. If you have this problem with any other type of file, you should try a different solution.
1.12. Use Resource Monitor
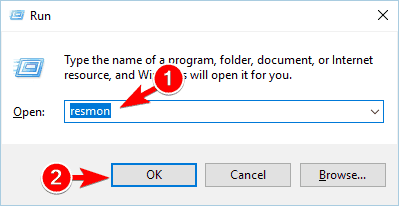
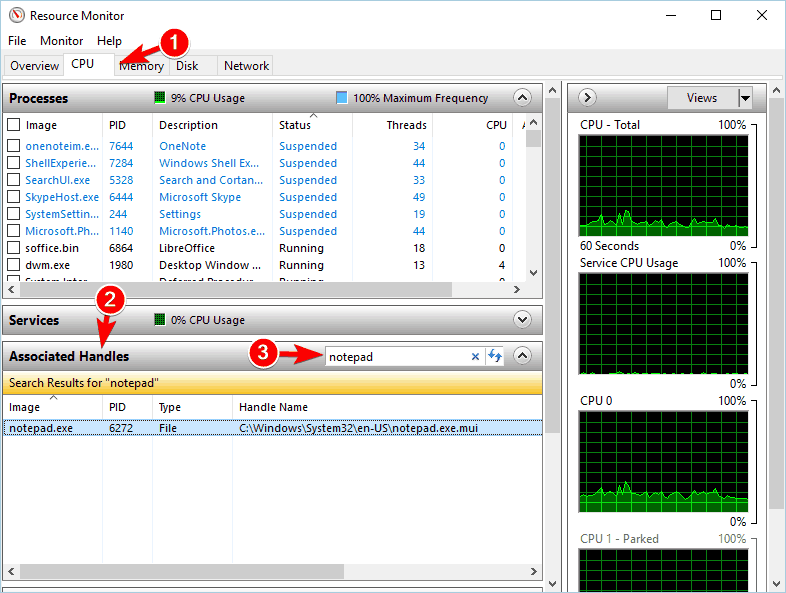
- Press Windows Key + R and enter resmon. Press Enter or click OK.
- When Resource Monitor starts, go to the CPU tab. Now, expand the Associated Handles section and in the Search Handles field, enter the name of the problematic file. A list of associated applications will now appear.

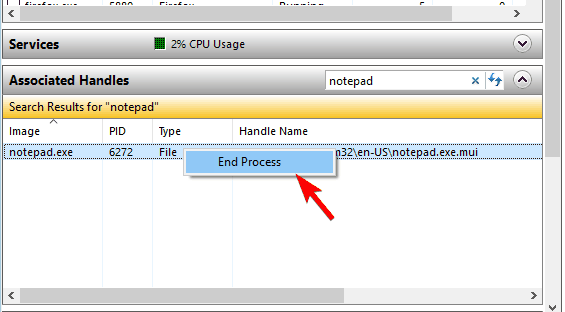
- Right-click the associated application and choose End Process from the menu.

If you can’t delete a specific file, you might be able to solve the problem by using Resource Monitor, a Windows application that can give you a lot of information about open applications and files.
Keep in mind that sometimes you won’t be able to find the problematic file using Resource Monitor. If that happens, you might have to check each process one by one and check the list of all associated handles.
If you manage to find the folder that has the problematic file, you’ll be able to determine which application is using it. Resource Monitor is an advanced tool, so it might take you a while to get used to it especially if you’re a first time user.
2. How do I fix the File in use error in Excel?
2.1. Create a registry file and add it to your registry
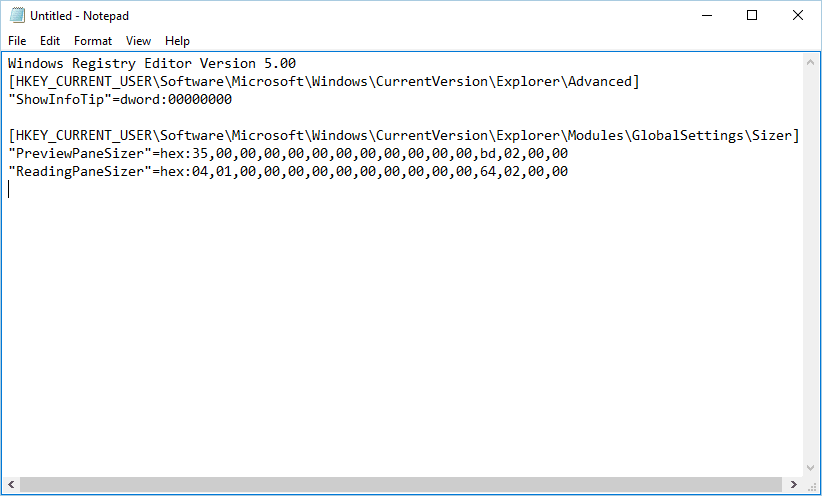
- Open Notepad.
- Paste the following text:
Windows Registry Editor Version 5.00[HKEY_CURRENT_USERSoftwareMicrosoftWindowsCurrentVersionExplorerAdvanced]"ShowInfoTip"=dword:00000000[HKEY_CURRENT_USERSoftwareMicrosoftWindowsCurrentVersionExplorerModulesGlobalSettingsSizer]"PreviewPaneSizer"=hex:35,00,00,00,00,00,00,00,00,00,00,00,bd,02,00,00"ReadingPaneSizer"=hex:04,01,00,00,00,00,00,00,00,00,00,00,64,02,00,00
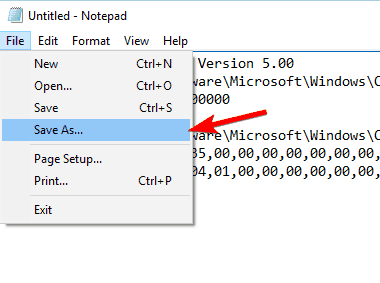
- Go to File and click Save as.

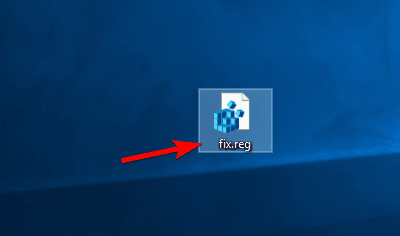
- Set Save as type to All Files. Enter fix.reg as the File name and click the Save button.
- Close Notepad and locate the fix.reg file. Double-click it and choose Yes when the warning message appears.

According to users, you might be able to fix the File in use error while opening Excel files by creating a .reg file and adding it to your registry.
Keep in mind that this solution will modify your registry, therefore it’s advised to create a backup or System Restore point.
2.2. Disable the preview pane
Users claim you can fix this problem simply by disabling the preview pane in File Explorer. We already explained how to do that in one of our previous solutions, so be sure to check it out.
2.3. Check the file name
The File in use error can appear if the file name of your Excel document is too long. If the file name is too long, Excel can’t create the lock file.
To fix the issue, you need to locate your Excel file and shorten its name. After renaming the file, you should be able to access it without issues.
2.4. Delete the hidden lock file
- Navigate to the folder where problematic Excel file is saved.
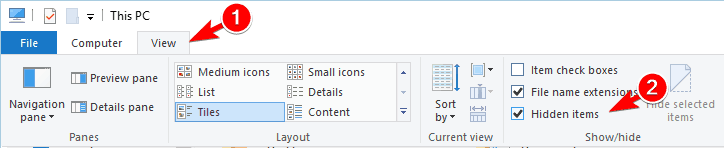
- Click View and check the Hidden items option.

- Locate the lock file. (It should have the same name as your Excel document.)
- Delete the lock file.
Excel usually creates a temporary lock file alongside your Excel document. According to users, you simply have to locate and remove the lock file in order to fix this error.
After removing the lock file, you should be able to access your Excel document without any issues.
2.5. Check the personal.xlsb file
- Navigate to C:Users
your_usernameAppDataRoamingMicrosoftExcelXLSTARTfolder.- If this folder isn’t available, navigate to
C:Usersyour_usernameAppDataLocalMicrosoftExcelXLSTARTfolder instead. - If you can’t find any of these folders, you’ll need to reveal hidden files. We already showed you how to do that in our previous solution, so be sure to check it out.
- If this folder isn’t available, navigate to
- Keep in mind that personal.xlsb is a hidden file, so you’ll need to reveal hidden files in order to see it.
- Once you locate personal.xlsb file, delete it if you don’t plan to use it.
- Optional: If you need the personal.xlsb file, right-click it and choose Properties from the menu.
- Navigate to General tab and check the Read-only option. Click Apply and OK to save changes.
According to users, the File in use error in Excel appears after adding macros to the personal.xlsb file. To fix the problem, you need to find and delete that file.
After doing that, you should be able to start Excel without any problems.
The File in use error is an annoying problem that will prevent you from accessing your files. If you have this error on your PC, be sure to try some of our solutions and let us know how it works out for you!
[wl_navigator]