Fix: ''Trust this device'' error in Windows 10
![]() 4 min. read
4 min. read
![]() Updated on
Updated on
Share this article

Improve this guide
Read our disclosure page to find out how can you help Windows Report sustain the editorial team Read more
Even though Windows 10 resembles Windows 8 in some matters, there are a lot of changes that confuse users after the OS upgrade. In a sea of differences, one that’s quite important is a complete abandonment of ”Trusted PC” option that was present in Windows 8. Users can run into a prompt questioning whether you trust your current device, but that’s only remotely similar to a ”Trusted PC” option from Windows 8. The bad thing about this? They are unable to confirm the account with the two-step verification.
In order to address this, we prepared a few possible solutions for this problem, hoping that at least one will help you resolve the problem at hand. If you’re stuck with the confirmation or the confirmation window suddenly disappears, this should help you address it.
What’s ”Trust this device” in Windows 10
- Try signing in again
- Try an alternative verification
- Use an alternative account
1: Try signing in again
Let’s try and explain what’s exactly happening with your Windows 10 PC when, immediately after the boot sequence, the ”Trust this device” prompt occurs. Some would say that this change, in comparison to Windows 8, is a bad move. We can agree to some extent.
Firstly, even though it’s presented as a security improvement, it’s quite hard to understand what’s exactly about. Is there something wrong caused by the latest system changes? Or you’re basically forced to log in with your credentials, even if you don’t want? Maybe both.
On the other hand, this is a valid security measure, a great way to protect your most important data: passwords, personal credentials and, credit card numbers. Also, it lets you sync various settings and preferences with other devices, just by using single Microsoft account.
It doesn’t refer only to Windows-powered PC’s, but to all devices. So, after you sign in, you’ll be able to make an Android or iOS device trusted, as well. Also, it doesn’t refer to plugged devices, so don’t mix it up with something else.
With that said, let’s move to a problem resolution. The first obvious step is to try to sign in multiple times. Here’s how to do it in a few simple steps:
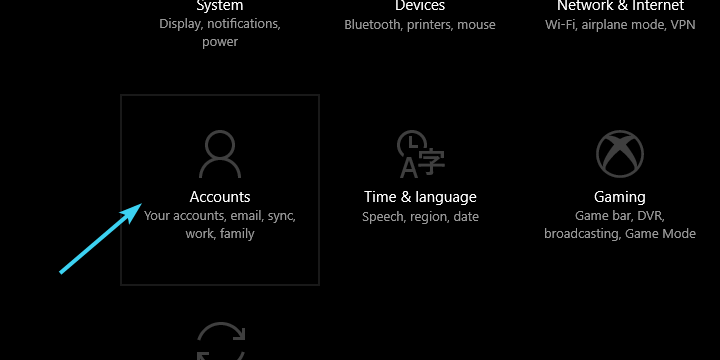
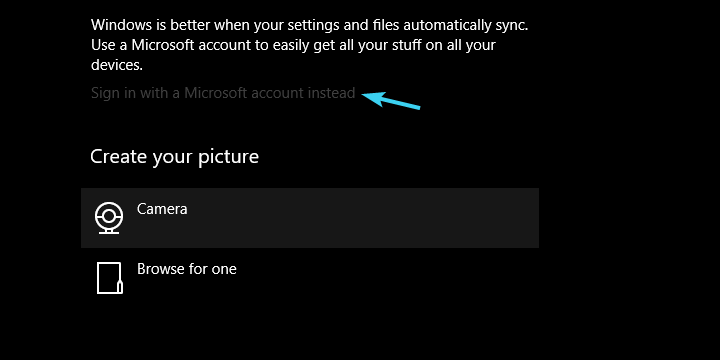
- Press Windows key + I to open Settings.
- Open Account.

- Highlight Your info in the left pane.
- Click on Sign in with a local account instead.
- Enter Password and your PC will log off.
- Now, get back to Settings > Accounts.
- Click on Sign with a Microsoft account instead.
- Enter your Microsoft Account e-mail and password and sign-in.
If that doesn’t help, continue to the steps below.
2: Try an alternative verification
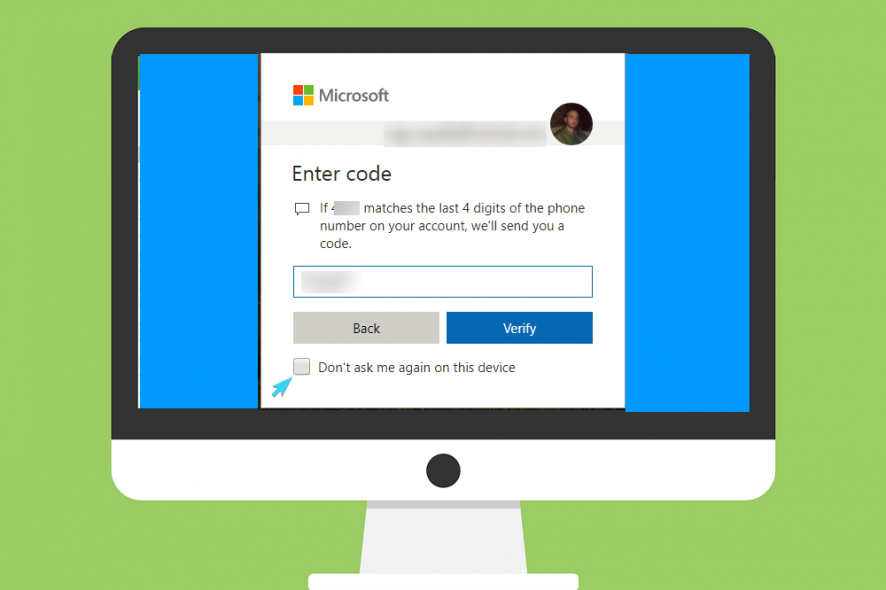
It’s not unusual for Microsoft accounts to mix things up and give you a headache. There are multiple ways to verify an account and make a device trusted. You can use an alternative e-mail address. They send you auto-generated code, you enter it in the dialog box and that’s it. Alternative verification ways are through the phone (call or SMS) and a verification app.
So, we reckon that, if one verification system fails, maybe the others will work in your favor. Here’s how to change your Microsoft accounts verification procedure from one to secondary authentication method:
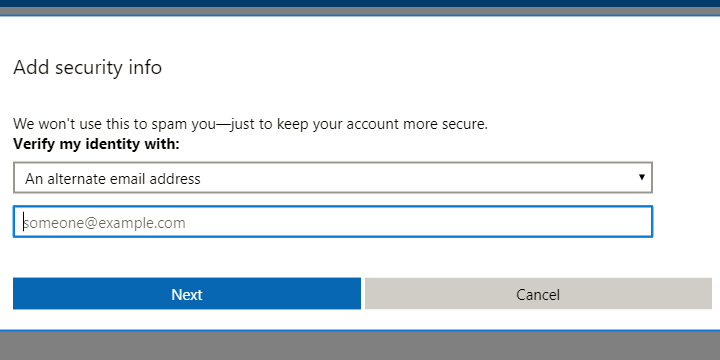
- Navigate to Microsoft Security basics page.
- Under the ”Update your security info” section, click Update info.
- Here, you can add additional info like an alternative phone number or e-mail address. It’s advised to always have at least 3 authentication methods, including the password.
- Add an alternative e-mail or phone number.
- Log into an alternative e-mail account or wait for the SMS with the confirmation code.
- Enter the code and confirm changes.
- Restart your PC.
- When prompted with ”Trust this device” message, press Windows key + I.
- Open Accounts.
- Select Your info from the left pane.
- Click on ”Sign with a Microsoft account instead’‘.
- In the new window, enter your e-mail address related to the Microsoft Account and press Next.
- Enter the e-mail password and click Sign in.

Finally, what’s important is to use an alternative authentication method when asked. If you failed with the secondary e-mail confirmation, try with the phone. That should resolve your issue.
That should do it. In case you have questions or suggestions, feel free to post them in the comments section below.
RELATED STORIES YOU SHOULD CHECK OUT: