5 Best Hardware Diagnostic Tools for PC [Tested by Experts]
Hardware diagnostic tools help you prevent hardware malfunctioning
![]() 10 min. read
10 min. read
![]() Updated on
Updated on
Share this article
This article is translated in

Improve this guide
Read our disclosure page to find out how can you help Windows Report sustain the editorial team Read more
To prevent errors like BSoD and system crashes you need to monitor your PC with hardware testers or, more elegantly named hardware diagnostic tools.
How can a hardware diagnostic tool help me? The information from a hardware diagnostic tool can be used as a preemptive measure, and to resolve any ongoing issues.
Important! Some of the special data as the CPU fan speed and temperature of various components can only be shown if the certain hardware comes with the sensor for it.
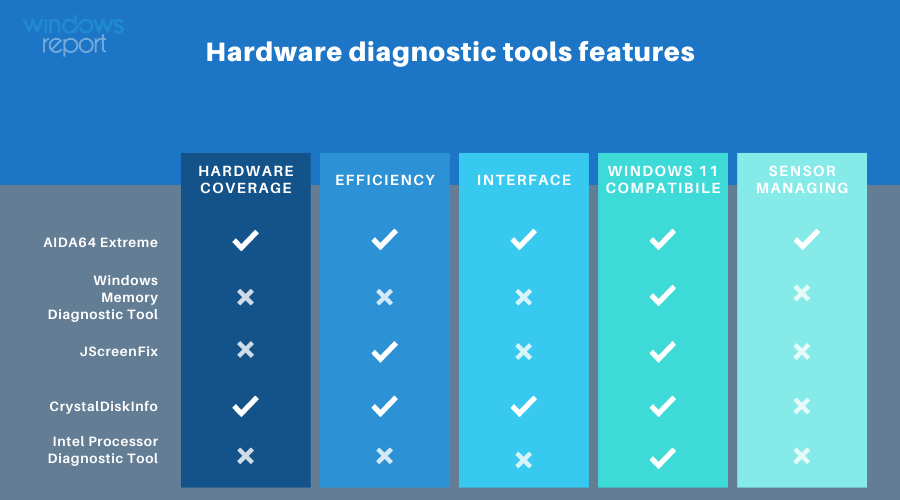
What are the best hardware diagnostic tools for Windows?
AIDA64 Extreme – Best hardware monitoring tool
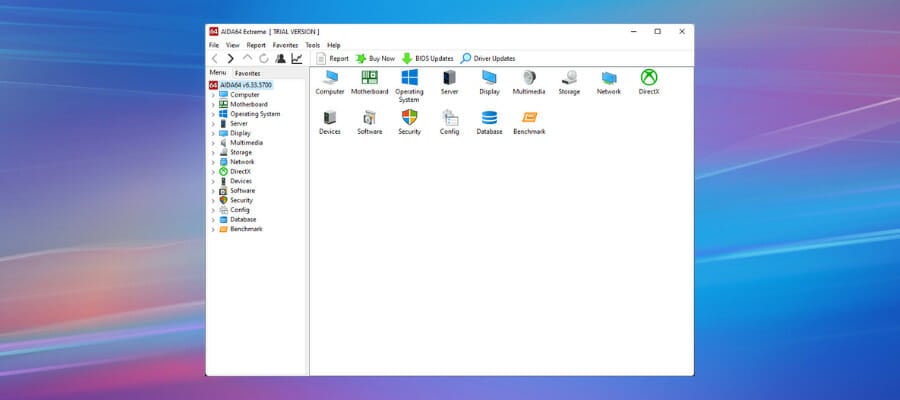
AIDA64 is a hardware monitoring software for Windows 10 that caters to home users, corporate engineers, and businesses, and it offers detailed information for over 185,000 hardware devices.
This useful software helps you keep an eye on the hardware’s details at all times, even when you are watching a movie on the full screen or playing a game.
AIDA64 Extreme measures your system’s performance with various calculations that precisely compare it to the other systems.
It also allows you to manage your business remotely, and monitor any changes in the software and the hardware. Note that AIDA64 System Stability Test uses a 64-bit multi-threaded stress testing module to drive your PC to its limits.
Even more, SSD, hard disk, and OpenCL GPGPU video adapter stress testing are all part of the package. As for those of you worried about accuracy, let us assure you that AIDA64 has impressive hardware detection capabilities.
To be more precise, it can easily provide detailed information on the PC’s internals in no time. This is possible thanks to a generous hardware database holding more than 200,000 entries.
Check out the main features that this tool brings to the table:
- Over 50 pages of information on software licenses, installed programs, and Windows settings
- Implements a set of 64-bit benchmarks
- Supports over 250 various sensor devices to measure temperatures, fan speeds, and not only
- Custom panel that perfectly fits the design of your rig
- CPU PhotoWorxx Benchmark for accurate color space conversion

AIDA64 Extreme
This is a great system information tool that allows you to monitor the performance of your computer.CrystalDiskInfo – Good for SSD diagnostics
Most modern computers come with Solid State Drive (SSD) which has its own advantages but is also known to die without giving a warning.
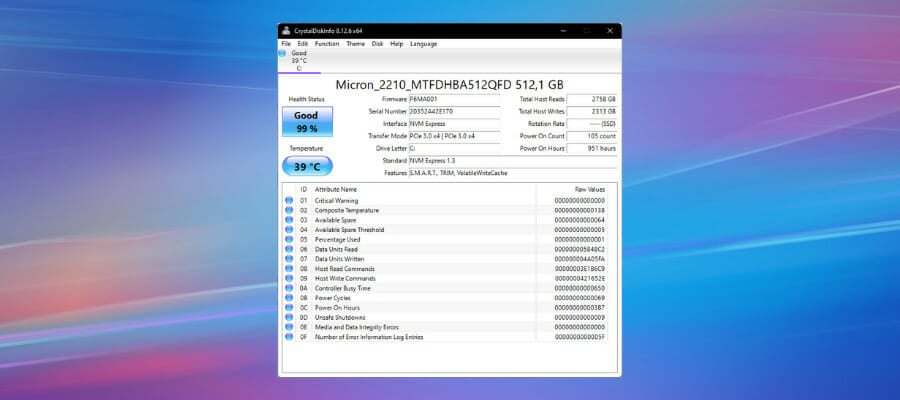
If you want to know if your SSD or hard drive is in good condition, the tool to use is no other than CrystalDiskInfo. It performs a complete analysis of the state of your data drives, including USB drives, SSDs, and HDDs.
Moreover, remember that it calculates the overall health status and gives you details about error rates, uptime, spin-up time, and temperature.
This program provides a clear interface that’s ideal even for newbies who might have a hard time finding what they are looking for. We say such a thing since the PC’s Temperature and general Health Status can be easily seen at the top.
At the same time, the lower part of the interface displays a complete list of all the Smart information the program is gathering.
What we found extremely useful is that you can configure CrystalDiskInfo to send you alerts if there is any issue identified in one of the systems being monitored. It is up to you to choose between Sound Alerts or Mail Alerts.
Moreover, don’t hesitate to adjust how frequently the tool refreshes its data or how long it waits to open after startup.
Also, note that the program has a sibling called CrystalDiskMark which you can also use to gauge how fast your data drives can read and write.
Check out the main features that this tool brings to the table:
- Straightforward interface, with Temperature, Health Status, and Smart information displayed
- Auto-detection feature that can be easily turned On or Off
- Ideal for reading and monitoring disk drive status
- Provides a health rating based on your drive’s Smart status
- Completely free to use by anyone
Intel Processor Diagnostic Tool – Best for Intel CPUs
Of all the components in your computer, processors are the least likely to cause problems. However, they don’t last forever, though issues are usually a result of an electrical surge or overheating.
You can clearly use one of the best laptop cooling pads and thankfully, the Intel Processor Diagnostic tool can help you fix all issues caused by faulty processors. How does it work?
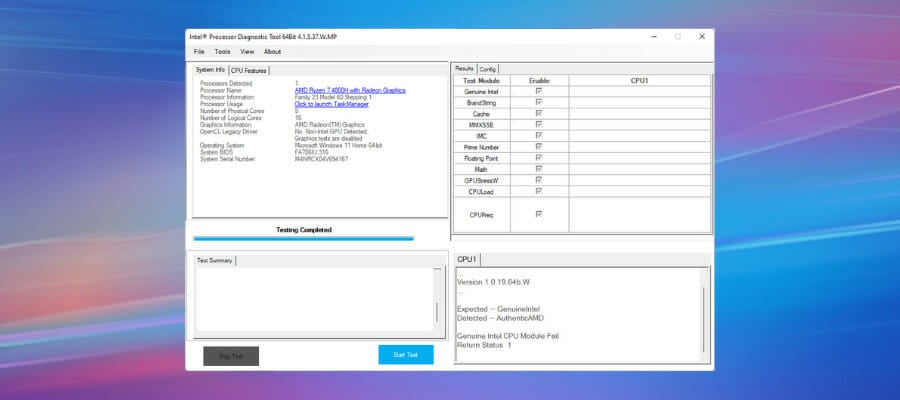
The program performs various stress tests on the processor, verifies the processor’s operating efficiency, and checks for brand identification.
This tool then displays the test results. If some of them do not meet the efficiency standards, it will display the problem and recommend a new processor.
Even more, feel free to configure it by accessing Tools > Config > Edit. You will immediately receive a note about the effect of changing Intel PDT parameters from the default configuration.
We also want to share a useful tip with you. You can get more details on how to use the utility by clicking on About > Help to view the Help Documentation file.
The tool can be downloaded from Intel’s website. However, make sure to download the right version for your machine, 32 or 64-bit.
Check out the main features that this tool brings to the table:
- Verifies the functionality of all the cores of Intel processors
- Tests specific processor features
- Brand identification is included
- Verifies the processor’s operating frequency
- Lets you save the test results files after the test
⇒ Get Intel Processor Diagnostic Tool
JScreenFix – Best for identifying LCD issues
If you notice some spots on your screen that are not caused by dust or stains, then your screen may have some stuck pixels which can be very annoying.
A stuck pixel is a conspicuous dot of color that fails to change when the neighboring pixels change. Such pixels become very noticeable when the screen turns black.
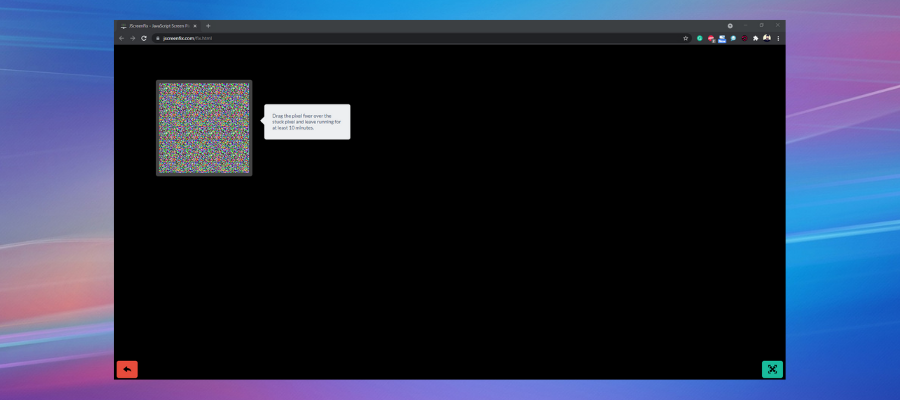
If the stuck pixels are not a result of defects in the screen, then JScreenFix can fix the problem. The program uses HTML5 and JavaScript directly in your web browser, so there’s nothing that you are supposed to install.
Quite the opposite, just launch it by using the link below and note that it works by flushing the affected area with hundreds of different colors every minute. This way, it takes only a few minutes to unstick the pixels.
Besides the fact that it has an intuitive interface and it’s very easy to use, this web app is suitable for both LCD and OLED screens.
Add to the list its compatibility with a wide variety of platforms – Windows 10, iOS, and Mac – and you’ve clearly found the most effective software solution available for repairing defective pixels with ease.
Check out the main features that this tool brings to the table:
- Easy to use, clean, and crisp interface
- Repairs stuck pixels in less than 10 minutes
- Pixel fixing algorithm that has been applied to over four million screens
- Provided free of charge
- Over 60% success rate
How do I scan for hardware errors in Windows 11?
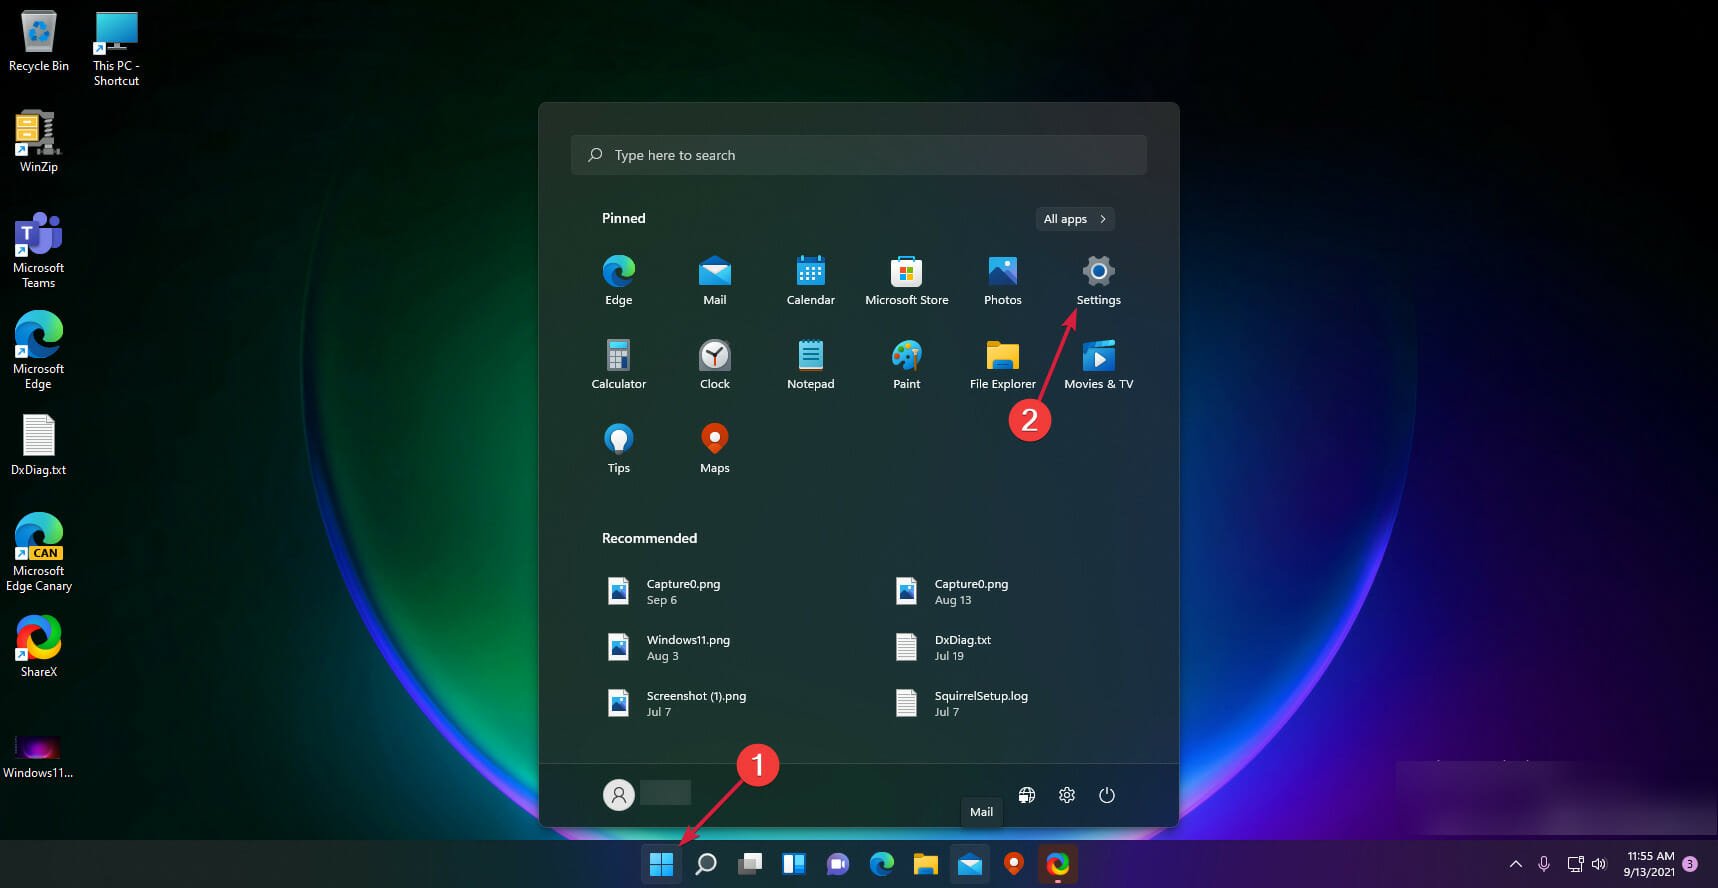
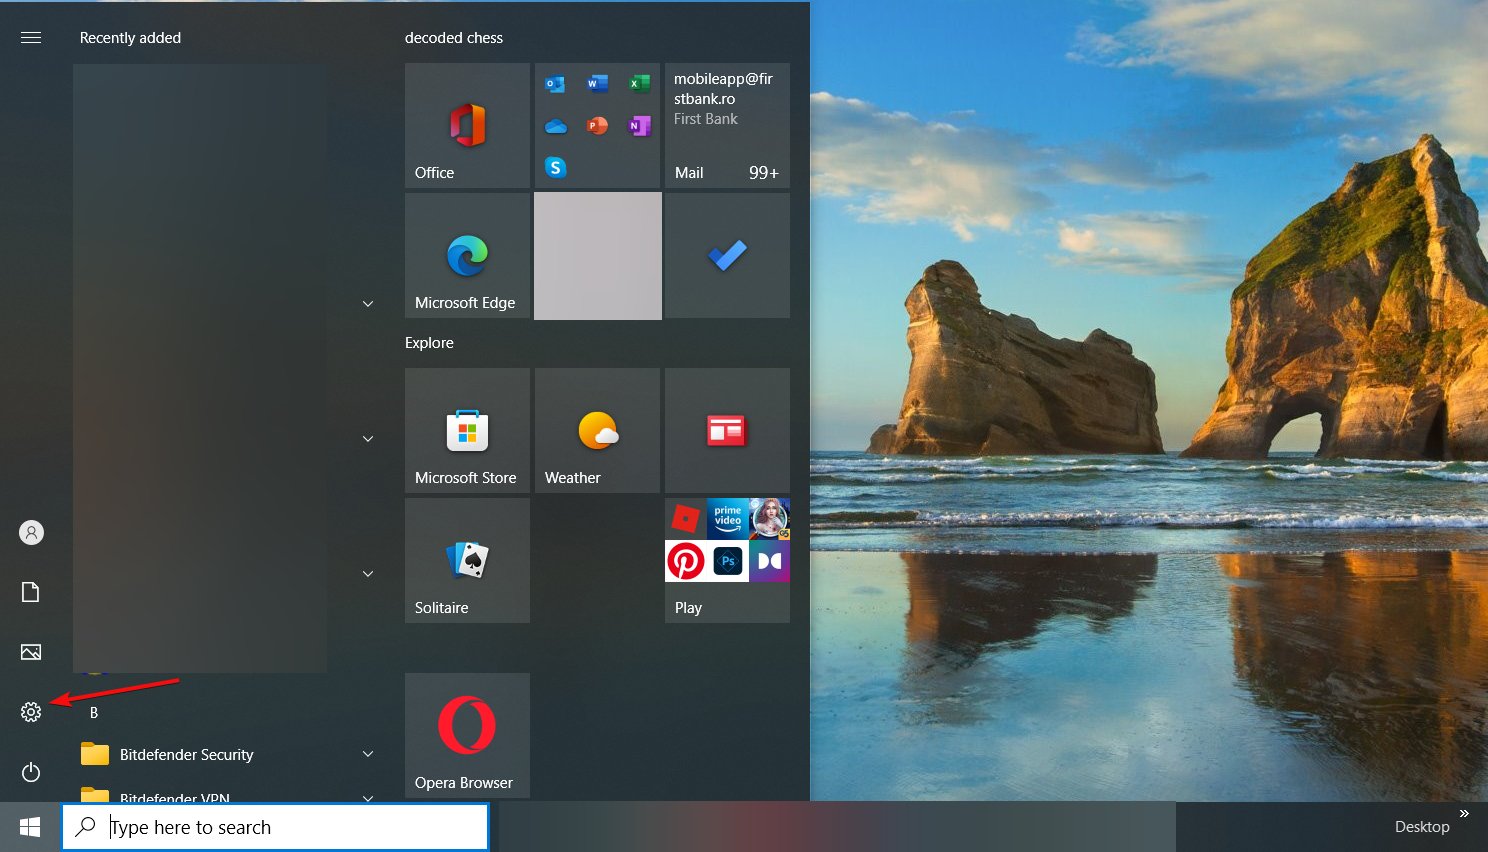
- Click the Start button and select Settings.

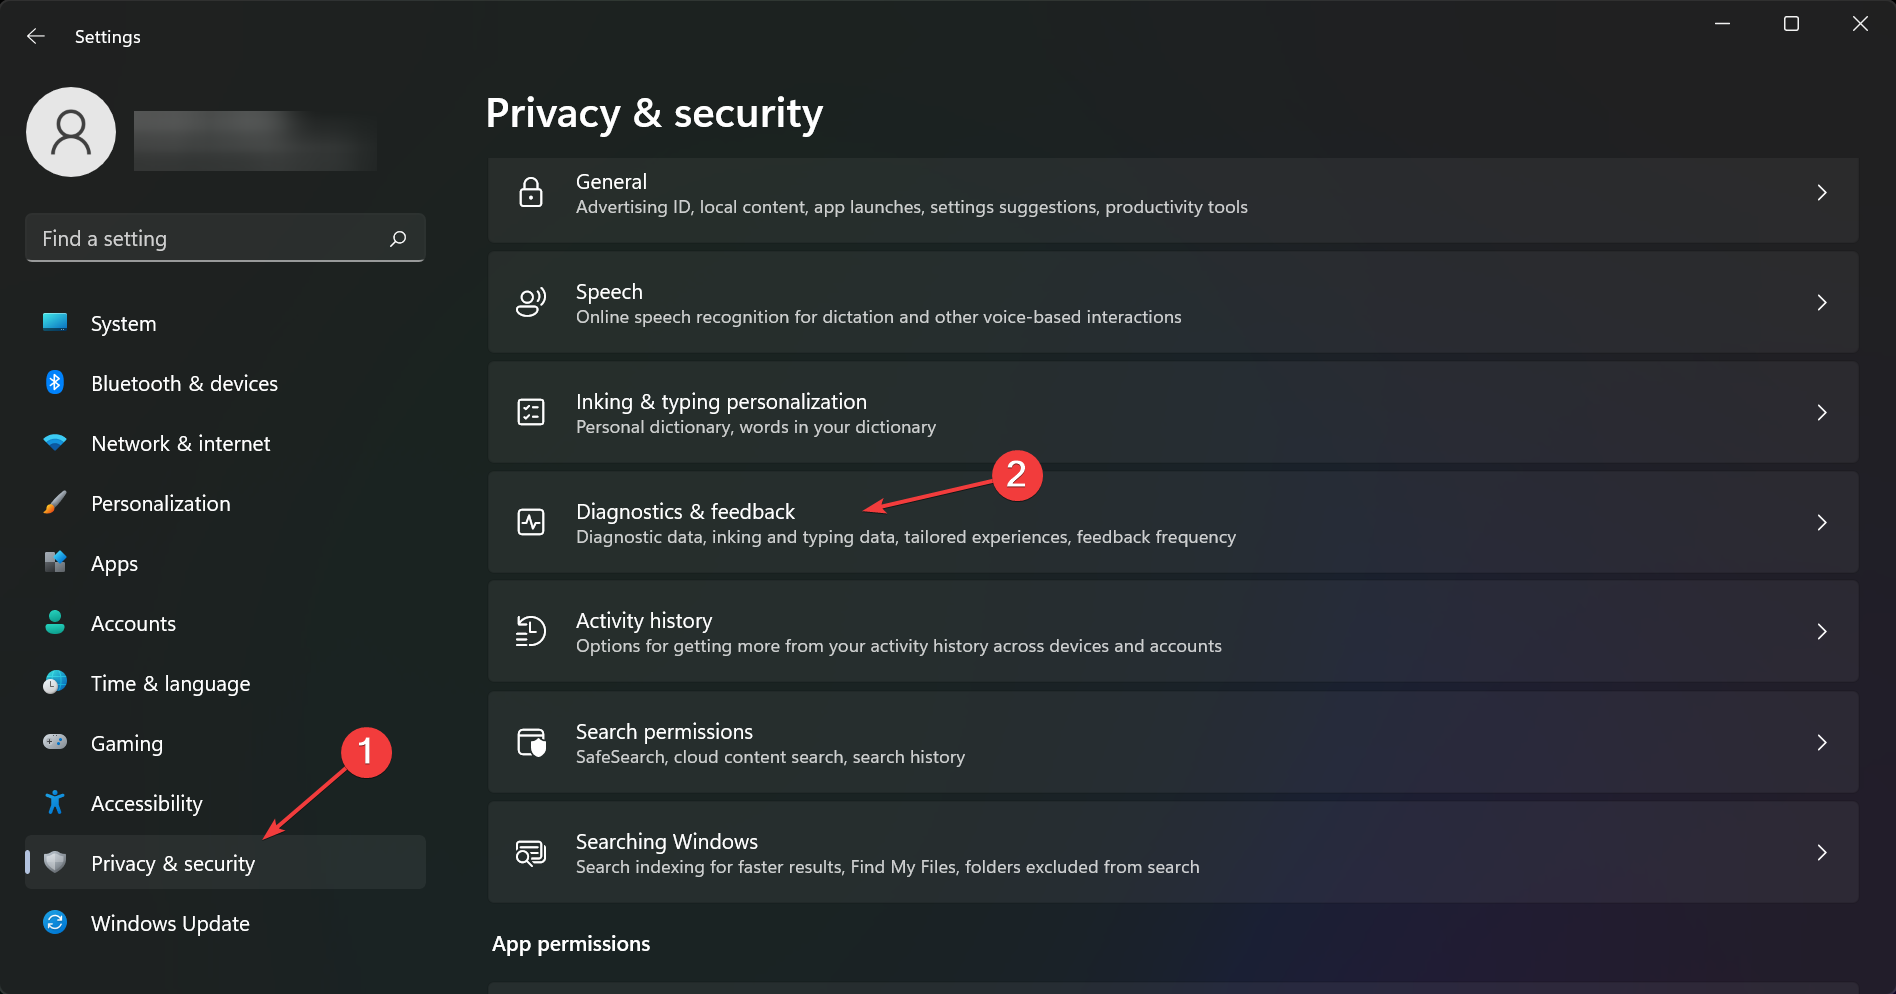
- Next, click on Privacy & security from the left pane and select Diagnostics & feedback from the right.

- Now, turn On the Diagnostic Data Viewer and click on the Open Diagnostic Data Viewer button.
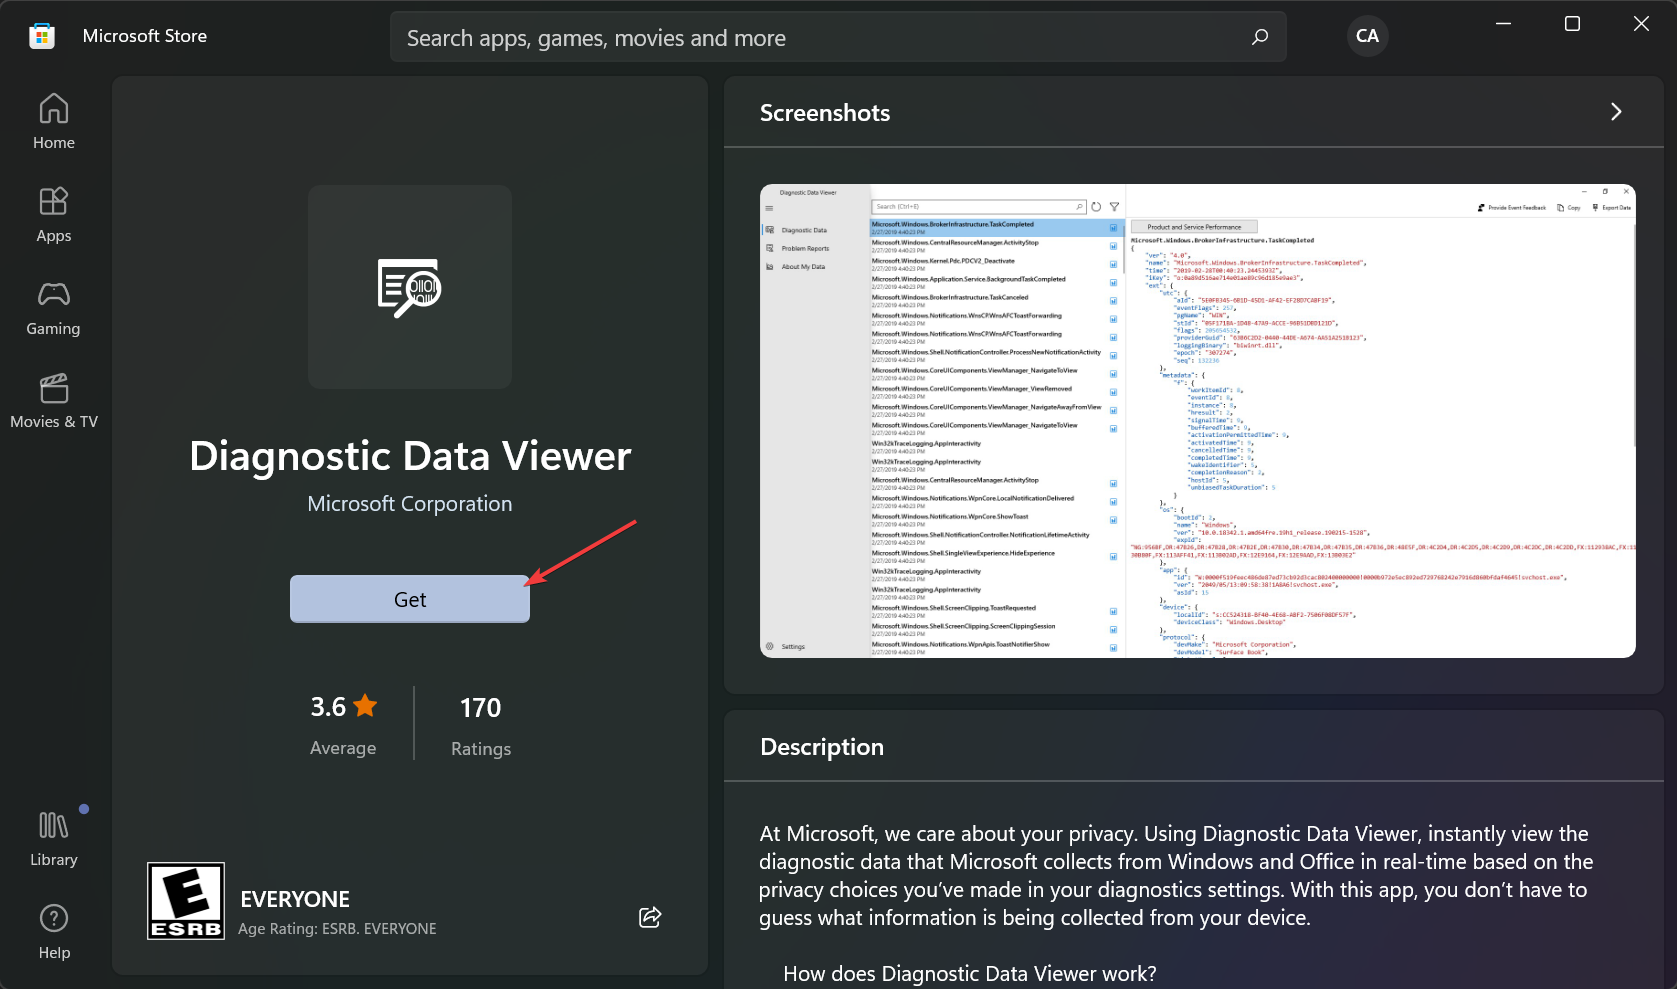
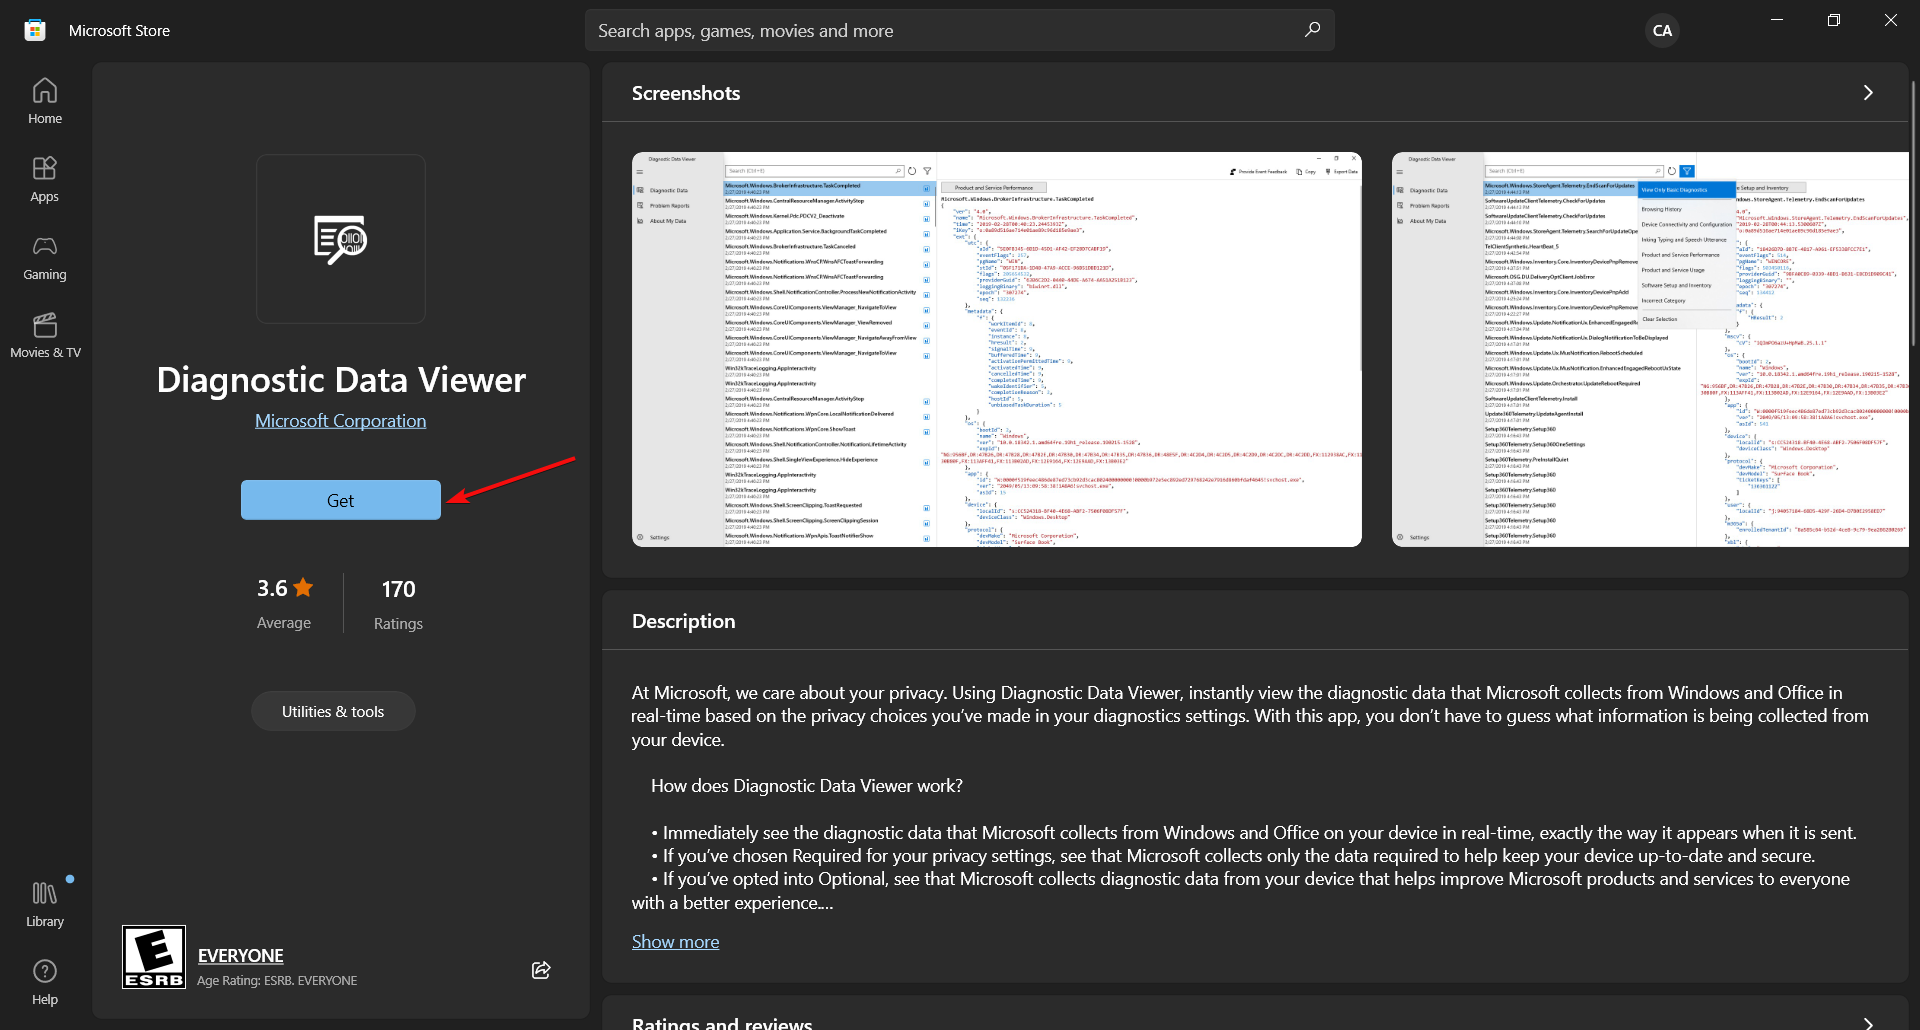
- By default, you don’t have the Diagnostic Data Viewer installed so you will be redirected to the Microsoft Store app where you need to click the Get button to download and install the app.

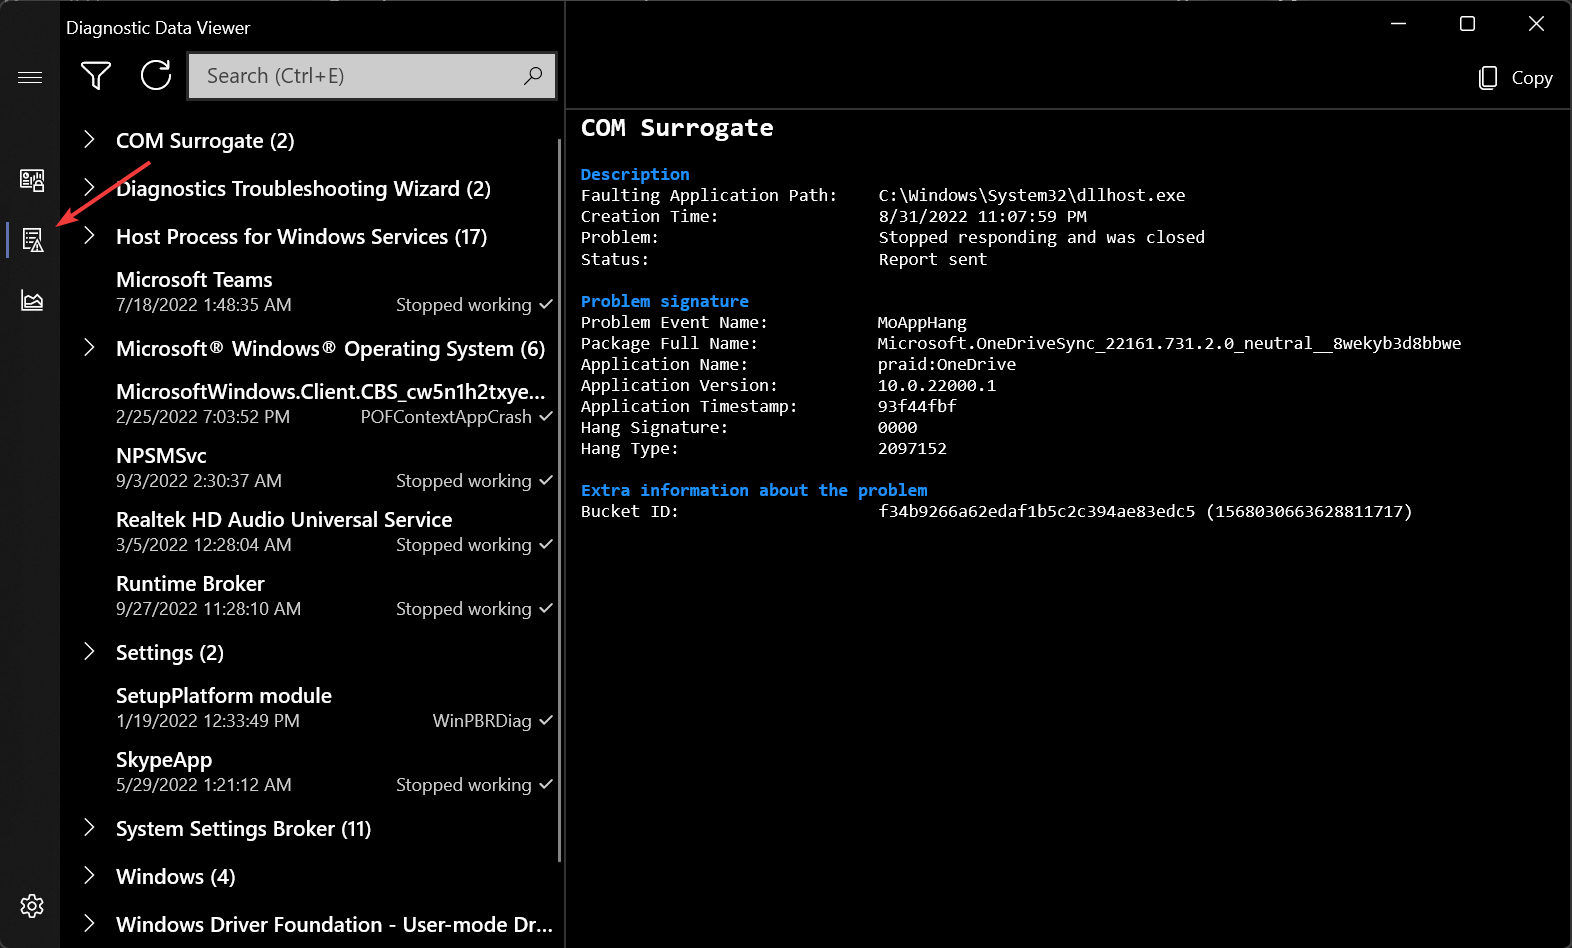
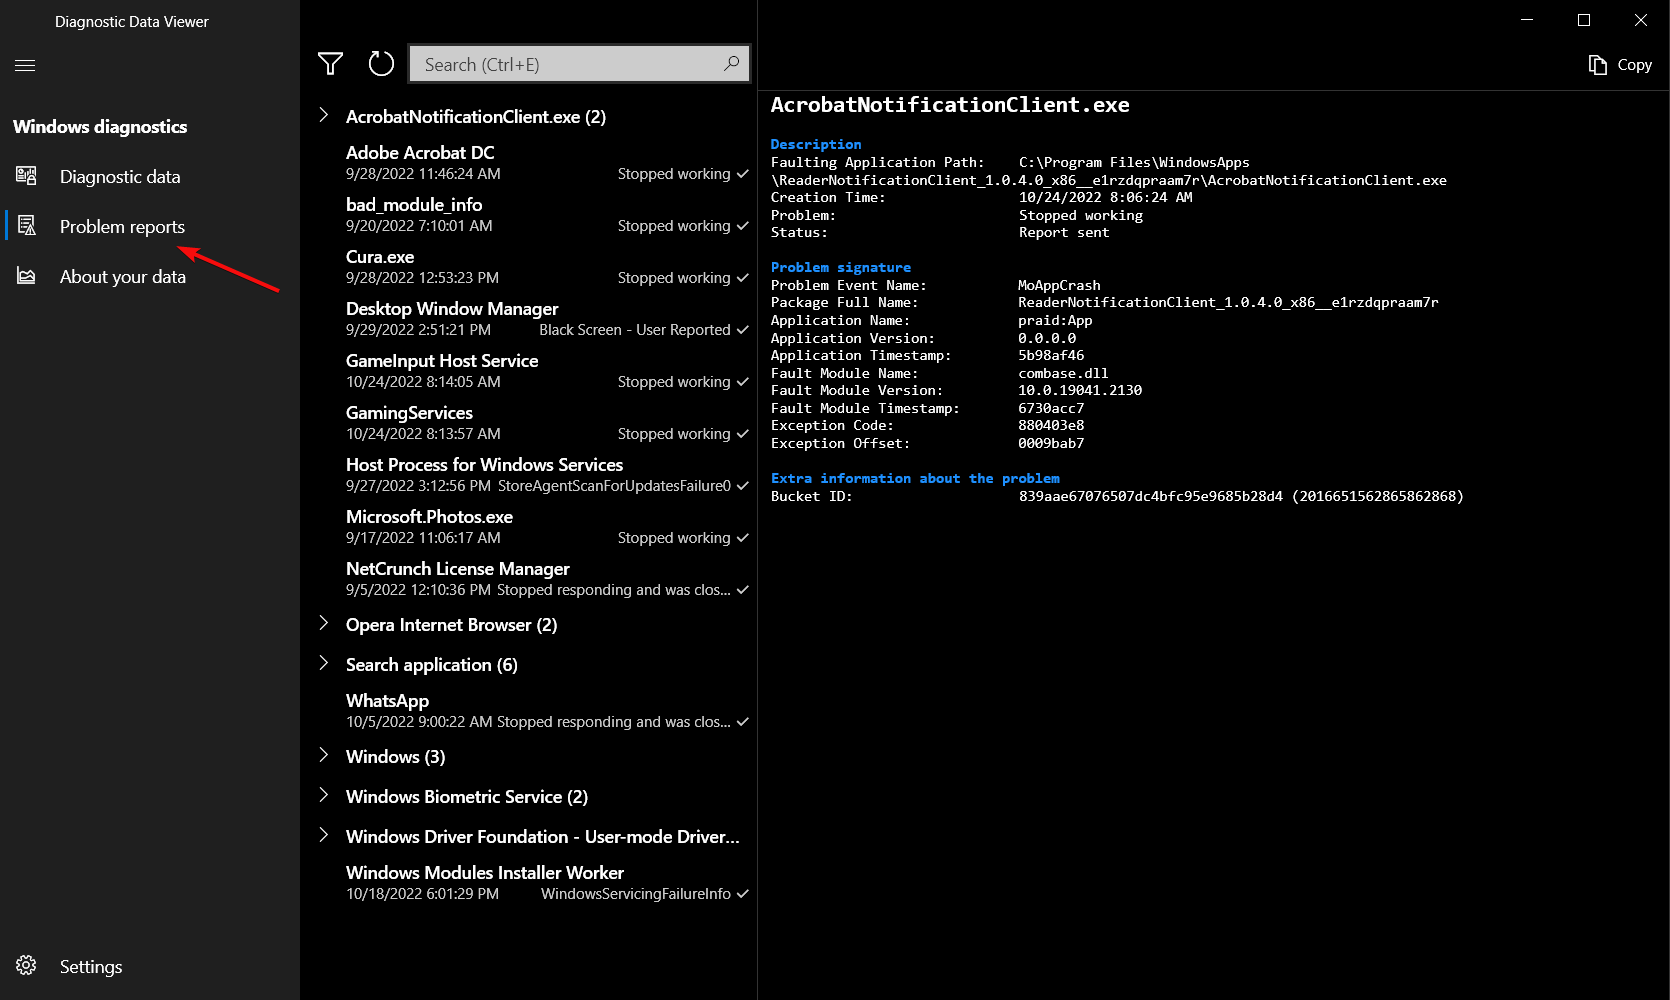
- After the app is installed, open the app and if you click the Problem Reports tab, you will see all the recent hardware issue reports with detailed information.


If you didn’t upgrade your machine with the latest OS, below you can see how you can do that on Windows 10.
How do I scan for hardware errors in Windows 10?
- Click the Start button and select Settings.

- Choose Privacy.

- Now, select Diagnostic & feedback from the left, turn On the View diagnostic data option and click on the Open Diagnostic Data Viewer button.
- By default, this app is not installed so you will be redirected to Microsoft Store where you need to click the Get button to download and install it.

- After the process is finished, open the app and click on the Program Reports tab from the left to see a detailed situation of all the latest hardware and software issues.


Do Windows 10 and 11 have a hardware diagnostic tool?
Although they offer a Memory Diagnostic Tool, it doesn’t offer too much information.
In comparison with Windows 10, the updated version of troubleshooting software has been improved on Windows 11. But it still doesn’t offer the entire range of features or the amount of information a good third-party software can.
How do I use the Memory Diagnostic Tool?
- Press the Win + R keys to open the Run dialogue box.
- Type mdsched.exe and press Enter to run it.

- Choose either to restart the computer and check for problems or to check for problems the next time you restart the computer.


Also known as mdsched.exe, the Windows Memory Diagnostic Tool runs comprehensive tests on your computer’s memory checking for any error that may stifle proper functioning.
To be more precise, it tests memory for defects and displays the results so that you can take action.
Keep in mind that no intervention is required on your part at this point since the verification is completely automatic. As for the actual memory test sets, they will continue to repeat until the PC is powered off.
The Memory Diagnostic Tool will run tests on your machine and will notify you of any memory module issues.
We also have a guide on how to fix Memory Diagnostic Tool if it doesn’t return any results.
Are hardware diagnostic tools safe?
We can’t generalize this idea too much, as not all hardware diagnostic tools are made the same. Our research has suggested that across time, hackers and other third parties have used the disguise of a diagnostic tool to pack in malware and bloatware.
This implies that every decision made in regards to installing or not installing the software will need to be processed separately.
To simplify the process, it is always recommended that you download software only from official sources.
There is a good chance that the problem with your computer is faulty hardware and there is a tool that you can use to fix the issue in the shortest time possible.
Knowing these diagnostic programs might save you time and the cost of hiring an expert.
There are many diagnostic tools that you can use to fix hardware problems and since we could not cover all of them in one lot, we hope that you will find the above tools useful.
You can bookmark this page as you might need to visit it again if you come across the same problem or a different one in the future.
For more information, you may also read our guide with 7 ways to run complete hardware diagnostics on Windows 10.
If you have any other questions or suggestions, feel free to drop them in the comments section below.