How to Increase the Icon Cache Size on Windows 10
Boost your PC's performance with a quick Registry tweak
![]() 1 min. read
1 min. read
![]() Updated on
Updated on
Share this article

Improve this guide
Read our disclosure page to find out how can you help Windows Report sustain the editorial team Read more
Key notes
- The icon cache stores copies of your icon samples.
- When Windows 10 uses these icon copies, rather than the original icons, it saves time and completes tasks much faster.
- Your PC might slow down in case the icon cache storage is too big.
- Modifying your Registry allows you to increase the icon cache size on your Windows 10 device in just a few clicks.
Windows features many useful files meant to help your PC work faster. Among these files, there is the icon cache which keeps copies of each and every icon sample.
This will come in handy when Windows needs to create a certain type of file or improve the basic icon after an upgrade. Instead of using the original icon file, it takes a copy that was stored in the icon cache and thus, the task is completed much faster.
However, sometimes your PC may be slow, and this is because there are too many icons stored in the cache. To fix this problem, the best solution is to increase the icon cache size.
How can I increase the size of Windows 10’s icon cache?
1. Open the Run dialog by pressing the Win + R keys on the keyboard.
2. Type the command regedit in the text box and then press Enter. The Registry Editor window will open.
3. Navigate to the following key in the Registry:HKEY_LOCAL_MACHINE\Software\Microsoft\Windows\Current Version\Explorer
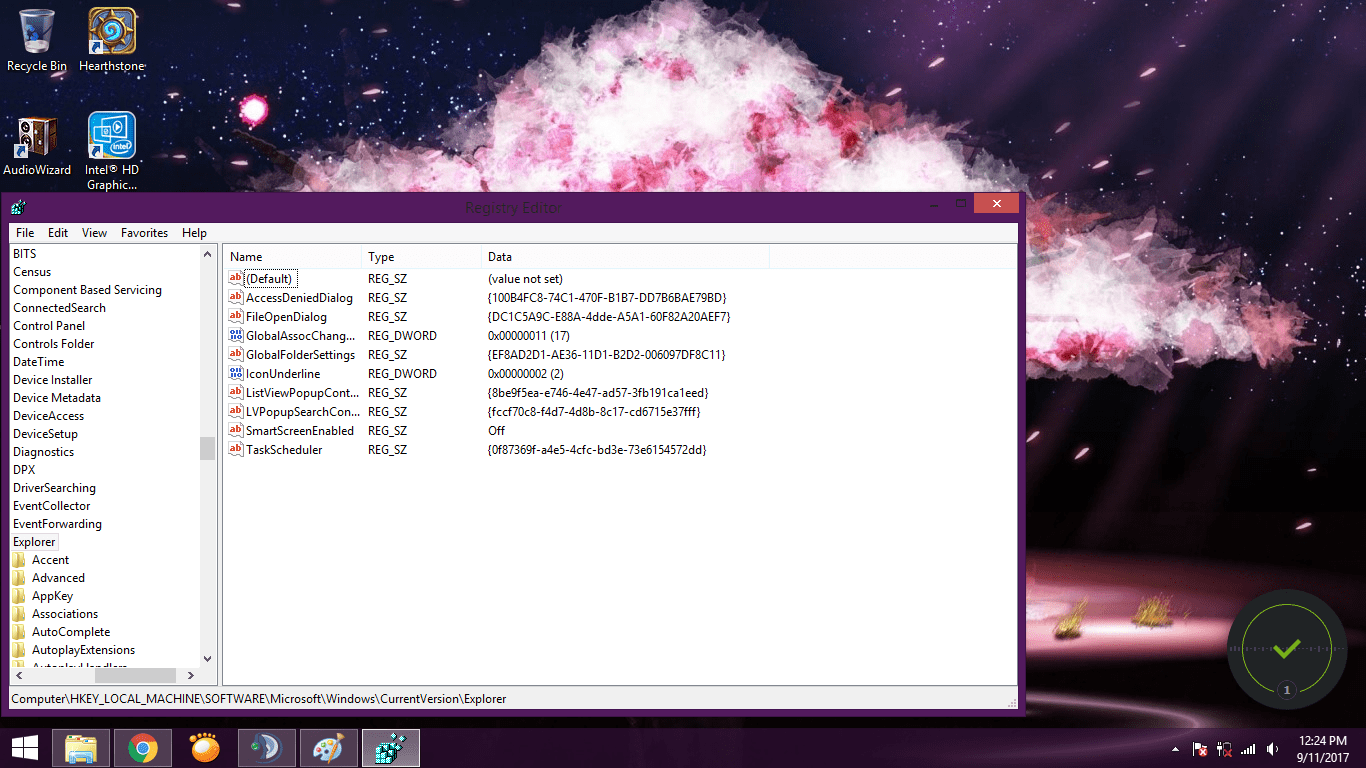
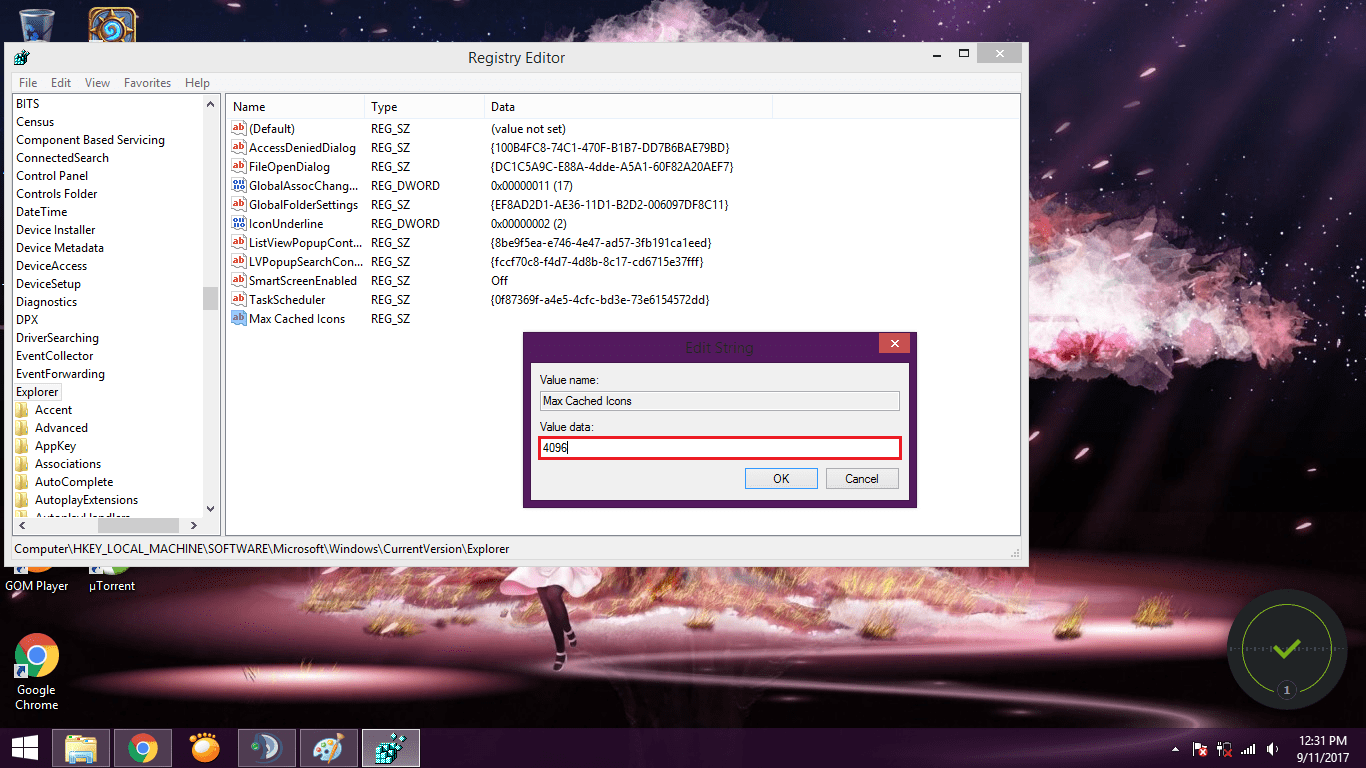
4. Once you launch the Explorer section, you need to create a new String Value called Max Cached Icons, which will reveal the maximum allocated space for the icon cache.
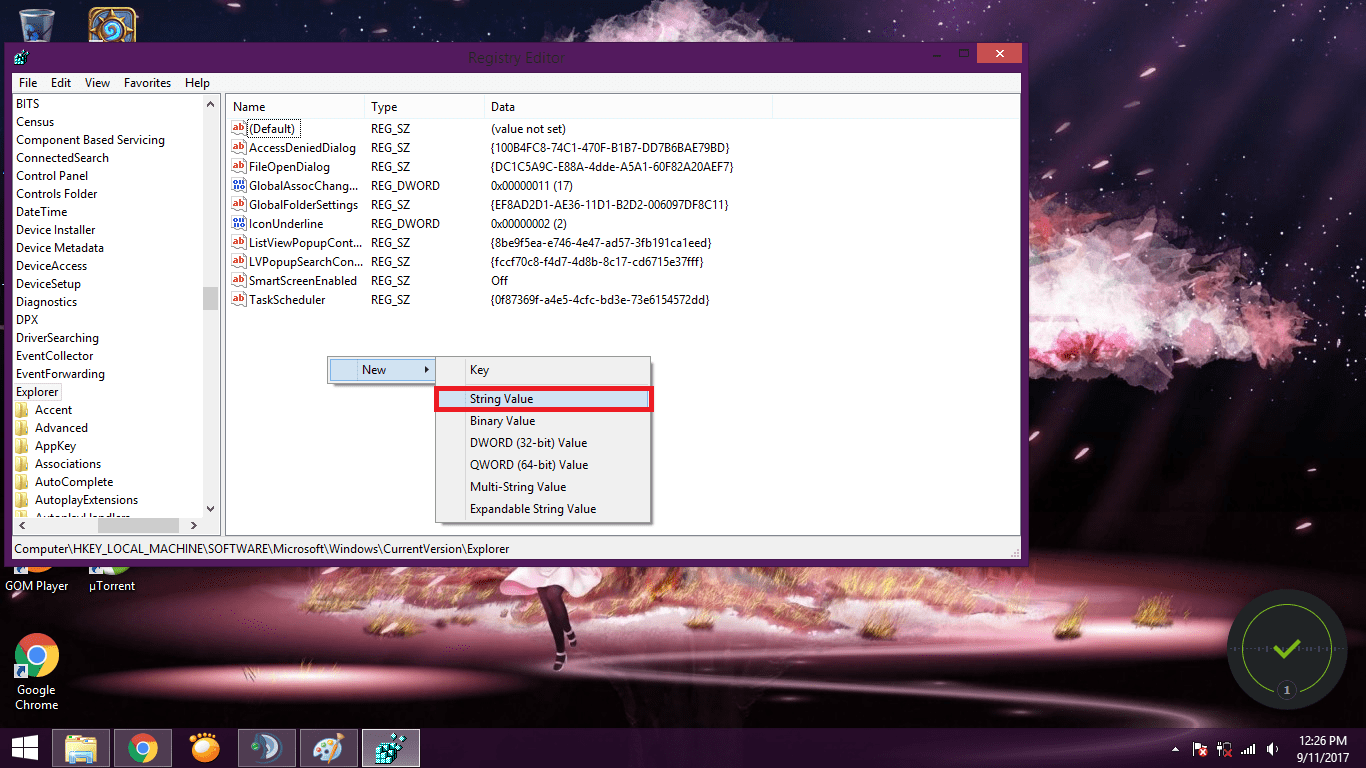
5. The value you need to introduce is 4096 which is the equivalent of 4 MBs. This is an improvement to the 550 KBs which are offered by the default Windows settings.
Increasing the size to more MBs might result in a slow working Windows system, so the key point is to not go overboard.
6. Once you complete all these steps, you can close the Registry Editor and restart Windows for the changes to take effect.
You can increase Windows 10’s icon cache size very easily by making a small modification to your Registry. In doing so, you will be able to customize the size to your liking.
However, as per usual, you need to be careful while making any changes to your Registry, and follow the guide thoroughly to avoid causing any harm to your PC.
We hope this article helped you to increase theicon cache size on your Windows 10 device. If you come across other workarounds to increase Windows 10’s icon cache size, you can list the troubleshooting steps in the comment section below.
Likewise, write down in the comments section any thoughts or questions you have about this article.