FIX: Microsoft Word has stopped working in Windows 10
![]() 14 min. read
14 min. read
![]() Updated on
Updated on
Share this article

Improve this guide
Read our disclosure page to find out how can you help Windows Report sustain the editorial team Read more
Key notes
- Every once in a while you might get a Microsoft Word stops working error on Windows 10.
- We've compiled a list of solutions, depending on the Word version, so check them out below.
- Whatever software error you get, we've got it covered! See the Troubleshooting page.
- Our Microsoft Guides will come in handy whenever you want to get the best of your Office tools.
Probably one of the most popular Office applications is Microsoft Word. The text editor has millions of users, despite the fact that the application also has a few issues.
A common, and at the same time very vague error message, is, for instance, Microsoft Word has stopped working.
Today we’re going to focus on it and show you how to fix this problem on Windows 10.
What can I do if Word stops working on Windows 10?
How do I fix Microsoft Word (Office suite)?
1. Repair the Office installation
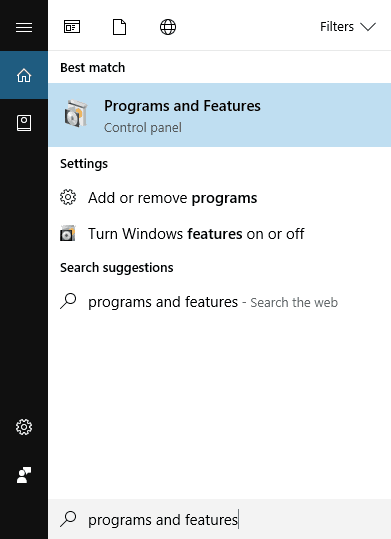
- Press Windows Key + S and enter programs and features. Select Programs and Features from the list of results.

- Locate your Office installation on the list and select it.
- In the top menu click the Change button.

- Select the Repair option and click Continue. Bear in mind that newer versions of Office might have Online Repair or Quick Repair options instead.
- Follow the instructions to repair your Office installation.

This solution should work for all versions of Office. After repairing your Office installation, check if the error appears again. This also helps when you are faced with the msosync.exe error.
2. Install the latest updates
Outdated versions of Word and Office might have a few bugs or incompatibility issues, so it’s recommended that you always update them.
To download Office updates, do the following:
- Open any Office application and click File in the top left corner.
- Navigate to Account / Product Information / Update Options.
- Select Update Options.
- Choose to Enable Updates option. If this option isn’t available, it means that automatic updates are enabled.
- Select Update Options again and choose Update Now from the menu. Wait for Office to download and install the necessary updates.
If you have Office 2010 or older, you can check for updates by following these steps:
- Start any Office application.
- Go to File / Help.
- Select Check for Updates or Install Updates option.
Windows 10 performs updates automatically, but you can also check manually for updates. To do that, follow these steps:
- Press Windows Key + I to open the Settings app.
- Go to the Update & security section.
- Go to the Windows Update tab and click Check for updates.
Update drivers
After updating the apps, make sure to also check your drivers. Windows usually update drivers in the background or with certain updates, however, glitches are possible.
So we recommend updating the drivers using reliable third-party tools to automatically install the newest one.
Downloading and installing drivers manually is a process that carries the risk of getting the wrong driver installed, which may lead to serious malfunctions of your system.
That being said, if you are not sure what kind of software to choose for driver administration, discover here the best driver update software on Windows 10. Otherwise we recommend using Outbyte Driver Updater.
3. Reinstall Office completely
Reinstalling Office will get you a new, updated copy of the program, with no glitches, cache, or temporary files that might have affected the program’s functionality before.
To uninstall Office 2013, 2016, or Office 365 from your PC, you’ll need to download Microsoft’s Office removal tool. It will remove all files and registry entries associated with Office.
After downloading the tool, start it and follow the instructions on the screen to complete the uninstall. Now you just need to restart your PC and install the same version of Office.
If you have Microsoft Office 2010 or older, we recommend that you download the appropriate removal tool from Microsoft’s website.
More so, to efficiently uninstall Office apps from your computer, without letting file leftovers behind, it’s advised to use the best uninstaller software today.
4. Disable Add-ins
- Press Windows Key + R to open the Run dialog. Enter winword.exe /a and press Enter or click OK. (In addition to winword.exe /a command, you can also use winword /safe to start Word in Safe Mode).

- Microsoft Word should now start. Click on the Office button and select Word Options.
- Select the Add-Ins tab and then disable all add-ins.
- After doing that, try to start Word again and check if the problem is resolved.

In order to enhance their functionality, Word and many other Office tools support add-ins. These little applications allow you to expand the functionality of Word or any other Office tool with new features.
Unfortunately, not all add-ins are compatible with Windows 10 or with your version of Office and that can lead to the issue discussed here.
To find a problematic add-in you’ll need to repeat previous steps and enable add-ins one by one. Keep in mind that after enabling an add-in you have to restart Word again. Repeat this process until you find the add-in that is causing this problem.
It’s worth mentioning that some users reported that ABBYY FineReader 9.0 Sprint add-in was problematic for them on Word 2016.
However, it appears that updating ABBYY FineReader can resolve the issue for good.
Besides, Microsoft reported that KingSoft’s PowerWord and Dragon Naturally Speaking add-ins also have problems with Office 2013 and 2016. The Bluetooth add-in also caused some trouble.
In all instances, disabling the ad-ins restored access to Word.
5. Modify your registry
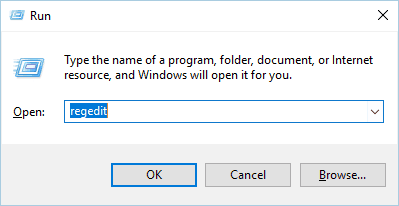
- Press Windows Key + R and enter regedit. Press Enter or click OK.
- Once Registry Editor opens, go to the following location (your key might be different depending on the version of Office that you have):
HKEY_CURRENT_USERSoftwareMicrosoftOffice15.0Word - Locate Data subkey. Right-click it and choose Delete from the menu.
- After deleting the key, close Registry Editor and try to start Word again.
Word will automatically recreate the deleted key, and the problem should be resolved. We have to mention that this solution should work with almost any version of Word, so be sure to try it out.
6. Remove the old printer driver
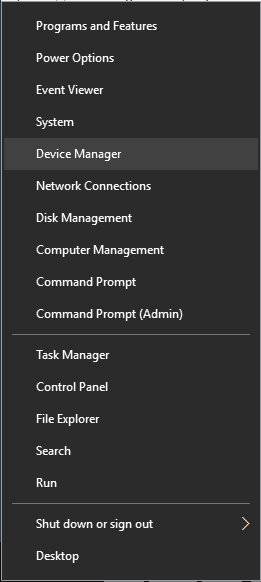
- Press Windows Key + X to open Win + X menu. Choose the Device Manager from the list.

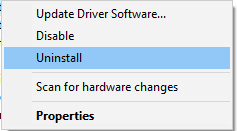
- Locate your printer, right-click it, and choose Uninstall.

- Click OK to confirm that you want to remove the driver.
After deleting the driver, restart your PC and check if the issue is resolved. If removing the driver solves the problem, download and install the latest driver for your printer from the manufacturer’s website.
7. Remove any recently installed software
Third-party applications can interfere with Word and cause errors. To fix this problem, you’ll need to uninstall any recently installed software.
If you added any new hardware to your PC, such as a printer or scanner, you might want to try removing its driver and software and check if that solves the issue.
Or you might want to remove any tools that you installed in the past few weeks.
8. Insert your document into another file
- Open the File menu and then select New / Blank Document.
- Go to the Insert tab and click on Object in the Text group. Now select Text from File.
- Select the desired file and click Insert.
The Microsoft Word has stopped working error can sometimes appear while trying to open previously saved documents. If that’s the case, this step might help.
9. Delete the Word Options registry key
Keys in your registry can get corrupted, and if that happens, you’ll need to remove them manually. Removing keys from the registry can lead to instability issues, therefore we advise you to create a backup of your registry, just in case.
To delete this key from the registry, do the following:
- Open Registry Editor. (For detailed instructions on how to do that be sure to check the forth solution above.)
- In the left pane navigate to the following key (it might look different on your device, depending on the Office version):
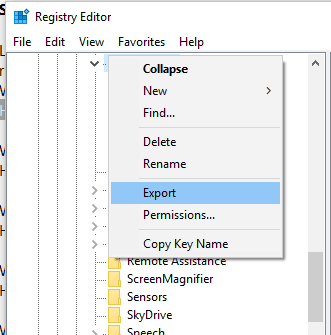
HKEY_CURRENT_USERSoftwareMicrosoftOffice16.0WordOptions - Right-click the key and choose Export from the menu.

- Save the file as Wddata.reg and save it on your Desktop.
- Now go back to the Registry Editor, right-click the Options key, and choose Delete from the menu.
- Close Registry Editor.
After doing that, try to start Word again and check if the problem is resolved. If the problem still persists, run Wddata.reg on your Desktop to restore the deleted key.
10. Replace the Normal.dot global template file
- Make sure that all Office programs are closed.
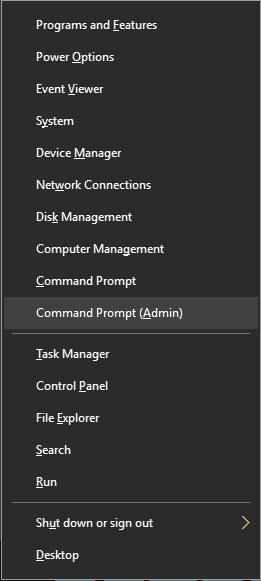
- Press Windows Key + X and select Command Prompt (Admin).

- When Command Prompt starts, enter the command below and press Enter to run it:
ren %userprofile%AppDataRoamingMicrosoftTemplatesOldNormal.dotm Normal.dotm - Wait for the command to finish and then close Command Prompt.
- After that, try to start Word again.
Word stores formatting and macros in a global template file, and if your global template file is corrupted you’ll get this error message. So renaming the Normal.dot file should work.
Note that by altering this file you can lose your customization options such as styles, macros, etc. If you want to preserve those settings, we highly recommend that you copy the customization from one global template to another by using the Organizer.
11. Disable Startup folder add-ins
- Locate the Office installation directory on your PC. By default, it should be something like this (depending on your Office version):
C:Program FilesMicrosoft Officeoffice16 - Navigate to the Startup folder.
- A list of files should appear. Rename one file by adding .old at the end. Be sure to remember the original file name because you’ll need to revert the changes later.
- Try to start Word again. If the issue appears again, repeat Step 3. Rename a different file this time. After that, try to start Word again. Repeat this step until you rename all files in the Startup directory.
- If you manage to start Word after renaming one of the files, it means that the last renamed file was causing this error.
- Rename all files except the problematic one to their original names and check if Word still works. If so, you’ll need to update the problematic add-in or remove it.
If the problem still persists, you need to do the following:
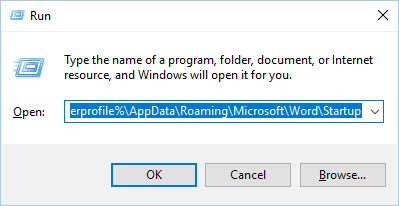
- Press Windows Key + R and enter the following command and press Enter:
%userprofile%AppDataRoamingMicrosoftWordStartup. - After the folder opens, repeat steps 3-5 from above.
12. Delete COM add-ins registry keys
- Close all Office programs and start the Registry Editor.
- In the left pane navigate to this key:
HKEY_CURRENT_USERSoftwareMicrosoftOfficeWordAddins - Right-click on Addins and choose Export. Save the file to the desired location.
- Right-click Addins key again and choose Delete from the menu.
- In the left pane navigate to:
HKEY_LOCAL_MACHINESoftwareMicrosoftOfficeWordAddins - Export the key as we showed you in Step 3.
- Delete the Addins key.
- Close Registry Editor and start Word again.
If the problem is resolved, it means that COM add-ins are causing this issue. To fix the problem, you need to find and disable the problematic COM add-in. First, you need to restore the deleted keys by running the exported .reg files. After that, follow these steps:
- Click the File menu and choose Options.
- Click Add-Ins.
- In the Manage list click COM Add-Ins and then click on Go.
- If a certain add-in is listed in the COM Add-Ins dialog box, clear the checkbox next to its name. (If you have multiple COM Add-Ins available, repeat this step and disable a single add-in at a time in order to find the problematic one.)
- Click OK.
- Now select File / Exit.
- Start Word and check if the problem is resolved. If the issue still persists, repeat the steps until you find the problematic add-in. After finding it, disable it or try to download the latest version.
13. Change the default printer
- Press Windows Key + S and enter devices and printers. Select Devices and Printers from the list of results.

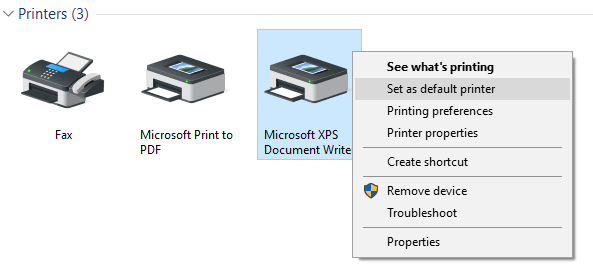
- In the next window, Go to the Printers section.
- Right-click Microsoft XPS Document Writer. Select Set as a default printer option.

- Close Devices and Printers window and try to start Word again.

If the error message doesn’t appear, it means that your printer was causing this problem.
To fix the problem, we advise that you update your printer drivers using Outbyte Driver Updater, as mentioned in the first solution, and check if that solves the issue.
14. Create a new Windows profile
- Press Windows Key + I to open the Settings app.
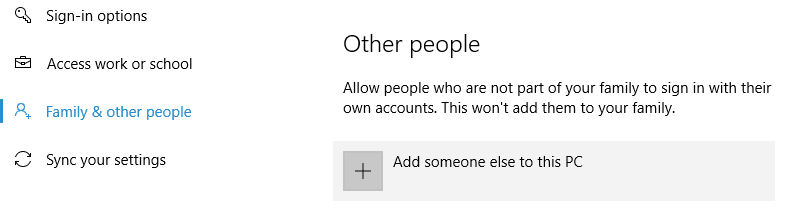
- Go to Accounts > Family & other people.
- In the Other people section click the Add someone else to this PC button.

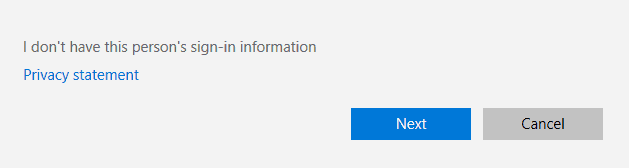
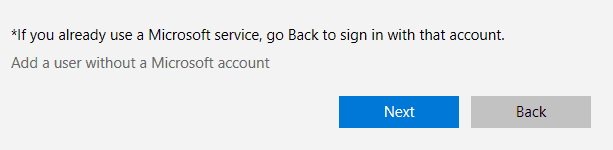
- Select I don’t have this person’s sign-in information.

- Now select Add a user without a Microsoft account.

- Enter the username and password for the new user account and click on Next.


After making a new user account, switch to it and check if the problem is resolved.
If Word is working properly, you might have to continue using the new user account if you don’t manage to find another working solution.
How do I fix Microsoft Word 2013 issues?
1. Set Word to Power Saving mode
Users reported Word 2013 being set to High-Performance mode surely causes functionality issues.
So go to your switchable graphics control panel and set Word 2013 to work in Power Savings mode. After doing that, try to run Word and check if the problem is resolved.
2. Check your graphics card driver
This issue can sometimes appear due to problems with your graphics card driver. Users reported that they had problems with Nvidia drivers, and they fixed them by renaming the NVWGF2UM.DLL to NVWGF2UM.old.
Renaming the driver files isn’t the best solution, especially since it’s hard to find the problematic driver file.
So we advise you to update your graphics card driver and check if that solves the issue. If the problem still persists, you might want to remove your driver and use the default driver from Microsoft.
Solution 3 – Disable your dedicated graphics card
Many laptops and some desktop computers have both integrated and dedicated graphics cards. According to users, they experienced Microsoft Word has stopped working error because Word 2013 wasn’t compatible with their AMD graphics card.
To fix this problem, you need to temporarily disable the dedicated graphics card from the switchable graphics menu. After doing that, try to start Word 2013 and check if the problem is resolved. If the issue is fixed, you’ll need to download the latest drivers for your dedicated graphics card and check if that solves the problem.
4. Disable Hardware Acceleration
- Open any Office application.
- Select File / Options / Advanced.
- Locate the Hardware Acceleration option and disable it.
- After doing that, try to start Word 2013 again.
If you can’t open Word 2013 at all, you can disable hardware acceleration using Registry Editor. To do that, follow these steps:
- Open Registry Editor.
- In the left pane navigate to this key:
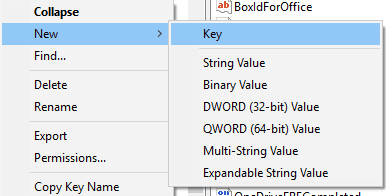
HKEY_CURRENT_USERSoftwareMicrosoftOffice15.0Common - Right-click the Common key and choose New > Key from the menu.

- Enter Graphics as the name of the new key.
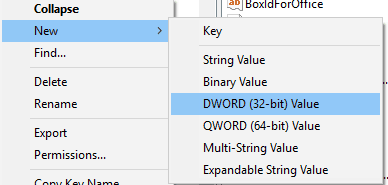
- Now right click Graphics key and select New / DWORD (32-bit) Value. Name the new value DisableHardwareAcceleration.

- Double click DisableHardwareAcceleration value and set its Value data to 1. Click OK to save changes.
- Close the Registry Editor and check if the problem is resolved.
We have to mention that modifying the registry comes with certain risks, so we strongly advise you to create a backup of your registry before making any changes.
Hardware acceleration can be useful to achieve maximum performance with certain apps, but it seems that with Word 2013, there’s an opposite effect.
5. Delete any add-in leftover files
Sometimes when you delete a certain add-in, its files might remain in the Office Startup folder.
Users reported that this is what happened with the Mendeley add-in after they removed it.
Keep in mind that almost any leftover file from add-ins can cause this problem to appear, so be sure to check the Office Startup folder.
We already explained how to enter the Office Startup folder in one of our previous solutions, so be sure to check that solution for detailed instructions.
How do I fix Microsoft Word 2010 issues?
Users reported issues with the Bluetooth add-in in Office 2013 and Office 2010. If you can’t disable the Bluetooth add-in, you might have to uninstall the Bluetooth driver or update it.
If you use Bluetooth frequently and you don’t want to uninstall the driver, you might be able to fix the problem by renaming two files.
On this note, users suggested renaming btmoffice.dll and btmofficea.dll. You can simply add .bak and the end of the file name to safely rename your files.
To find the files easier, use the search bar in File Explorer.
So these were our solutions to get Work running again. If you need to further investigate how to repair a Word document, we’ve got a dedicated article specifically on this topic.
If any of our recommendations worked for you, we’d like to hear that, so please use the comments sections below.