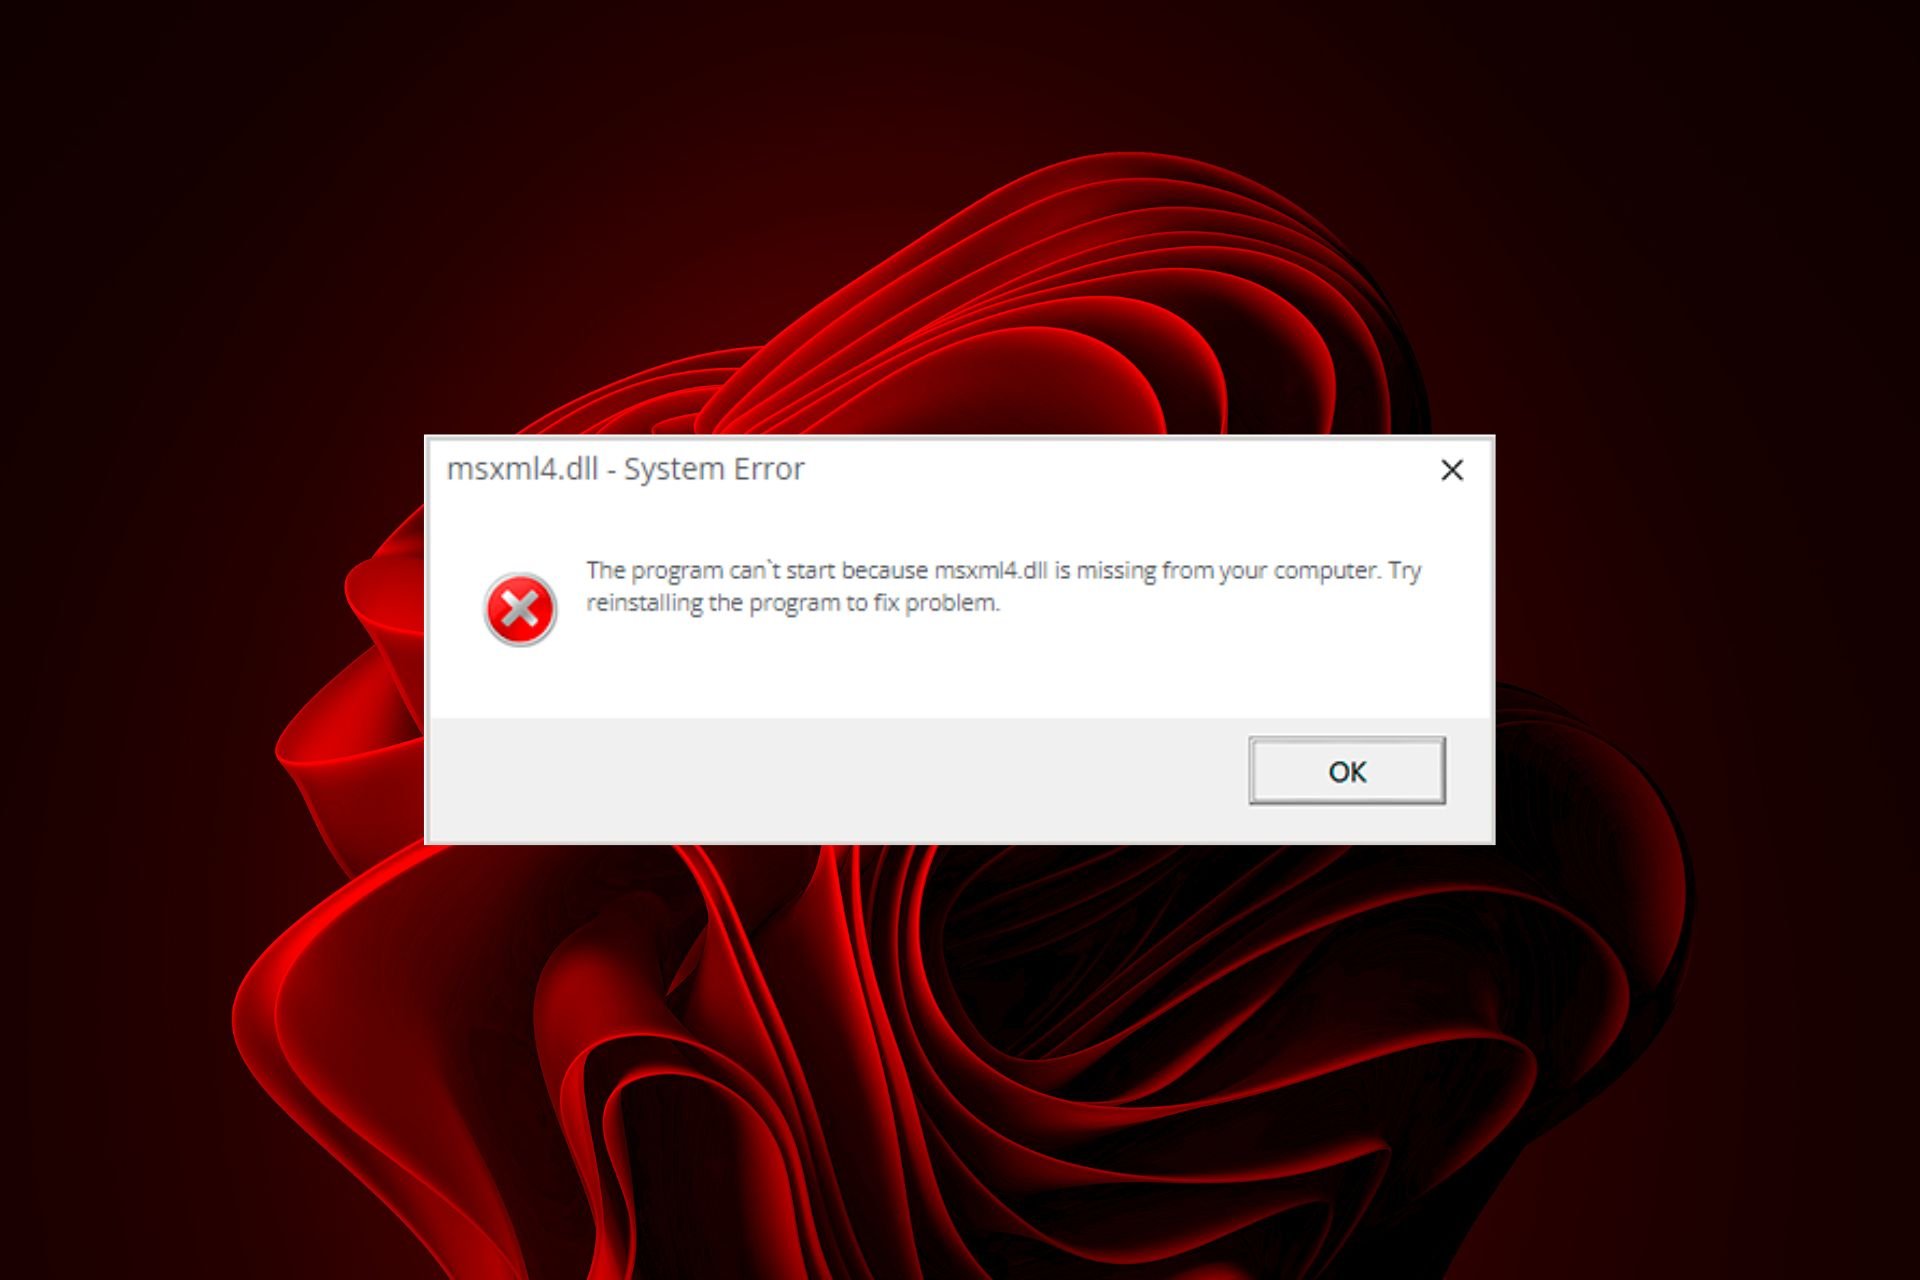
OccidentAcrident.dll startup error in Windows 10/11 [Fixed]
Following our solutions listed below will surely solve your issue
![]() 6 min. read
6 min. read
![]() Updated on
Updated on
Share this article

Improve this guide
Read our disclosure page to find out how can you help Windows Report sustain the editorial team Read more
Key notes
- The OccidentAcrident.dll error message occurs due to a corrupt or missing file in your system.
- Using a specialized tool will easily get rid of this error message and get your system up and running again.
- Try manually registering using our method and see if you still get the OccidentAcrident.dll error message on Windows 10.

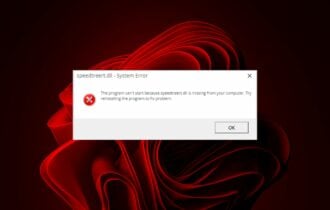
When Windows starts it loads a bunch of system DDLs and will throw an error message if there was an issue with any one of them.
The OccidentAcrident.dll startup error, as the name implies, is an error you’ll face on startup. The most common way you’ll receive this error is after upgrading to Windows 10 or installing some program.
How to fix the OccidentAcrident.dll startup error?
1. Use a third-party tool
If you wish to restore important files to your PC, a specialized repair tool will get the job done in no time. This type of software is packed with cleaning features, and it can also restore corrupted system files.
These tools may correct faulty messages and give useful PC repairs whenever they are required. When you boot your computer and encounter the OccidentAcrident.dll startup problem, they may repair and rebuild the Windows operating system.
They also can repair and replace DLL files. That’s why we recommend utilizing a third-party program that can automatically analyze your device for corrupted or damaged files and then repair them to restore stable functioning.
2. Use Autoruns
Use Autoruns to delete entries of missing files
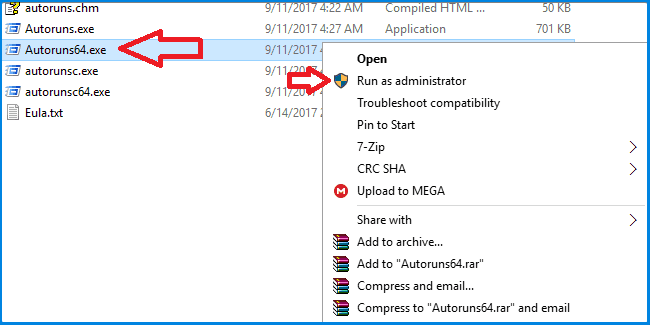
- Download Autoruns.
- Autoruns will download in the form of a zip.
- If you have 32-bit Windows, you should right-click on Autoruns.exe, or you should right-click on Autoruns64.exe if you have a 64-bit Windows.
- Click Run as an administrator after right-clicking on the file.

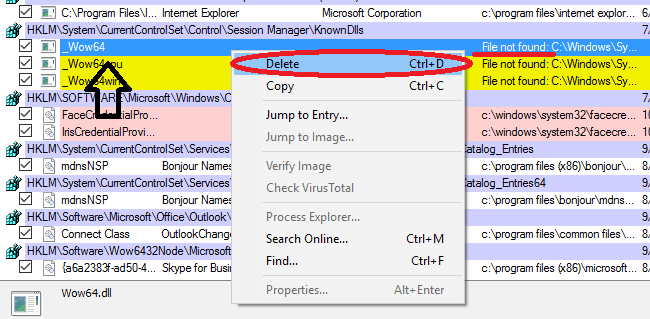
- After Autoruns opens, locate the entries with a yellow color and an Image Path that begins with File not found. This signifies that there is a rule that specifies running a certain program at startup but the file that is supposed to be executed is not found; those files could contribute and relate to the error you are facing.
- On finding any such entry, right-click on it and choose delete from the drop-down menu.

- Double-check that you’ve deleted all the entries and then restart the computer, and you should be good to go.
As mentioned above, this is a startup problem. That’s why this program is immensely useful. It lets you look at what processes run at startup, when built-in Windows programs start, and how they are configured.
It is basically a one-stop shop for anything related to Windows startup. We’ll see how we can use Autoruns to fix this problem.
Note: You should create a system restore point because we are treading dangerous grounds. If you don’t know how to do it, you can follow our tutorial.
Use Autorun to disable third-party entries
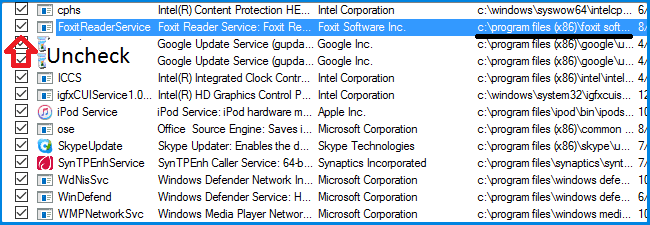
- Start Autoruns with administrator privilege.
- Examine whether the publisher of an entry is Microsoft Corporation or not.
- If it has a third party publisher, uncheck the entry and restart your computer.

- If the problem still persists, that means that application wasn’t the problem, and you should enable it again.
- Repeat step 1-4 for all the third party entries one by one. If you didn’t face the error after disabling a certain program, most likely, it is the culprit.
Note: This is a tedious method that will involve you restarting your computer a dozen times so we recommend that you try all the other options before this one.
3. Manually register with the Microsoft Register Server
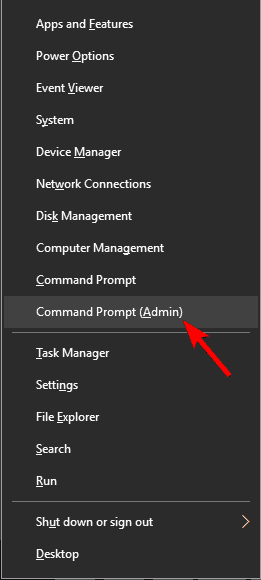
- Press Windows Key + X and choose Command Prompt (Admin) or PowerShell (Admin).

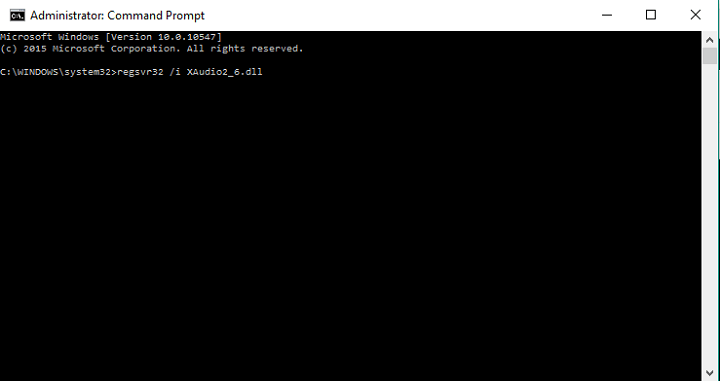
- Enter the following line into the Command Prompt, and press Enter:
regsvr32 /u XAudio2_6.dll(this command will un-register the file)
- Now Enter this command, and press Enter:
regsvr32 /i XAudio2_6.dll(this will register the file again)
- Close the Command Prompt, and try to open the game associated with XAudio2_6.dll again.

Maybe XAudio2_6.dll is present on your computer, but it’s just not registered. In most cases it (and all other .dll files) should be registered automatically, but in some cases, there could be complications.
Therefore, you can try to register this file on your own and see if there are any improvements. Follow the steps above to do so. If this does not solve your issue, move to the next solution.
4. Use the System Restore
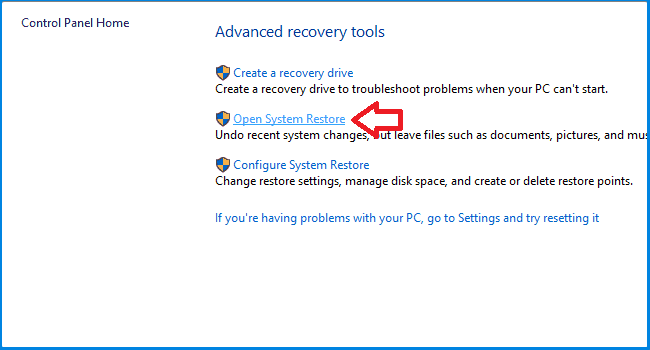
- Right-click on the Start button and select Control Panel.
- Open Recovery by searching for it.
- Click on Open System Restore.

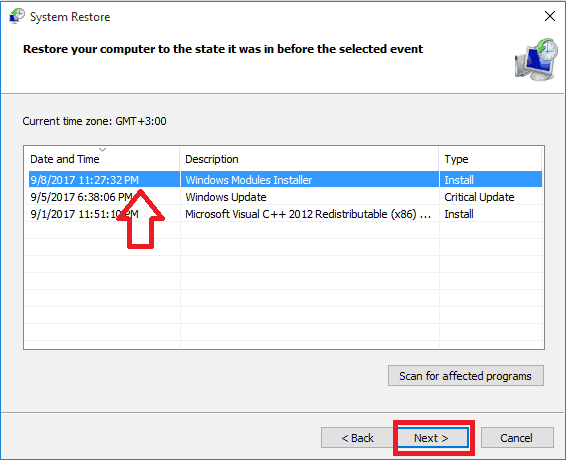
- Click Next and you’ll see a list of restore points. The best restore point would be one that is recent and predates the error.
- Select the restore point and click Next. Windows will show you a list of hard drives that will be affected.
- Click Finish to begin the restoration process.

If you’ve started getting this error recently, you can restore your computer to a prior state using System Restore. The only hurdle would be that there must be a restore point dated before the error that you can go back to.
Thankfully, Windows creates restore points when it updates your system, and many programs, like Office and 3ds Max, automatically create restore points during their installation.
5. Use the Windows installation media
Reset your computer using an installation media
- Connect the installation media to your computer and then restart it.
- Boot from the installation disc or USB. How you do this depends on the manufacturer.
- Starting the installation, choose the language you prefer and click Next.
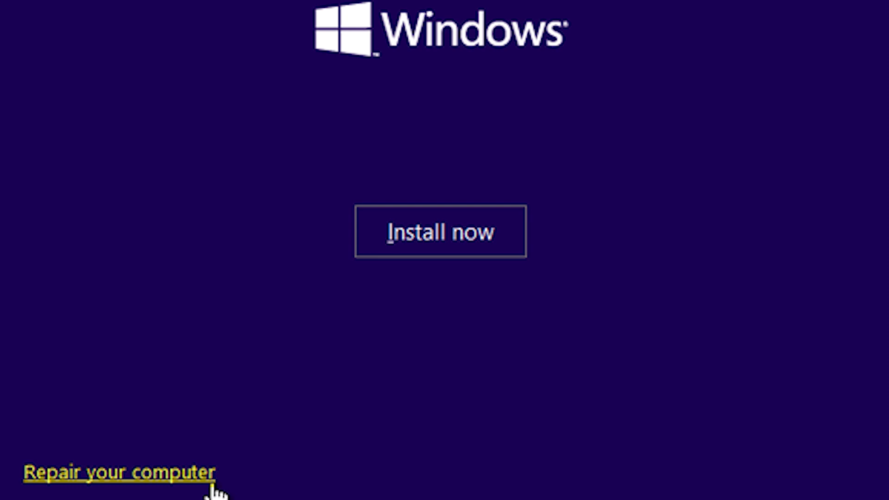
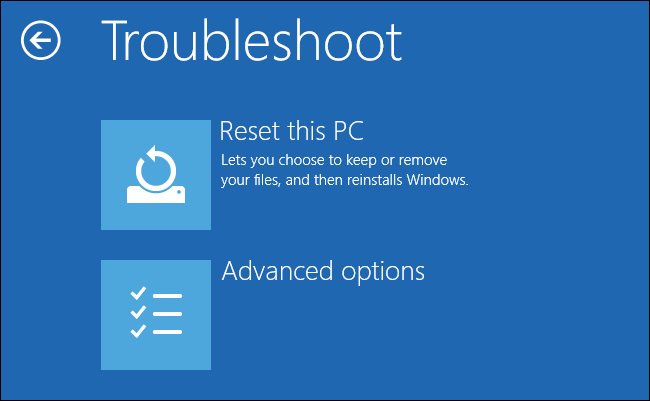
- Choose Repair your computer, then click Troubleshoot.

- Finally, select Reset this PC. This should reset your PC and solve your problem.

You can reset your computer to its default state. This will remove all of the installed applications and restore all the settings, but lets you keep your files if you choose to.
Reinstall Windows
Reinstalling Windows will delete everything, including applications; updates; drivers; and personal files, so you should think it through.
If you are sure, then you can follow the detailed instructions provided in this article to do it.
Using installation media gives you two new ways to recover your system. Before we start, naturally, you must have either a disc or USB with Windows installation files on it.
If you don’t have one, don’t worry, we’ve got you covered. You can learn how to easily create a bootable Windows USB or disc by following the instructions in this useful article.
OccidentAcrident.dll error is a DLL error and those are generally quite hard to fix. We hope these methods have helped you get rid of it.
Use the comments section below to tell us how your efforts went, if there has been another DLL error you faced in the past, and if we’ve forgotten to mention an easier way to get rid of this error.