RAM is Not Detected? 4 Ways to Recognize it
Ensure that the RAM is fully compatible with your system
![]() 3 min. read
3 min. read
![]() Updated on
Updated on
Share this article

Improve this guide
Read our disclosure page to find out how can you help Windows Report sustain the editorial team Read more
Key notes
- If RAM is not detected in bios or by your motherboard, make sure that it's compatible with your system.
- Adjusting the memory settings on your PC can sometimes help with this error message.
Many users reported that new RAM is not detected on their PC, which can be problematic. RAM is a basic component of any computer, and your PC can’t work without it.
To fix this issue, first, you need to check your RAM type and make sure that you’re using compatible modules.
Fixing this issue isn’t as hard as you think, and today we’re going to show you how to fix it properly.
Why is my RAM not detected?
- You have exceeded your operating system’s RAM limit.
- Your motherboard can’t handle more RAM memory.
- The memory isn’t compatible with your motherboard.
- The maximum RAM limit isn’t properly set on your PC.
What can I do if my RAM is not detected?
1. Check Windows OS RAM limits
- Press the Cortana button on the taskbar.
- Enter the keyword system in the search box.
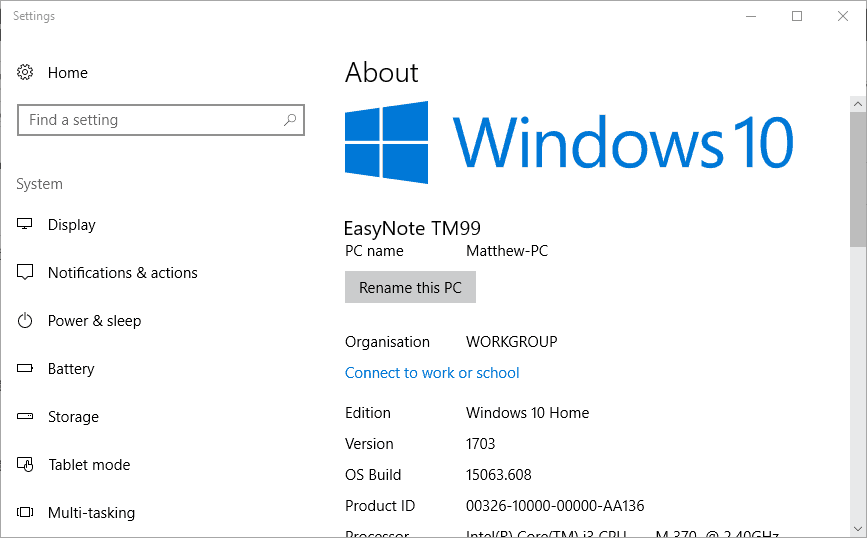
- Select to open the System tab shown in the snapshot directly below.

- Windows 10 users can also select About your PC to open further OS details as below.

- The listed system type specification tells you whether your platform is 32 or 64-bit. Also, note the Installed RAM spec that highlights the usable RAM amount.

You’ll need to upgrade a 32-bit platform to a 64-bit OS to ensure that all your system’s RAM is accepted. A 64-bit Windows 10 or 8 upgrade will ensure at least 128 GB RAM is accepted.
The Pro edition of Win 10 supports up to 2 TB (terabytes) of RAM. Note that your desktop or laptop will also need to 64-bit CPU to upgrade to a 64-bit OS.
The 64-bit Windows 7 platforms have lower RAM limits. The 64-bit Windows 7 Basic accepts 8 GB RAM only. You can add up to 16 GB RAM to Win 7 Premium.
2. Check Motherboard RAM restrictions
- Check your motherboard manual.
- Alternatively, enter the motherboard’s model number in a search engine to find a manufacturer support page for it.
- Then you can open a page on the manufacturer’s website that might provide further details pertaining to how much RAM your motherboard supports.
This is always a good rule to follow, with any hardware, so always make sure that everything is fully compatible.
3. Check RAM compatibility
- Check out this web tool with which you can find compatible upgrades.
- Enter your model and check the compatibility list.

- If it’s not compatible, remove the module and return it to the vendor for a replacement.

4. Adjust the maximum RAM setting
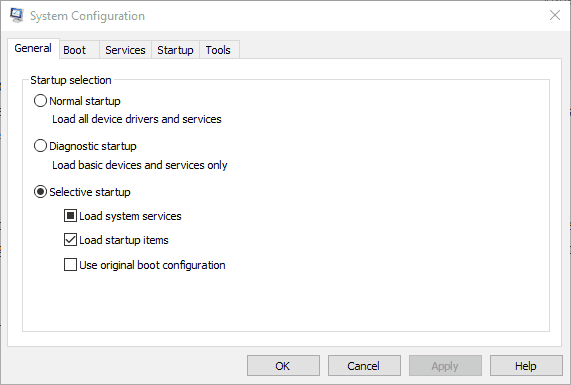
- Press the Windows key + R hotkey and enter msconfig in Run’s text box.
- Press the OK button to open the MSConfig window in the snapshot below.

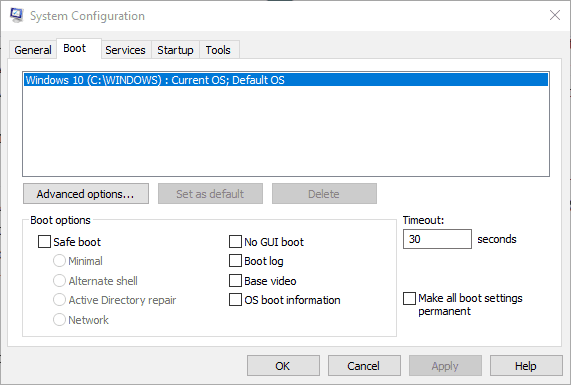
- Select the Boot tab on the System Configuration window.
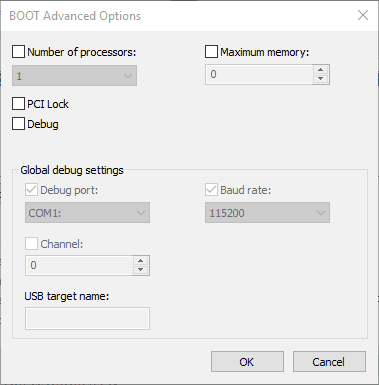
- Press the Advanced options button to open BOOT Advanced Options as shown below.

- Deselect the Maximum memory option there if it’s selected.
- Click OK to close the BOOT Advanced Options window.
- Press the Apply button, and restart the Windows OS.
We hope these steps helped you with the RAM not detected issue on your PC. Maybe now Windows will recognize all your laptop’s or desktop’s RAM.
Just make sure you check your Windows and motherboard system specifications before adding another RAM module to a desktop.
If the problem is still there, we have a great guide on what to do if the PC is not using all RAM, so be sure to check it out.