Fix: PC won't exit Sleep Mode
![]() 7 min. read
7 min. read
![]() Updated on
Updated on
Share this article

Improve this guide
Read our disclosure page to find out how can you help Windows Report sustain the editorial team Read more
Maintaining your power consumption when not using PC is the oldest trait of Microsoft-based platforms. There are two main low-power modes on your Windows PC: Sleep and Hibernate. The third is introduced with Windows Vista and it is called Hybrid Sleep. Hybrid Sleep takes benefits of both options.
While the sleep mode extremely useful for preserving energy and good state of PC hardware, it appears that there are some issues. More than a few users reported that after PC is put to ‘sleep’, they had troubles starting it back. A problem mostly occurs on laptops with the automatic sleep option enabled, albeit, there are some cases of this problem on the desktop configurations.
In case you’re experiencing this issue, we’ve enlisted a few possible solutions that are worth trying.
What to do if PC won’t exit from Sleep Mode
Table of contents:
- Change Sleep options for mouse and keyboard
- Change your Power Settings from Sleep to Hibernate
- Enable the Balanced power plan
- Turn off Hibernation
- Update graphics card driver
- Run the Power Troubleshooter
- Enable Hybrid Sleep
- Additional Tips
Fix – Unable to exit Sleep Mode in Windows 10
Solution 1 – Change Sleep options for mouse and keyboard
Mouse and keyboard are the only connection to your PC’s interface. On some occasions, they are the reason for malfunctioning Sleep mode. To make sure mouse and keyboard are not involved with the issue, follow this instruction (this is the case with USB devices, PS/2 ones are not included):
- In Windows Search write Device Manager
- Select and in the list of devices, find your mouse and keyboard.
- Bring out the drop-down list and select properties for each respectively.
- In the Power Managment card, check ”Allow the the computer to turn off the device to preserve power” box.

- Then check ”Allow the device to wake the computer” box.

This will solve the issue if the reason is somehow related to mouse and keyboard. If mouse and keyboard are not the cause, try some of the solutions listed below.
Solution 2 – Change your Power Settings from Sleep to Hibernate
In some cases, Hibernate option is a great substitution for malfunctioning Sleep. So, we ‘ll show you the way to completely exclude Sleep option and try with Hibernate. We presented it step-by-step.
- In Search Windows bar type Power.
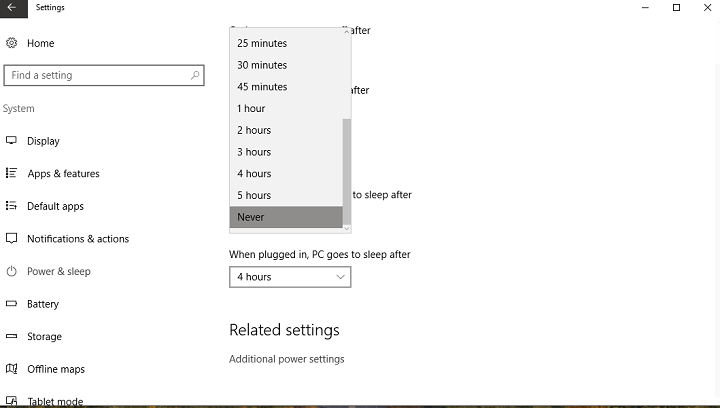
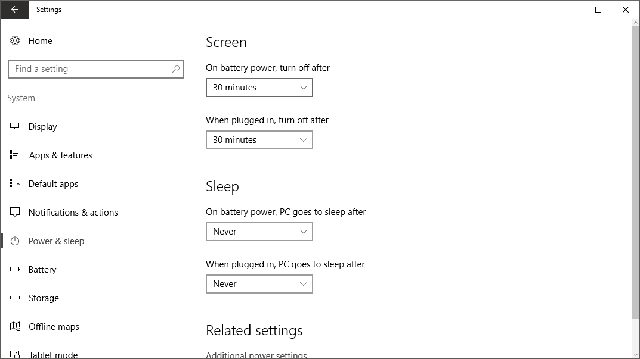
- Open Power & Sleep.
- In the Sleep section select Never.

- Once you’ve done that, open Additional Power Settings.
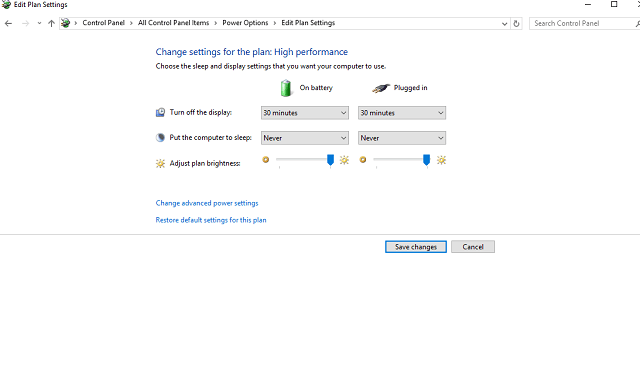
- Select your active Power plan and enter Change plan settings.
- Then click Change advanced power settings.
- In list find Sleep option and expand it.
- Make sure Sleep is set to never and select the preferred time for Hibernate.

- Choose OK to save settings.
This should make your PC go into hibernation instead in sleep mode.
If you want to place it manually and the Hibernate option is missing from the Start Power Button, do as follow.
- In Search Windows bar type Power.
- Open Power & Sleep.
- Choose Additional Power Settings.
- On the left click Choose what the power buttons do.
- Switch the Sleep button option from Sleep to Hibernate.
- Click Change settings that are currently unavailable.
- Uncheck Sleep and check Hibernate.
- Save changes.
This will add the Hibernate option to the Start Power Button.
Solution 3 – Update graphics card driver
Some users report that an outdated graphics card driver can cause this problem. So, make sure to keep your drivers up to date. If you’re not sure how to update your drivers, follow these instructions:
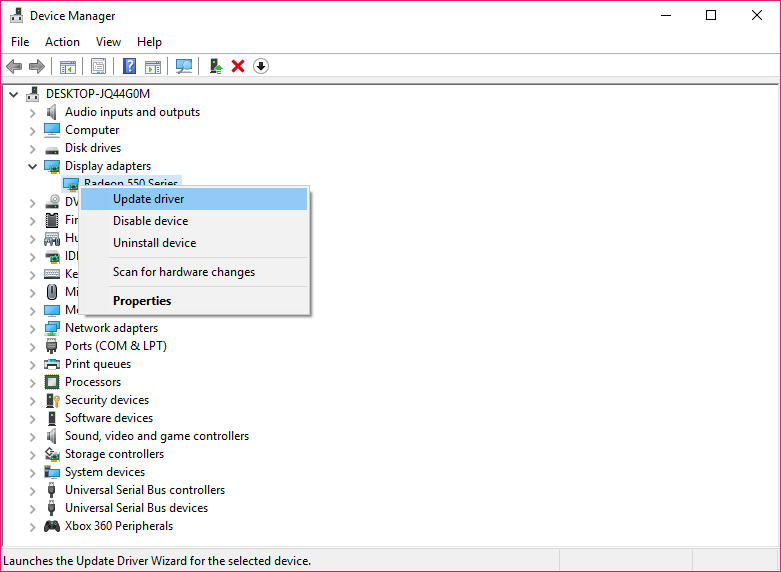
- Go to Search, type devicm, and open Device Manager.
- Expand Display Adapters.
- Right-click your graphics card, and go to Update driver.

- Follow further instructions and let the wizard find the driver update.
- Finish the process and restart your computer.
Update drivers automatically
If you don’t want the hassle of searching for drivers on your own, you can use a tool that will do this for you automatically. Of course, as you’re not able to connect to the internet at the moment, this tool won’t be useful. However, once you get online, it will help you to keep all your drivers up to date, so you won’t be in this situation anymore.
A dedicated third-party tool will help you update drivers automatically and prevent PC damage caused by installing the wrong driver versions. After several tests, our team concluded that this is the best-automatized solution.
Solution 4 – Enable the Balanced power plan
Your power plan has a lot to do with the way your computer turns off and goes to sleep. So, it’s advisable to use the Balanced option for the most optimal results. Here’s how to set the Balanced power plan:
- Go to Search, type cmd, and open Command Prompt as Administrator.
- Type in the following command and press Enter: powercfg -restoredefaultschemes.
- Reboot your PC
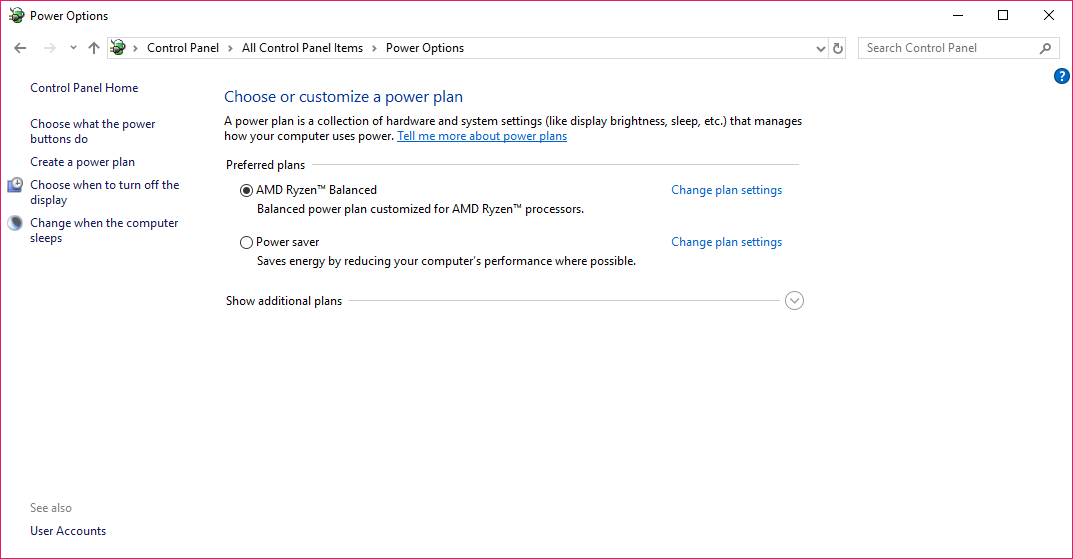
- When your computer boots, open the Control Panel.
- In the upper right of the window showed right next to “View by:” we need to select “Small icons”
- Go to Power options
- In the new window, double-check if the Balanced option is checked.

Solution 5 – Turn off Hibernation
If your computer is set to hibernate instead of going to sleep, you may have problems waking it up. So, make sure to turn off the Hibernation mode:
- Go to Search, type cmd, and open Command Prompt as Administrator.
- Type “powercfg /h off”, this will turn off the Hibernation feature on your PC – note that if you are on a laptop, this means when the battery runs out you might lose your opened work, so keep that in mind.
- After running the command – it will give you no output if it worked – simply restart your PC.
Solution 6 – Run the Power Troubleshooter
If none of the previous solutions resolved the problem, we’re going to try Windows 10’s built-in troubleshooting tool. This tool can be used for resolving all sorts of issues, including power problems. So, it might be helpful in this case.
Here’s how to run Windows 10’s built-in troubleshooter:
- Go to Settings.
- Head over to Updates & Security > Troubleshoot.
- Select Power, and go to Run the Troubleshooter.

- Follow further on-screen instructions and let the process finish.
- Restart your computer.

Solution 7 – Enable Hybrid Sleep
Some users also reported that the Hybrid Sleep option sometimes causes problems with waking up. So, we’re going to disable it. Here’s how:
- Right-click the Battery icon in the notification area and open Power options.
- Click “Change plan settings” on your active power plan.
- Click Change advanced power settings.
- Expand Sleep and then Allow Hybrid sleep.
- Turn Hybrid sleep on for both Battery and AC and confirm changes.
Additional Tips
There are a few more options that you should check out, just to be sure that your problem is not caused by them:
- Hardware, especially monitor. Faulty monitor can be a cause of your Sleep mode malfunctioning
- Update your BIOS. Outdated BIOS can be a problem, especially when updating an older machine to a Windows 10.
- Update or reinstall your GPU drivers. Faulty drivers will make the confusion in the system.
- If you are using a laptop, try disabling Intel Rapid Start Technology (IRST) in your BIOS Power settings. Windows 10 Deep sleep option is not available for older configurations and may cause issues.
We hope these tips will help you to overcome your problems. If you are having some other solutions for this problem, please inform us in the comments section.
RELATED STORIES YOU NEED TO CHECK OUT: