How to Speed up Slow Shutdown in Windows 10/7
![]() 4 min. read
4 min. read
![]() Updated on
Updated on
Share this article

Improve this guide
Read our disclosure page to find out how can you help Windows Report sustain the editorial team Read more

If you are wondering how you can speed up the shutdown process in Windows 10, then this is the right tutorial for you. Luckily for us, the slow shutdown that you encountered in the operating system can be solved by modifying some Registry items. So, follow the steps listed below to find out how to speed up the slow shutdown in Windows 10. This will only take you a couple of minutes of your time.
When you try to launch the shutdown process, the Windows 10 operating system will have to wait for the running applications to close first. So, this is mainly the one issue that is taking so much time to process. Also, please create a back up copy of all your important files, folders and applications because there is always the possibility to damage the operating system if you modify something wrong in the system registries.
How to fix slow shutdown in Windows 10/7
1. Change WaitToKillServiceTimeout value
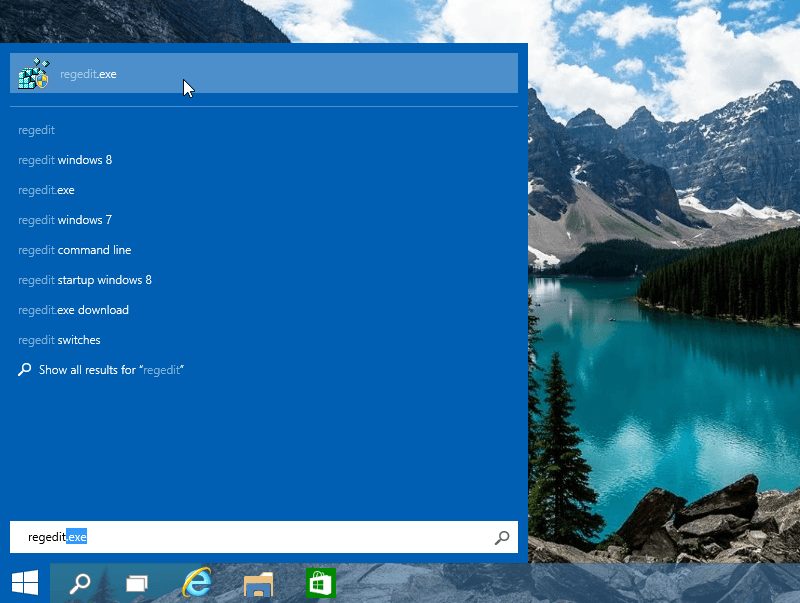
- Press and hold the “Windows” button and the “R” button.
- Now you should have the “Run” window in front of you.
- In the run dialog box write the following: “regedit” without the quotes.
- Press the Enter button on the keyboard.
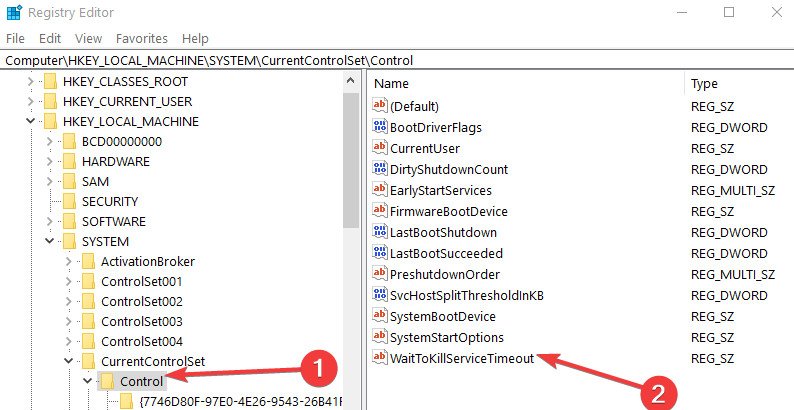
Note: If you are prompted by a user account control window, left click or tap on the “Yes” button to proceed. - On the left side panel double, click or double tap on the “HKEY_LOCAL_MACHINE” folder.
- From the “HKEY_LOCAL_MACHINE” folder, find and double click to open the “SYSTEM” folder.
- Within the “SYSTEM” folder, find and open the “CurrentControlSet” folder.
- Now in the “CurrentControlSet”, find and double click to open the “Control” folder.
- On the right side panel, search for the “WaitToKillServiceTimeout” REG_SZ.

- After you found it, double click or double tap on it to open.
- Under the Value Data field, you will need to modify that from “5000” to “1000”.
Note: This value is the time in which an application will be shutdown by Windows if it has not closed yet. - Left click or tap on the “OK” button to save your changes.
- Now go on the left side panel again and double click or double tap on the “HKEY_CURRENT_USER” folder to open it.
- From the “HKEY_CURRENT_USER” folder, find and open the “Control Panel” folder.
- In the “Control Panel” folder, you should find and open the “Desktop” folder.
- On the right side panel, you will have to created 2 “REG_SZ” values.
- Name one of the “HungAppTimeout” without the quotes.
- Name the other REG_SZ as “WaitToKillAppTimeout” without the quotes.
- After you successfully created them, double click on “HungAppTimeout” first.
- In the value data field, you can lower the time it takes for an app to shutdown.
Note: Keep in mind that if you drastically decrease the time for this REG_SZ file then the application might fail to save your changes properly. So, if you do decrease the time, please make sure to save your changes in the apps you are running when you shutdown the Windows 10 device. - Double click or double tap to open “WaitToKillAppTimeout”.
- In the value data field, decrease the value as well but the minimum should be “1000” ms.
- After you made all your changes, close the Registry Editor window.
- Reboot your Windows 10 operating system.
- After the reboot is completed, you can try out your shutdown feature to see if the timing has improved.
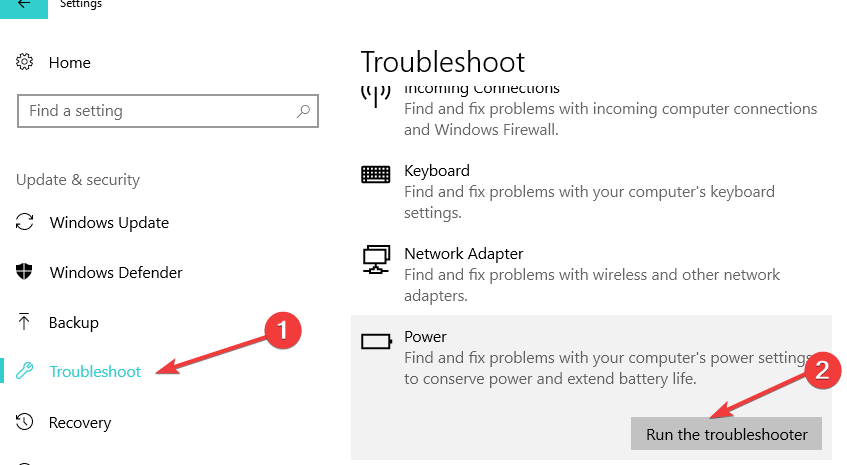
2. Run the Power Troubleshooter
Your computer may take longer to shut down due to incorrect or incompatible power settings. You can quickly solve this problem by running the built-in Power Troubleshooter from the Settings page. So, navigate to Settings > Update & Security > Troubleshoot > select and run the troubleshooter as shown in the screenshot below.
3. Create a shutdown shortcut
If you know that you computer usually takes a few minutes to completely shutdown, you can also create a shutdown shortcut which will immediately shut down the system.
- Right-click on your desktop > select New > Shortcut (You’ll enter the specific command strings to make your new shortcut immediately shutdown your computer
- Type Shutdown.exe -s -t 00
And you are done. If you carefully followed the steps above, you have decreased the shutdown time of your Windows 10 operating system by the time your read this line. If you do run into any issues along the way,please write us in the comments section below and we will help you further as soon as possible.
RELATED STORIES TO CHECK OUT:
- How to schedule shutdowns in Windows 8, 8.1, 10
- Fix: Windows 10 Shutdown Button Not Working
- Fix: Laptop Won’t Shutdown in Windows 10
.