7 Quick Fixes for Windows 10 Stuck in Automatic Repair Loop
Surefire solutions to boot into your PC normally
![]() 5 min. read
5 min. read
![]() Updated on
Updated on
Share this article

Improve this guide
Read our disclosure page to find out how can you help Windows Report sustain the editorial team Read more
Key notes
- If Windows 10 is stuck in the Automatic Repair loop, it might be because of corrupt or broken system files.
- One easy yet effective solution to this problem is to fix your boot files and memory sectors.
- You can also solve this problem by repairing your system files in Safe Mode.
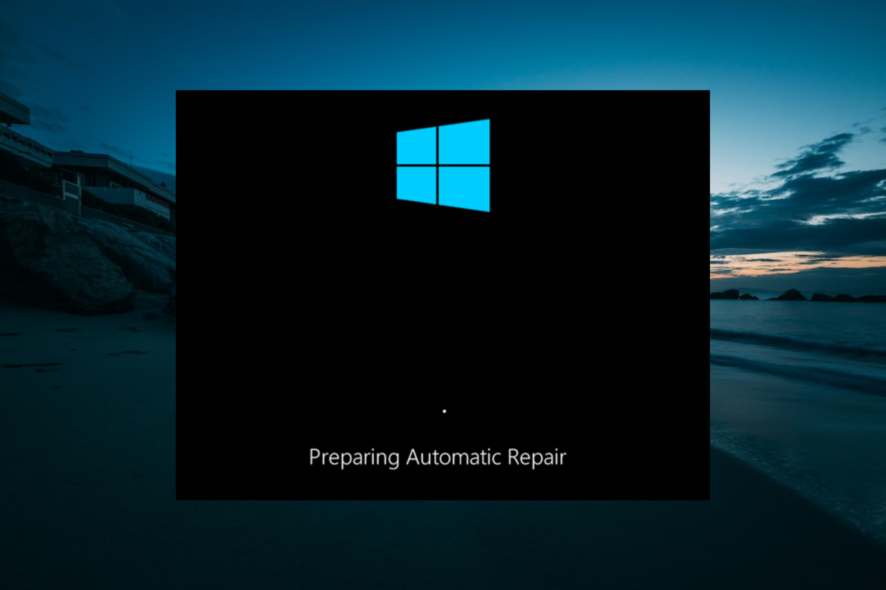
Windows 10 comes with a series of repair tools, with the Automatic Repair being one of the most effective. Unfortunately, many users are complaining that Windows 10 gets stuck in the Automatic Repair loop.
This can be frustrating as it prevents you from booting into your PC. Fortunately, it is not an issue that is impossible to fix, and we will show you to get past it in this guide.
What causes the automatic repair loop in Windows 10?
It is usually difficult to pinpoint the reason Windows 10 gets stuck in the Automatic Repair loop. However, when considered closely, you can trace the issue to one of the factors below:
- Corrupt system files: This is the most prominent cause of this issue. You can fix it quickly by repairing the broken system files in Safe Mode.
- Bad memory sectors: Sometimes, this issue might be down to faulty or corrupt memory sectors. Running the CHKDSK command should fix this quickly.
What to do if You Get Stuck on the Automatic Repair Loop on Windows 10
1. Disable Automatic Repair
- Power on your PC and press and hold the power button to force it to shut down. Repeat this thrice to launch the Advanced startup options. From here, proceed to Step 4.
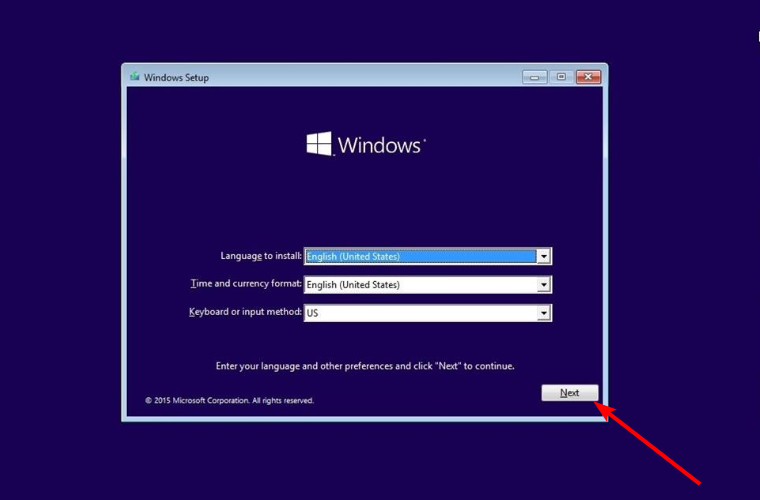
- If you can’t boot into the Advanced startup options, insert a bootable media creation tool into your PC, enter your language and other info and click Next.

- Now, click the Repair your computer option in the bottom left corner.

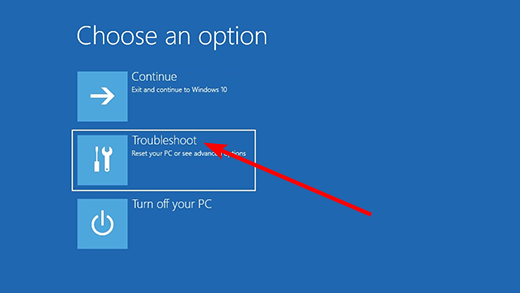
- Select the Troubleshoot option.

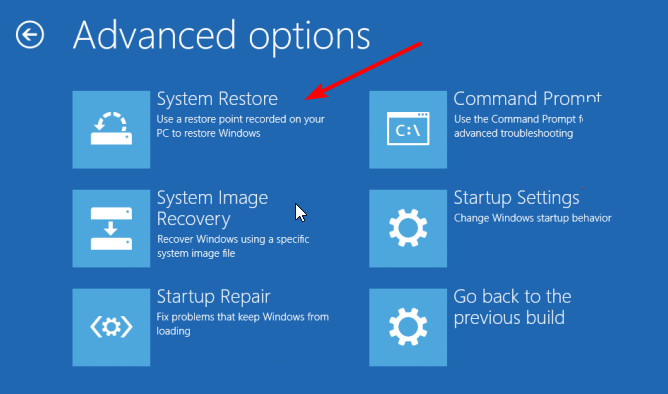
- Now, choose Advanced options.
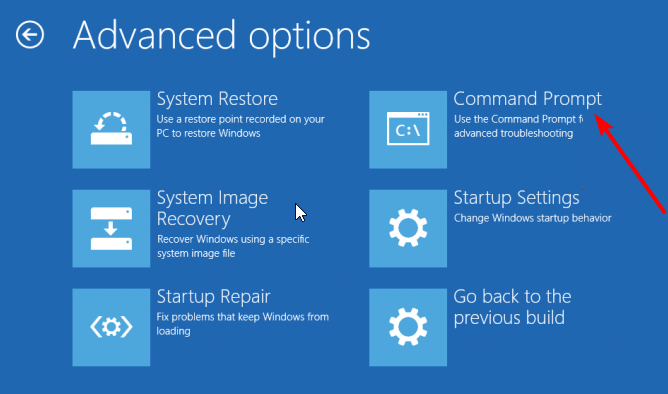
- Next, select the Command Prompt option.

- Type the command below and hit Enter:
bcdedit
- Check if the identifier option is set to {default} and recoveryenabled to Yes.
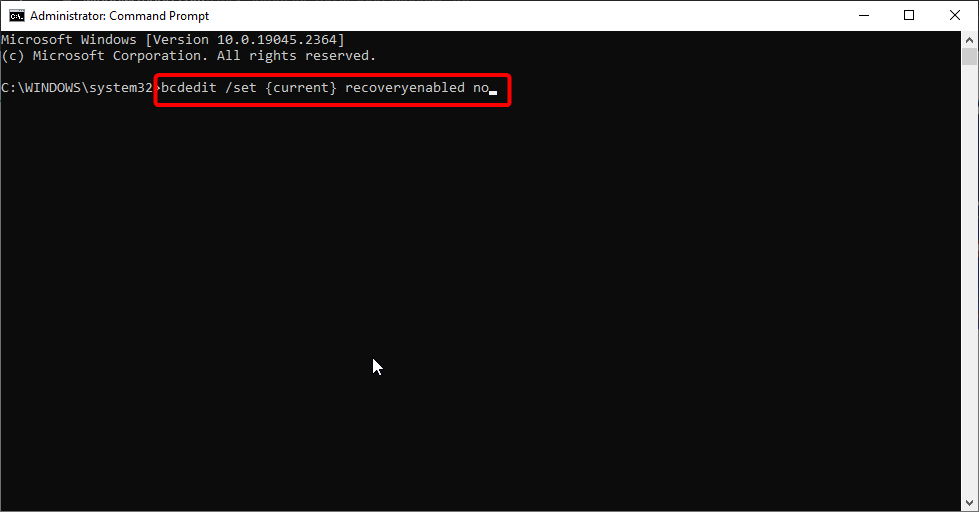
- Now, type the command below and press Enter:
bcdedit /set {default} recoveryenabled no - Finally, if the command above does not work, type the command below and hit Enter:
bcdedit /set {current} recoveryenabled no


The quickest way around this issue is to disable the Automatic Repair tool causing the problem. After running the last command on the list, close the Command Prompt window and restart your PC.
2. Repair boot files and memory sectors
- Repeat Steps 1 to 6 in Solution 1.
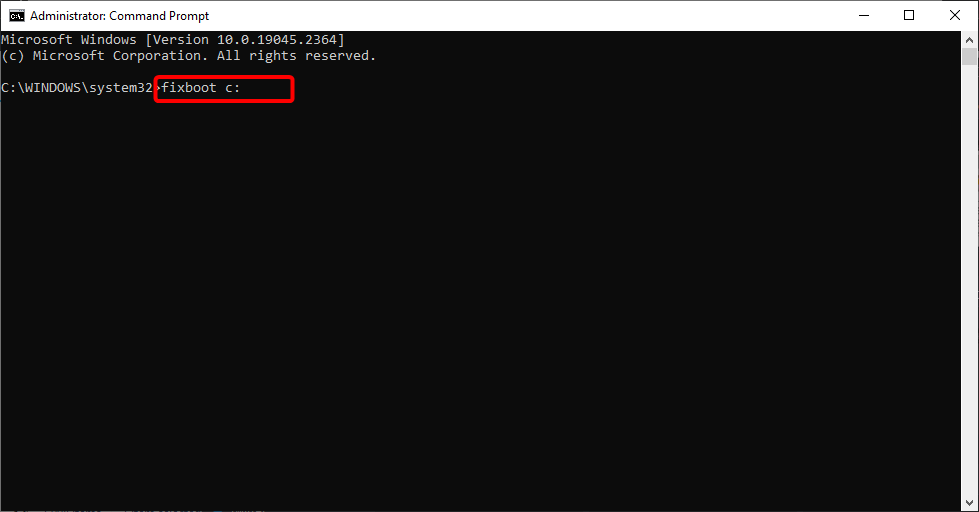
- Type the command below and press Enter:
fixboot c: - When the command finishes running, type the command below and hit Enter:
chkdsk c: /r - Finally, restart your PC.
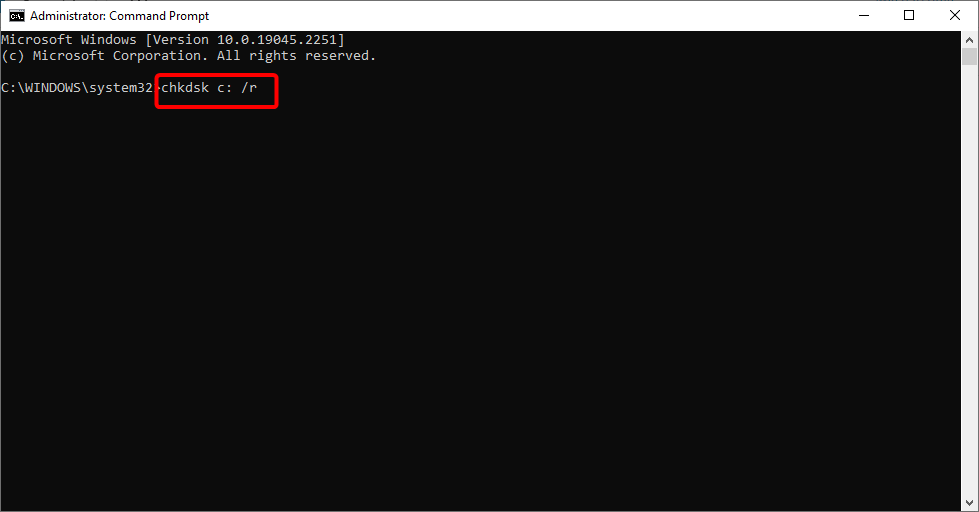
Since Windows 10 usually gets stuck in the Automatic Repair loop when you boot your PC, the problem might be caused by your boot files or hard disk. The solution is to repair these two important components and restart your PC.
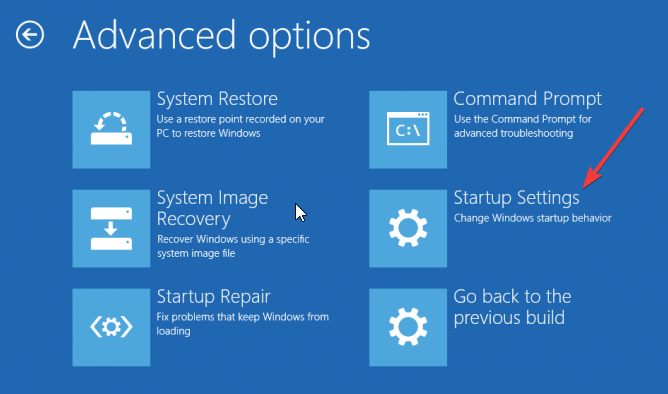
3. Repair system files in Safe Mode
- Repeat Steps 1 to 5 in Solution 1.
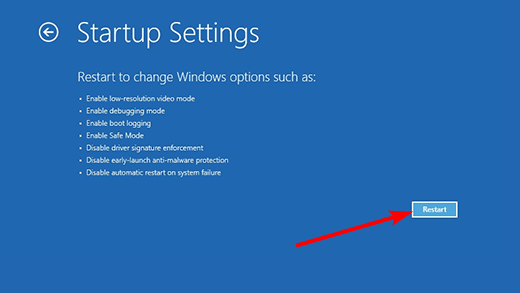
- Choose Startup Settings.
- Now, click the Restart button.
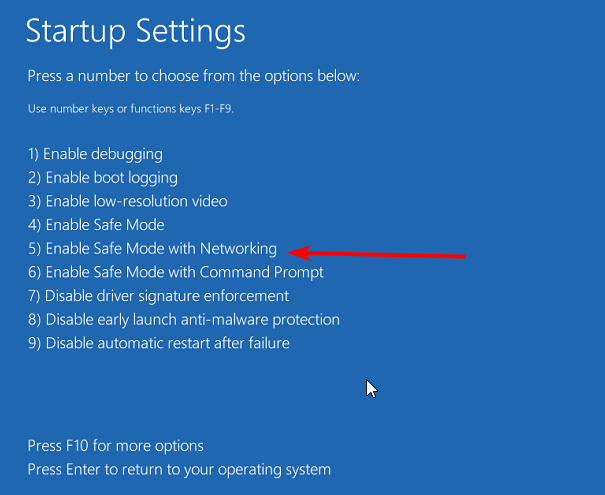
- When your PC restarts, press 5 or F5 to Enable Safe Mode with Networking.

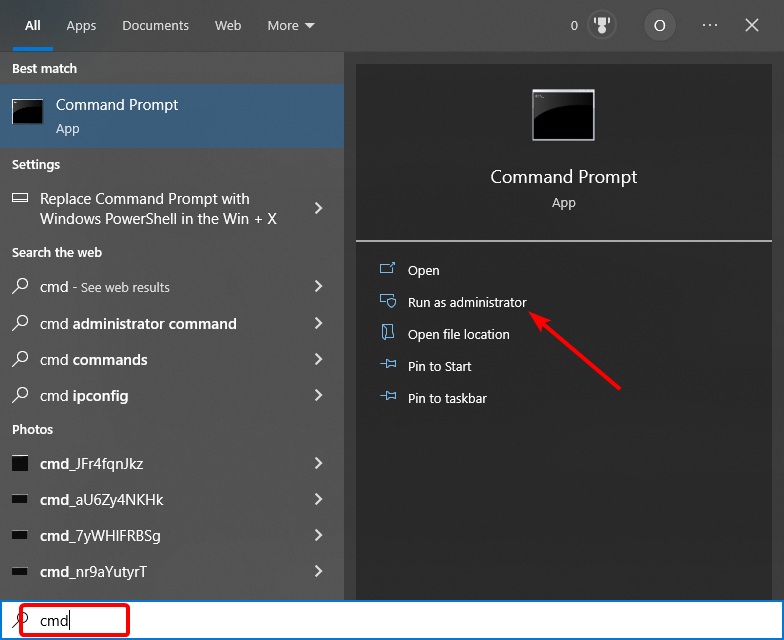
- Next, press the Windows key, type cmd, and click Run as administrator under Command Prompt.

- Type the command below and hit Enter:
DISM /Online /Cleanup-Image /RestoreHealth - Wait for the command to finish running, type the command below, and press Enter:
sfc/scannow - Finally, wait for the command to finish running and restart your computer.

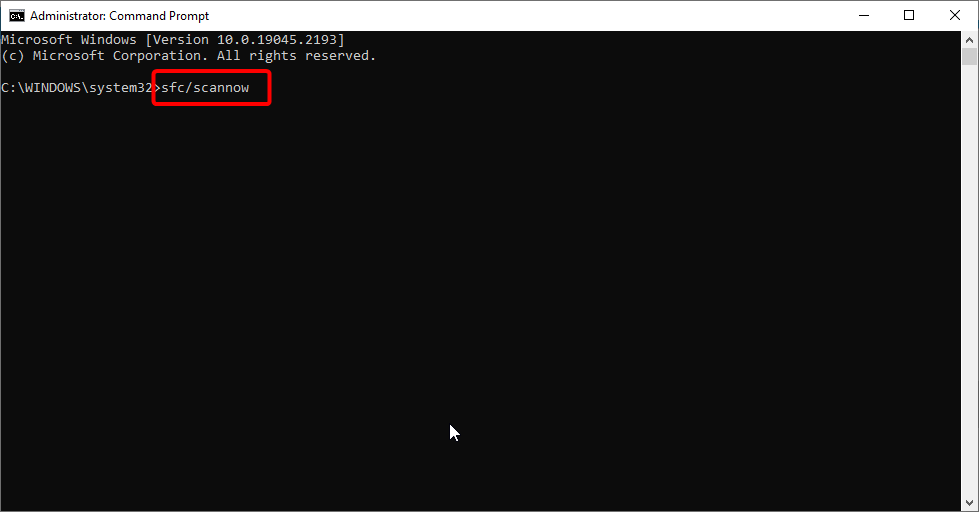
In some cases, Windows 10 gets stuck in the Automatic Repair loop because it encountered an issue and it is trying to fix itself. However, the problem worsens if the system image needed for the repair is also faulty.
This is where the DISM command comes in. It repairs and restores any faulty system image. On the other hand, the SFC command helps fix any other broken or corrupt system files.
4. Disable early launch anti-malware protection
- Repeat Steps 1 to 3 in Solution 3.
- Press 8 or F8 to Disable early launch anti-malware protection.
- Your PC should start normally if the feature is the cause of the issue.
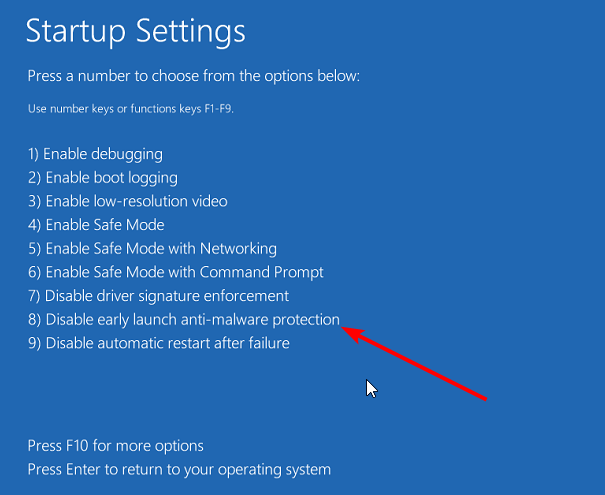
Windows 10 has a lot of protective features to keep your PC secure. One of them is the early launch of anti-malware protection.
But some users have found this feature to be why Windows 10 gets stuck in the Automatic Repair loop. Disabling the feature should fix this problem.
5. Restore the registry
- Repeat Steps 1 to 4 in Solution 1.
- Type the command below and hit Enter:
C:\Windows\System32\config\\rregback* C:\Windows\System32\config\ - When prompted to overwrite files, type All and hit Enter.
- Lastly, close Command Prompt and restart your PC.
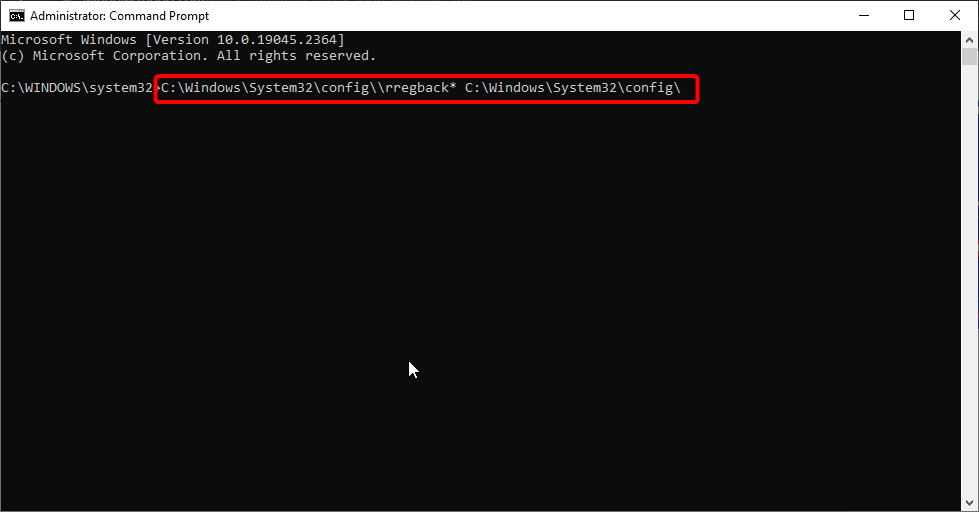
Another possible cause of this problem is a corrupt registry. The quickest way to make sure Windows 10 does get stuck in the Automatic Repair loop, in this case, is to restore the registry to default.
6. Perform a system restore
- Repeat Steps 1 to 5 in Solution 1.
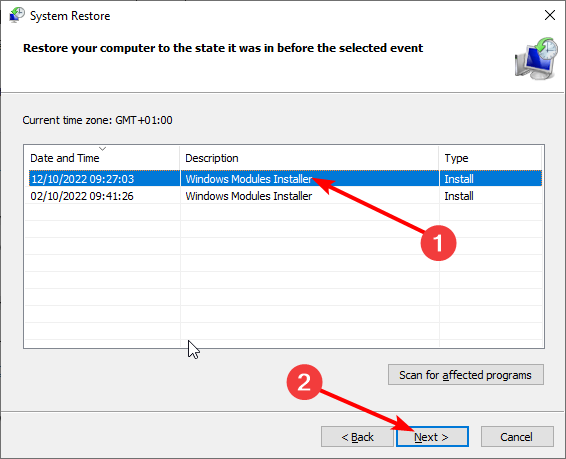
- Choose the System Restore option.
- Now, select your restore point and click the Next button.

- Finally, follow the onscreen instructions to complete the system restore.
If Windows 10 start getting stuck on the Automatic Repair loop after making some changes to your PC, the best thing to do is to perform a system restore. This will restore your PC to a point when it was working normally.
7. Reset your PC
- Boot into the Advanced startup options by restarting your PC thrice.
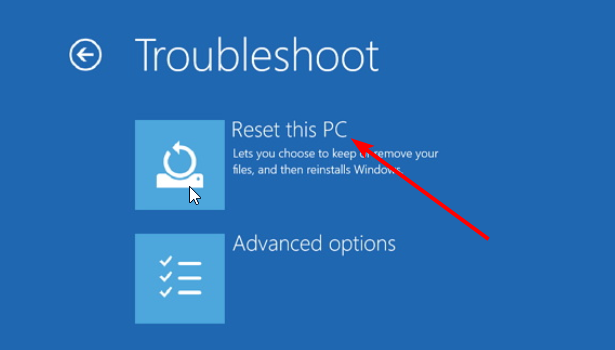
- Select the Troubleshoot option.
- Now, click the Reset this PC option.

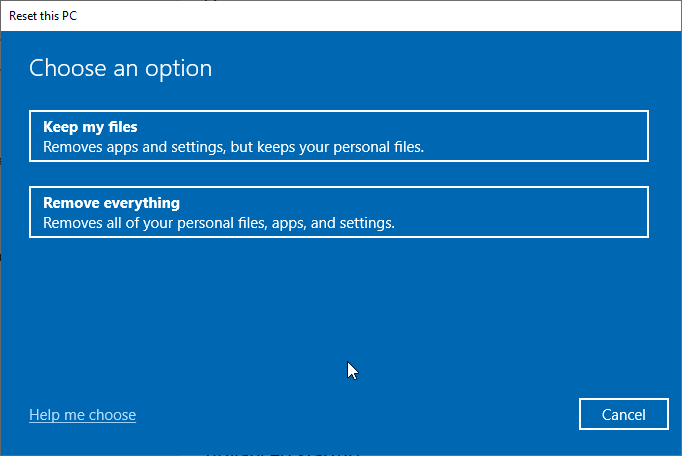
- Choose whether to keep your files or remove them.

- Finally, follow the onscreen instructions to complete the process.

If the solutions above fail to prevent Windows 10 from getting stuck in the Automatic Repair loop, you might have to reset your PC to default.
Fortunately, you have the option to keep your files. However, if you have a backup of your crucial files, it is advised to remove the files.
With this, we can conclude this article on how to fix the Windows 10 stuck in Automatic Repair loop issue. If you still can’t solve the problem after applying the fixes in this guide, you might need to perform a clean install of Windows 10.
Feel free to let us know in the comments below if you encountered any issues while applying the fixes in this guide.