System and Compressed Memory High Disk Usage [Fix]
Disabling the Prefetch service often does the trick
![]() 7 min. read
7 min. read
![]() Updated on
Updated on
Share this article

Improve this guide
Read our disclosure page to find out how can you help Windows Report sustain the editorial team Read more
If System and compressed memory cause high disk usage on your computer, look no further. In this article, we’ll show more than a couple of ways to solve this problem.
How can I fix System and Compressed Memory issues?
1. Check for memory leaks
We usually start our articles with easier solutions, but not this time. First, you should ensure there are no memory leaks in your system that might cause System and Compressed Memory high disk usage.
Since this can be a complicated and lengthy process, we’ll save some space for this article.
So, make sure to check out our article about memory leaks, where the whole problem is explained in details, including solutions, of course.
2. Set the paging file size for all drives back to automatic
The paging file size for all drives in Windows 10 is usually set to automatic. And that’s how it should be. However, there’s a chance that some external factor, like an update changes these settings. Or even you accidentally did.
If the paging file size is not set to automatic, that can lead to possible memory leaks and, you guessed it, high disk usage.
So, the obvious solution, in this case, is to set the paging file size back to automatic.
If you’re not sure how to do that, follow these instructions:
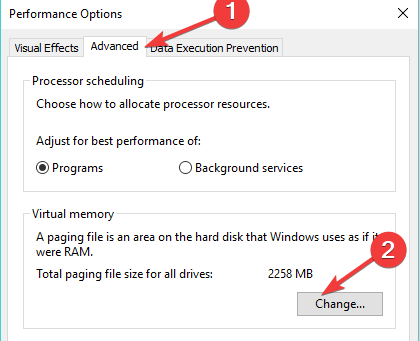
- Go to Search, type performance, and go to Adjust the appearance and performance of Windows
- Go to Advanced tab, and click Change… under Virtual memory

- Make sure Automatically manage paging file size for all drives is checked


3. Turn off “Show me tips about Windows”
Microsoft implemented a new feature into Windows 10 that gives you tips and mini-tutorials about the system as you use it.
Even though Microsoft imagined it to be a helpful guide for new Windows 10 users, this feature is rather annoying and resource-consuming.
In fact, “Show me tips about Windows” can actually cause high disk or CPU usage, which for example is also the case with Runtime Broker error in Windows 10. And it could also be the main cause of our problem here.
So, in order to resolve the high disk usage issue, we’ll try disabling this feature.
And here’s how to do that:
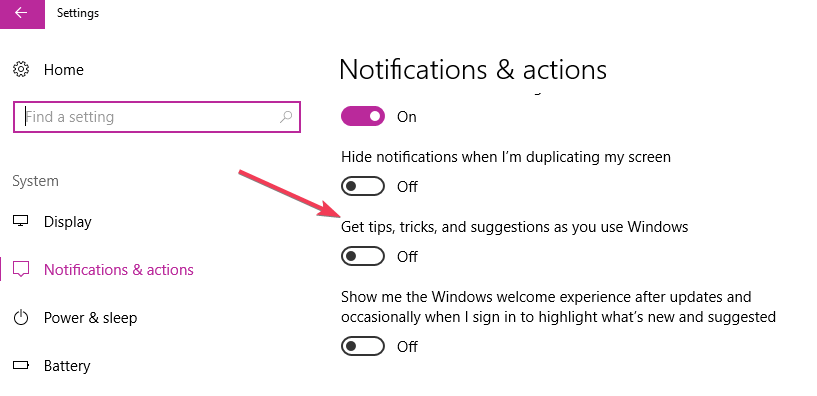
- Go to the Settings app
- Go to System > Notifications & actions
- Now, disable Get tips, tricks, and suggestions as you use Windows

- Restart your computer
After disabling this option, you won’t be getting these annoying messages anymore. And hopefully, your disk will be relieved of the heavy load.
4. Disable Desktop Notifications in Chrome
If you use Google Chrome as your primary browser, there’s a chance you have Chrome Desktop notifications enabled. While this might be useful to you, it’s surely resource-consuming.
So, if you’re dealing with high disk usage, disabling this feature is recommended.
Here’s how to do that:
- Open Google Chrome, click the menu (three dots), and go to Settings
- Under Privacy and security, click Content settings.
- Click Notifications.
- Choose to block or allow notifications:
- Block all: Turn off Ask before sending.
- Block a site: Next to “Block,” click Add. Enter the site and click Add.
- Allow a site: Next to “Allow,” click Add. Enter the site and click Add.
5. Update Windows
There’s a chance an update you installed some time ago interferes with some system feature, which causes, you guess, high disk usage. So, it won’t hurt if you check for updates once again.
Maybe it’s a known issue, and Microsoft development team has already prepared the solution.
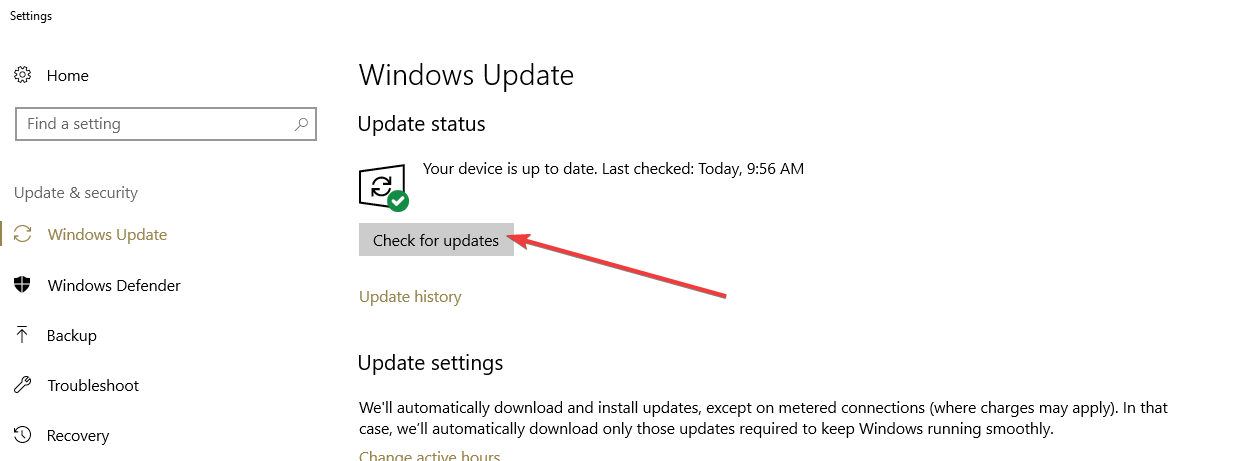
To update your system, simply go to Settings > Update & security, and check for updates.
6. Roll-back updates
If updating Windows doesn’t solve your problem, we’ll do the exact opposite. Maybe the latest update you installed is exactly the one that causes high disk usage.
In that case, your best bet is to delete the update, and wait for Microsoft to release the new one.
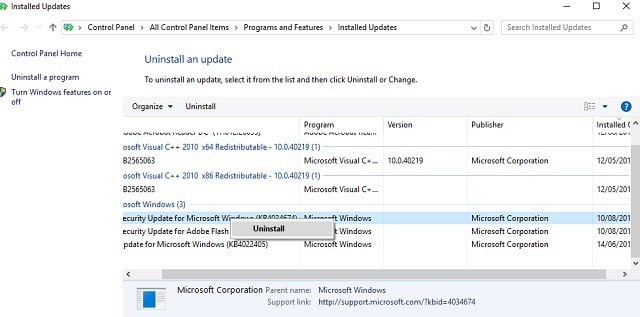
Here’s how to delete updates in Windows 10:
- Go to Settings > Updates & Security > Windows Update
- Go to Update history > Uninstall updates

- Now, find the latest update installed on your computer (you can sort updates by date), right-click it, and go to Uninstall
- Restart your computer
7. Repair Corrupt System Files
If none of the solutions from above solved the problem, we’re going to try running the SFC scan. This built-in tool is made for dealing with various system errors and interferences.
While it doesn’t necessarily mean the SFC scan will solve the problem, it certainly won’t hurt if we try.
In case you don’t know how to run SFC scan, follow these instructions:
- Go to Search, type cmd, right-click Command Prompt, and select Open as Administrator
- Enter the following command, and press Enter: sfc/scannow

- Wait for the process to finish
- Restart your computer

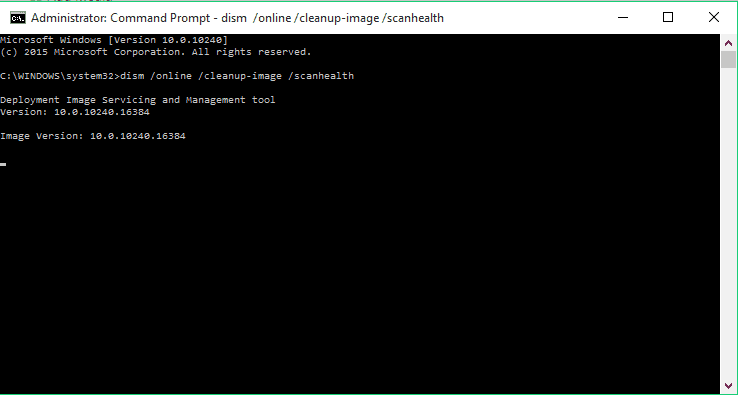
8. Run DISM
If the SFC scan found no solutions for the problem, we’ll try with the Deployment Image Servicing and Management Tool (DISM).
This tool basically does the same thing as the SFC but with higher accuracy and deepness.
Here’s how to run DISM:
- Press Windows key + X and start Command Prompt (Admin).
- In the command line type following command:
- DISM.exe/Online /Cleanup-image /Restorehealth

- DISM.exe/Online /Cleanup-image /Restorehealth
- In case the DISM can’t obtain files online, try using your installation USB or DVD. Insert media and type following command:
- DISM.exe /Online /Cleanup-Image /RestoreHealth /Source:C:RepairSourceWindows /LimitAccess
- Be sure to replace ”C:RepairSourceWindows” path of your DVD or USB.
- The operation should last no more than 5 minutes.
9. Disable the Superfetch service
Superfetch and Prefetch services are there actually to improve your system’s speed and responding time. However, having these services enabled can also lead to high disk usage. So, maybe it would be better for you to disable at least one of them.
Disabling these services helped some users who were facing high disk usage problems before, and maybe it’ll be helpful in this case, as well.
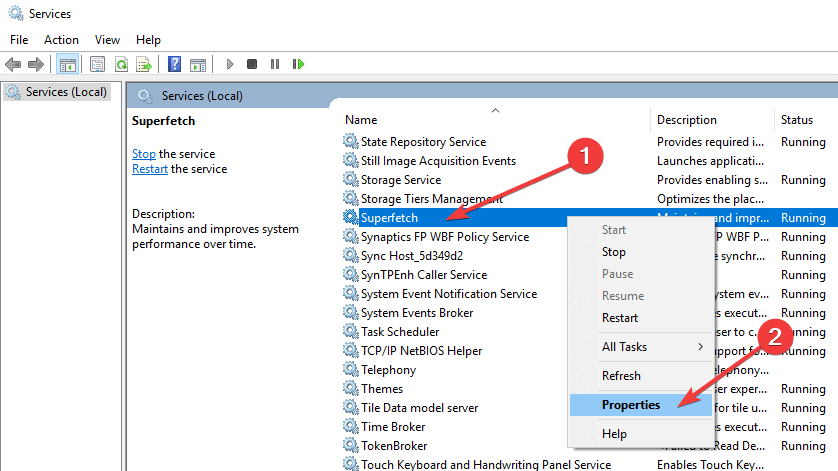
Here’s how to disable the Superfetch service:
- Go to Search, type services.msc and open Services
- Find Superfetch service, right-click on it and go to Properties

- Click on Disable, and then OK
10. Disable the Prefetch service
You can also disable the Prefetch service. Disabling this service is a little more complicated, but it shouldn’t be a problem if you follow these instructions:
- Go to Search, type regedit and open Registry Editor
- Navigate to the following path:
- HKEY_LOCAL_MACHINESYSTEM
CurrentControlSetControlSession Manager
Memory ManagementPrefetchParameters
- HKEY_LOCAL_MACHINESYSTEM
- Double-click on EnablePrefetch. You can configure EnablePrefetch by entering some of the following values into the Value Data box:
- 0 – Disables Prefetcher
- 1 – Enables Prefetch for Applications only
- 2 – Enables Prefetch for Boot files only
- 3 – Enables Prefetch for Boot and Application files
- As the default value is 3, set it to 0
- Restart the computer
11. Kill the Speech Runtime Executable process
Speaking of services, there’s another service called Speech Runtime Executable that can also cause the System and Compressed Memory high disk usage. So, we’re going to kill this process, and see if anything’s different. Here’s how to do that:
- Right-click the taskbar, and open Task Manager
- Go to the Processes tab
- Find the process named Speech Runtime Executable, and select it
- Click End Task
12. Limit CPU Usage
And if none of the solutions listed above managed to solve the problem, we’re going to try with limiting CPU usage. This solution helped some users who were facing high CPU usage caused by MsMpEng.exe, and maybe it’ll be also helpful in this case
Here’s what you need to do:
- Go to Task Manager > More details > click on the Details tab
- Right-click msmpeng.exe > select Set affinity > select the CPU limit threshold.
That’s about it. We certainly hope at least one of these solutions helped you resolve the System and Compressed Memory high disk usage problem.
If not, maybe it’s time to reinstall your system or check if everything’s okay with your computer’s hardware.
You might also be interested in reading our guide on how to enable or disable Memory Compression on Windows 11.
If you have any comments, questions, or suggestions, don’t hesitate to let us know in the comment section below.