FIX: The specified module could not be found USB error
![]() 4 min. read
4 min. read
![]() Updated on
Updated on
Share this article

Improve this guide
Read our disclosure page to find out how can you help Windows Report sustain the editorial team Read more
Key notes
- USB flash drivers are perfect for storing files and folders while on the go: they pack a huge storage capacity compared to their tiny size.
- But sometimes, even USB flash drives fail to work as intended preventing users from accessing their files.
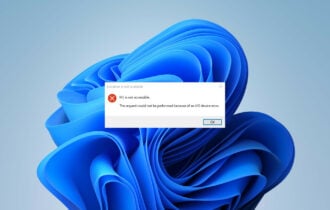
- The specified module could not be found is one of the most annoying errors you can experience when connecting your USB flash drive to your computer. In this quick guide, we'll show you how to fix it.
- This guide is part of our USB hub. Feel free to bookmark it for more handy guides.

One of the most annoying errors that you can experience with your USB flash drive is The specified module could not be found error. This error can prevent you from accessing your files, so today we’re going to show you how to fix it on Windows 10.
What to do if the specified module is missing
1. Scan your USB drive for viruses
The specified module could not be found error can sometimes be related to virus infection.
To ensure that you don’t infect your PC, we advise you to scan your drive with antivirus software. In addition to your regular antivirus, we advise you to use malware removal tools such as Malwarebytes or similar.
For some additional options, check out this guide with the best anti-malware software available right now.
If you find any viruses on your drive, be sure to remove them. After removing the viruses, try to access your flash drive again.
If you already have an antivirus for flash drives, you’ve automatically verified that the infected USB does not spread a virus to your computer. Following that, you may run a scan on the USB to ensure it’s clean.
To make the process more interesting, consider installing a portable antivirus on your flash drive, which is frequently used by experts to do an emergency scan of a virus-infected PC system. This ensures that no virus gets onto the USB in the first place.
2. Use Command Prompt
The specified module could not be found also appears if the attributes of your flash drive are modified. This usually occurs after a virus infection, so if you haven’t scanned your flash drive already, we urge you to do so.
To change the attributes of your flash drive, do the following:
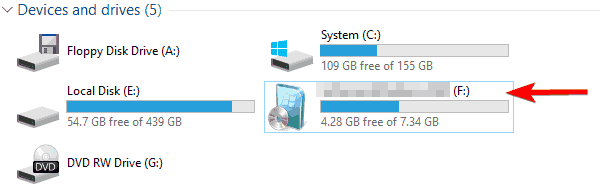
- Check the drive letter of your flash drive. You can do that by opening This PC. Be sure to memorize the correct letter of your USB flash drive. In our case, the assigned letter is F, but it might be different on your computer.

- Now open Command Prompt as administrator. To do that, press Windows Key + X to open Win + X menu and choose Command Prompt (Admin).

- When Command Prompt opens, you need to enter attrib -h -r -s F:*.* /s /d. Be sure to replace F: with the letter that you got in Step 1. In our example we got F, but you might get a different letter on your PC. It’s important to use the correct letter, but if you accidentally enter the wrong letter you can cause issues with your PC, so be cautious.

- Press Enter to run the command.
- After the command is executed, close Command Prompt.


After doing that, you should be able to access your flash drive without any issues.
Some users are also suggesting copying the contents of your flash drive to your hard drive and then use the Command Prompt to fix the problem. To do that, follow these steps:
- Open This PC and locate your USB flash drive. Right click it and select Copy from the menu.

- Paste the content of your flash drive to a desired folder on your hard drive. We created a new folder just for this purpose.
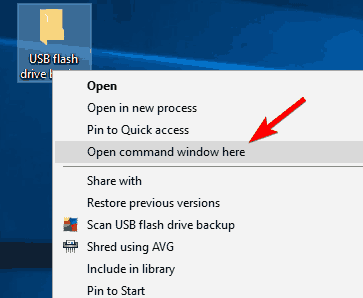
- Hold the Shift key on your keyboard and right click the folder that has files from your USB flash drive in it. Choose Open command window here from the menu.

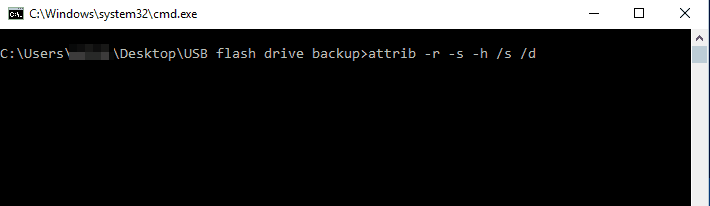
- Command Prompt will now appear. Enter attrib -r -s -h /s /d command and press Enter to run it.

- After running the command, close Command Prompt.

If your Shift key isn’t working, fix it quickly with the help of this useful guide.
Now you should be able to access backed up files without issues. Last thing that you need to do is to format your USB flash drive. To do that, follow these steps:
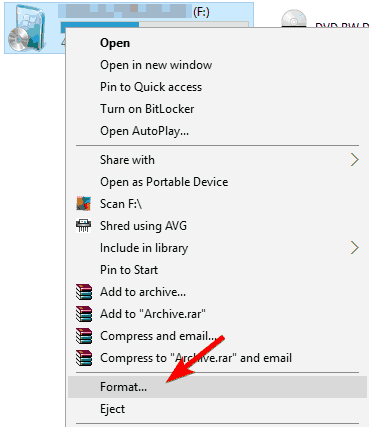
- Go to This PC, locate your USB flash drive, right click it and select Format from the menu.

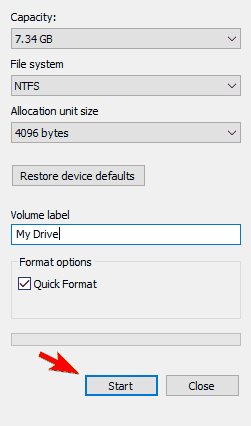
- Select formatting options and click the Start button.

- Wait while Windows 10 formats your drive.
After your drive is formatted, you should be able to access it without any problems.
The specified module could not be found USB error will prevent you from accessing files on your USB flash drive. Users reported that changing the attributes of your flash drive can easily fix the problem, so be sure to try that.
In addition, it’s always a good idea to scan your flash drive and be sure that it’s clean from viruses.
If you have any other suggestions or questions, feel free to leave them in the comments section below.