Disable SMBv1 on Windows using these quick methods
![]() 4 min. read
4 min. read
![]() Updated on
Updated on
Share this article

Improve this guide
Read our disclosure page to find out how can you help Windows Report sustain the editorial team Read more
Recently, the cyber world was hit by Petya and WannaCry ransomware which has generated a lot of security concerns for Windows users. Unfortunately, the vulnerabilities of the Windows Server Message Block (SMB) service helps ransomware to propagate. Due to security reasons, Microsoft recommends that you disable SMBv1 so as not to fall victim of ransomware attacks.
Server Message Block is a network file sharing protocol meant for sharing information, files, printers and other computing resources between computers. There are three versions of the Server Message Block (SMB) which are SMB version 1 (SMBv1), SMB version 2 (SMBv2), and SMB version 3 (SMBv3).
Disable SMBv1 on Windows
SMBv1 is the oldest version of the Server Message Block protocol. Microsoft released official documentation on how to disable SMBv1 as a preventive measure against the WannaCry ransomware. As a result of this, all Windows users are required to install the latest patches released by Microsoft. We will show some ways to disable SMBv1.
Disable SMBv1 using PowerShell
First of all is PowerShell a Windows shell and scripting tool. You can disable SMBv1 on your Windows using PowerShell.
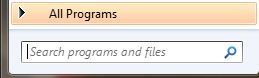
Step 1: Go to the Start menu and type “Windows PowerShell”
Step 2: Also, Launch PowerShell window in the administrator mode

Step 3: In addition, Type the following command
Set-ItemProperty -Path "HKLM:SYSTEMCurrentControlSetServicesLanmanServerParameters" SMB1 -Type DWORD -Value 0 –Force

Step 4: Finally, Hit the “Enter” key to disable SMB1
Disable SMBv1 using Windows features (Windows 7, 8 & 10)
Also, you can disable SMBv1 by turning it off using Windows features.
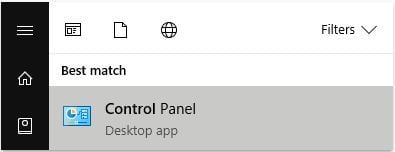
Step 1: First of all, Search for “Control Panel” in the Start menu and open it.
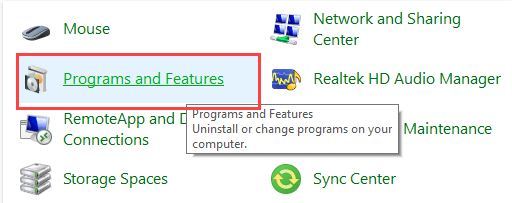
Step 2: Also, In the Control Panel window click on the option “Programs and Features.”
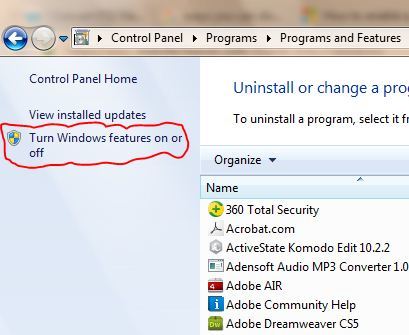
Step 3: Also, Click on the link “Turn Windows Features On or Off” that appears on the left panel.
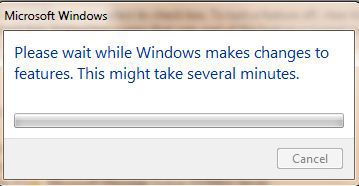
Step 4: In the Windows Features window; Scroll down, find the “SMB 1.0/CIFS File Sharing Support” option, uncheck it and click on the “OK” button to save the changes.

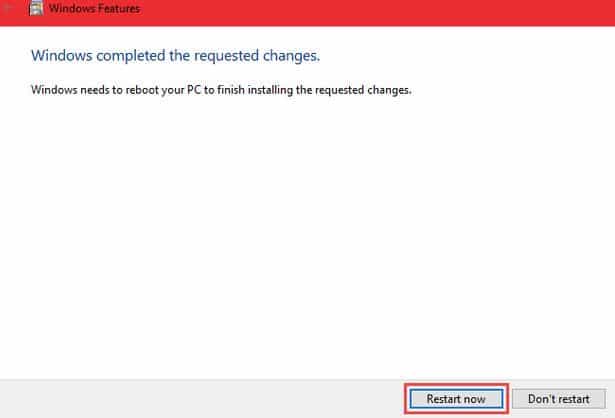
Step 5: Windows will perform necessary changes and prompts you to restart your system.
Step 6: Finally, Click on the “Restart Now” button to effect the changes.
- Read more: How to undo registry changes in Windows
Disable SMBv1 using Windows registry (Windows 7)
Furthermore, disabling SMBv1 using Windows registry requires editing the Windows registry.
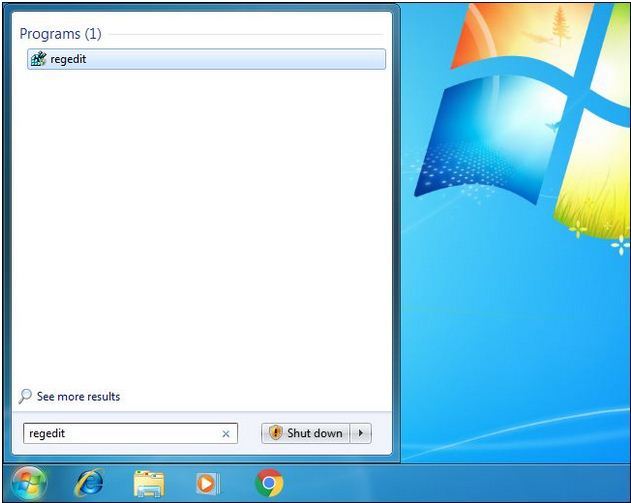
Step 1: Press the Windows button and type “regedit”
Step 2: Also, Press Enter to open Registry Editor and give it permission to make changes to your PC
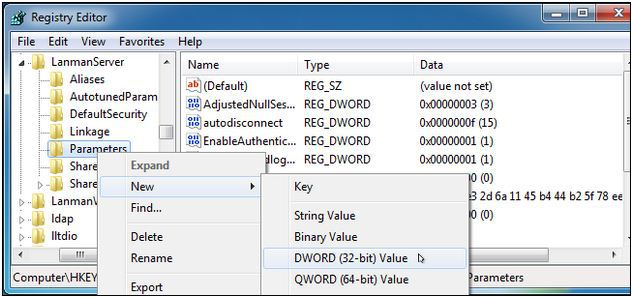
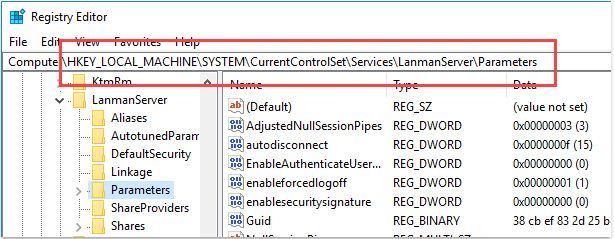
Step 3: In the Registry Editor, use the left sidebar to navigate to the following key:

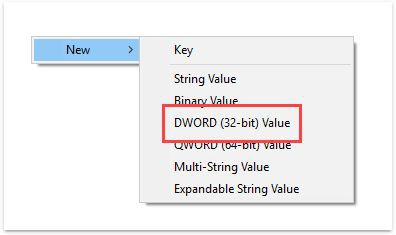
Step 4: In addition, Create a new value inside the Parameters subkey. Right-click the Parameters key and choose New > DWORD (32-bit) Value.
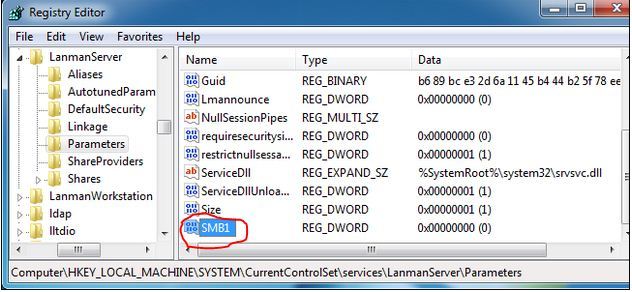
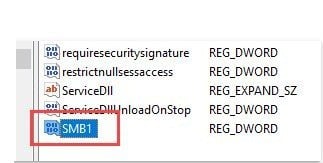
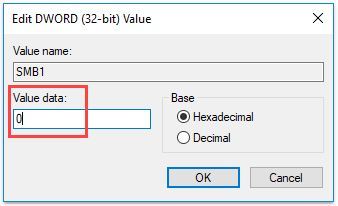
Step 5: Also, Name the new value SMB1. The DWORD will be created with a value of “0”, and that’s perfect. “0” means SMBv1 is disabled. You don’t have to edit the value after creating it.
Step 6: Hence, You can now close the registry editor. You will also need to restart your PC before the changes take effect. If you ever want to undo your change, return here and delete the SMB1 value.
Disable SMBv1 using Windows registry (Windows 10)
How to disable SMBv1 using Windows registry on Windows 10.
Step 1: In the Start menu, search for regedit and open it.
Step 2: Navigate to the highlighted path.
Step 3: In the right panel, right-click and select the option “New” and then “DWORD (32-bit) Value.”
Step 4: Name the new value “SMB1” and press Enter.
Step 5: Double-click on SMB1, enter “0” in the Value Data field and click on the “Ok” button.
Step 6: Restart your system to disable SMBv1.
Note: If you ever want to enable SMBv1 again, change the value data to “1” instead of “0”.
- Read more: How to undo registry changes in Windows 10
These methods are only applicable to disable SMBv1 on a single PC but not a web server or an entire network. For more information concerning disabling SMBv1 across an entire network or a web server, consult Microsoft official documentation on disabling SMB.
RELATED STORIES TO CHECK OUT:
- Lukitus, a new version of Locky ransomware is on the loose via spam emails
- Prevent ransomware attacks with CyberGhost Immunizer
- Protect your PC from ransomware and malware with Windows Defender’s new Controlled Folder Access