Fix: Problems with VIA HD Audio in Windows 10/11, 7
![]() 6 min. read
6 min. read
![]() Updated on
Updated on
Share this article

Improve this guide
Read our disclosure page to find out how can you help Windows Report sustain the editorial team Read more

Most new operating systems have driver issues and Windows 10 isn’t an exception. According to users, they have reported problems with the VIA HD Audio driver for Windows 10, and if you have a problem with these audio drivers today we have a solution that might help you.
But first, here are some more examples of similar issues that can be resolved using the same solutions:
- VIA HD Audio deck not opening
- VIA HD Audio front panel not working
- VIA HD Audio driver Windows 7 64 bit
- VIA HD Audio headphones not working Windows 10
What to do if VIA HD Audio stops working in Windows 10, 8.1, 7
- Uninstall old drivers and download the latest ones
- Change the default format of your speakers
- Set VIA HD as Default Audio Device
- Use the Audio Troubleshooter
- Disable Audio Enhancements
- Perform the SFC scan
- Restart the Audio service
Fix: VIA HD Audio not working in Windows 10, 8.1, 7
1. Uninstall old drivers and download the latest ones
Probably the most common solution for fixing problems with VIA HD Audio is updating your drivers. This is especially important for Windows 10 because updating your drivers is important after the upgrade to the new system. So, if you’re not sure how to do that, follow these steps:
- Open the Device manager.
- Find the Sound, video and game controllers and left click to expand it.
- Find VIA HD drivers from the list, right click on them and press Uninstall.
- After the uninstall process is completed restart your computer.
- Now you need to go to VIA’s website and download the Windows 10 drivers. As far as we know the 6.0.11.0500b version of the drivers was released just two days ago but if there’s a newer version download that one instead.
- Download the driver, and install it.
Users have reported that 6.0.11.0500b drivers have fixed the sound issues while microphone issues remain. VIA has confirmed that there are some issues related to sound and their cards, and they claim that fully functional drivers will be released shortly.
1.1 Update drivers automatically
If you don’t want to wander VIA’s website in search of the right driver, you can use a third-party tool that will do this for you. This software can scan your PC out of date drivers as soon as you install it and provides an accurate account of all of the elements that need to be updated.
Plus, it is guaranteed that you get the correct drivers for your device and not end up with incompatible ones that may damage your PC even more. The tool will find outdated drivers and install the current ones automatically very fast.
The process of updating old drivers is intuitive and you will be guided through the steps, and therefore get the job done in a few clicks.
That being said, you only have to try this tool for yourself and ease the puzzling method of installing PC drivers manually.
2. Change the default format of your speakers
If updating your drivers didn’t get the job done, or your VIA HD drivers are already updated, you can try with changing the default sound format of your speakers. Here’s how to do that:
- Right-click the Sound icon in the bottom right of your screen and choose Playback devices from the menu.
- When the Sound window opens, double-click the speakers icon and you’ll open Speaker Properties.
- Navigate to the Advanced tab and find the Default format list.
- From the list choose any 16bit option, for example, 16bit 96000hz.
- Click Apply then OK.
Now your sound should be working, and if there are still issues, repeat the process and choose a different value.
We have to point out that this also works with your microphone, and the process is almost the same.
- Right-click the Sound icon, open Playback devices and choose Recording tab.
- Double click the Microphone to open Microphone properties and then click the Advanced tab.
- Find the Default format list and choose one of the 16bit options.
- Click Apply then OK, and you’re good to go.
This is just a workaround and not the best or the permanent solution, but the number of users has confirmed that it works. As we already stated, both Microsoft and VIA have noticed that there are some issues between VIA’s cards and Windows 10, and VIA has stated that they will release an updated version of their drivers optimized for Windows 10 soon, so we’ll just have to be bit patient until that happens.
3. Set VIA HD Audio as Default Audio Device
If you have multiple devices or simply drivers that can act as the Default Audio Device, there’s a chance VIA HD Audio is not set for that. So, we’re going to check if VIA HD Audio is set as your default audio device, and set it if not. Here’s how:
- Right-click the speaker icon from the taskbar.
- Head over to the Playback tab.
- Click VIA HD Audio device, and click Set as default.
- Save the changes and restart your computer.
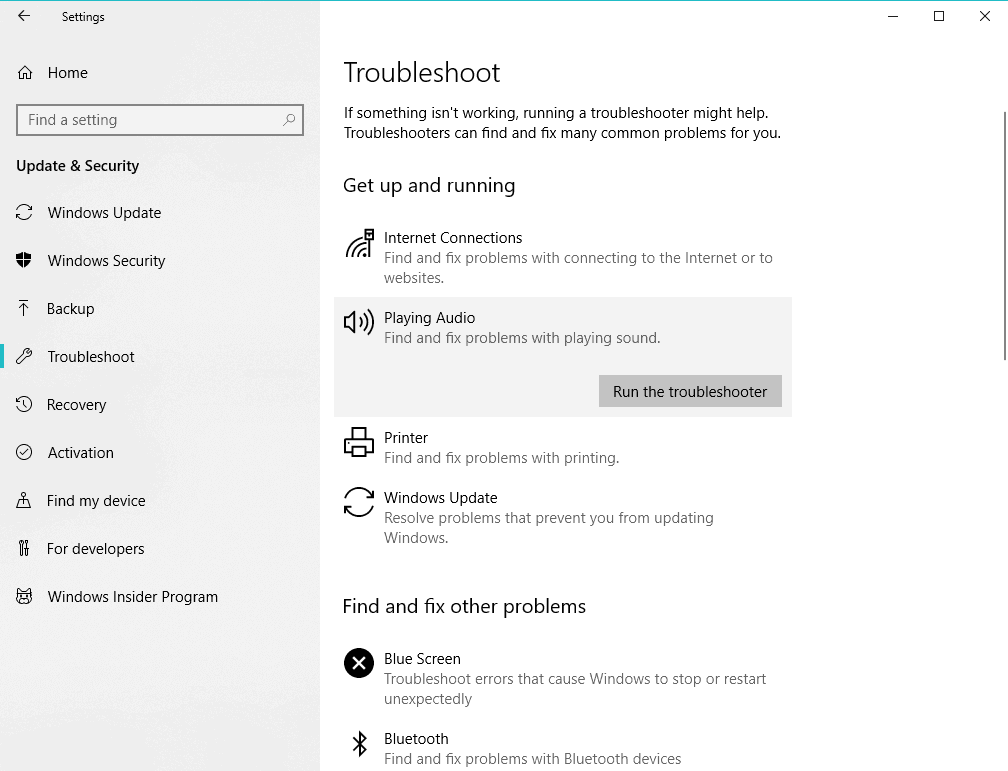
4. Use the Audio Troubleshooter
The next thing we’re going to try is Windows 10’s built-in audio troubleshooter. Here’s how to run it:
- Go to Settings.
- Head over to Updates & Security > Troubleshoot.
- Select Playing Audio, and go to Run the Troubleshooter.

- Follow further on-screen instructions and let the process finish.
- Restart your computer.
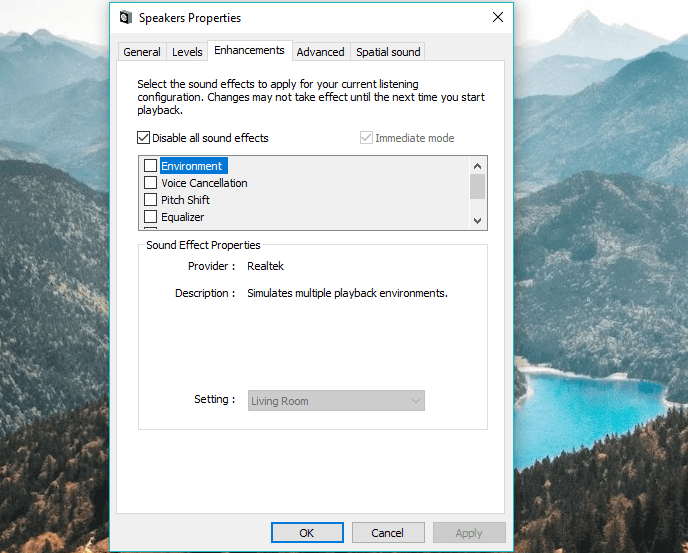
5. Disable Audio Enhancements
Although Audio Enhancements are meant to improve the audio experience in Windows 10, they usually interfere with drivers. So, sometimes the best solution is to simply disable Audio Enhancements. Here’s how to do that:
- Right-click the speaker icon from the taskbar.
- Head over to the Playback tab.
- Double-click your VIA HD Audio device.
- Go to the Audio Enhancements tab.
- Check Disable all sound effects.

- Save the changes and restart your computer.
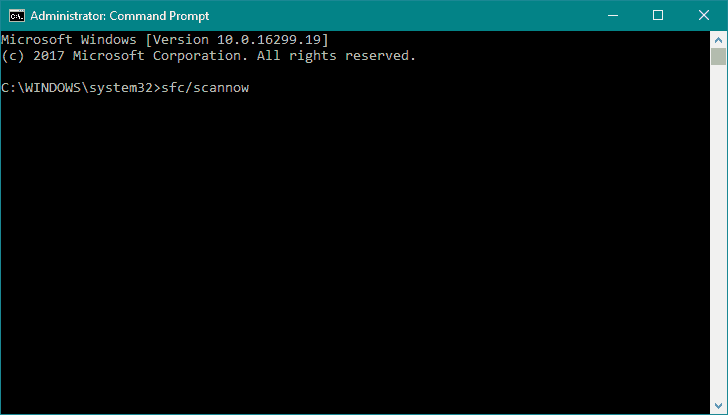
6. Perform the SFC scan
The SFC scan is another built-in troubleshooter we’re going to try. This tool can help you resolve various issues within Windows, and hopefully, this one too. Here’s how to run the SFC scan:
- Go to Search, type cmd, and open the Command Prompt as Administrator.
- Type in the following command, and press Enter: sfc/scannow

- Wait for the process to finish.
- Restart your computer.
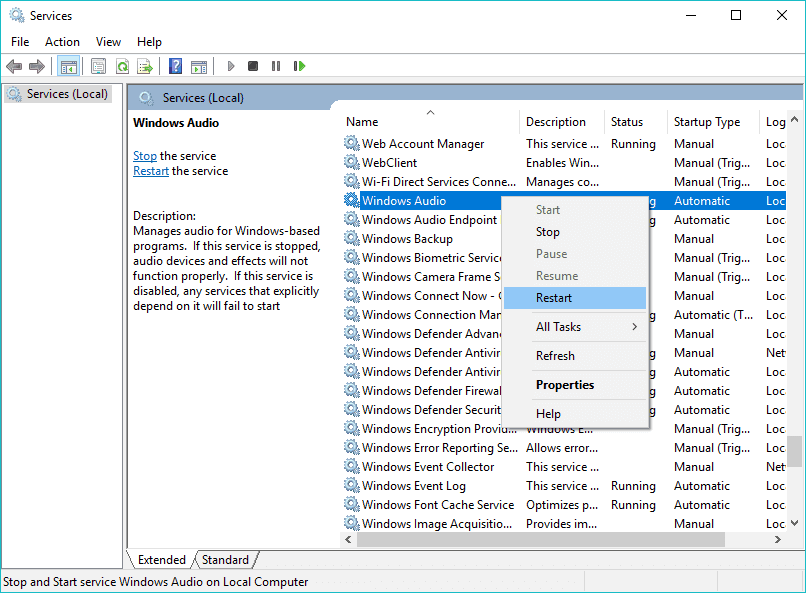
7. Restart the Audio service
If none of the previous solutions helped you resolve the problem with VIA HD Audio, let’s try restarting the Audio service. Here’s how to do that:
- Go to Search, type services.msc, and open Services.
- Scroll down and find the Windows Audio service.

- Right-click it and go to Restart.
- Wait for the process to finish and restart your computer.
That’s about it. We certainly hope at least one of these solutions helped you resolve the problem with VIA HD Audio in Windows 10. If you have any comments, questions or suggestions, just let us know in the comments down below.
If you have any other Windows 10-related issues you can check for the solution in our Windows 10 Fix section.