How to Get the Windows 7 Photo Viewer on Windows 10
![]() 4 min. read
4 min. read
![]() Updated on
Updated on
Share this article

Improve this guide
Read our disclosure page to find out how can you help Windows Report sustain the editorial team Read more
Key notes
- You can easily adapt Windows 7 Photo Viewer if you just upgraded your OS.
- One way to do it is to set Windows Photo Viewer for Windows 10 as your default image viewer.
- You can also use a line-command tool to make Windows 7 image viewer work in Windows 10.
- Lastly, you can add a shortcut to the Desktop so that you open it easier each time.

The Photos app has replaced the Windows 7 Photo Viewer as the default image viewer in Win 10. Windows 10 doesn’t even include the registry keys for Photo Viewer.
However, that doesn’t mean you can’t open the WPV in Win 10. There are, in fact, a few ways you can restore the WPV in Windows 10. This is how you can open Photo Viewer in Windows 10.
How can I run Windows 7 Photo Viewer on Windows 10?
1. Select Windows Photo Viewer as your default image viewer
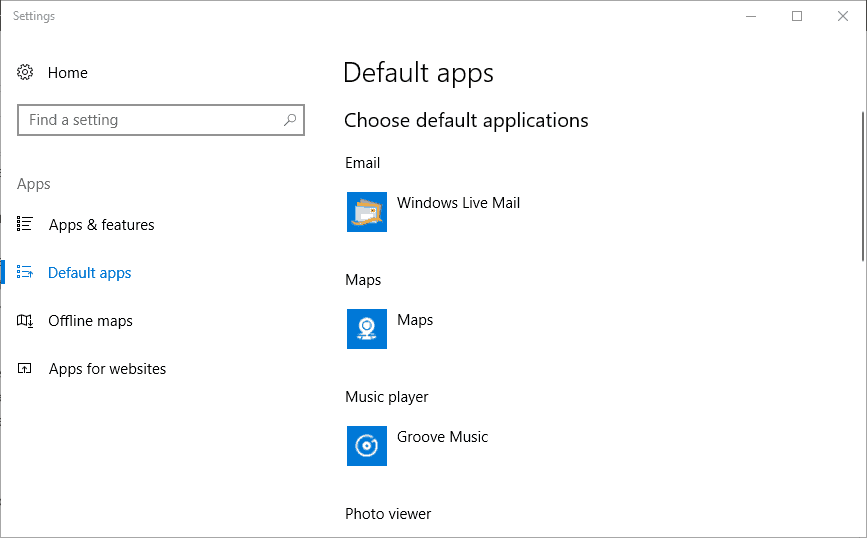
- Click on the Windows search bar on the taskbar and type default apps.
- Select Default apps to open the window shown directly below.

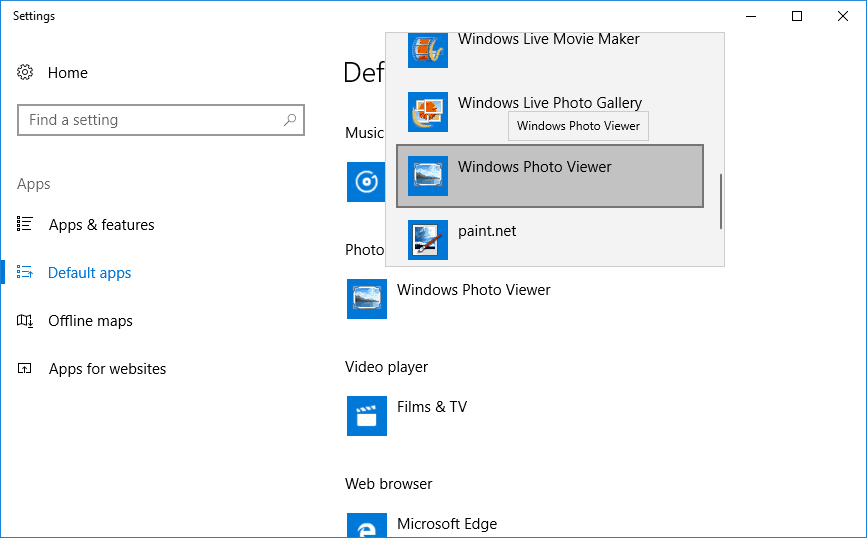
- Click on Photos under Photo Viewer to open the app list directly below.
- Select Windows Photo Viewer listed on the app list to choose it as the default image viewer.
- The Photo Viewer will now open whenever you click an image.
If you’ve upgraded to Windows 10 on a desktop or laptop that originally came with Win 8.1 or 7, you’ll find that the Windows Photo Viewer is still there.
The Photo Viewer registry keys are still in place on PCs that originally came with earlier Windows platforms. Thus, all you really need to do to open pictures with Windows Photo Viewer is to configure the default app settings so that it’s the default image viewer software by following the steps above.
If you’re still running Windows 7 and you need some great software to organize your photos, we have a great list of tools.
2. Make Photo Viewer work by using Command Prompt
2.1 Open Photo Viewer by using Command Prompt
- Press the Win key + R to open the Run window.
- Enter cmd and click OK to open the window below.

- Input the following command and press Enter:
rundll32 "%ProgramFiles%Windows Photo ViewerPhotoViewer.dll", ImageView_Fullscreen
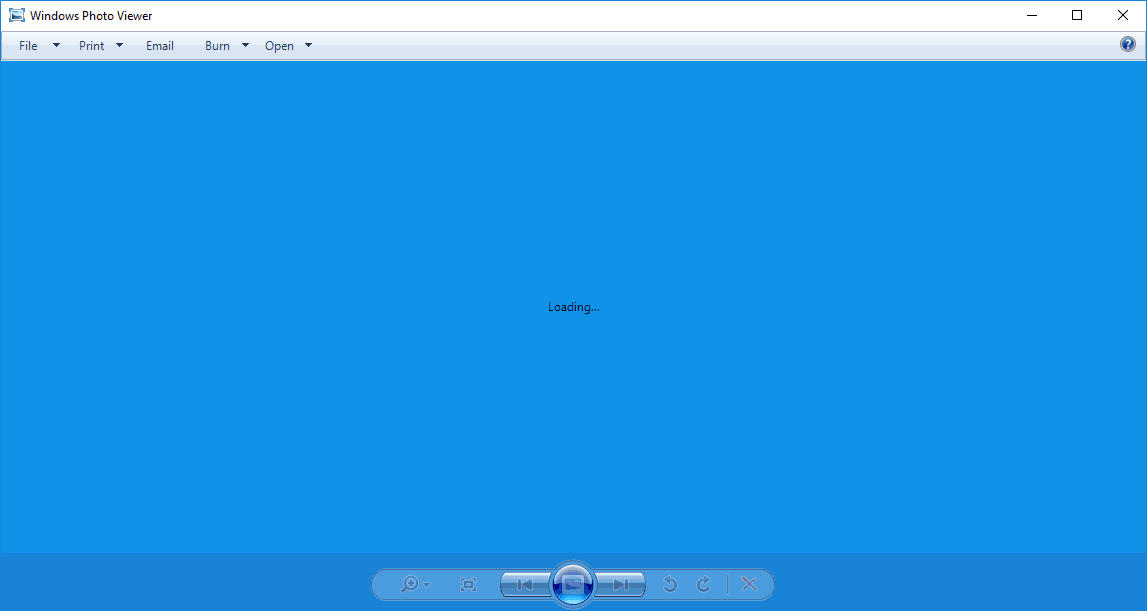
- An empty Windows Photo Viewer window will open as below when you press Enter. However, you can’t open any images in the Photo Viewer, which isn’t much good!
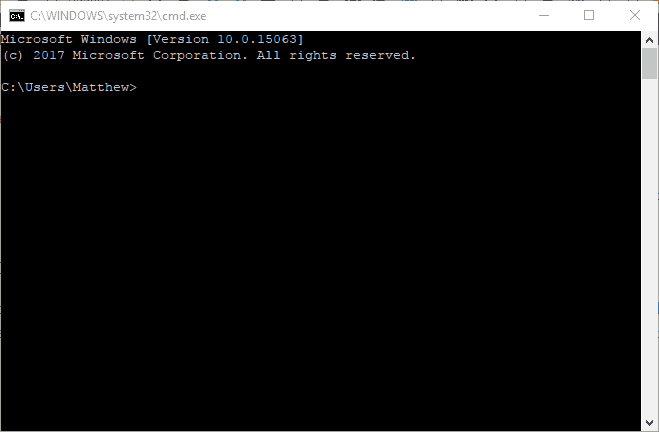

Photo Viewer will not be listed on the Choose an app list if Windows 10 is the original platform on a desktop or laptop. Nevertheless, you can still launch WPV with the Command Prompt.
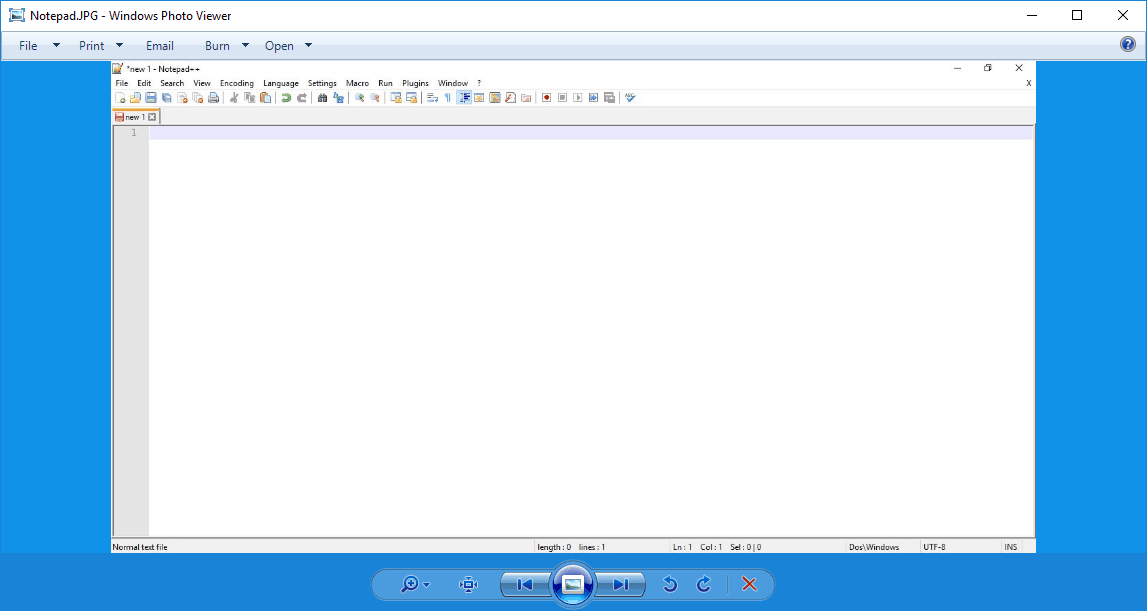
2.2 Open photos in Photo Viewer using Command Prompt
To open the Photo Viewer with some images, you’ll need to enter a full path to a folder that includes images at the end of the command.
For example, the command could be something like this: rundll32 "%ProgramFiles%Windows Photo ViewerPhotoViewer.dll", ImageView_Fullscreen C:\Users\My Photos
Just make sure that you include the full folder image path, and then press the Enter key.
That will open Photo Viewer with all the images included in the folder path, and you can flick through them by pressing the Windows Photo Viewer’s Previous (Left arrow) and Next (Right arrow) buttons.
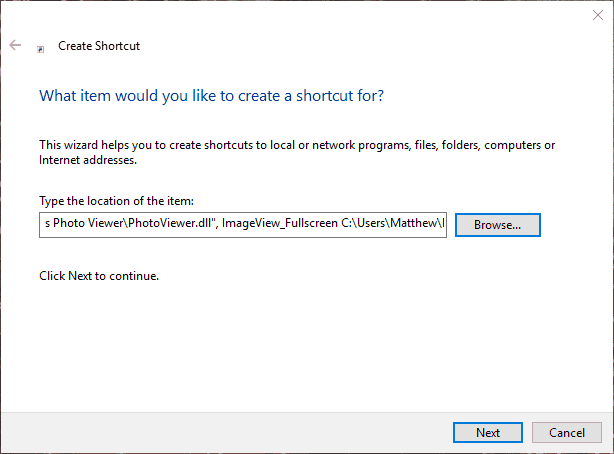
3. Add a Windows Photo Viewer Shortcut to the Desktop
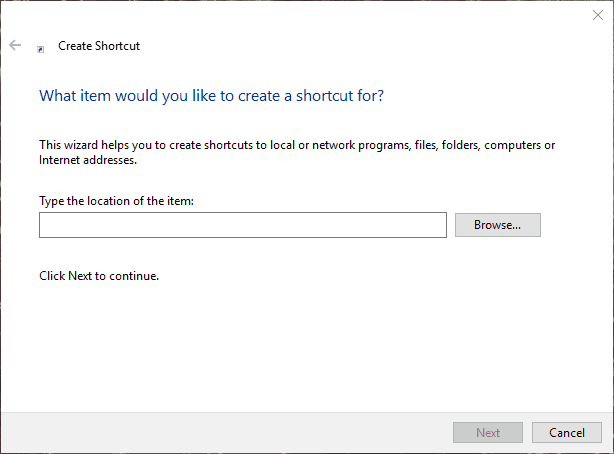
- Right-click the desktop and select New, select Shortcut to open the window shown directly below.

- Enter the following line followed by your image folder path:
rundll32 "%ProgramFiles%Windows Photo ViewerPhotoViewer.dll", ImageView_Fullscreen - Press the Next button, and enter a title for the shortcut in the text box.
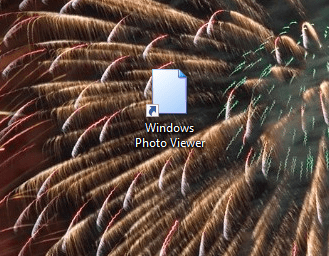
- Click the Finish button to add the Windows Photo Viewer shortcut to the desktop as below.

- Click the Windows Photo Viewer desktop shortcut to open the WPV. It will open with the images within the folder specified in the Command Prompt earlier.
You don’t need to open the Command Prompt to launch WPV with an image folder. Instead, you can add shortcuts to the desktop that open WPV with a specified picture folder like instructed above.
So that’s how you can get the Windows 7 image viewer back in Windows 10. However, there are also plenty of alternative freeware third-party image viewers you can install.
This software guide provides further details for the top seven Windows 10 photo viewers.
Important note: Microsoft officially ended Windows 7 support. If you’re planning to upgrade to Windows 10, make sure to check out our wide collection of guides on how to make the transition as smooth as possible.