Check Disk Command
![]() 2 min. read
2 min. read
![]() Updated on
Updated on
Share this article

Improve this guide
Read our disclosure page to find out how can you help Windows Report sustain the editorial team Read more
CHKDSK (or Check Disk command) is a system tool in DOS, OS/2, and Windows Command Prompt that can check the integrity of your hard disk and can fix various file system errors.
Sure, you can use a software that checks your hard disk health. To choose the best one, check out our list of HDD health check software for PC users.
In this post, you will find out how to run and use the CHKDSK utility tool for related issues in Windows 10.
How to run CHDSK
Follow these steps to run CHDSK from Command Prompt:
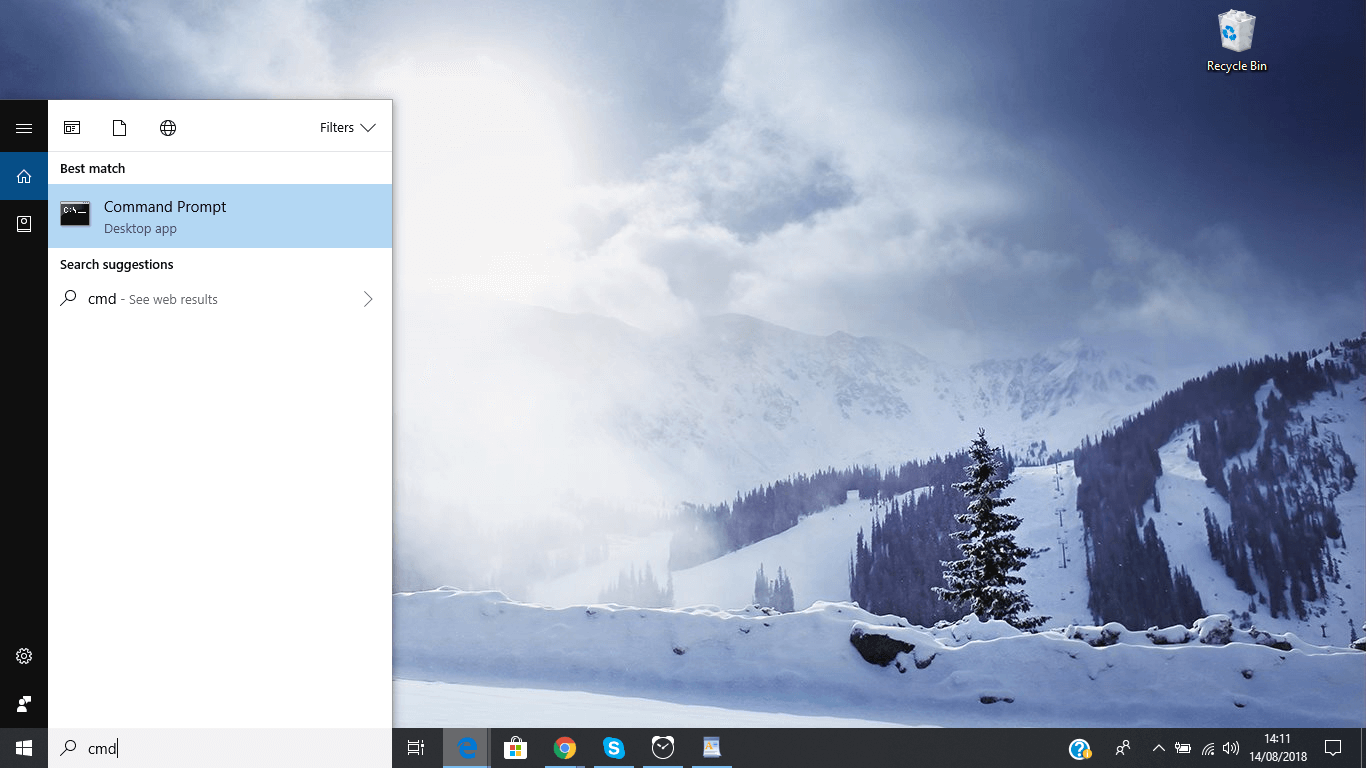
- Press the Windows key+X to open the Start Menu
- Select Search (or press S) and type: cmd to open the Command Prompt

- Right-click on Command Prompt from the search results list
- Click Run as administrator
- Log in as an Administrator
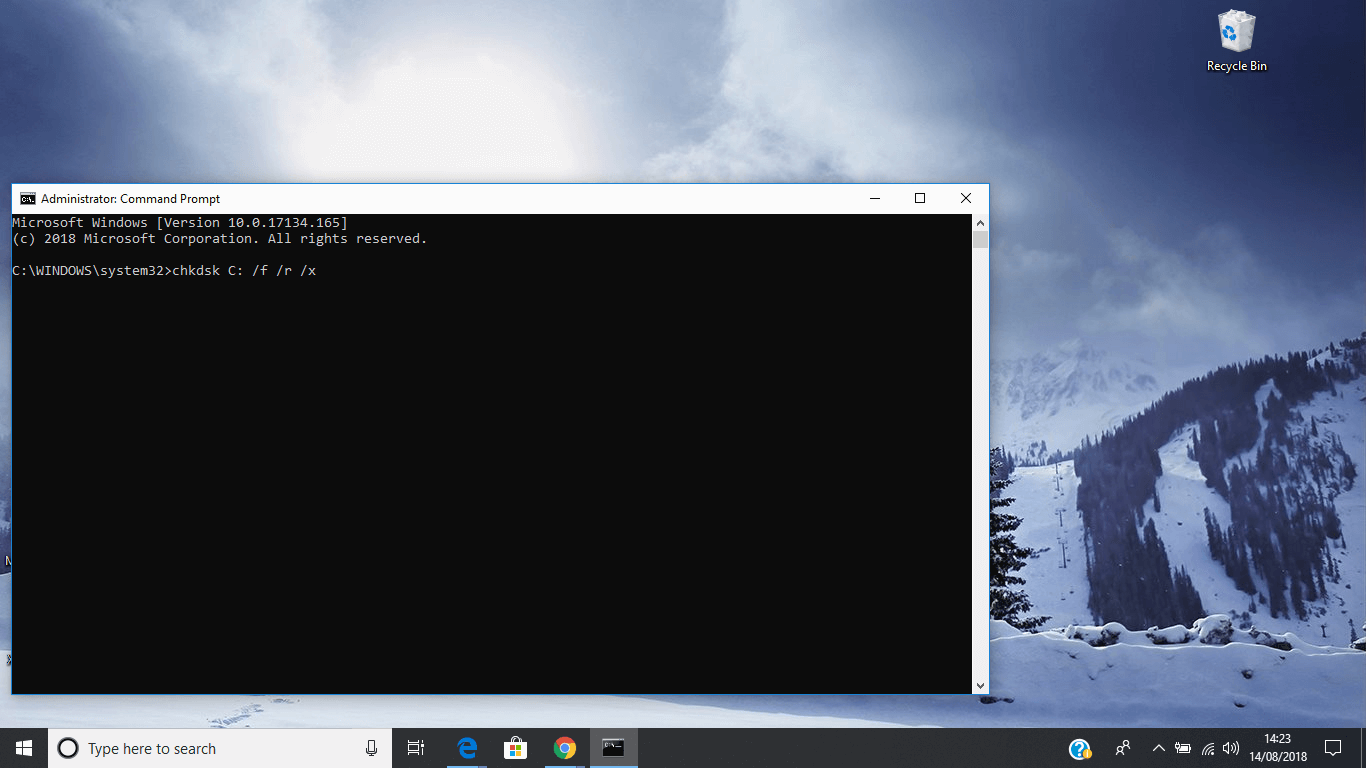
- When Command Prompt launches, type the command:
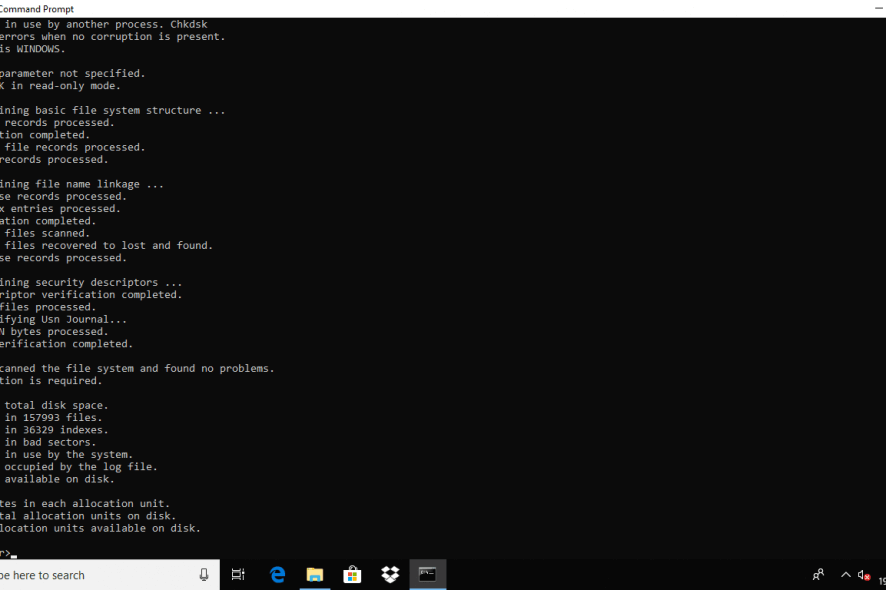
chkdsk C: /f /r /x
chkdsk /f C: When you use this command, Check Disk performs an analysis of the disk and then repairs any errors it finds, provided that the disk isn’t in use. If the disk is in use, Check Disk displays a prompt that asks whether you want to schedule the disk to be checked the next time you restart the system.
chkdsk /r C: When you use this option, Check Disk will locate bad sectors and proceed to recovery any readable information.
chkdsk /x C: When using this command parameter, Check Disk will force the dismount of the volume you’re about to work on before the utility begins the scan.
Fix CHKDSK issues in Windows 10
The Check Disk Utility or Chkdsk.exe is used for detecting and fixing errors in your hard disk and the file system. But it also can cause some problems. As users reported, here are some of the errors that occurred and the solutions to help you fix them: