
Val 19 Error: What is & How to Get Rid of This Error Code
Make sure your internet connection is working and strong enough
It goes without saying that a lot of people actually get a kick out of playing Valorant and have declared this title to be their all-time favorite. But, as with any game ever made, Valorant can also suffer from nasty error codes and other game-breaking bugs.
A lot of Valorant players have been complaining about dealing with the Val 19 error code for this particular title, and we decided to look into it. Luckily, there are solutions we can use to deal with such situations even in the absence of an official fix update provided by the developer itself.
After assessing the situation, we’ve concluded that these solutions are the best to use if you were ever to have the same problem. So, without any further ado, let’s get right into it and discover together how to put all this ugliness behind us and move on.
What is code error Val 19?
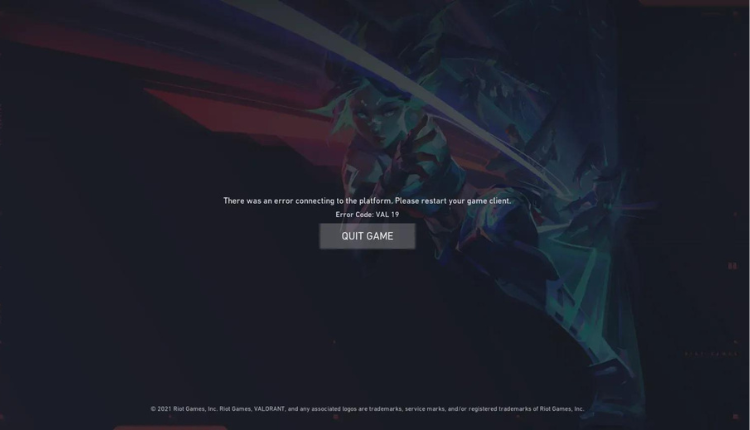
Val 19 is a common error code caused by the Riot Client not properly initializing. The full error reads: There was an error connecting to the platform. Please restart your game client. Error Code: Val 19. Don’t worry, we have all the solutions you require for dealing with Val 19 error code in Valorant.
How do I get rid of error Code Val 19?
Table of contents:
1. Restart your Riot Client
As you well know, Valorant is accessible via the Riot Client. Therefore, restarting the Riot Client will likely solve any game errors you might encounter.
Moreover, upon restarting the client, it will also look for and install any pending updates you might have missed.
2. Terminate all Riot-related processes
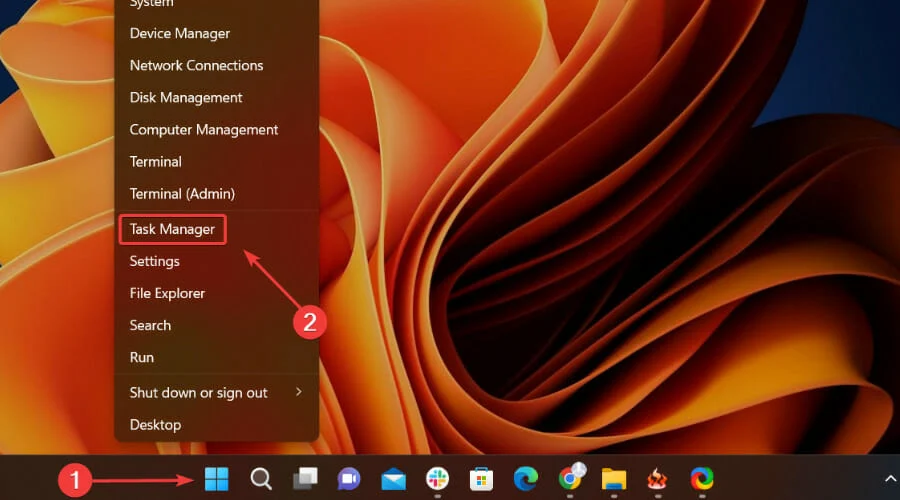
- Right-click the Start Menu icon and select Task Manager.

- Look for any Riot-related process, select it and press the End Task button.

3. Clear DNS Cache and Data
- Open the Start Menu, search for Command Prompt and open it as an administrator.
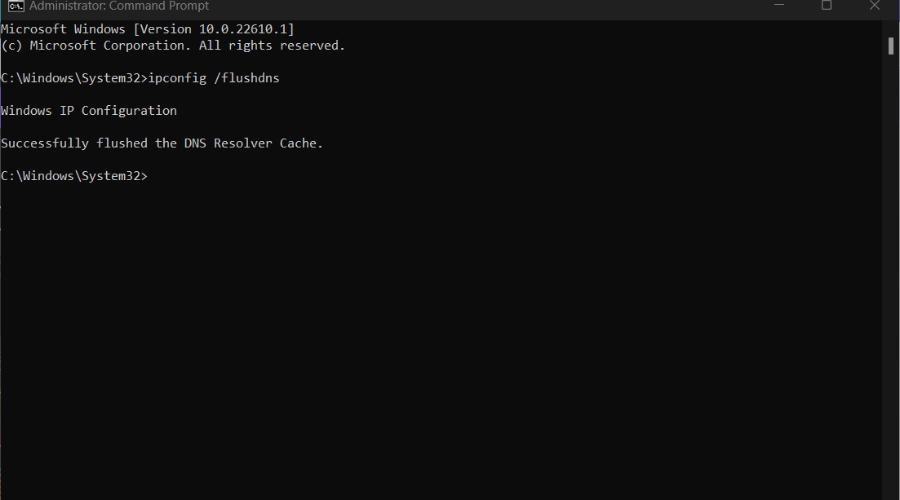
- Type ipconfig /flushdns and press Enter.

4. Update your network driver
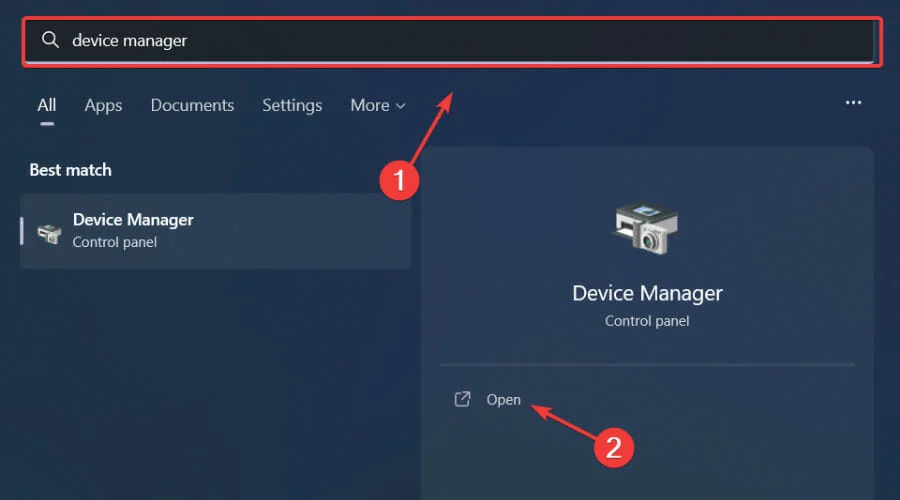
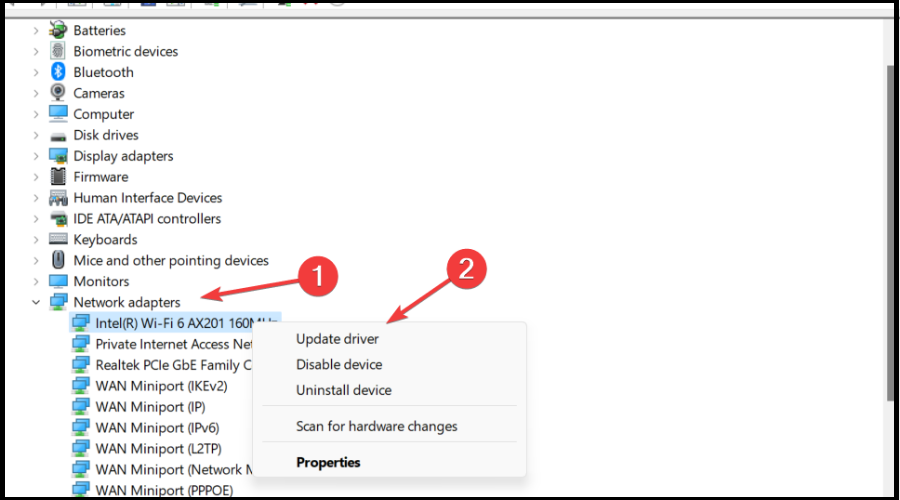
- Press the Windows key, search for Device Manager and click on Open.
- Expand Network Adapters, right-click on the one you use, and select Update driver.
- Select Search automatically for drivers.
If you’re into gaming, surely you can do without all the crashes, lags, or freezes by keeping all drivers up to date and error-free easily. Sometimes, manual checks are hard to perform, that’s why we recommend using an automated assistant that will scan for fresh driver versions daily. In case you’re a beginner, you don’t have to worry! Outbyte Driver Updater is smart, simple, and engaging and its user interface was built to make your life easier.
5. Reinstall the game
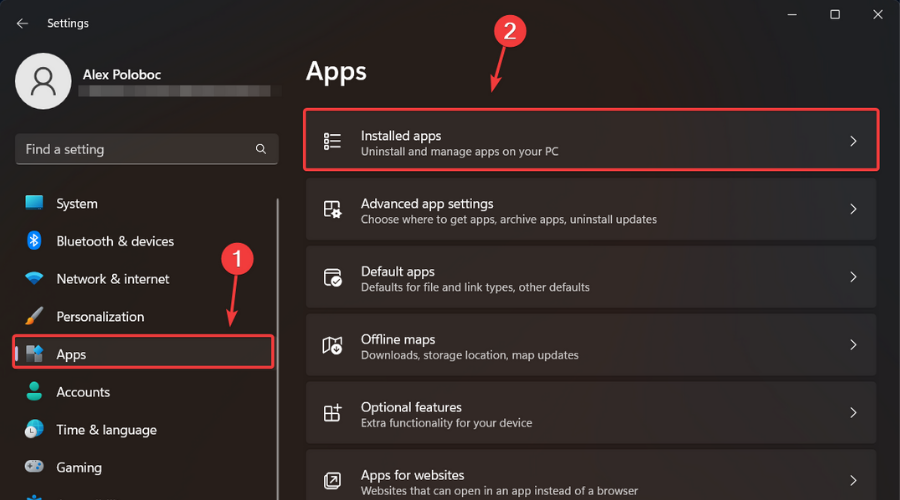
- Press Windows + I to open Settings.
- Select Apps and then click on Installed apps. installed apps”>
- Search for Valorant, then click on the three dots next to it and select Uninstall.
- Install the game again.
 installed apps”>
That is pretty much the entire process. See, not that hard and not very much to do, but still necessary if you are facing this conundrum.Remember to always make sure your internet connection is working and strong enough before you get into the more intricate parts of the troubleshooting process.
Related Articles:
- Valorant A Critical Error Has Occurred: How To Fix
- Valorant Error Code VAN 81: How To Quickly Fix It
- Fix: Valorant Randomly Freezing & Crashing Without Any Error
Has this guide helped you in overcoming this issue? Share your experience with us in the comments section below.