Fix: Hypervisor is not running on Windows 10/11 [Full Guide]
![]() 7 min. read
7 min. read
![]() Updated on
Updated on
Share this article
This article is translated in


Improve this guide
Read our disclosure page to find out how can you help Windows Report sustain the editorial team Read more
Key notes
- Some Windows 10 users reported that they get the error message Hypervisor is not running when trying to run multiple operating systems.
- First you need to make sure that virtualization is enabled in the BIOS.
- Use a reliable tool to update the drivers to the latest version.
- Also, check if your CPU supports virtualization in order to use native virtualization.

Many users use virtualization, but sometimes they might encounter Hypervisor is not running message on their PC.
This message will prevent you from using virtualization, but in today’s article, we’ll show you how to properly tackle this issue.
Virtualization is a useful feature, but sometimes problems with it can occur. Speaking of virtualization issues, here are some common problems that users reported:
- Hypervisor is not running Windows 10 Pro, BIOS – This problem can occur if virtualization isn’t enabled in BIOS, so be sure to find this feature and enable it.
- Hypervisor launch has been disabled through the hypervisorlaunchtype bcdedit setting – Sometimes Hyper-V feature can be disabled, but you should be able to start it simply by running a single command in Command Prompt.
- Hyper-V failed to start Hypervisor is not running – This problem can occur if your BIOS is out of date. To fix the issue, update your BIOS and check if that solves the problem.
- Virtual machine error Hypervisor is not running – Sometimes this problem can occur due to problematic updates, and in order to fix the issue, it’s advised to find and remove these updates manually.
- Hypervisor is not enabled, present, working – These are some common problems that can occur with Hyper-V, but you should be able to fix them using one of our solutions.
How do I fix the Hypervisor not running error on Windows 10?
- Make sure that virtualization is enabled in BIOS
- Update your BIOS
- Update the drivers to the latest version
- Reinstall HyperV feature
- Remove problematic updates
- Use bcdedit command
- Use DISM command
- Check if your CPU supports virtualization
- Use third-party applications
1. Make sure that virtualization is enabled in BIOS
If you’re getting Hypervisor is not running message, perhaps the problem is related to your BIOS settings. As you know, in order to use virtualization, this feature needs to be actually enabled in BIOS.
To check if virtualization is enabled, just enter BIOS and look for this feature.
How to enable virtualization in BIOS:
- Access your BIOS (If you need a hand, here’s how to enter BIOS on a Windows 7, 10 or 11 PC).
- Then, click on Advanced Mode, and go to the Advanced tab.
- Select CPU Configuration and set the Intel Virtualization Technology option (for Intel) or the SVM Mode (for AMD) to Enabled.
- Make sure you save the changes before you exit this screen.
That is how to enable Hyper-V Hypervisor in Windows 10. However, note that enabling virtualization can be different according to your CPU, PC model, chipset, and of course, motherboard.
To see how to properly access BIOS and find this feature, we advise you to check your motherboard manual for more information.
Once you enable this feature, go back to Windows and check if the problem is still there.
2. Update your BIOS
The problem with virtualization can be your BIOS, so if you’re getting the Hypervisor is not running message on your PC, the problem might be an outdated BIOS.
Several users reported that they fixed this problem by updating their BIOS to the latest version.
This is an advanced process, and if you don’t perform it properly you can cause permanent damage to your PC, so we advise you to be extra cautious.
We already wrote a short guide on how to flash your BIOS, but if you know how to properly update BIOS on your motherboard, check your motherboard manual for detailed information.
3. Update the drivers to the latest version
If you’re unable to use virtualization due to Hypervisor is not running message, perhaps the problem is related to your drivers.
If you want to update all drivers on your PC fasts, perhaps using a third-party solution might be the best choice.
Using our recommendation, you can automatically update all your drivers with just a couple of clicks.
4. Reinstall the HyperV feature
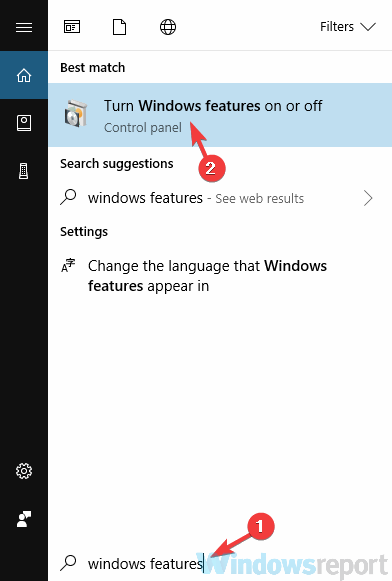
- In the Search bar type windows features, and choose Turn Windows features on or off from the list of results.

- Locate the HyperV feature and uncheck it. Now click OK to save changes. If you’re asked to restart your PC, be sure to do so.

- Once your PC restarts, go back to Windows Features window and enable the Hyper-V feature. You might be asked to restart your PC once again, so be sure to do that.

According to users, if you’re getting this error, perhaps there’s a glitch with HyperV feature.
Sometimes various Windows glitches can occur, but you can fix most problems with HyperV simply by reinstalling it.
Once your system restarts, the problem with Hyper-V should be resolved and everything will start working again.
In addition, the Task Manager can detect if it’s running on a physical or virtual machine. Under the Performance tab, the label Virtual machine: Yes is listed if a hypervisor has been detected.
 Tip
Tip
5. Remove problematic updates
- Press the Windows Key + I to open the Settings app.
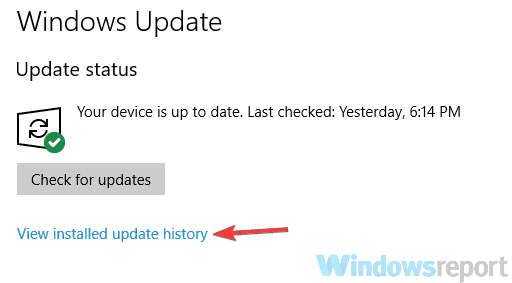
- Navigate to the Update & Security section, and select View update history.

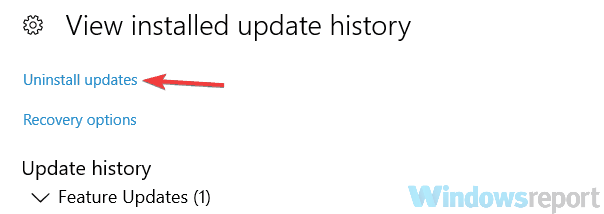
- You should now see a list of recent updates. Pay attention to the recent updates and memorize them or write them down. Now click Uninstall updates.

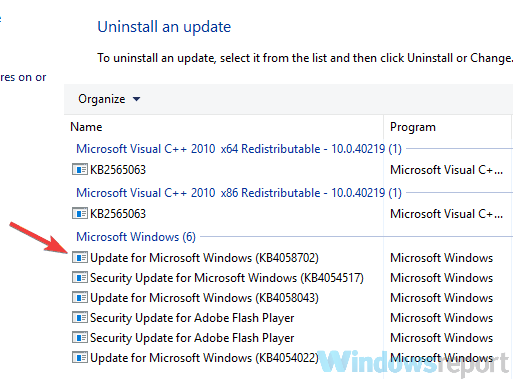
- List of recent updates will appear in the new window. To remove an update, double-click it and follow the instructions on the screen.

If the error started appearing recently, the problem might be a problematic Windows update.
As you know, Windows installs updates automatically, and if the problem started appearing recently, it’s possible that the update is causing it.
To fix the problem, it’s advised that you find the problematic update and remove it, by following our above steps.
Once the update is removed, check if the problem is resolved. You might have to repeat this step a couple of times before you find the update that is causing the problem.
Once you find the problematic update, be sure to write its name down.
Windows tends to install the missing updates automatically, so in order to prevent this problem from reappearing, we advise you to block this update from installing automatically.
6. Use the bcdedit command
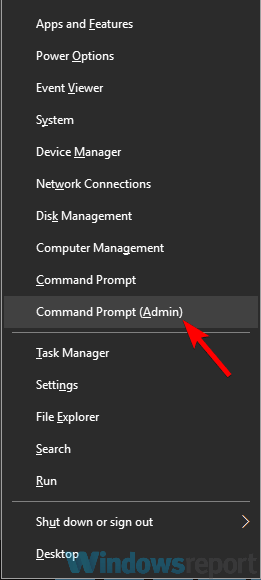
- Press the Windows Key + X, and select Command Prompt (Admin) or PowerShell (Admin) from the menu.

- When Command Prompt opens, run the following command:
bcdedit /store c:BootBCD /set hypervisorlaunchtype Auto
After the command is executed, check if the problem with virtualization is resolved. Alternatively, you can also use the bcdedit /set hypervisorlaunchtype auto command.
If you’re having problems with virtualization, perhaps you can fix the problem simply by running a single command in Command Prompt.
7. Use the DISM command
- Start Command Prompt as an administrator.
- When Command Prompt starts, run this command:
dism /online /enable-feature /featurename:Microsoft-Hyper-V -All
Sometimes you might get this error because certain components aren’t working properly. To fix this problem, it’s advised that you run the DISM command in order to enable the HyperV feature.
Once the command is executed, Hyper-V feature should be enabled and the problem with virtualization should be resolved.
8. Check if your CPU supports virtualization
In order to use native virtualization in Windows 10, it’s necessary that your processor supports certain features. If it doesn’t have these features, you won’t be able to use the built-in virtualization.
To see if your processor supports virtualization, you’ll need to check its specifications on the manufacturer’s website.
Alternatively, you can use third-party tools in check if your processor supports virtualization.
Many users reported that virtualization won’t work on their PC since the processor doesn’t support SLAT feature.
If your processor doesn’t support the necessary features, you might have to change it in order to use built-in virtualization.
9. Use third-party applications
If you didn’t manage to fix Hypervisor is not running error, perhaps you might want to try using a third-party solution as a workaround.
Even if your processor doesn’t support the virtualization features, you should be able to create a virtual machine in Windows using our recommendation software.
This tool specializes in virtualization, and it offers all the necessary features for both advanced and first-time users alike, so we strongly suggest that you try it out.
The hypervisor is not running error can cause problems, but we hope that you managed to fix it using one of our solutions. For more suggestions, please access the comments section below.