SPECIAL_POOL_DETECTED_MEMORY_CORRUPTION error
![]() 7 min. read
7 min. read
![]() Updated on
Updated on
Share this article

Read our disclosure page to find out how can you help Windows Report sustain the editorial team Read more
Key notes
- Many Windows 10 users complained that the SPECIAL_POOL_DETECTED_MEMORY_CORRUPTION error restarts their PC and crashes their OS.
- This BSoD SPECIAL_POOL_DETECTED_MEMORY_CORRUPTION error can be fixed by using a special repair tool found below.
- You should also update Windows 10 and all your drivers in order to fix this and other issues.
- If you can’t make it this far, then you should run the DISM by following our step-by-step guide, so keep reading!
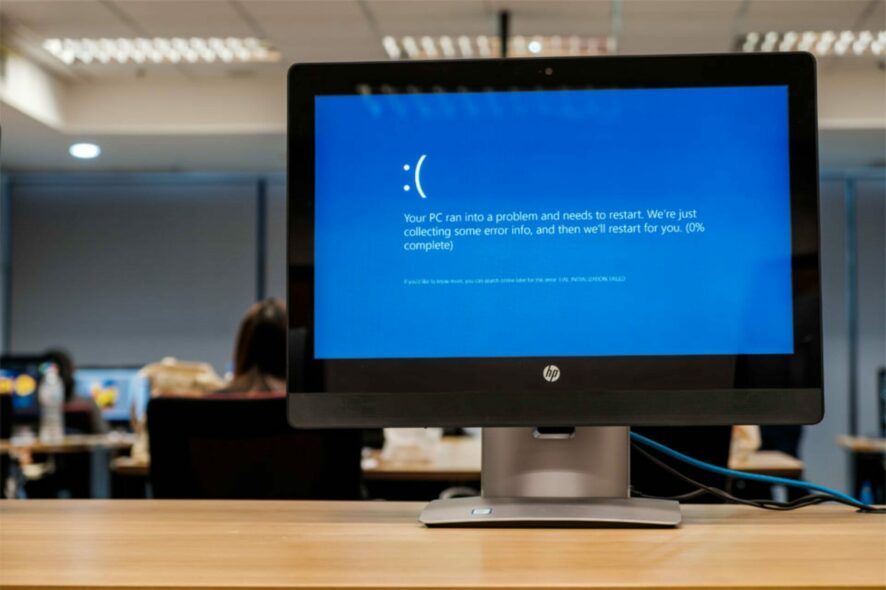
The SPECIAL_POOL_DETECTED_MEMORY_CORRUPTION error is a Blue Screen of Death error, and just like any other BSoD error, this one will crash Windows 10 and restart your PC.
This error can be caused by certain hardware issues or incompatible software, and today we’re going to show you how to fix it, so keep reading!
How to fix SPECIAL_POOL_DETECTED_MEMORY_CORRUPTION?
- Use a repair tool
- Run the hardware troubleshooter
- Run the SFC scan
- Update Windows 10 and all your drivers
- Run DISM
- Rollback your graphics card drivers
- Uninstall problematic software
- Update your BIOS
- Remove your Bluetooth adapter
- Check your RAM and motherboard
1. Use a repair tool
In most cases, using a third-party repair tool is the best choice to fix recurring BSoD errors that scare all Windows users. You can repair the corrupted system software and fix malfunctioning files that most probably will restore your system.
2. Run the hardware troubleshooter
- Open the Settings app and go to the Update & Security section.
- Select Troubleshoot from the menu on the left.
- Select BSOD from the right pane and click Run the troubleshooter.

- Follow the instructions on the screen to complete the troubleshooter.

Windows 10s built-in troubleshooter is a tool that can resolve all sorts of issues in Windows 10. Including BSOD issues.
3. Run the SFC scan
- Right-click on the Start Menu button, and open Command Prompt (Admin).
- Enter the following line and press Enter:
sfc/scannow
- Wait until the process is done (it may take a while).
- If the solution is found, it will automatically be applied.
- Close the Command Prompt and restart your PC.
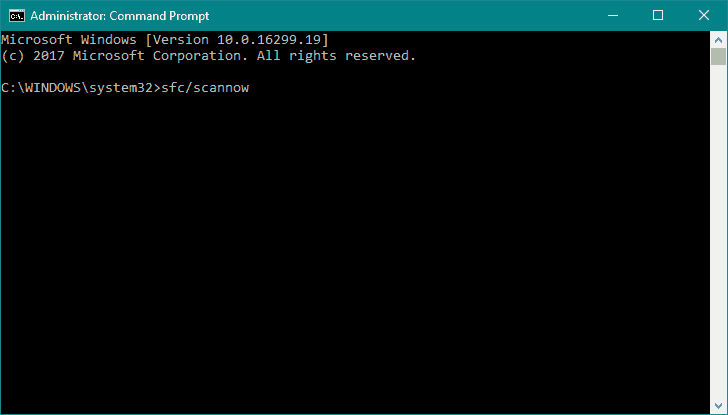
If the troubleshooter failed to resolve the problem, we’re going to run the SFC scan. This is a command-line tool that scans your system for potential issues, and resolves them, if possible.
So, using this command might be helpful with the SPECIAL_POOL_DETECTED_MEMORY_CORRUPTION error, as well.
4. Update Windows 10 and all your drivers
As we previously mentioned, this error can be caused by hardware or software, and since Windows 10 might have a few issues with certain hardware and software, you could potentially get this error.
Fortunately, Microsoft is working hard to fix any hardware or software incompatibility issues, and it is releasing new patches through Windows Update frequently.
Windows updates fix many security vulnerabilities and issues related to both hardware and software, so if you’re having BSoD errors such as SPECIAL_POOL_DETECTED_MEMORY_CORRUPTION, we strongly advise you to update Windows 10.
In addition to updating Windows 10, it’s also important to update your drivers. Drivers are in charge of your hardware, and if a certain driver isn’t compatible with Windows 10, that can lead to system instability and BSoD errors.
You can easily update your drivers, and all that you have to do is to download the latest drivers from your hardware manufacturer’s website.
Bear in mind that you’ll have to update drivers for all major hardware components in order to fix this error.
Update drivers automatically
Searching for drivers on your own can be time-consuming. So, we advise you to use a tool that will do this for you automatically.
Using an automatic driver updater will certainly save you from the hassle of searching for drivers manually, and it will always keep your system up to date with the latest drivers.
Using our recommendation of the software below will help you update drivers automatically and prevent PC damage caused by installing the wrong driver versions.
After several tests, our team concluded that this is the best-automatized solution, so be sure to try it out.
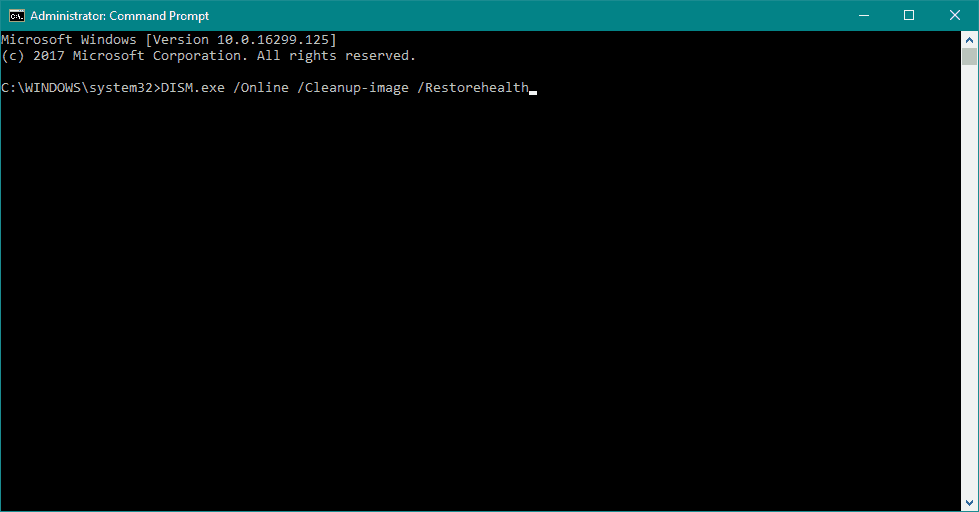
5. Run DISM
- Standard way
- Right-click Start and open Command Prompt (Admin).
- Paste the following command and press Enter:
DISM /Online /Cleanup-Image /RestoreHealth
- Wait until the scan is finished.
- Restart your PC, and try updating again.
- With the Windows installation media
- Insert your Windows installation media.
- Right-click the Start menu and, from the menu, choose the Command Prompt (Admin).
- In the command line, type the following commands and press Enter after each:
dism /online /cleanup-image /scanhealthdism /online /cleanup-image /restorehealth
- Now, type the following command and press Enter:
DISM /Online /Cleanup-Image /RestoreHealth /source:WIM:X:SourcesInstall.wim:1 /LimitAccess
- Make sure to change an X value with the letter of the mounted drive with Windows 10 installation.
- After the procedure is finished, restart your PC.
If previous troubleshooters failed to resolve the problem, we can try DISM. Deployment Image Servicing and Management (DISM) reloads the system image, which can lead to resolving various issues, including our BSOD problem.
We’ll walk you through both the standard and the procedure that utilizes the installation media above.
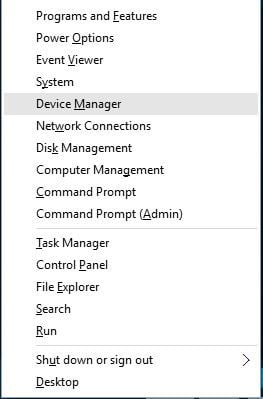
6. Roll back your graphics card drivers
- Press the Windows Key + X, and choose Device Manager from the list.

- When Device Manager opens, locate your display driver and double click it.
- Go to the Driver tab and click the Roll Back Driver button.

- Wait for Windows 10 to install the previous version of the driver.
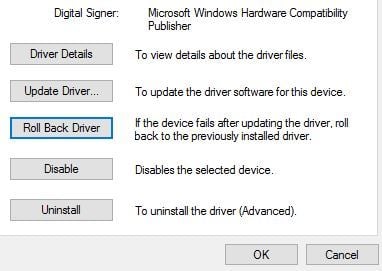
Few users reported that the SPECIAL_POOL_DETECTED_MEMORY_CORRUPTION error was caused by the beta version of Nvidia drivers.
According to them, rolling back to the previous version of the drivers fixed the issue. To roll back a certain driver, be sure to follow the above steps.
Alternatively, you can uninstall the display driver by following the same steps and installing the final version instead of the beta version.
It’s worth mentioning that this issue affects Nvidia users, but you can try this solution even if you use an AMD graphic card.
7. Uninstall problematic software
Certain software can also cause these types of errors, especially if it’s not compatible with Windows 10.
According to users, NetLimiter doesn’t work well with Windows 10 and can cause the SPECIAL_POOL_DETECTED_MEMORY_CORRUPTION error to appear, so if you’re using this software, we strongly advise you to uninstall it.
We also have to mention that antivirus programs can also cause these types of errors, and in order to fix them you might have to completely remove any third-party antivirus programs that you have installed.
Uninstalling the antivirus software isn’t always enough, so you need additional support from a professional cleaning program.
The ideal tool that can be used to delete certain programs or files on your system is CCleaner, a popular solution for cleaning your PC and optimizing performance.
8. Update your BIOS
Several users reported that the SPECIAL_POOL_DETECTED_MEMORY_CORRUPTION BSoD error was fixed after performing a BIOS update, so you might want to try that.
Updating BIOS unlocks new features and allows your motherboard to support newer hardware.
To update BIOS, you just have to visit your motherboard manufacturer’s website and download the latest version of BIOS for your motherboard.
We have to warn you that updating BIOS is an advanced procedure, and in order to properly update your BIOS and prevent any permanent damage, we strongly advise you to check your motherboard manual for detailed instructions.
9. Remove your Bluetooth adapter
As we previously mentioned, these types of errors can be caused by certain hardware, and a few users reported that the Bluetooth adapter was the cause for the SPECIAL_POOL_DETECTED_MEMORY_CORRUPTION error.
According to users, they managed to fix this problem by removing their Bluetooth adapter, so you might want to try that.
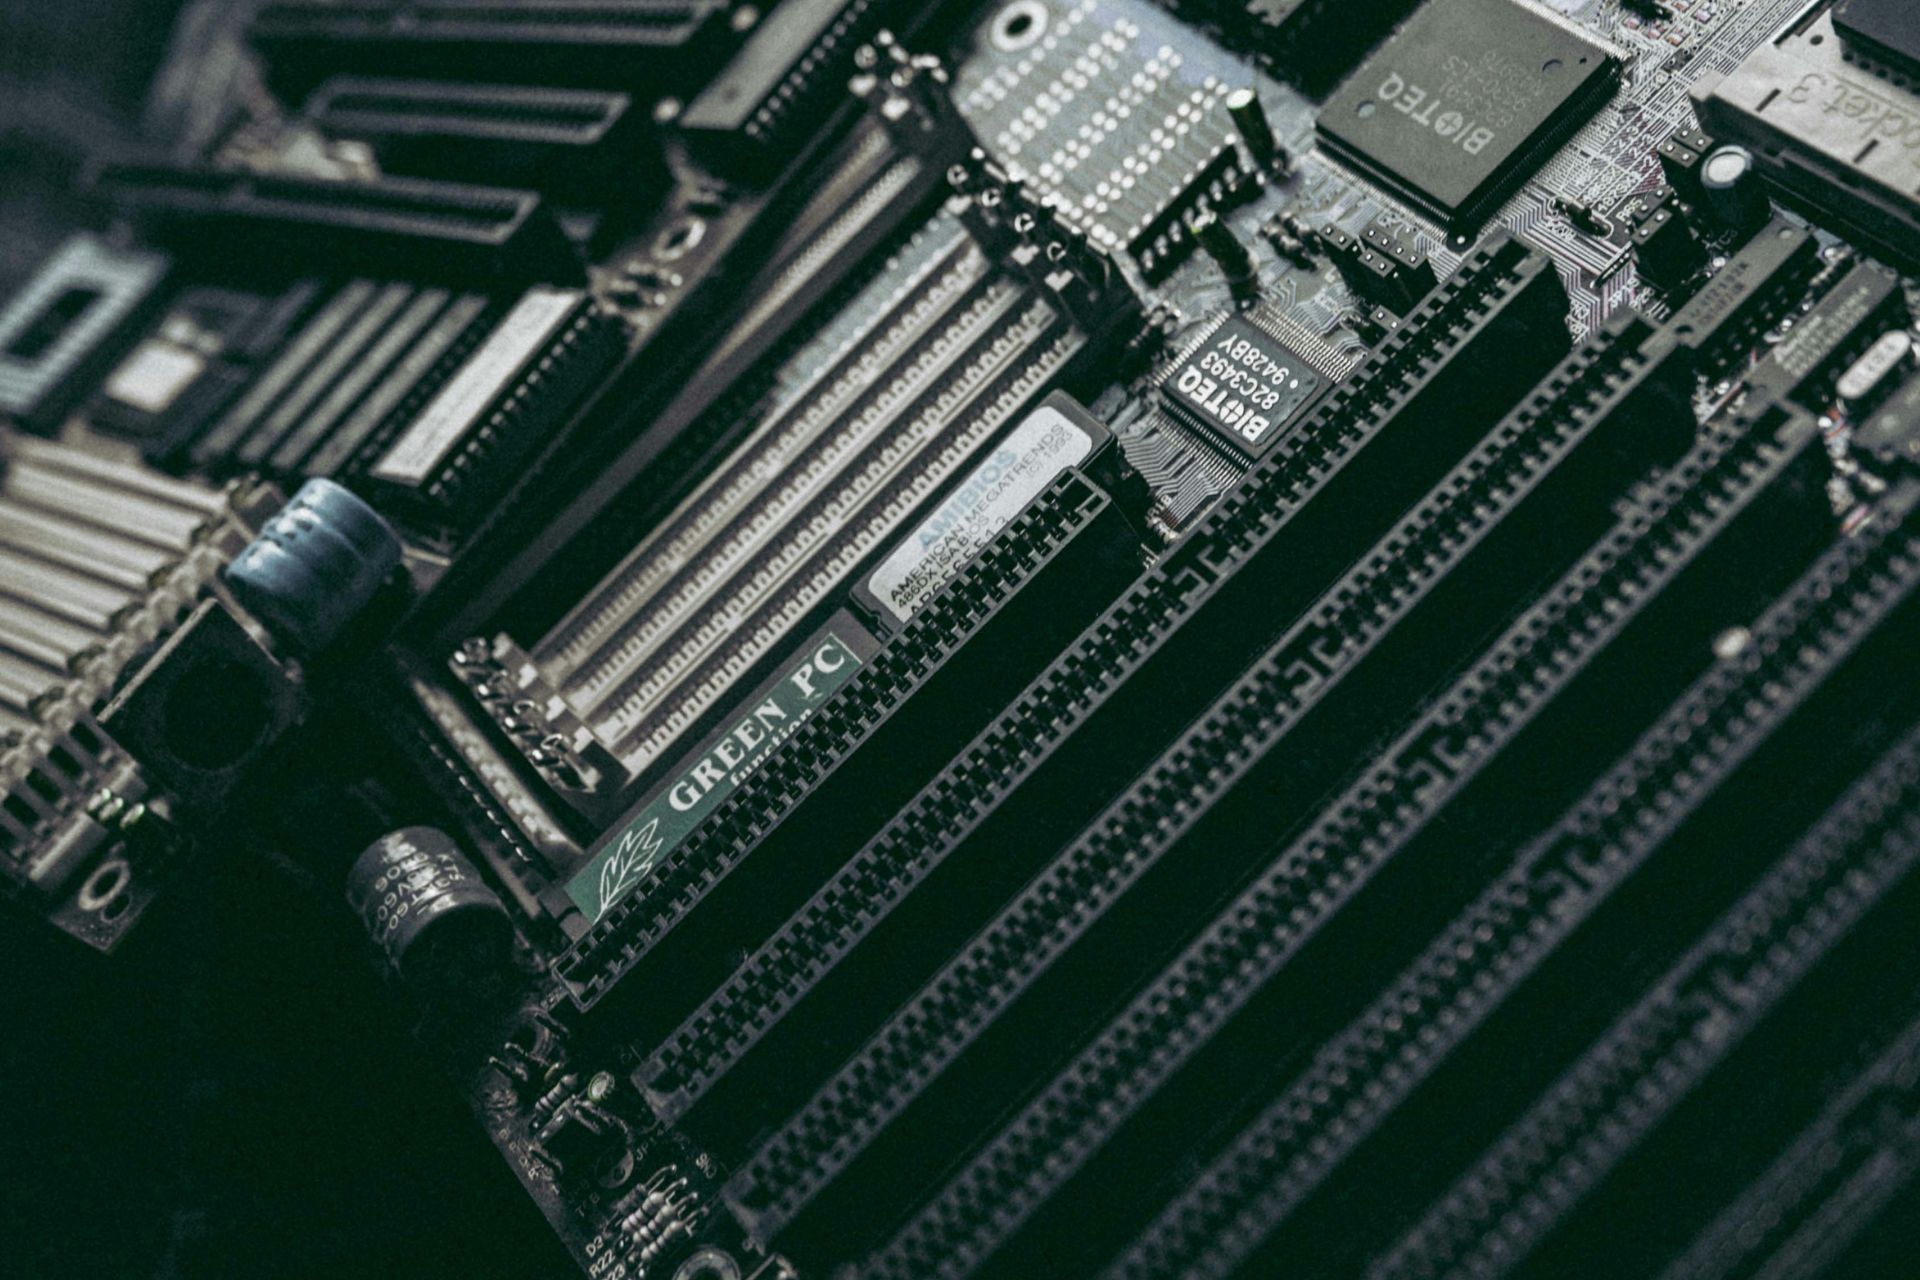
10. Check your RAM and motherboard
Blue Screen of Death errors are often caused by faulty hardware, and one of the most common causes for these types of errors is faulty RAM.
To fix this issue, we recommend that you test your RAM modules one by one until you find a faulty one. You can also perform a thorough scan of your RAM by using MemTest86+.
If your RAM is working properly, be sure to check other major hardware components such as your motherboard, graphic card, hard drive, etc.
SPECIAL_POOL_DETECTED_MEMORY_CORRUPTION error can cause you big problems on Windows 10, but this error can be easily fixed by using one of our solutions.
We hope that our recommendations from this guide were helpful for you. For more suggestions, please access the comments section below.