How to Configure Windows 11 Firewall for SQL Server
![]() 5 min. read
5 min. read
![]() Published on
Published on
Share this article
Improve this guide
Read our disclosure page to find out how can you help Windows Report sustain the editorial team Read more

Windows Firewall’s default function is to block unauthorized connections to protect your system; therefore, configuring it properly on Windows 11 is vital, especially when setting up SQL Server for remote access.
When configuring the SQL Server for remote access, you must allow certain ports and programs through the firewall to ensure clients can connect to the database securely.
Before we begin, make sure you have administrative rights on the Windows server where the SQL server is installed. Furthermore, ensure that the SQL server is installed and configured correctly.
How can I configure Windows 11 Firewall for SQL Server?
1. Create inbound rules for the SQL server ports
1.1 Mention the SQL server port
- Launch the SQL Server Configuration Manager.
- Go to SQL Server Network Configuration > Protocols for (Instance Name)
- Right-click TCP/IP and choose Properties.
- Go to IP Addresses tab, scroll down to find the TCP Port settings. Make sure TCP/IP is enabled. If it is not, right-click it and choose Enable.
1.2 Configure Windows Firewall
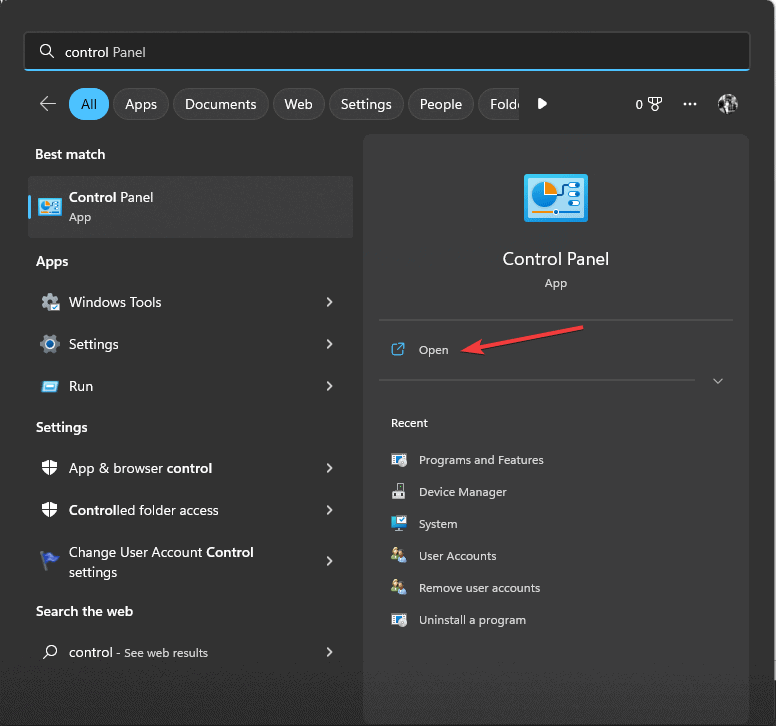
- Press the Windows key, type control panel in the search box, and click Open.

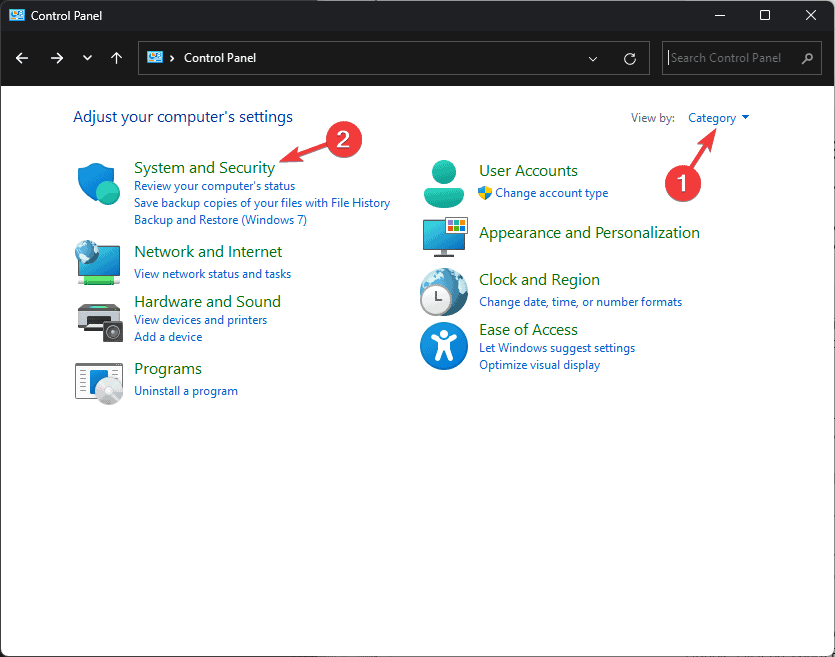
- Select Category for View by and click System and Security.

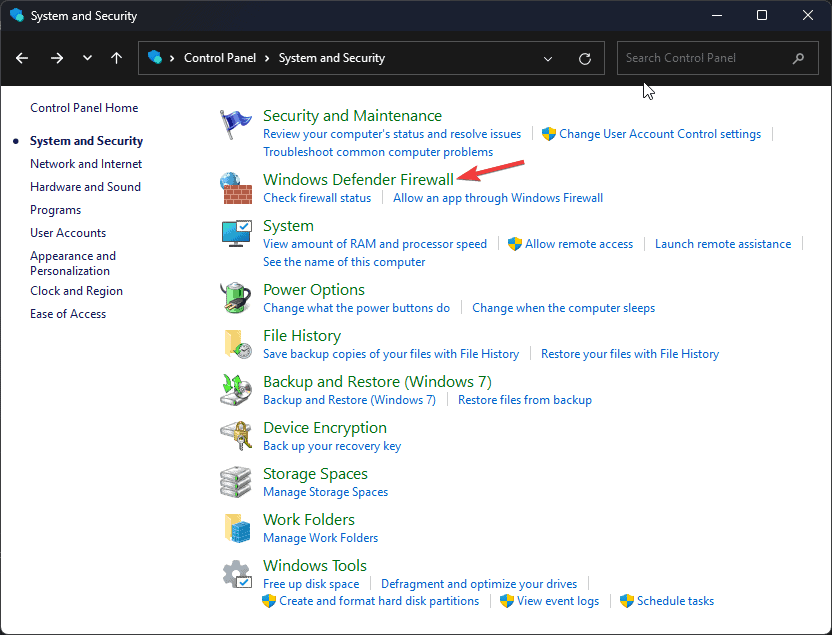
- Next, click Windows Defender Firewall.

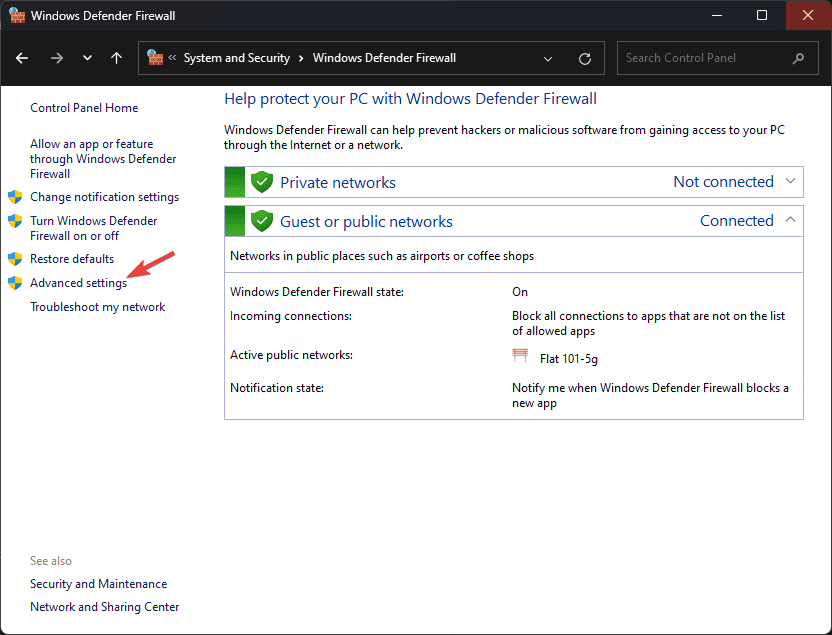
- From the left pane, click the Advanced settings link.
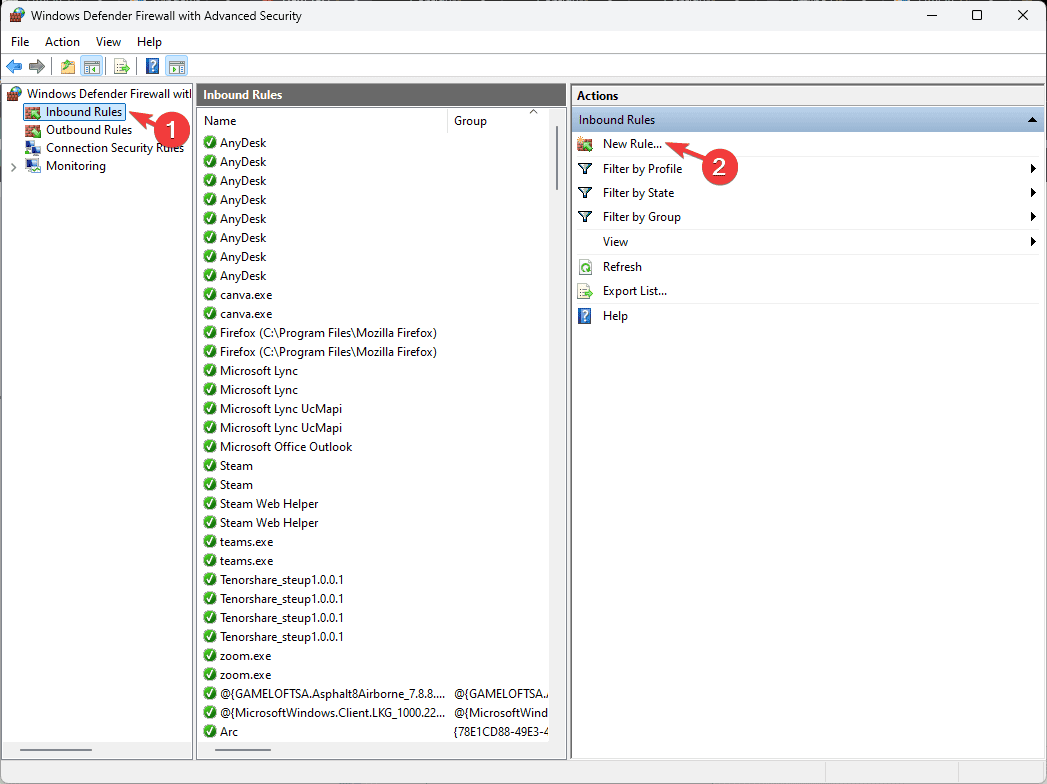
- On the Windows Defender Firewall with Advanced Security window, select the Inbound Rules option from the left pane and click New Rule from the Actions column.

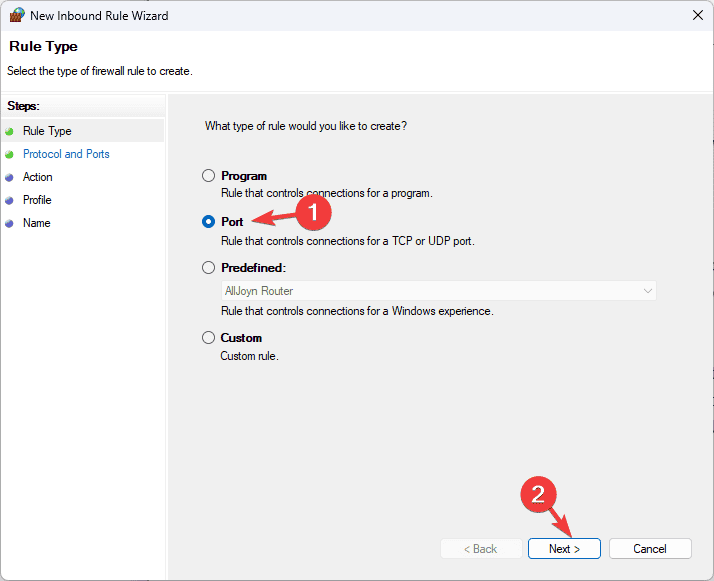
- On the New Inbound Rule window, select Port and click Next.

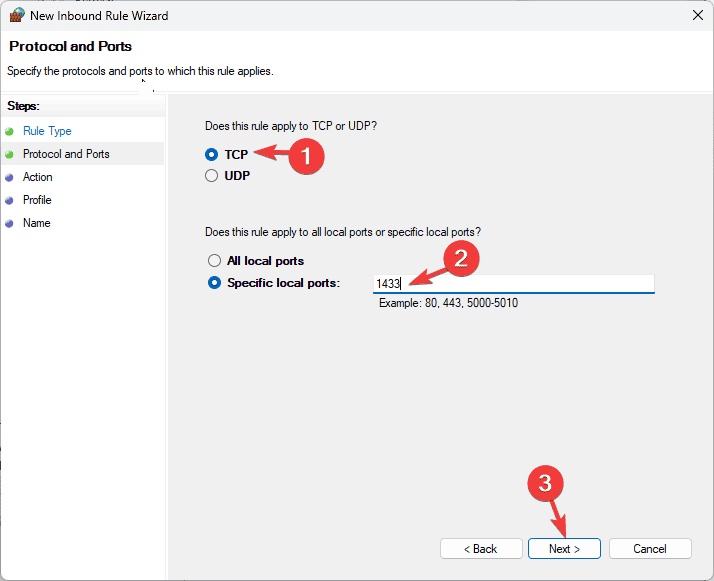
- Choose TCP and for Specific local ports, enter 1433, then click Next.
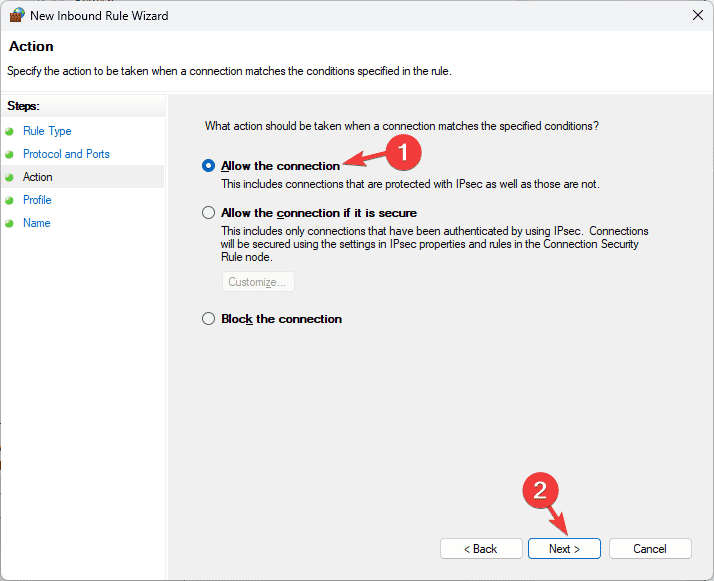
- Select the Allow the connection option and click Next.
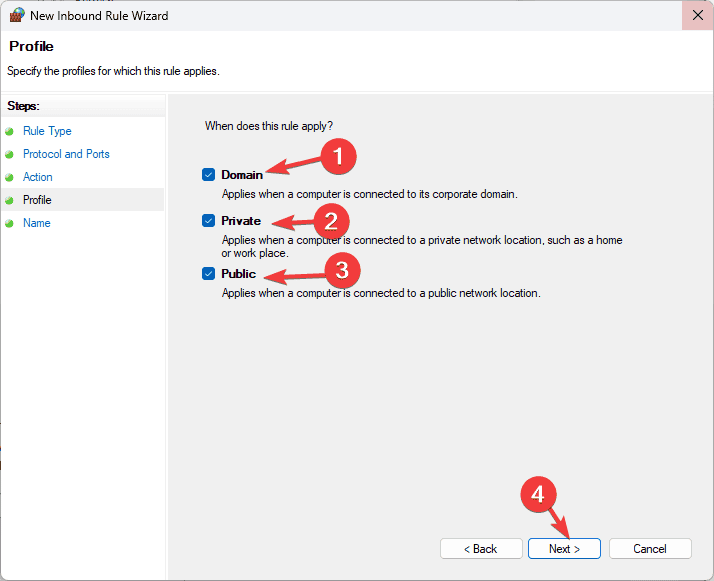
- Place a checkmark next to Domain, Private, and Public, then click Next.
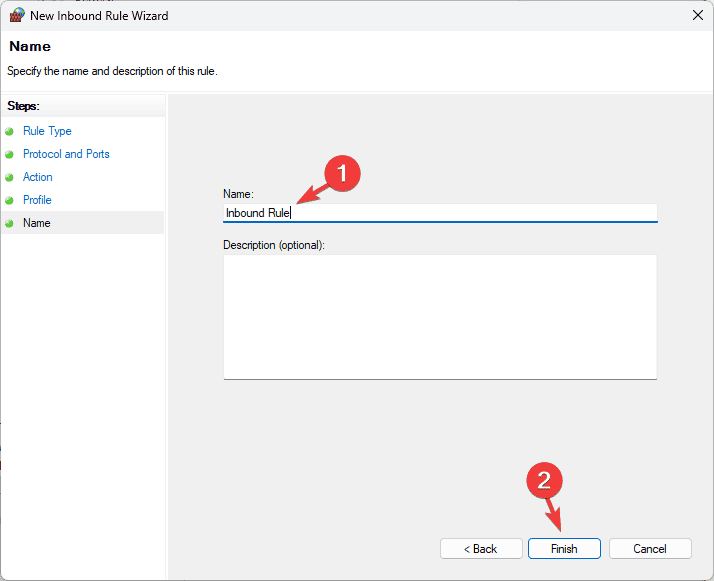
- Name the rule, add a description (optional) and click Finish.
Once done, you have to add the port SQL uses for UDP as well, follow these steps:
- On the Windows Defender Firewall with Advanced Security window, select the Inbound Rules option from the left pane and click New Rule from the Actions column.
- On the New Inbound Rule window, select Port and click Next.
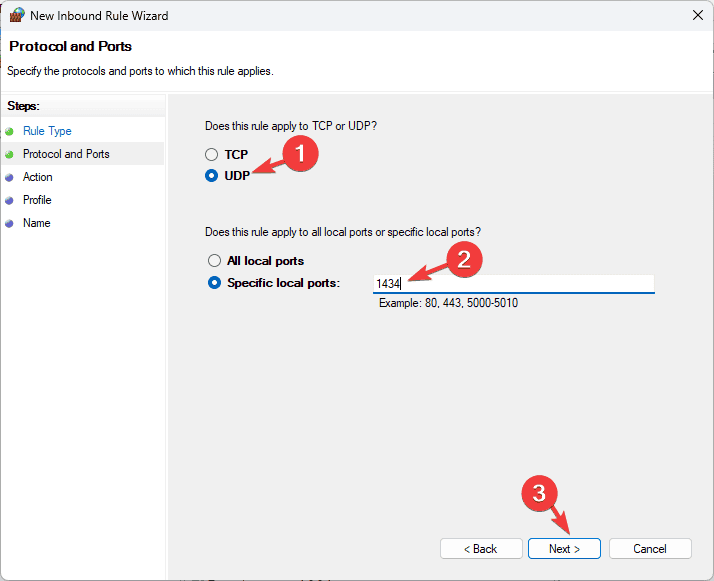
- Choose UDP and for Specific local ports, enter 1434, then click Next.
- Select the Allow the connection option and click Next.
- Place a checkmark next to Domain, Private and Public, then click Next.
- Name the rule, add a description (optional) and click Finish.
1.3 Create a Rule for SQL Server Management Studio (SSMS)
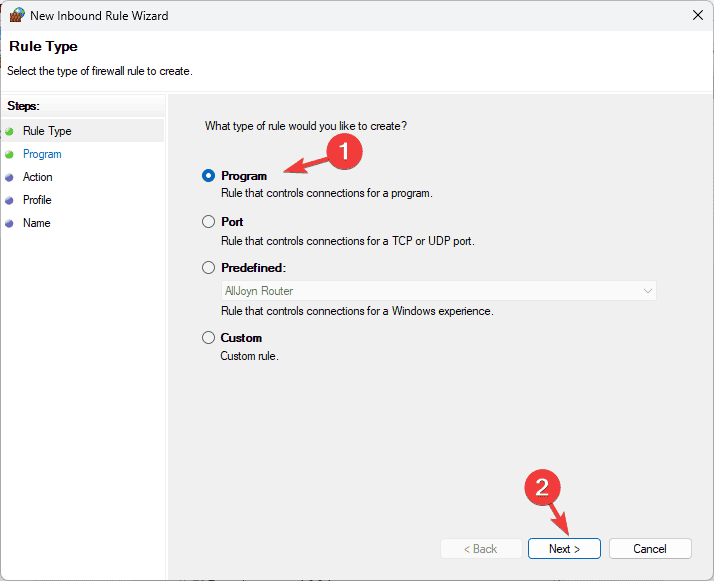
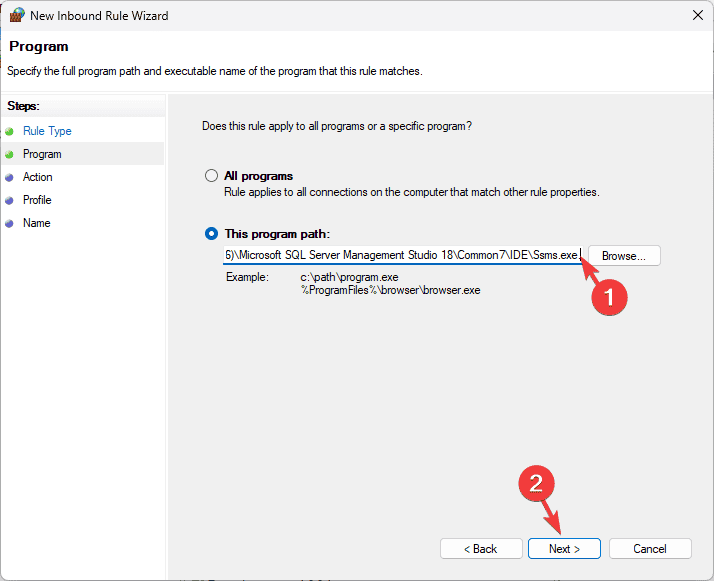
- Repeat steps from 1.2 to create an inbound rule but instead of Port, choose Program and click Next.
- On the next page, select This program path and click Browse and locate SSMS executable or enter this path:
C:\Program Files (x86)\Microsoft SQL Server Management Studio 18\Common7\IDE\Ssms.exe - Now select Allow the connection and click Next.
- Choose all profiles on the following page, and click Next.
- Name the rule and click Finish.
2. Allow the SQL Server applications in the Firewall
- Press the Windows key, type control panel in the search box, and click Open.
- Select Category for View by and click System and Security.
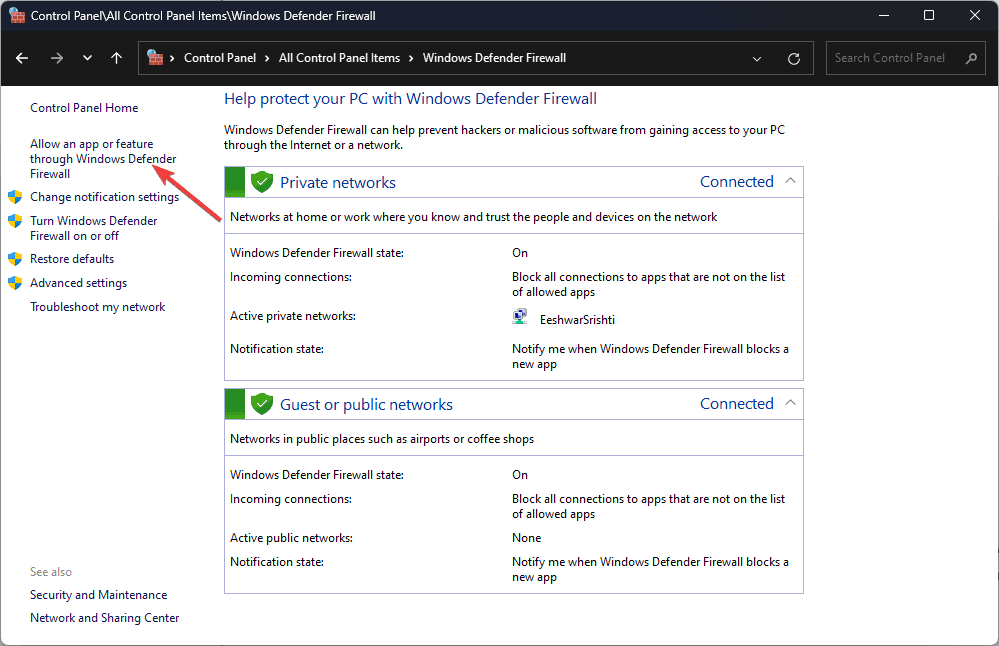
- Next, click Windows Defender Firewall.
- Click the Allow an app or feature through Windows Defender Firewall link from the left pane.

- On the Allowed apps window, you will see Allow another app button. If it is greyed out, click the Change settings button to enable it.
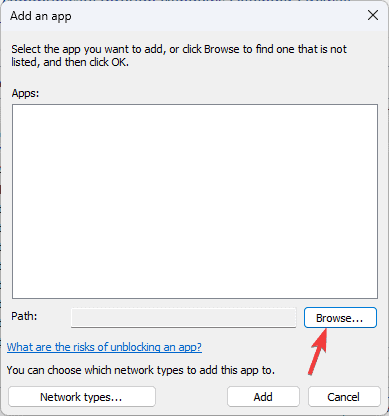
- Now, click the Allow another app button.

- Click the Browse button.

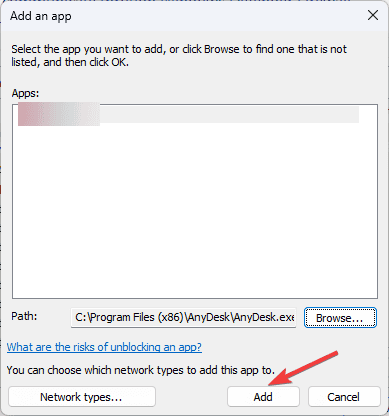
- Once you locate the sqlbrowser.exe file. This is the default location of the folder, navigate after replacing C with the system drive letter on your device:
C:\Program Files (x86)\Microsoft SQL Server\90\Shared - Click the Add button.
- Click OK to save the changes.

Now you will have to add SQL Server Application; for that, follow these steps:
- Open the Allowed apps window using the steps mentioned above, and click the Allow another app button.
- Click the Browse button.
- Once you locate the sqlserver.exe file. Here is the default location of the folder, but before navigating to the path, replace C with the system drive letter on your device:
C:\Program Files\Microsoft SQL Server\<Version and Edition>\MSSQL\Binn - Click the Add button.
- Click OK to complete.
To conclude, configuring the Windows 11 firewall for the SQL server is important for securing your database when enabling remote access. Remember to review your firewall settings and SQL security regularly according to your changing needs.
If you need help securing your SQL server database, here are some tips you can follow; read this guide to learn more. Also, if you are looking for a way to repair your corrupted database in an SQL server, we have a separate guide to help you.
If you have any suggestions or things to keep in mind related to setting up a Windows 11 Firewall for the SQL server, feel free to share them with our readers in the comments section below.


User forum
0 messages