Your Computer Needs to be Repaired Error in Windows 10/11
![]() 8 min. read
8 min. read
![]() Updated on
Updated on
Share this article

Improve this guide
Read our disclosure page to find out how can you help Windows Report sustain the editorial team Read more
Some users have reported that they didn’t have any problems using Windows 10 or Windows 10 Technical Preview since they’ve installed it, but recently, a strange error which says “Your computer needs to be repaired” shows up, preventing the normal work of the system.
How to Fix ‘Your Computer Needs to be Repaired” Error in Windows 10
Your computer needs to be repaired error can prevent you from starting your PC. This can be a big problem, and speaking of this issue, here are some similar problems that users reported:
- Your PC needs to be repaired 0xc000000f, 0xc000014c, 0xc0000225, 0xc0000098, 0xc0000185, 0xc0000034 – Various error codes can appear with this message, but you should be able to fix this and many other errors by using one of our solutions.
- Your computer needs to be repaired blue screen – Sometimes this problem can appear due to missing updates. If you can enter Windows, be sure to download and install the latest updates on your PC.
- HP, ASUS your computer needs to be repaired – This issue can affect any PC brand, and HP and ASUS aren’t exceptions. All of our solutions are universal, so you should be able to apply them regardless of the PC brand you’re using.
- Your PC needs to be repaired a required device is not connected, the boot configuration data file is missing, kernel is missing – Sometimes this issue can occur if the boot records are damaged or if your system files are corrupted. However, you can fix the issue by running a few commands in Command Prompt.
Solution 1 – Run Windows Update
According to users, Your computer needs to be repaired message can appear due to missing updates. However, you should be able to fix it simply by downloading and installing the latest updates.
By default, Windows 10 installs the missing updates automatically, but sometimes you might miss an update or two. However, you can always check for updates manually by doing the following:
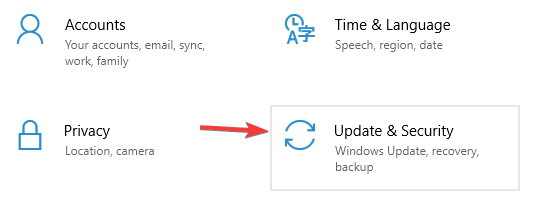
- Press Windows Key + I to open the Settings app.
- Now go to the Update & Security section.

- Click Check for updates button.

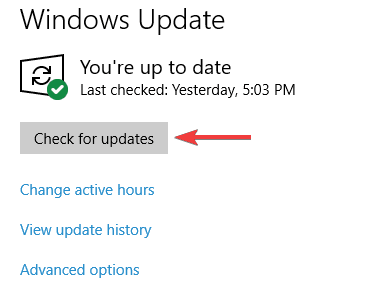
Windows will now check for available updates and download them in the background. Once the updates are downloaded, they’ll be installed as soon as you restart your PC. After your system is up to date, the problem should be resolved.
Since Windows Update runs automatically in Windows 10, and it downloads new builds and other updates automatically, not receiving the latest build probably means that Windows Update process is disabled. So, we’re going to check, and enable it again, if it’s disabled. To check if Windows Update process is running, do the following:
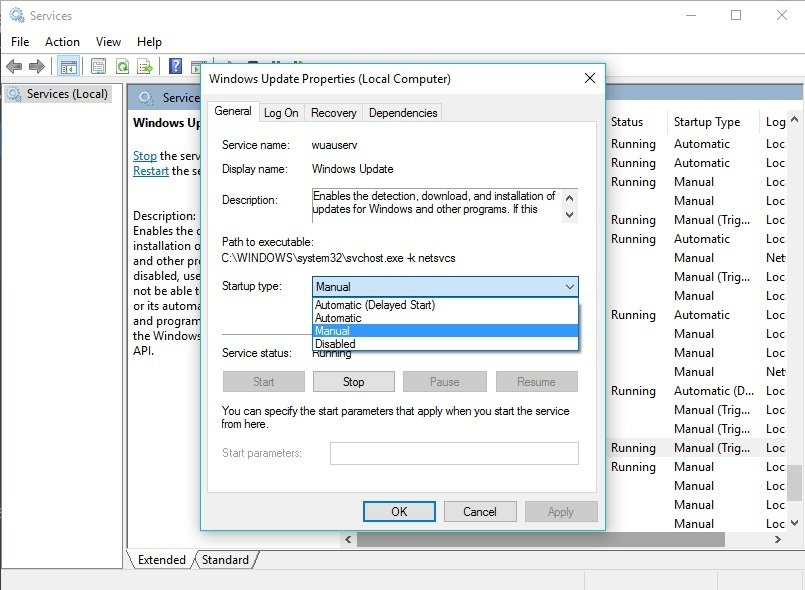
- Go to Search, and type services.msc, and open Services.
- Find Windows Update service and right-click on it, and go to Properties.
- See if the process is running, if not, select Startup Type as Manual, and click on Start.

Solution 2 – Change BIOS Date
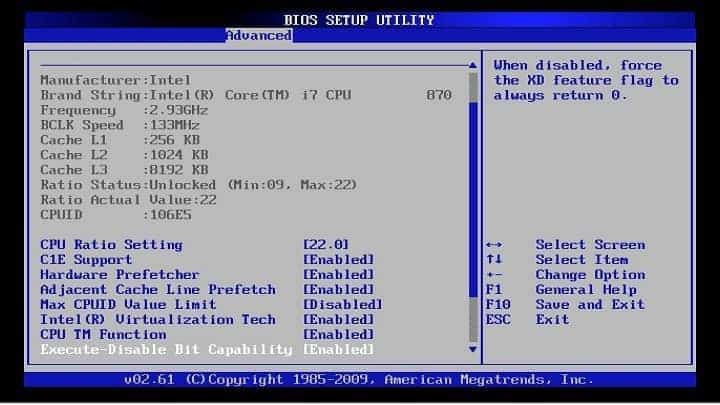
Another thing that could cause this problem is wrong BIOS date. Your current Windows 10 Build reads the date of your BIOS, and according to that date, it ‘decides’ whether it’s still valid or not. So if the BIOS date is wrong, the Build may ‘think’ that it’s expiration time, and you’ll have problems. So, just in case, enter your BIOS settings, and check if the date is right.
To check if your BIOS date is valid, do the following:
- Restart your computer.
- On the boot, press the key which allows you to enter BIOS settings (it’s usually DEL, but it varies on different computers).
- Find date and time of your BIOS, it’s usually under General tab.
- Follow the instructions from BIOS on how to change your date and time, and set it to the current date.
- Exit BIOS and start your computer again.
Unfortunately, we can’t give you precise instructions about changing your BIOS date and time, because it could be different on some computer, so if you’re having trouble changing the date and time of your BIOS by following our instructions, search the internet, and try to find instructions which fit well with your computer.
Solution 3 – Fix the boot records
According to users, sometimes this problem can occur due to issues with your boot records. However, you can fix that problem by running a couple of commands. To do that, first you need to start Command Prompt outside of Windows. You can do that by following these steps:
- Restart your PC several times during the boot sequence.
- Now select Troubleshoot > Advanced Options > Command Prompt.
- Run the following commands one by one:
- bootrec /scanos
- bootrec /rebuildbcd
- bootrec /fixmbr
- bootrec /fixboot
After running all commands, restart your PC and check if the problem is resolved.
Solution 4 – Delete the EFI partitions
Several users reported that Your computer needs to be repaired message can appear due to EFI partitions that remained from the old Windows installation. To fix the problem, users are suggesting to create a bootable media and boot your PC from it.
This will start the installation process. Select Advanced settings and look for EFI partitions from the older Windows installation. Once you find and remove those partitions, the problem should be completely resolved.
Solution 5 – Use Automatic Repair feature
If you can’t boot to your PC due to Your computer needs to be repaired message, you might be able to fix the problem by using Startup Repair feature. To do that, follow these steps:
- Restart your PC few times during the boot sequence. After a couple of restarts you’ll be presented with the list of options.
- Choose Troubleshoot > Advanced options > Automatic Repair.
- The repair process will now start. Wait for the few moments to complete.
- Once the process is finished, your PC will restart and everything should start working again.
Few users are suggesting to fix this problem by booting from the installation media and choosing the repair option. Once you start the repair option, follow the instructions from above to repair your PC.
Solution 6 – Remove unnecessary hardware and peripherals
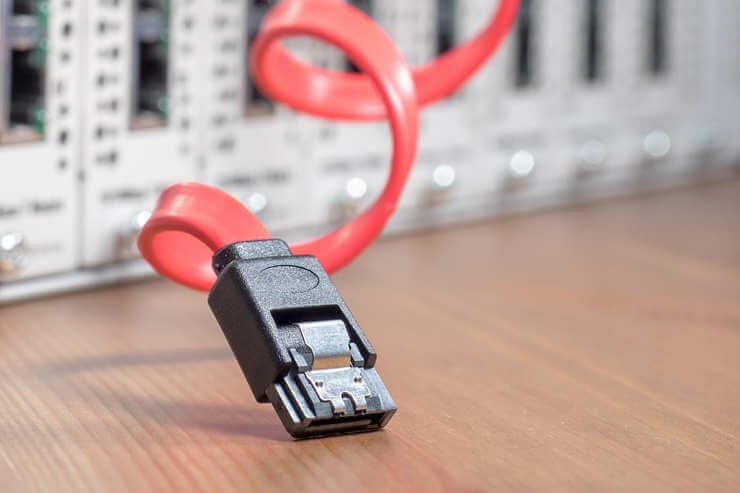
According to users, sometimes your peripherals or hardware can cause this issue to appear. If this problem started recently, be sure to remove any non-essential peripherals from your PC. If you have any USB devices connected, except your keyboard and mouse, be sure to remove them. The same goes for additional monitors.
As already mentioned, your hardware can cause this problem to appear, so be sure to check your hardware as well. If you installed any new hardware recently, check it and make sure that it’s working properly.
Solution 7 – Make sure that correct partition is set as active
Sometimes Your computer needs to be repaired message can appear if the incorrect partition is set as active. To fix this problem, you need to start Command Prompt outside of Windows and run a couple commands. To do that, follow these steps:
- Restart your PC several times during the boot sequence.
- Now choose Troubleshoot > Command Prompt from the menu.
- When Command Prompt opens, enter the following commands:
- diskpart

- list part
- diskpart
- Now find out which partition needs to be selected as active. Enter select partition X and replace the X with the matching number.
- Now enter active and press Enter.

After doing that, you can close Command Prompt and check if the problem with your system is resolved.
Solution 8 – Perform SFC and chkdsk scans
According to users, sometimes this error can occur if your system files are corrupted. However, you can fix this issue by performing both SFC and chkdsk scans. To do that, just follow these steps:
- Start Command Prompt outside of Windows like we showed you in one of our previous solutions.
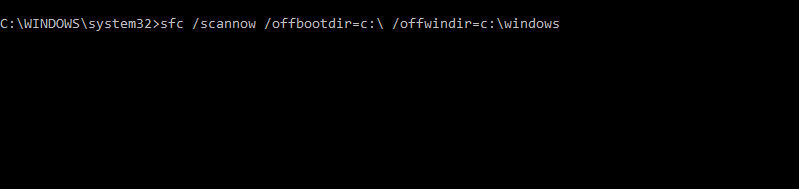
- When Command Prompt starts enter the following command:
- sfc /scannow /offbootdir=c: /offwindir=c:windows

Once the SFC scan is finished, check if the problem is still there. If the issue is still there, you might have to run one more command.
In some cases the files on your hard drive might be corrupted, and to fix them, run chkdsk c: /r command. Once your hard drive is scanned, check if the problem is resolved.
That would be all, I hope this article cleared up the situation for you, and that these solutions were helpful. If you have any comments, or questions, just let us know in the comments.
READ ALSO: