Fix: Error 0x80070005-0x90002 in Windows 10

Since free upgrade period ended on July 29, only way to get Windows 10 is to perform the clean install. Many users reported error 0x80070005-0x90002 while using Media Creation Tool, so let’s see how to fix this error.
Error 0x80070005-0x90002, how to fix it?
- Try using Media Creation Tool on a different PC
- Update your drivers
- Run the SFC scan
- Run DISM
- Run the Update Troubleshooter
- Uninstall previous updates
- Remove your antivirus software
- Delete $WINDOWS.~BT folder
Fix: Windows 10 upgrade error 0x80070005-0x90002
Media Creation Tool is a popular tool that downloads Windows 10 ISO file and creates a bootable media in just a few steps. This is an official tool from Microsoft, and users worldwide use it to create Windows 10 installation media. Since this is the only tool that allows you to download Windows 10 ISO files and create bootable media, it’s easy to see how error 0x80070005-0x90002 can cause so many problems. Even though problems with Media Creation Tool can be troublesome, there are few ways to fix these problems.
1. Try using Media Creation Tool on a different PC
If your computer is giving you error 0x80070005-0x90002 while using Media Creation Tool, you might want to try using it on a different PC. Users reported that they are unable to create a bootable media with Media Creation Tool on their PC, but the issue was easily fixed after using the Media Creation Tool on a different PC.
According to users, you just need to choose an option to create a media for another computer, insert a blank DVD or USB flash drive and wait for Media Creation Tool to complete the process. After doing that you can use the bootable media on your PC to install Windows 10.
2. Update your drivers
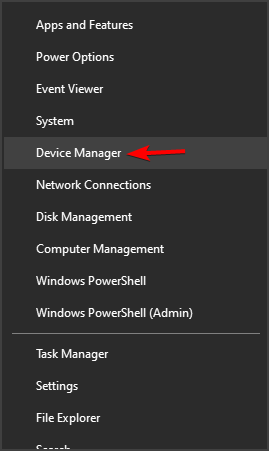
- Right-click the Start button and select Device Manager from the list.
- Go to the desired section and expand it.
- Right-click the component and select Update driver from the list of options.

- Select Search automatically for drivers.

- Do that for all the drivers you want to update.
It’s always a good idea to keep your drivers up to date. But this time, it may actually solve the problem you’re having. So, go and make sure all your drivers are updated.
In order to prevent PC damage by installing the wrong driver versions, we strongly suggest doing it automatically by using a driver updater tool.
An automatized solution will reduce your time spent and with just a few clicks the program will start scanning your PC for outdated drivers automatically.
- Download and install Outbyte Driver Updater.
- Launch the software.
- Wait for the app to detect all faulty drivers.

- Now, it will show you all the malfunctioning drivers listed to select the ones to Update or Ignore.
- Click on Update & Apply Selected to download and install the newest versions.
- Restart your PC to ensure the applied changes.

Outbyte Driver Updater
Secure your Windows PC with Outbyte from various errors caused by problematic drivers.3. Run the SFC scan
If none of the previous solutions managed to resolve the problem, we’ll seek help from troubleshooters. The first troublesooting tool we’re going to try is the SFC scan. This is a command-line tool that basically scans your computer for potential issues, and resolves them if possible.
Here’s how to run the SFC scan:
- Right-click on the Start Menu button, and open Command Prompt (Admin).
- Enter the following line and press Enter: sfc/scannow

- Wait until the process is done (it may take a while).
- If the solution is found, it will automatically be applied.
- Now, close the Command Prompt and restart your computer.
4. Run DISM
The next tool we’re going to try is DISM. Here’s how to run DISM in Windows 10:
- Open the Command Prompt as shown above.
- Enter the following command and press Enter:
- DISM.exe /Online /Cleanup-image /Restorehealth

- DISM.exe /Online /Cleanup-image /Restorehealth
- Wait for the process to finish.
- Restart your computer.
- In case the DISM can’t obtain files online, try using your installation USB or DVD. Insert media and type following command:
- DISM.exe /Online /Cleanup-Image /RestoreHealth /Source:C:RepairSourceWindows /LimitAccess
- Make sure to replace ”C:RepairSourceWindows” path of your DVD or USB.
- Follow further on-screen instructions.
5. Run the Update Troubleshooter
And finally, if the command line tools faild to resolve the issue, let’s try Windows 10‘s built-in troubleshooting tool. You can use this tool to fix various issues, including update problems.
Here’s how to run Windows 10‘s troubleshooter:
- Go to Settings.
- Head over to Updates & Security > Troubleshoot.
- Select Windows Update, and go to Run the Troubleshooter.

- Follow further on-screen instructions and let the process finish.
- Restart your computer.
6. Uninstall previous updates
There’s also a chance some previous update you installed prevents your system from receiving new ones. In that case, the best solution is to simply delete that update. Here’s how to do that:
- Go to Settings > Updates & Security > Windows Update.
- Go to Update history > Uninstall updates.

- Now, find the troublesome update (you can sort updates by date), right-click it, and go to Uninstall.
- Restart your computer.
7. Remove your antivirus software
Users reported that error 0x80070005-0x90002 can be caused by your antivirus software, therefore it’s advised that you disable it or remove it while using Media Creation Tool. Almost any antivirus tool or firewall can cause this error to appear, therefore be sure to remove all antivirus programs from your PC in order to fix this error.
Sometimes the easiest way to fix problems on your PC is to update all your drivers. Updating drivers manually can be a long and tedious process, but with this Driver Update software, you can quickly download all the necessary drivers thus fixing many problems.
8. Delete $WINDOWS.~BT folder
And finally, some users also reported that deleting the $WINDOWS.~BT folder resolves this problem, so we can try that, as well. Here’s what you need to do:
- Open File Explorer, and go to This PC > Local Disk (C:) (or whichever your system hard drive is).
- Now, click View and check the box that says Hidden Files.
- Find the folder named $WINDOWS. ~ BT.
- Rename it or delete it.
Error 0x80070005-0x90002 can cause big problems if you’re trying to create a Windows 10 bootable media, but we hope that you fixed this issue after using one of our solutions.
Read our disclosure page to find out how can you help Windows Report sustain the editorial team. Read more


Improve this guide


User forum
0 messages