0x80070539 Windows Update Error: How to Fix It
We recommend restarting vital Windows update components
![]() 3 min. read
3 min. read
![]() Updated on
Updated on
Share this article

Improve this guide
Read our disclosure page to find out how can you help Windows Report sustain the editorial team Read more
Key notes
- The Windows update error 0x80070539 is a general error code that can occur when Windows fails to install or update a program.
- To fix it, you may try a system restore as a last resort since this may make you lose some installed applications.

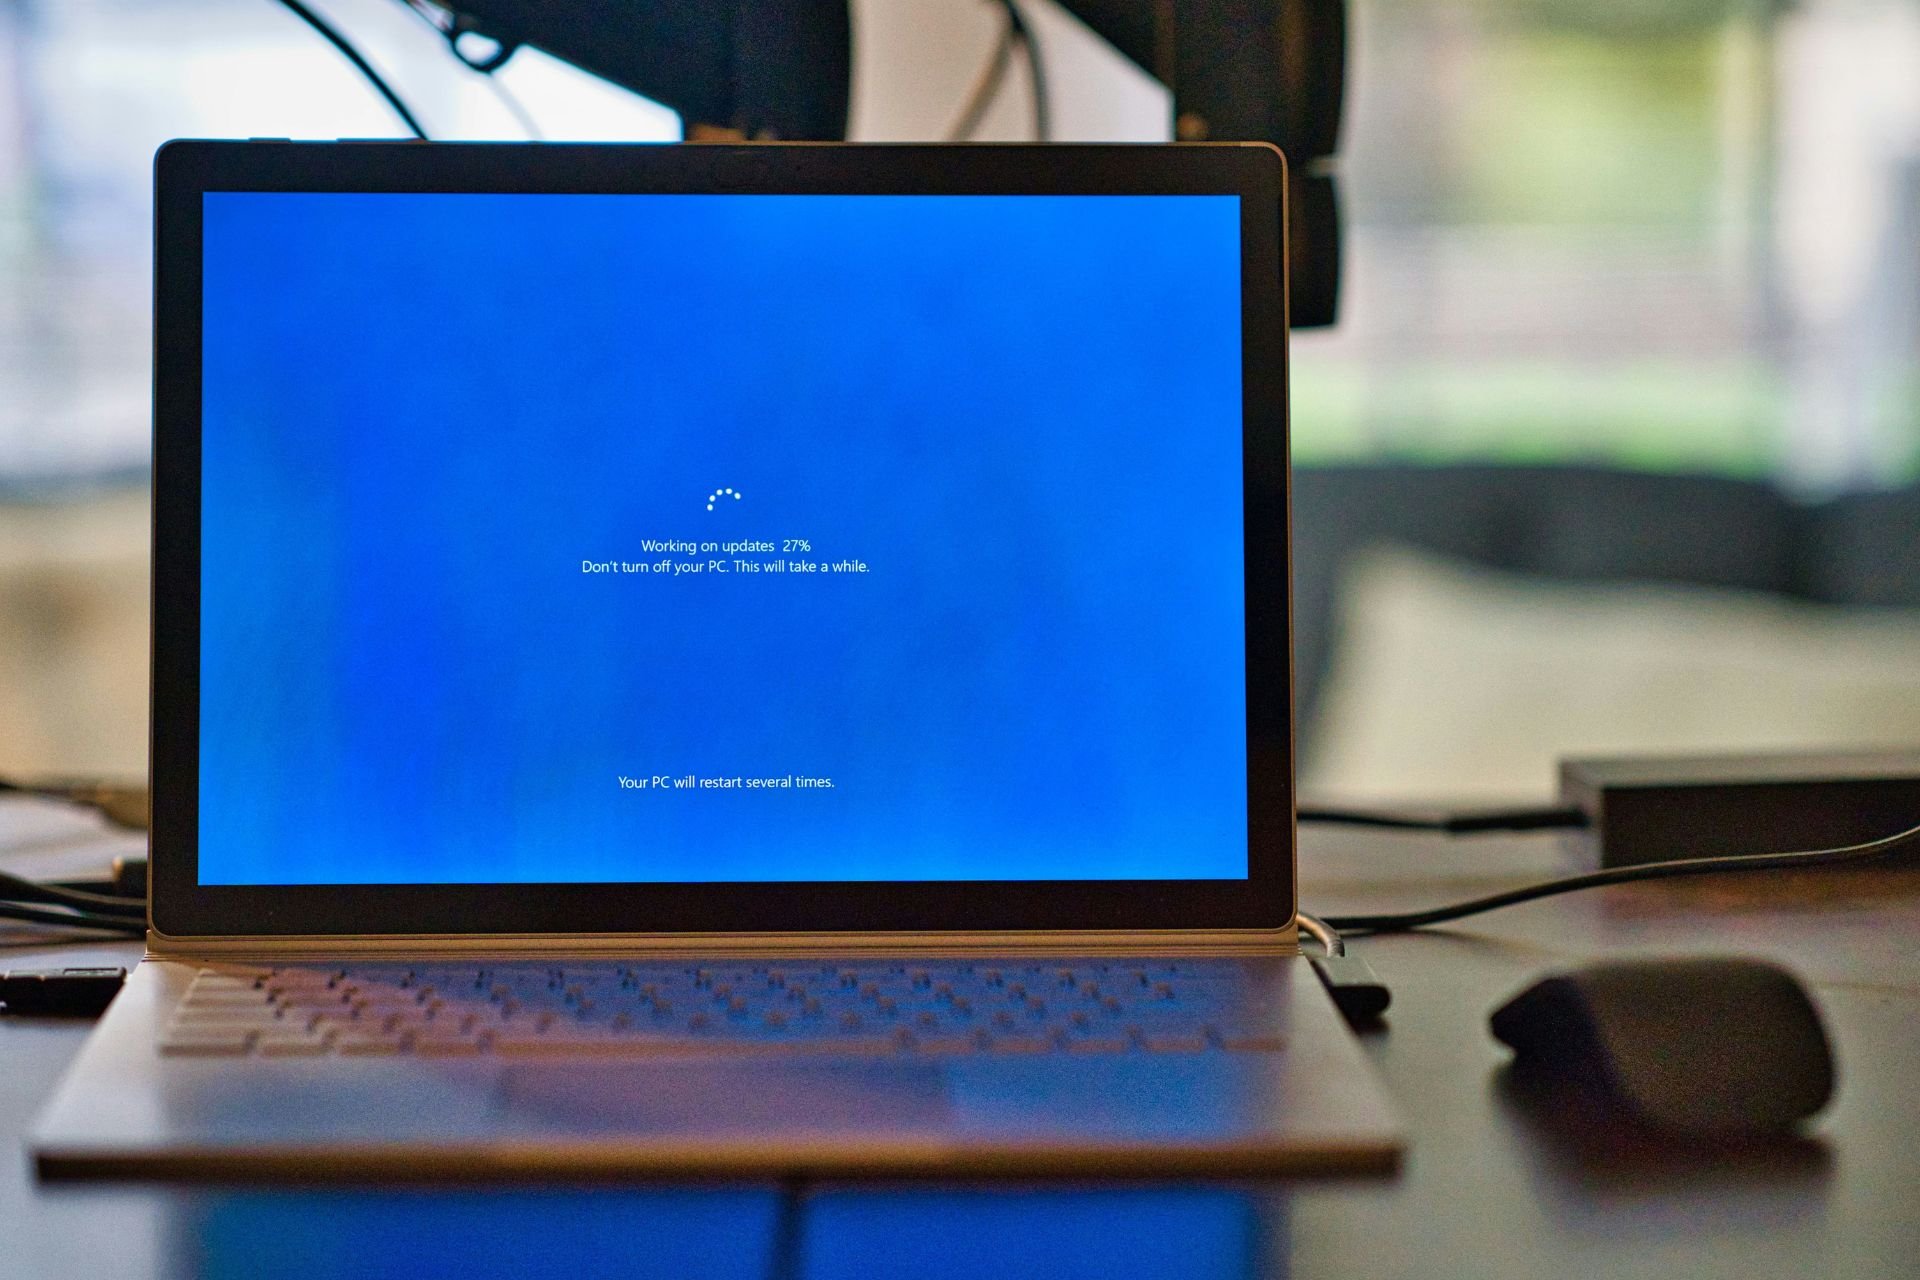
Windows update errors are quite common, and I’m sure they happen to many Windows users ever since the operating system has been receiving more regular updates.
There are many types of errors, and each comes with its unique error code, such as the 0x80070539 error.
This particular error mostly occurs during the installation process, when a Windows update system is broken, or due to network glitches when installing the updates
In this guide, I will try to help you resolve this update error with some practical and easy-to-apply solutions.
What is the 0x80070539 Windows update error?
This error means that Windows fails to install or update a program, and any of the following causes it:
- Corrupted Windows update service files.
- While rare, hardware problems may trigger the update error.
- Conflicts triggered by your anti-virus software.
We recommend always using the most reliable and compatible Windows 11 antivirus software, as it reduce the chances of conflicts and errors.
How do I fix error 0x80070539?
We recommend you take the following steps before trying other solutions:
- Temporarily disable your anti-virus software, then try the update.
If this does not work, proceed to the solutions we recommend below.
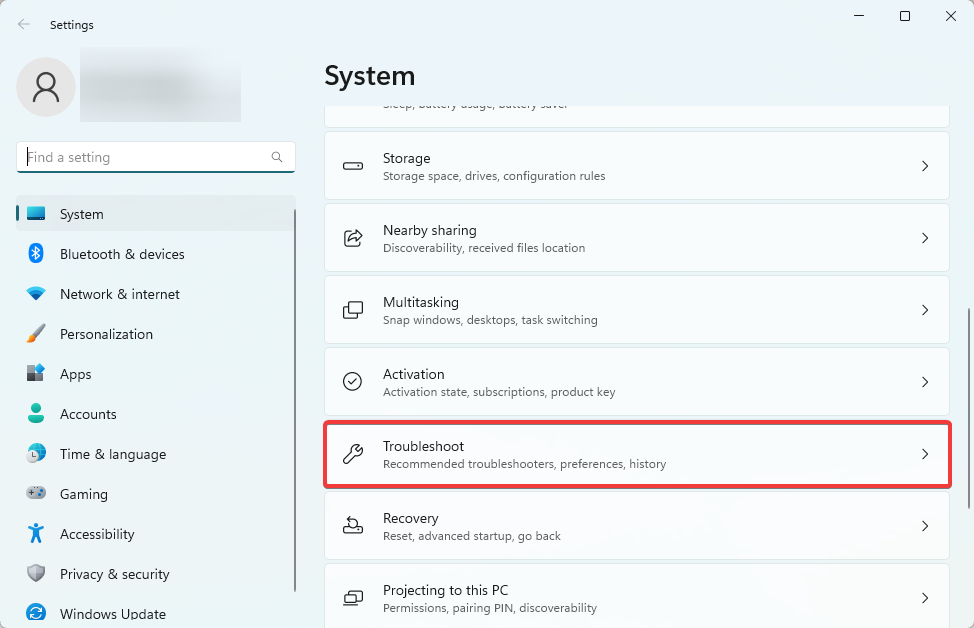
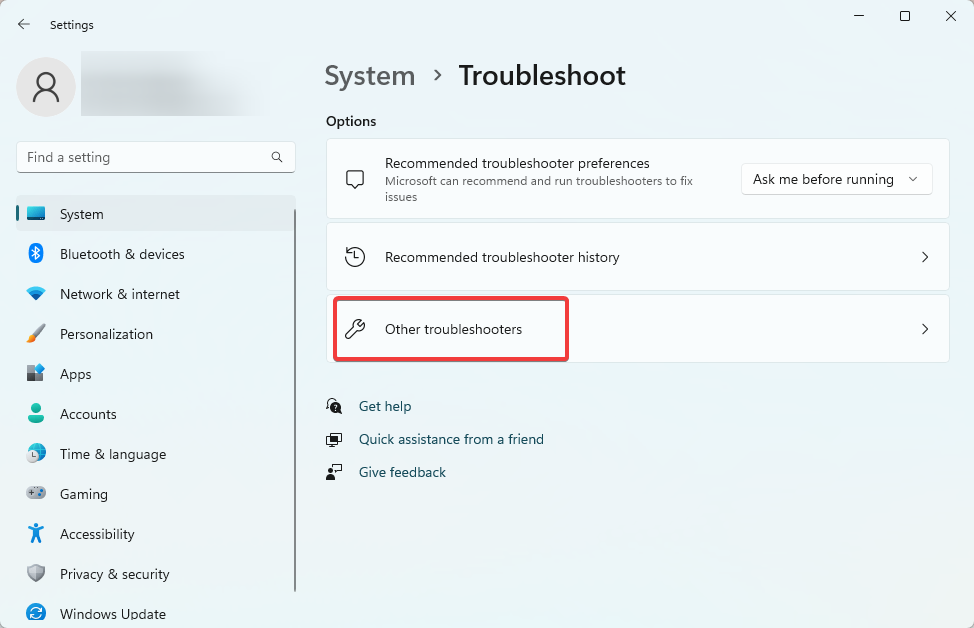
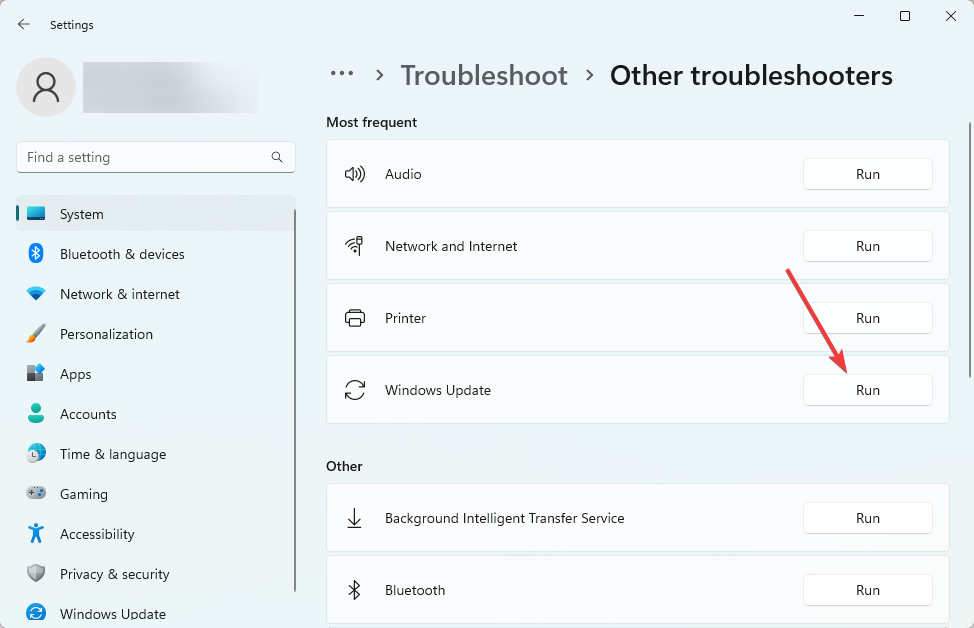
1. Run the Windows update troubleshooter
- Press Windows + I to open the Settings app.
- On the right pane, click on Troubleshoot.

- Select Other troubleshooters.
- Click the Run button for Windows update.
- Finally, apply any recommendations and, if required, restart your computer, then verify it fixes the 0x80070539 error.
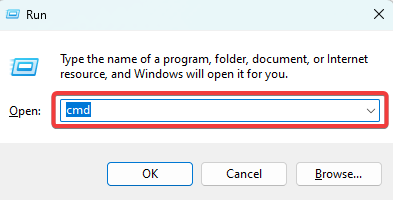
2. Run the System File Checker
- Open the Run dialog by pressing Windows + R.
- Type cmd and press Ctrl + Shift + Enter to open the Command Prompt with administrator privileges.

- Input the scan script below and hit Enter.
sfc /scannow
- Finally, follow any prompts given, and restart your computer.

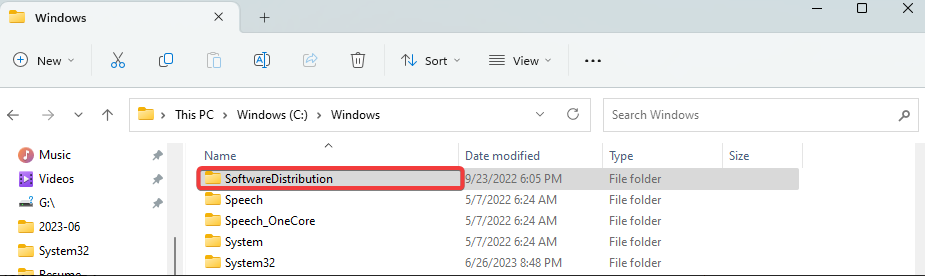
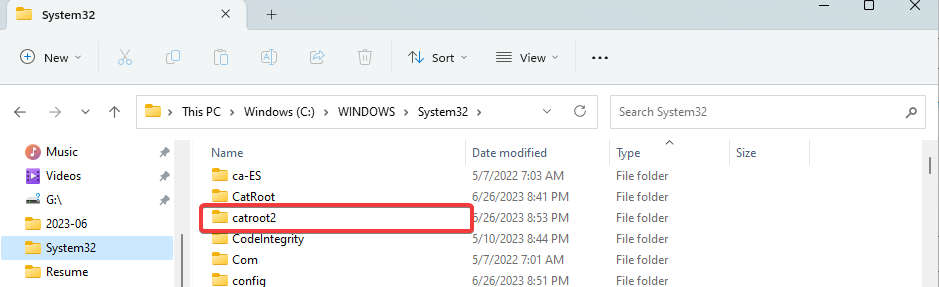
3. Reset update components
- Open the Run dialog by pressing Windows + R.
- Type cmd and press Ctrl + Shift + Enter to open the Command Prompt with administrator privileges.
- Input the scripts below in the Command Prompt and hit Enter after each one to stop vital update components.
net stop bits
net stop wuauserv
net stop appidsvcnet stop cryptsvc
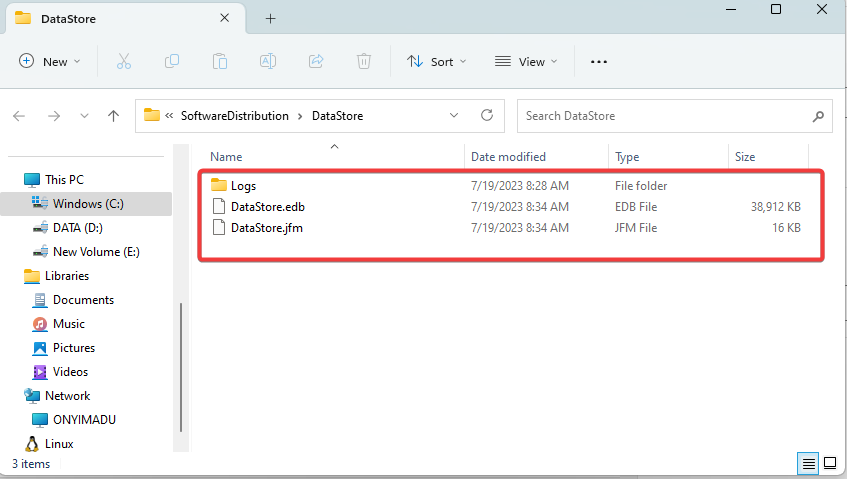
- Open File Explorer by pressing Windows + E.
- Navigate to the path below and rename SoftwareDistribution to SoftwareDistribution.old.
C:\Windows
- Navigate to the path below and rename Catroot2 to Catroot2.old.
C:\Windows\System32\
- Once again, open an elevated Command Prompt and restart the vital Windows services by running the scripts below:
net start bits
net start wuauservnet start appidsvc
net start cryptsvc
- Finally, restart your computer and verify it fixes the 0x80070539 update error.


4. Clean the Windows Update temporary cache
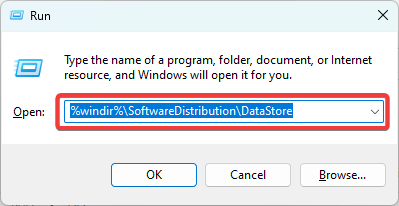
- Open the Run dialog by pressing Windows + R.
- Type the path below and hit Enter.
%windir%\SoftwareDistribution\DataStore
- Delete the content of the directory.

- Finally, restart your computer and verify it fixes the 0x80070539 update error.
There you have it; some of the most practical ways of troubleshooting the Windows update error. In rare cases, you may consider a system restore, making you lose some of your recently installed applications.
Please let us know if you have found this article helpful, and tell us the solutions that worked for you.