Windows XP Sounds for Windows 11: How to Download & Set Up
Explore the easy ways to get the good old Windows XP sounds
3 min. read
Updated on
Read our disclosure page to find out how can you help Windows Report sustain the editorial team. Read more
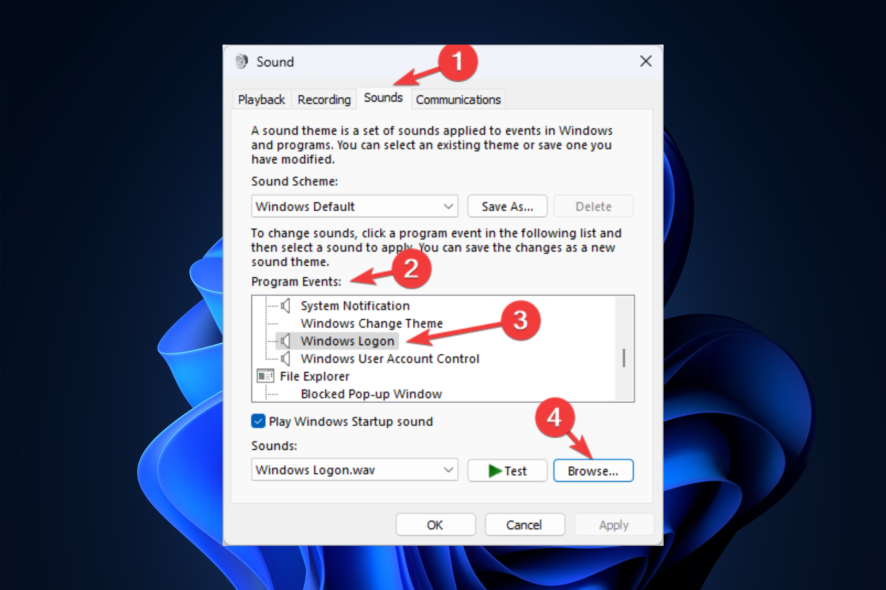
Do you want to bring back the nostalgia of using Windows XP with the iconic startup and shutdown sounds on your Windows 11?
This guide will discuss ways to download and set up the Windows XP sounds for Windows 11. Let’s start!
How can I download and set up Windows XP sounds on Windows 11?
1. Enable Windows XP startup sound
1.1 Download the .wav file
- Go to the Vsthemes website.
- Scroll the page and click Download file to download all the Windows XP sounds.
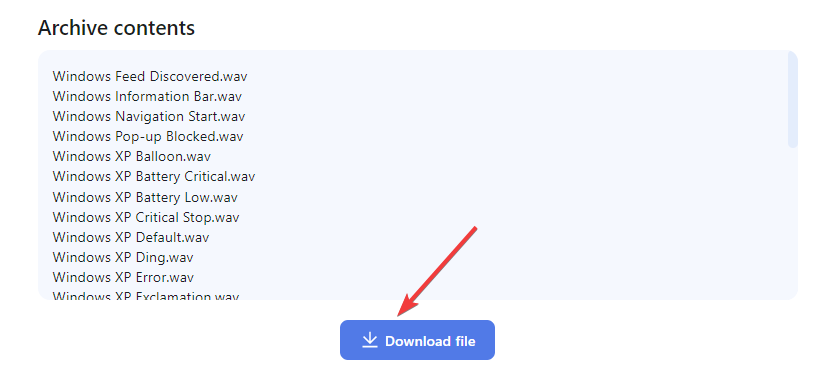
- Now next page, click Download.

- Save the file in an accessible location.
1.2 Make changes in Registry Editor
- Press Windows + R to open the Run window.
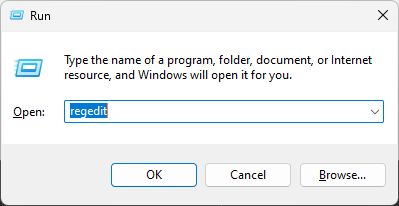
- Type regedit and hit Enter to open Registry Editor.
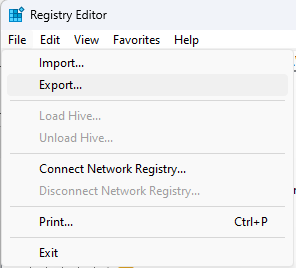
- First, take a backup, go to File, then click Export. Next, save the .reg file on your computer.
- Navigate to this path:
Computer\HKEY_CURRENT_USER\AppEvents\EventLabels\WindowsLogon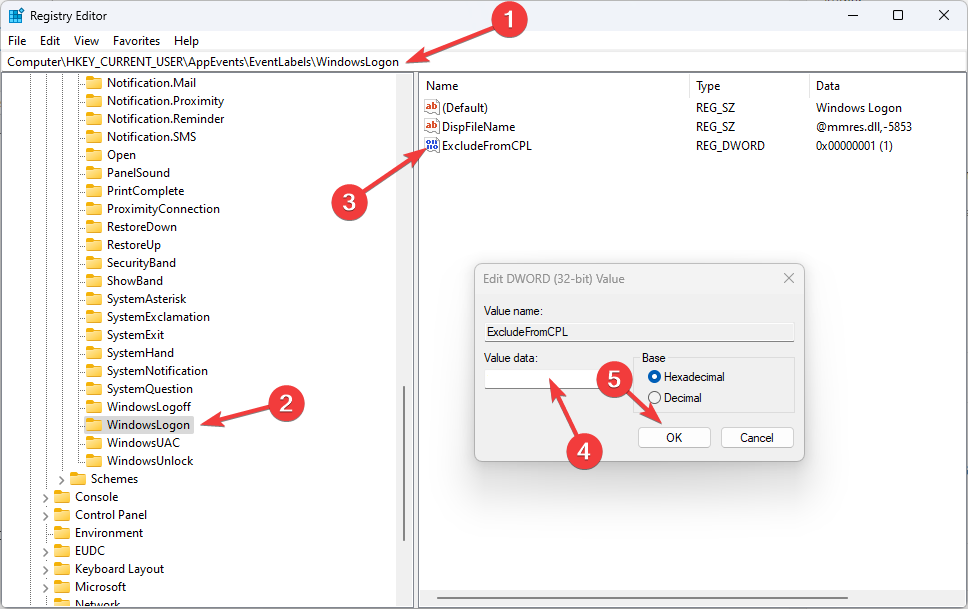
- Double-click ExcludeFromCPL and change the Value data to 0.
- Restart your computer.
1.3 Change settings in Control Panel
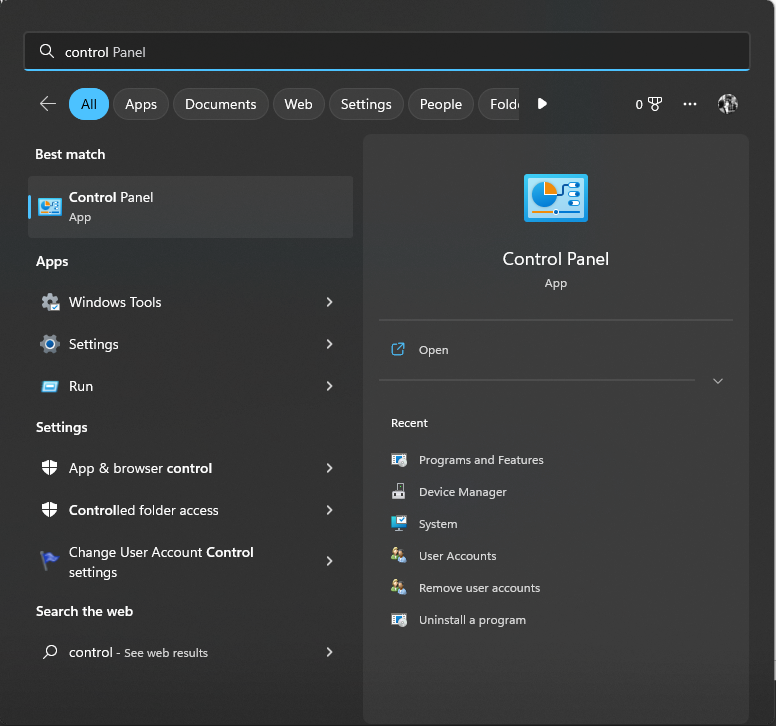
- Press the Windows key, type Control Panel, and click Open.
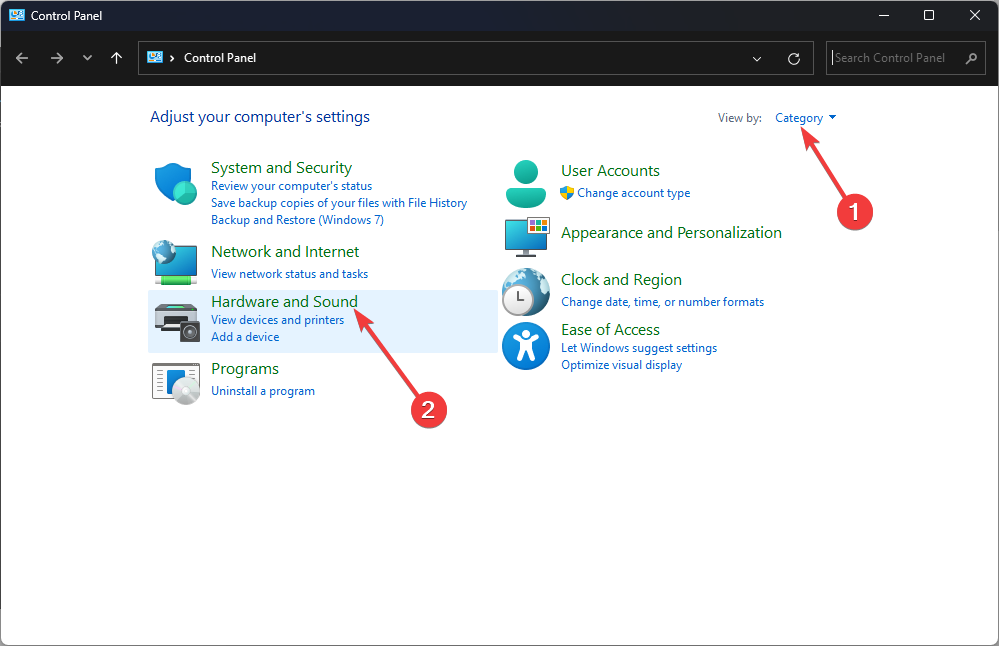
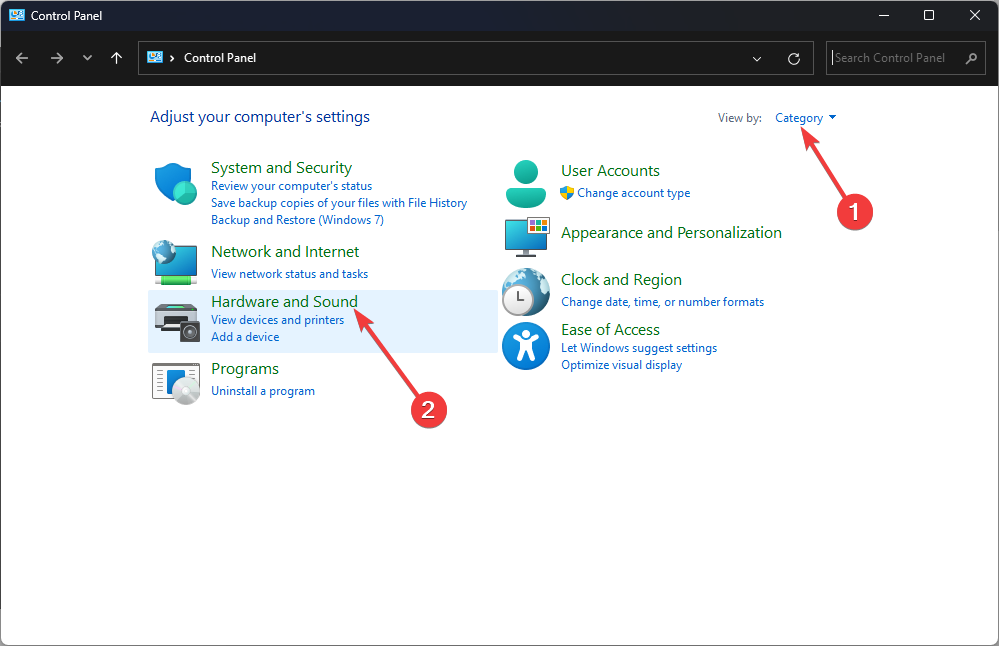
- For View by, select Category. Click Hardware and Sound.
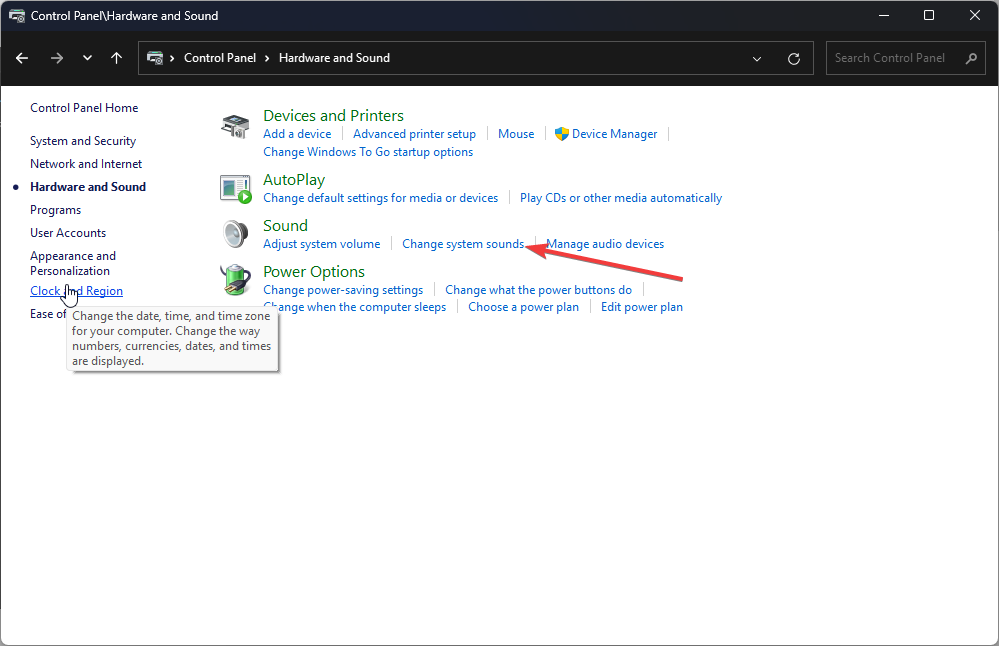
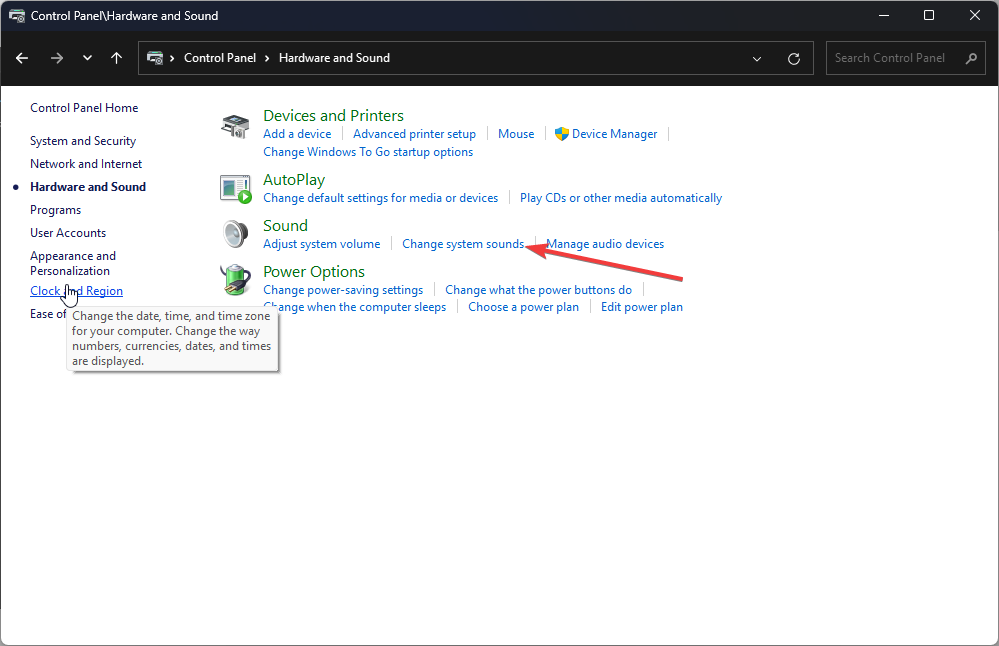
- On the next page, under Sound, click Change system sounds.
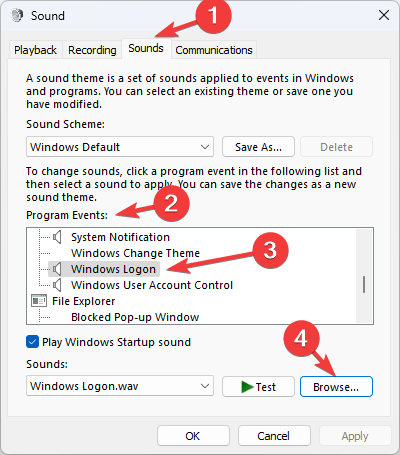
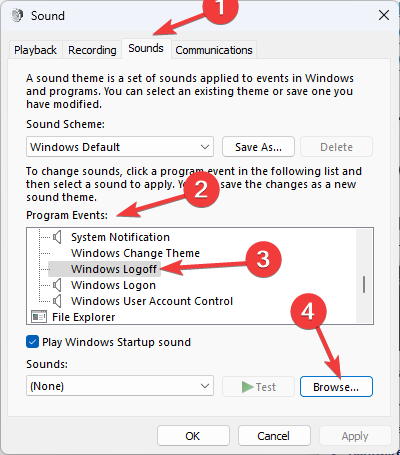
- Go to the Sounds tab, under Program Events, under Windows, and click Windows logon.
- Click Browse.
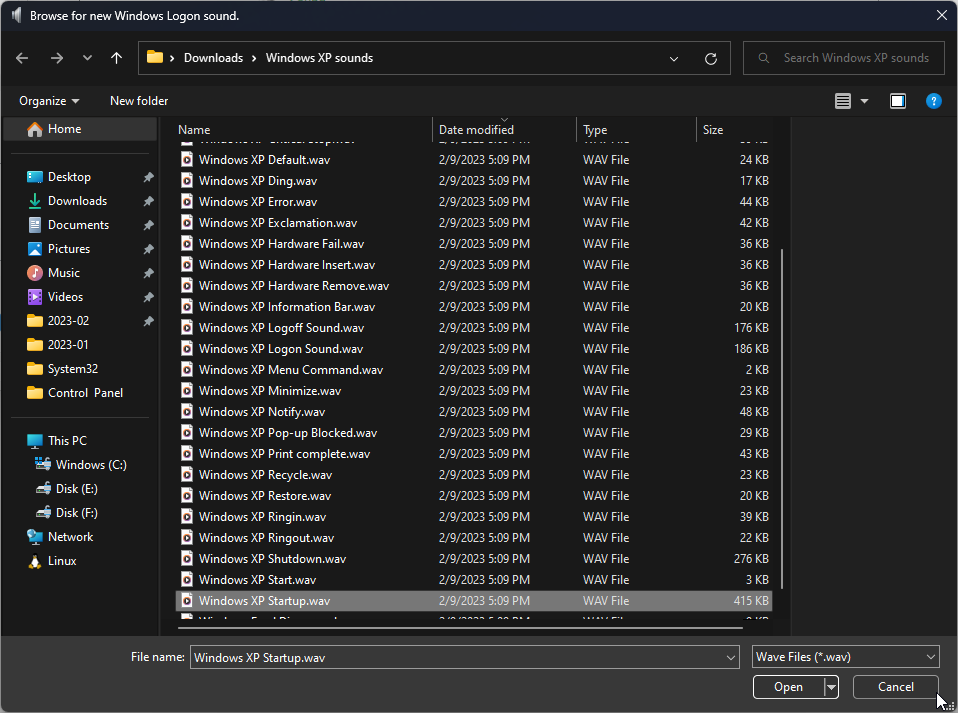
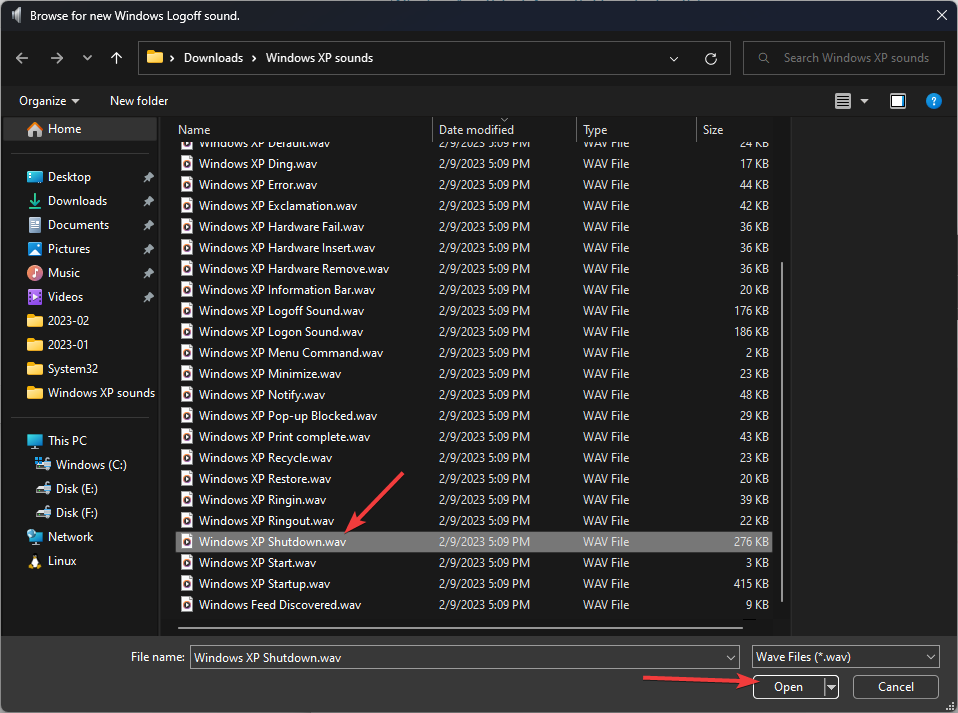
- Select the file you downloaded, and click Open.
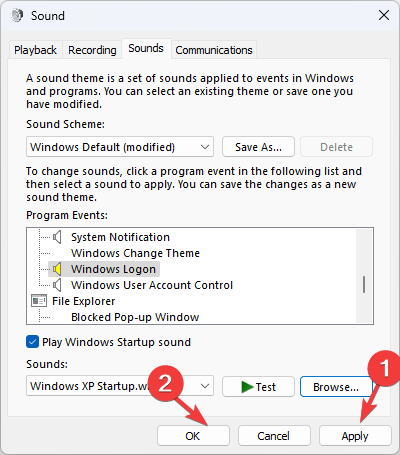
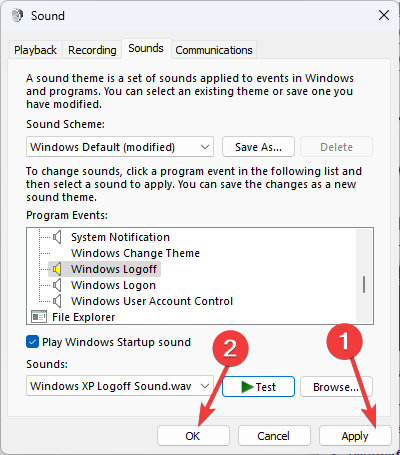
- Click Apply and then OK.
- Restart your computer to listen to the sound.
2. Enable Windows XP shut down sound
2.1 Make changes in Registry Editor
- Press Windows + R to open the Run console.
- Type regedit and hit Enter to open Registry Editor.
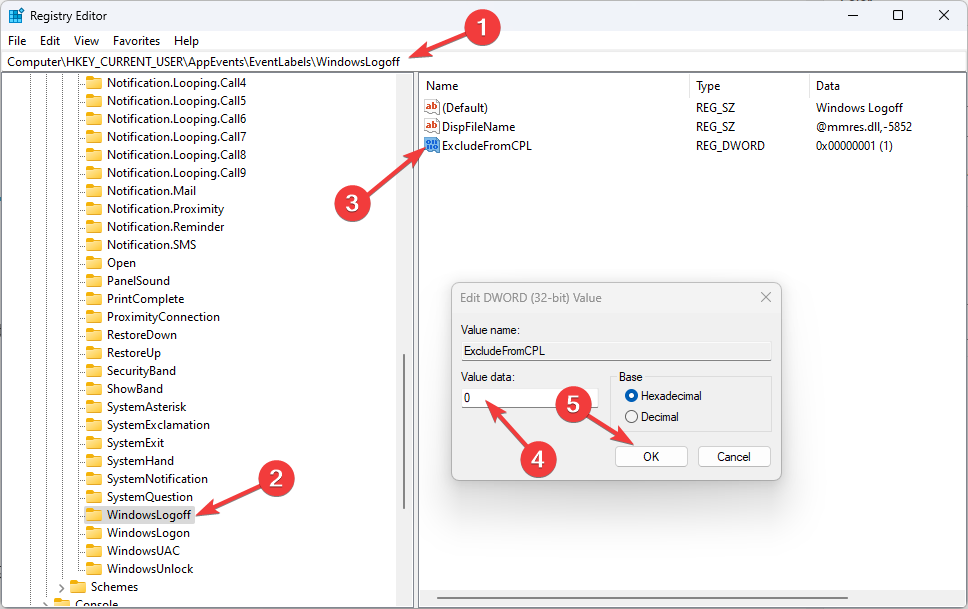
- Navigate to this path:
Computer\HKEY_CURRENT_USER\AppEvents\EventLabels\WindowsLogoff - Locate ExcludeFromCPL and change the Value data to 0.
- Restart your PC.
2.3 Change settings in Control Panel
- Open Control Panel by using the steps mentioned in the first method.
- For View by, select Category. Click Hardware and Sound.
- Under Sound, click Change system sounds.
- On the next page, under Program Events, navigate to Windows, then select Windows Logoff.
- Click Browse.
- Select the shutdown sound from the folder you downloaded in the first step and click Open.
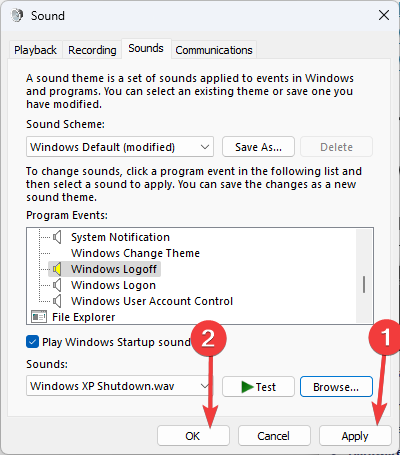
- Click Apply and then OK.
3. Enable other sounds
- Open Control Panel by using the steps mentioned in the first method.
- For View by selecting Category from the drop-down. Click Hardware and Sound.
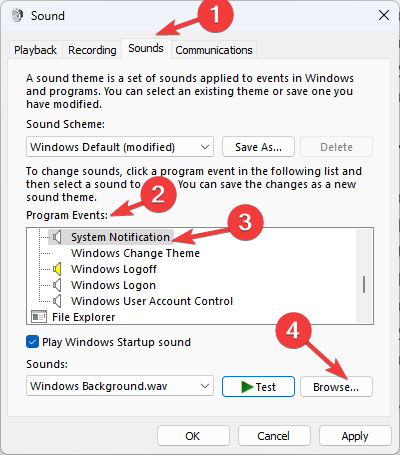
- Under Sound and click Change system sounds.
- Now go to Program Events under Windows, navigate to the sound you want to change, and select it. Click Browse.
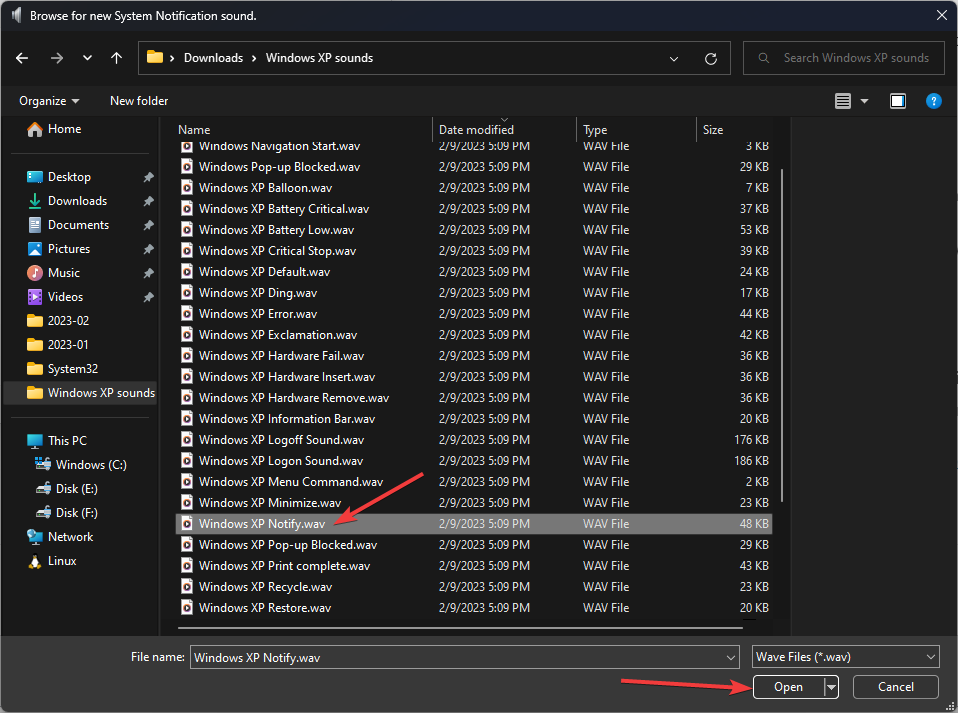
- Select the .wav file from the downloaded folder and click Open.
- Click Apply and OK.
So, this is how you can download and set up Windows XP sounds on your Windows 11 computer. If you have any questions or concerns, please feel free to mention them in the comments section below.
Windows XP was one of the best versions of Windows, and you can still keep using it with a few tips mentioned here.
For fans of Windows 7, we have a great article on Windows 7 startup sound, so don’t miss it.


User forum
0 messages