How to create sub-tasks in Microsoft To-Do
![]() 2 min. read
2 min. read
![]() Published on
Published on
Share this article

Improve this guide
Read our disclosure page to find out how can you help Windows Report sustain the editorial team Read more

Here’s a simple To-Do tip which you may have overlooked. Sub-tasks, also known as steps, allow you to break tasks down into multiple distinct stages, each with their own completion status. This enables you to track entire processes within a single task, avoiding the need to clutter lists with multiple related tasks.
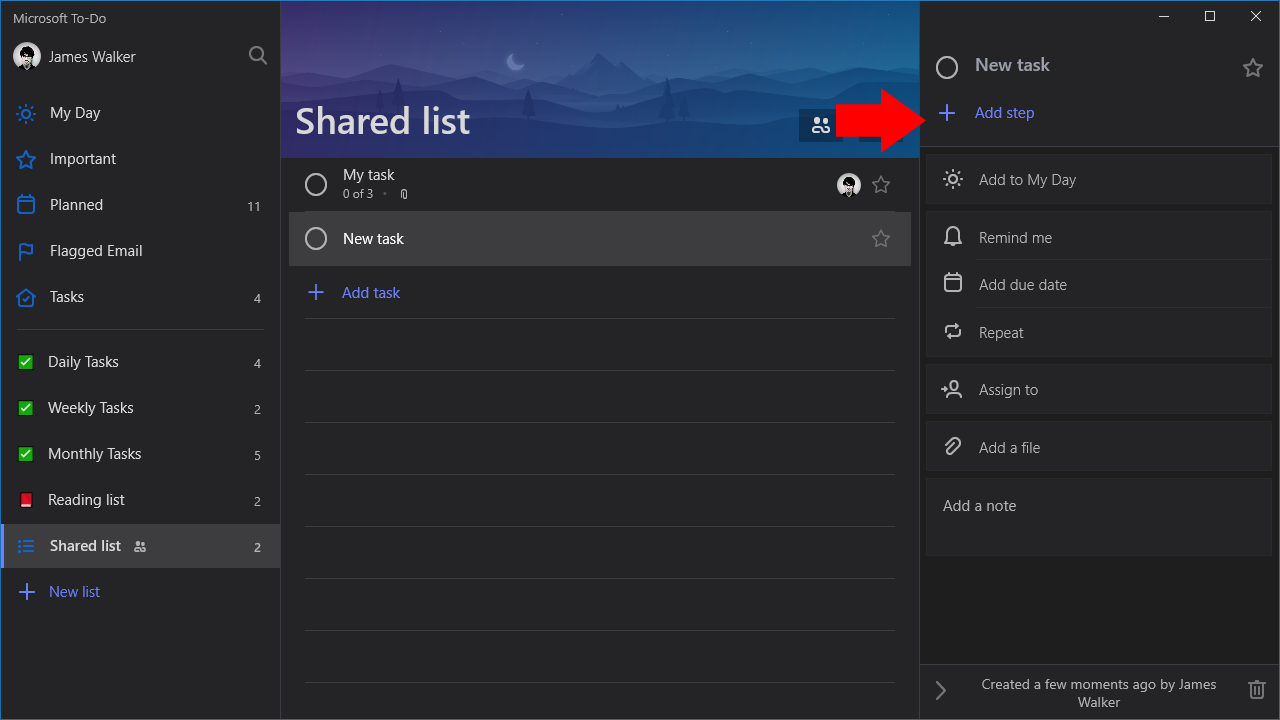
Every To-Do task can contain steps. To add a step to a task, click the task’s name to reveal its details pane. Then, click “Add step” at the top of the panel and type a description for the step. You can add as many steps as you need.
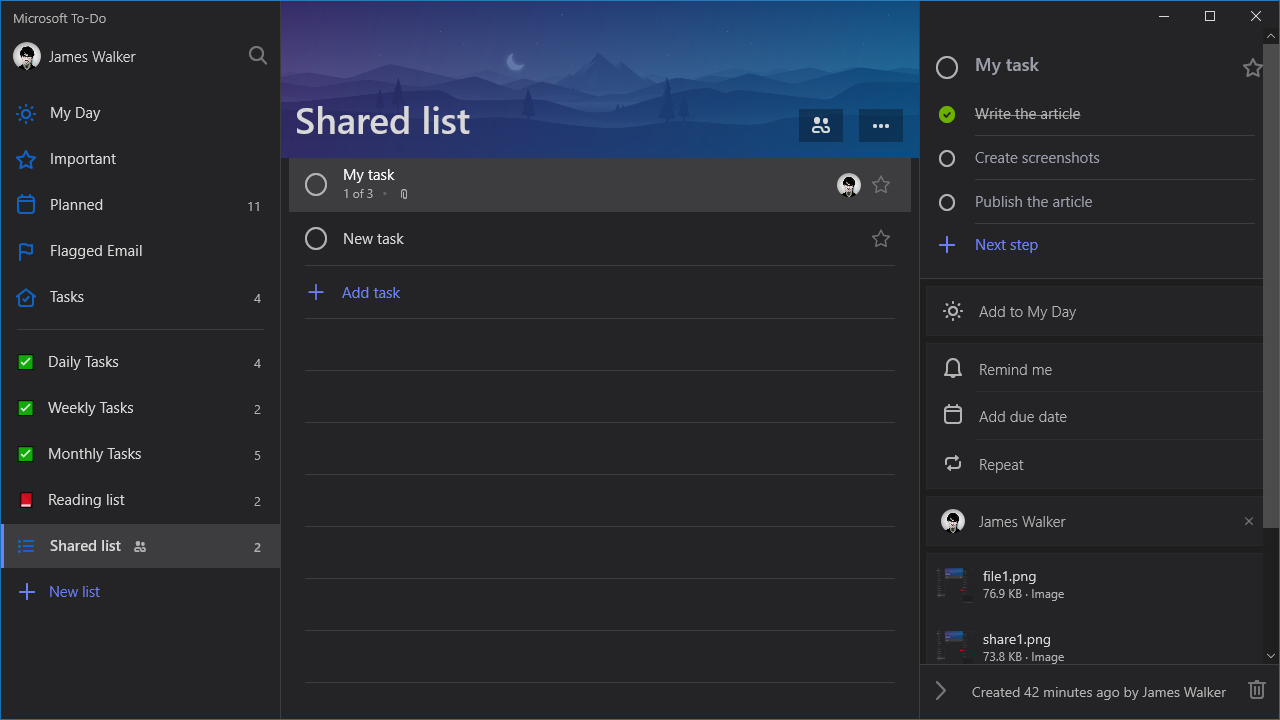
Once you’ve added some steps, it’s time to start completing them! Check off each step as you complete it, so you can track progress and see how much work is remaining. Back on the main task list, you’ll see the number of completed and pending steps is shown below each task, to give you an at-a-glance view of the remaining steps. Don’t forget to mark the task itself as completed once you’ve checked off all the steps.
Steps can be especially powerful when paired with some other task options. For example, steps are included when a task is set to recur, so you can quickly set up tasks which define processes to be completed on a daily, weekly or monthly basis. Without steps, you’d have to create multiple tasks – one for each step – which would clutter your list and require you to configure the recurrence on each one.