No Sound in Arc Browser? Here's How you Easily Fix it
If there is no sound on YouTube, just reload or reopen the tab in Arc
4 min. read
Updated on
Read our disclosure page to find out how can you help Windows Report sustain the editorial team. Read more

Having trouble with no sound in your ARC Browser? First, check if you have selected the right speakers or headphones in Windows, from the volume icon on your taskbar. Many users have had this problems because they accidentally muted the toolbar in Arc, or it opened muted. So, check the sidebar and see if the tab is muted. You can unmute it with a single click.
For some, the issue is only present when you switch tab during the the countdown of a video (on YouTube). To fix the problem, just reload the tab or close it and open a new YouTube tab.
1. Update your audio drivers
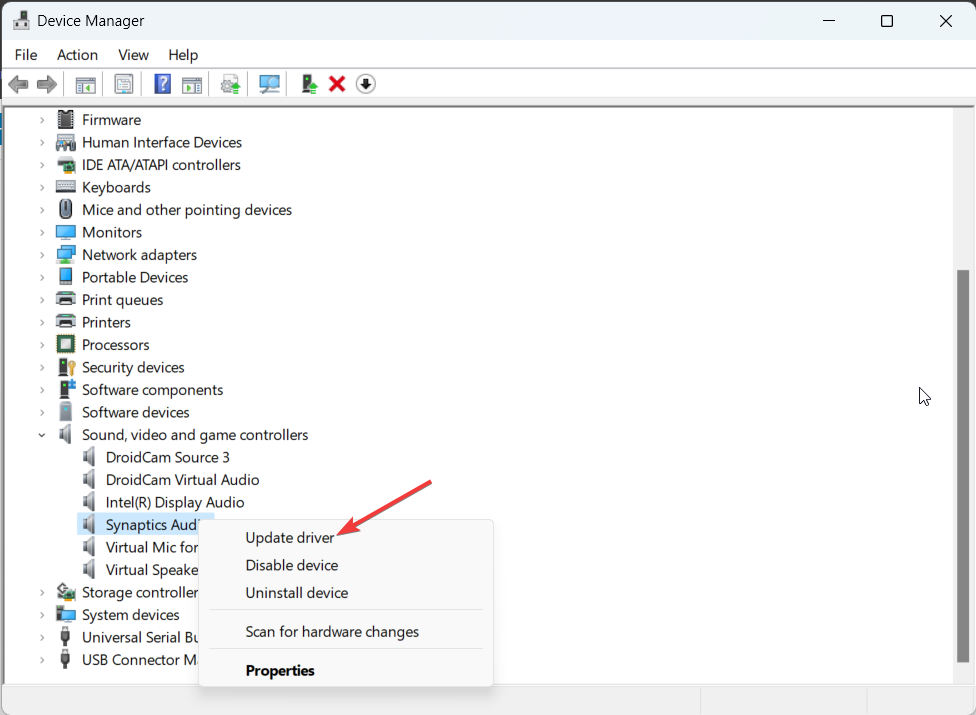
- Open Device Manager by right-clicking the Start button and selecting the app from the list.
- Expand the Sound, video, and game controllers section.
- Right-click on your audio device and select Update driver.
- Choose Search automatically for updated driver software and follow the prompts.
Updating your audio drivers can resolve compatibility issues that might cause audio problems in ARC Browser, ensuring you have the latest fixes and enhancements.
3. Adjust Volume in Background Music (for Mac users)
- Open Background Music by clicking on its icon in the menu bar (MacOS).
- Locate the ARC Browser in the list of applications.
- Adjust the volume slider for the ARC Browser to ensure it’s not set to a low or muted level.
Using Background Music ensures that the ARC Browser’s volume is properly set, which is common when system-wide volume control interferes.
4. Reconfigure HDMI Audio (for external output audio)
- Disconnect the HDMI cable from both your TV and the audio system.
- Reconnect the HDMI cable to the ARC/eARC labeled ports on both devices.
- Go to your TV’s audio settings and select “HDMI ARC” as the audio output source.
- Enable HDMI-CEC control (Anynet+ for Samsung TVs) on your TV.
Ensuring that your HDMI connections and settings are correct can fix any signal issues that prevent audio from being sent through ARC.
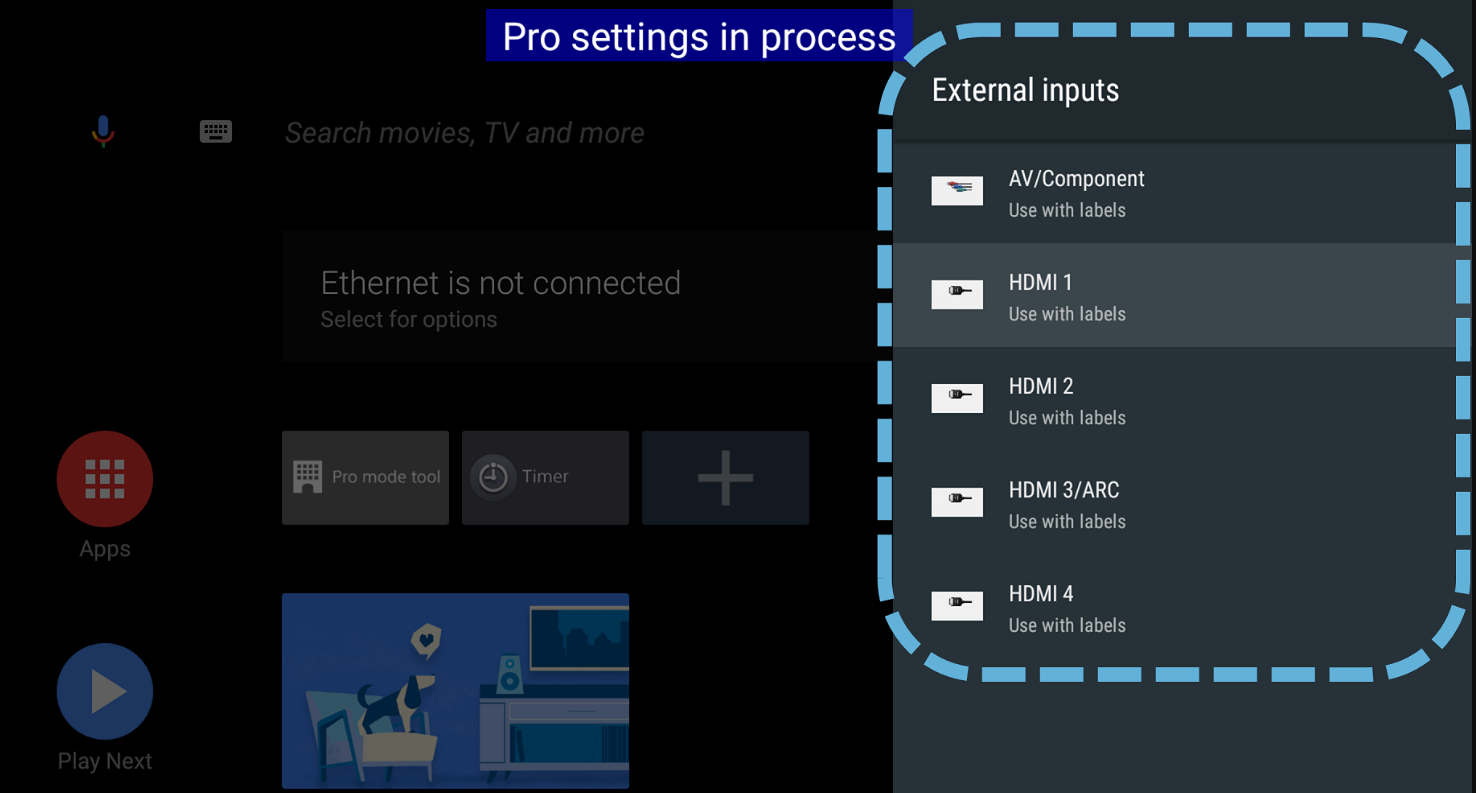
5. Clear Cache and Data (on Android TV)
- Go to the settings menu of your TV.
- Navigate to Apps and find the ExternalInputServices if you are using Android TV.
- Select Clear data and Clear cache.
- Restart your TV and reconnect your HDMI cable.
Clearing the cache and data can solve issues related to outdated or corrupted settings that might prevent audio from being output through ARC.
6. Use a high-speed HDMI Cable
- Ensure you are using a high-speed HDMI cable rated as 2.0 (18Gbps) or better.
- Replace your current HDMI cable with a known working high-speed HDMI cable.
- Reconnect your devices using the new cable.
Using a high-speed HDMI cable ensures that your connection supports the ARC/eARC features, which are essential for proper audio communication.
7. Power reset your devices (for external audio problems)
- Turn off both your TV and audio system.
- Disconnect the power cords and HDMI cables from both devices.
- Leave them disconnected for at least two minutes.
- Reconnect the HDMI cable to the ARC/eARC ports and plug in the power cords.
- Turn on the TV first and then the audio system.
A power reset can solve temporary glitches or software hang-ups that may prevent ARC from functioning correctly.
8. Use Device Manager to re-enable an audio device
- Right-click the Start button and select Device Manager.
- Expand the section Sound, video, and game controllers.
- Right-click on HD Audio Driver for Display Audio and select Disable device.
- Right-click it again and select Enable device.
Re-enabling the audio device can resolve conflicts and refresh the device settings, which often resolve the no-sound issue.
9. Check HDMI Control Settings
- Go to the settings menu of your audio system (AVR or soundbar).
- Ensure that HDMI Control (CEC) is set to On.
- Check the ARC/eARC or TV Audio Input Mode setting, and set it to Auto.
Proper HDMI Control settings ensure that the connected devices communicate correctly, facilitating the ARC feature to output sound.
10. Configure TV Audio Output to PCM (for TV audio issues)
- Open your TV’s settings menu.
- Navigate to the Sound or Audio settings.
- Select Digital Audio Out, then choose PCM.
Setting the audio output to PCM can help in cases where Dolby or DTS audio formats are not supported by your audio system, ensuring a more basic but functional audio transmission.
Most of the times, this is a simple problem with selecting the right audio output source on your PC, or an accidental mute action on your tab in Arc browser. However, above, you will find solutions on all possible issues.
To prevent future issues, regularly update your drivers and check your audio settings. Happy browsing!


User forum
0 messages