Services.msc Error 1053: 6 Quick Ways to Fix it
Services.msc is an indispensable component of the system
![]() 4 min. read
4 min. read
![]() Updated on
Updated on
Share this article
Improve this guide
Read our disclosure page to find out how can you help Windows Report sustain the editorial team. Read more
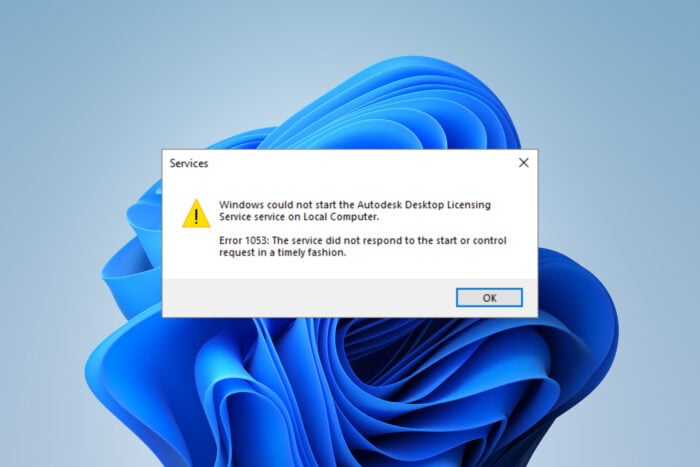
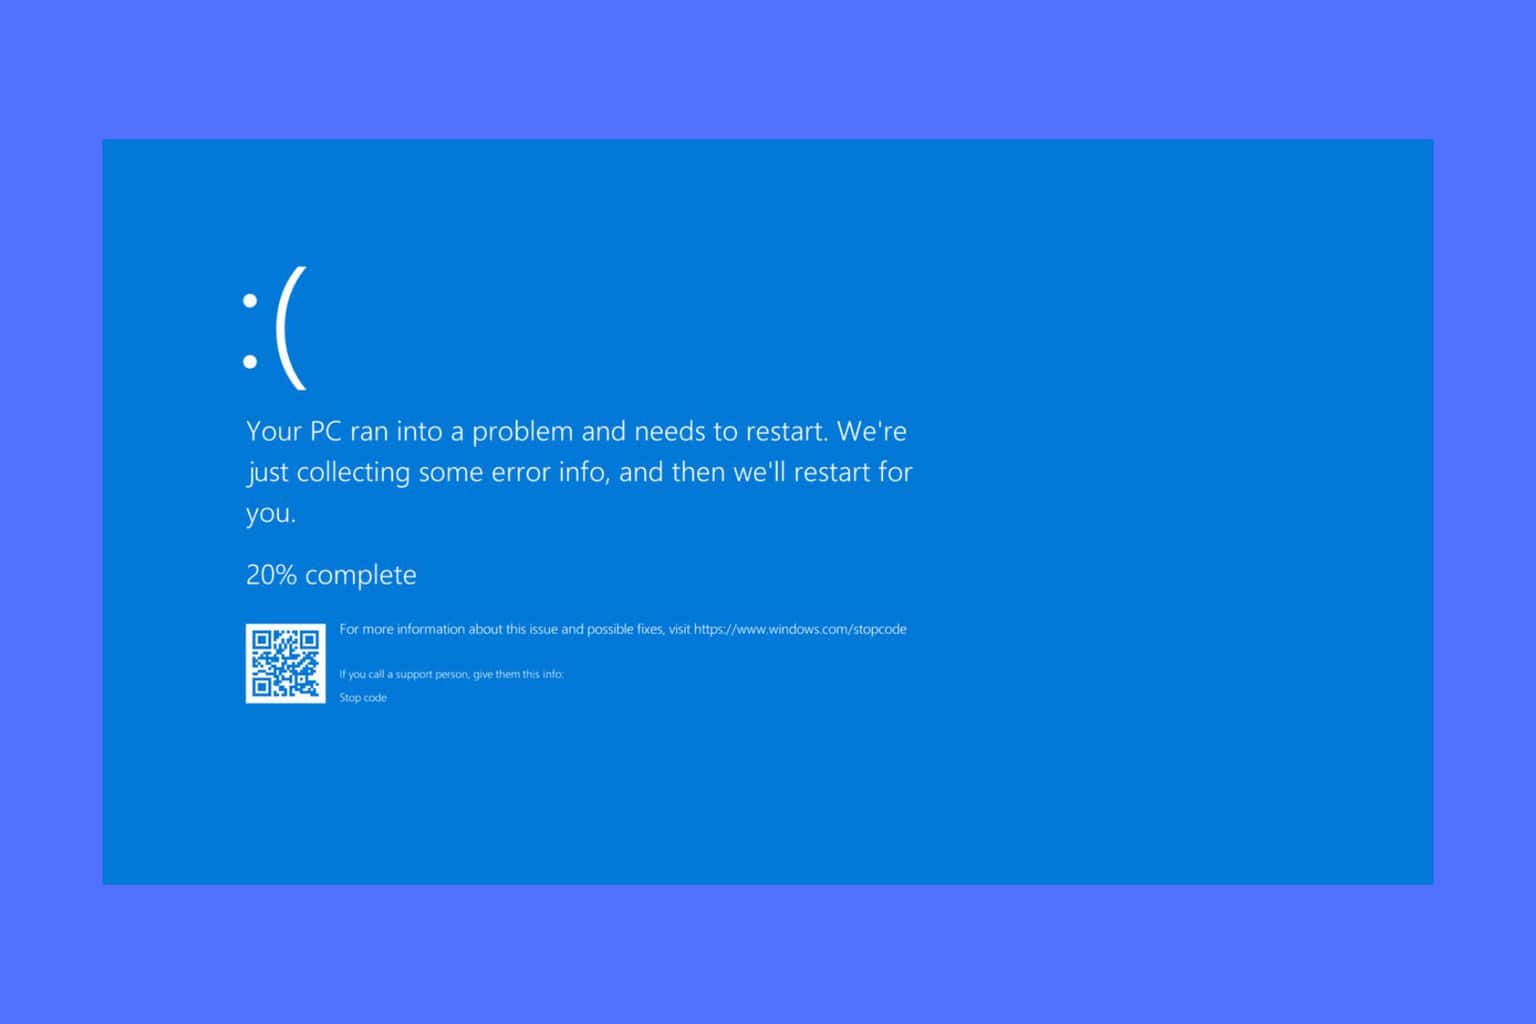
Dealing with the services.msc error 1053 can be quite frustrating, especially when it disrupts your workflow. This error typically indicates that a service did not respond to the start or control request in a timely fashion. First, make sure that you install all pending Windows updates.
How do I fix Services.msc error 1053?
1. Change Timeout Settings in Registry Editor
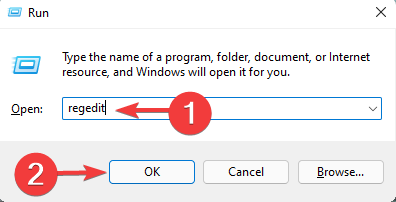
- Press the Win + R keys to open the Run dialog box.
- Type regedit and press Enter to open the Registry Editor.

- Navigate to the following path:
HKEY_LOCAL_MACHINE\SYSTEM\CurrentControlSet\Control - Right-click on the Control folder in the left pane, then click on New -> DWORD (32-bit) Value.
- Name the new DWORD as ServicesPipeTimeout.
- Double-click on ServicesPipeTimeout and set its value to 180000 (this is in milliseconds, so it sets the timeout to 3 minutes).
- Click OK to save the changes.
- Close the Registry Editor and restart your computer.
Changing the timeout settings in the registry editor increases the time that Windows waits for a service to respond. This can help services that need more time to start.
2. Check System File corruption
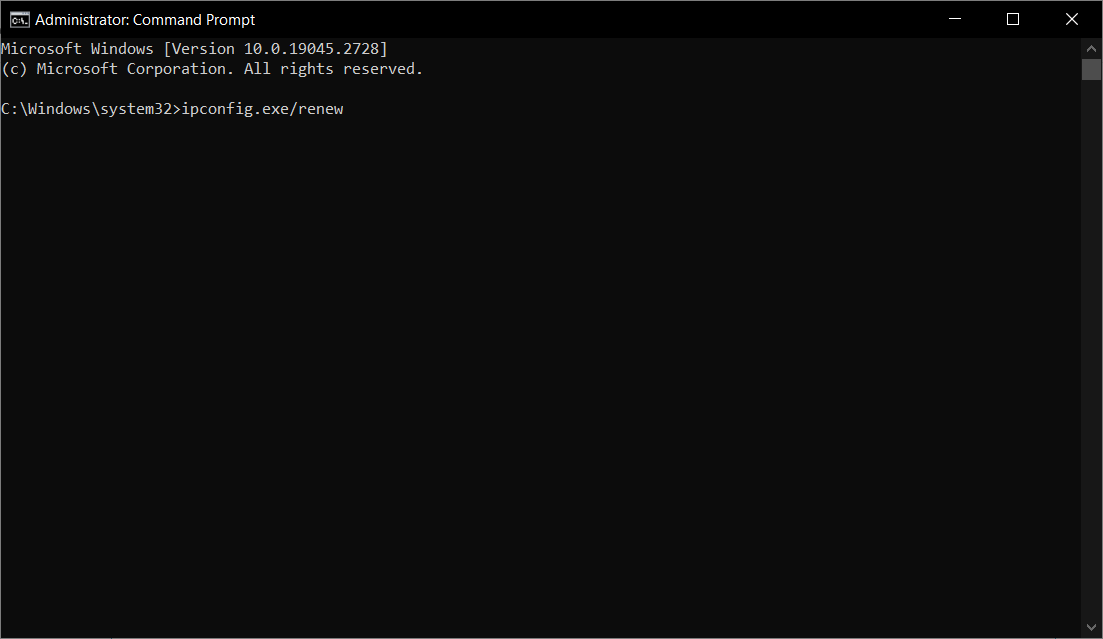
- Open the Start menu and type cmd in the search bar.
- Right-click on Command Prompt and select Run as administrator.
- In the Command Prompt window, type sfc /scannow and press Enter to run the System File Checker.
- Wait for the process to complete. It might take a few minutes.
- If the System File Checker finds and fixes any issues, restart your computer.
- If the issue persists, run the following commands one by one in Command Prompt:
DISM /Online /Cleanup-Image /CheckHealthDISM /Online /Cleanup-Image /ScanHealthDISM /Online /Cleanup-Image /RestoreHealth
Running these commands checks for and repairs corrupted system files that might be preventing the service from starting correctly.
3. Reset the Winsock Data
- Open the Start menu and type cmd in the search bar.
- Right-click on Command Prompt and select Run as administrator.
- In the Command Prompt window, type the following commands and press Enter after each one:

netsh winsock resetipconfig /renew
- Restart your computer.
Resetting the Winsock catalog and renewing the IP configuration can resolve network-related issues that might be affecting the service.
4. Take ownership of the application
- Navigate to the folder where the application that is triggering the error has the executable file.
- Right-click on the executable file and select Properties.
- Go to the Security tab and click on Advanced.
- In the Advanced Security Settings window, click on Change next to the Owner field.
- Type your username in the text box and click Check Names. Click OK.
- Check the box labeled Replace owner on subcontainers and objects.
- Click Apply and then OK to save the changes.
- Restart your computer.
Taking ownership of the application ensures that you have the necessary permissions to start the service. However, make sure that you are logged in as administrator.
5. Reinstall the application that is triggering the error
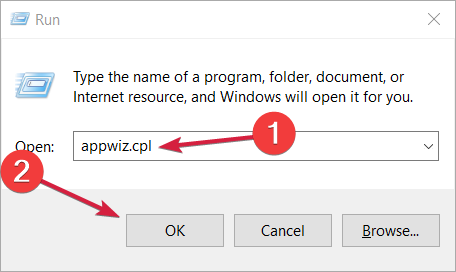
- Press the Win + R keys to open the Run dialog box.
- Type appwiz.cpl and press Enter to open the Programs and Features window.

- Find the application in the list, right-click on it, and select Uninstall.
- Follow the prompts to uninstall the application.
- After restarting your computer, download the latest version of the application from its official website and perform a fresh installation.
Reinstalling the application can fix issues related to corrupt or missing files that are necessary for the service to start.
6. Ensure .NET Framework compatibility
- Press the Win + R keys to open the Run dialog box.
- Type control and press Enter to open Control Panel.
- Navigate to Programs -> Programs and Features.
- Click on Turn Windows features on or off in the left pane.
- Ensure that the appropriate versions of the .NET Framework are installed and enabled.
- If any required versions are missing, check the boxes to enable them and click OK.
- Restart your computer.
Ensuring that the correct .NET Framework versions are installed can resolve compatibility issues that prevent services from starting.
By following these steps, you can effectively resolve the services.msc error 1053 and get your system back on track. You may also need our guide on what to do if the Windows Update services are missing from Services.msc. Moreover, if you’re experiencing similar problems with the “Services.msc Access Denied” error, we’ve got you covered.
If you have more suggestions or questions, feel free to address them in the comments below.


User forum
0 messages