
Luminar Review: Improved AI, Faster Editing, and a Major Fall Upgrade


 15 min. read
  Published on

We’ve long been fans of Luminar for making powerful photo editing accessible. Version 1.28 introduced several improvements and even more features are arriving this Fall. Today, let’s explore what’s new, while also reevaluating Luminar’s essentials for newcomers.
What is Luminar?
Luminar is a comprehensive photo editing suite from Skylum that combines AI-powered enhancements with extensive manual editing tools. It’s designed to make complex edits faster and more approachable for beginners. At the same time, experienced photographers get plenty of control over the final result.
Its tools cover everything from basic color and exposure adjustments to portrait retouching, sky replacement, object removal, relighting, and creative effects.
Luminar can function as a standalone editor or plugin for Adobe Photoshop and Lightroom, while desktop and mobile options make it easier to incorporate into different workflows.
What’s New in 1.28?
Luminar 1.28 was released in the summer and focuses heavily on making the existing editing experience faster and easier to navigate. Changes included:
- Unified interface: Presets, Tools and Edits now live together in the right-hand panel, reducing unnecessary switching between different parts of Luminar.
- Faster performance: Exports are up to 27% faster and Preset previews up to 3.8× faster.
- More efficient masking: Masking can now consume up to 33% less RAM.
- Improved generative tools: GenErase, GenSwap and GenExpand have been refined for more realistic results.
- Expanded camera support: Support has been added for several newer cameras and RAW formats.
What’s Coming this Fall?
The Fall update represents the second phase of Luminar’s major 2026 upgrade. In the coming weeks, you can expect:
- AI Assistant (Update): Describe the result you want and Luminar recommends and applies an appropriate combination of tools.
- Improved Enhance: An advanced model analyzes each image before applying more precise enhancements without excessive processing.
- Atmosphere Fog 2.0 (Update): Adds atmospheric effects that respond naturally to the scene’s light, color and depth.
- Smarter Crop: Suggests compositions based on subjects, balance, leading lines and visual weight.
- Web Editor: Extends Luminar into the browser for a more seamless cross-platform editing experience.
Furthermore, free users can also expect to see improved masking and presets, built-in printing functionality, and new export options that make it easy to add watermarks and frames to finished images.
Key Features
Let’s take a closer look at all of Luminar’s key features:
Presets and the New Unified Editing Workflow
Presets are a great starting point when you want to improve a photo without adjusting every setting yourself. Luminar offers a library of ready-made looks, from subtle colour corrections to more dramatic creative effects. It also suggests presets based on the image you’ve opened, helping you find a suitable look without browsing through every category.
You can apply a preset with a click, adjust its strength, and then fine-tune the result using Luminar’s individual editing tools. This makes presets useful even if you prefer a more hands-on approach: they provide a starting point rather than locking you into a finished look. You can also save your own presets to give a series of photos a consistent appearance.
Version 1.28 makes this process more convenient by bringing Presets, Tools, and Edits together in a unified right-hand panel.
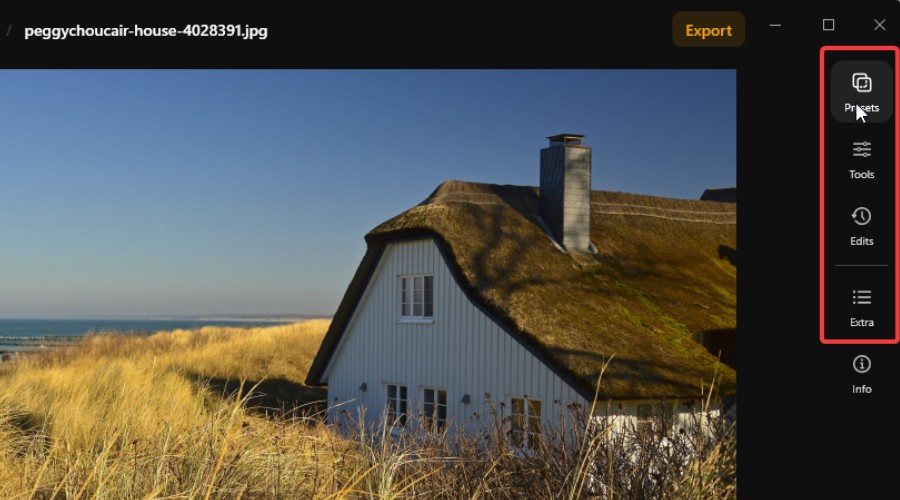
Instead of switching between separate areas of the interface, you can choose a preset, refine it, and revisit your adjustments in one place.
It’s a small but welcome workflow improvement, particularly when you’re experimenting with several presets or adjustments before settling on one.
AI Masking, Layers, and Non-Destructive Editing
Masking lets you apply an adjustment to one part of an image without affecting everything else. It can be a fiddly process in traditional editors, but Luminar’s Mask AI does much of the selection work for you.
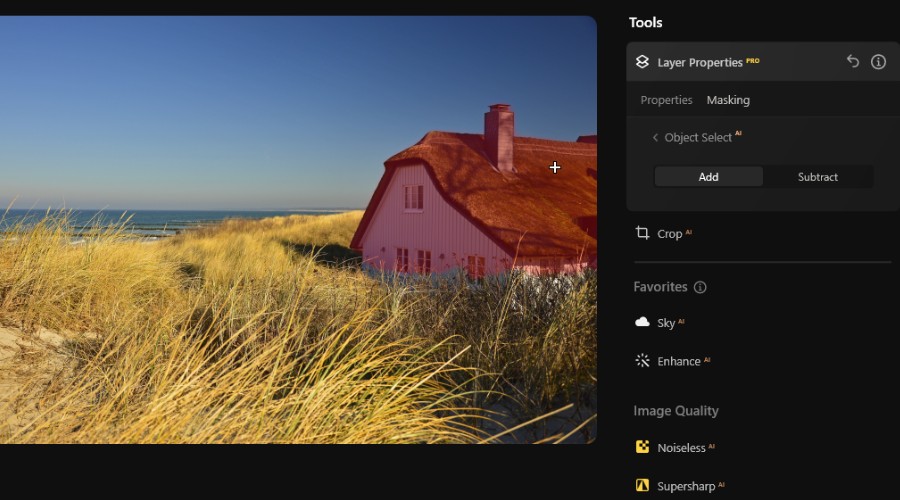
It identifies elements such as people, skies, buildings, vehicles, and vegetation, so you can brighten a subject or enhance the sky without changing the rest of the image.
You’re not limited to the AI’s selections, either. Use a brush to add or remove areas, or choose gradient, colour, and luminosity masks for more precise control. This is particularly useful when an automatic selection misses a small detail or you want an effect to fade gradually across the photo.
I found the masking process is noticeably less taxing in version 1.28, making it easier to move between selections and adjustments without having to wait too long.
Luminar also supports layers, allowing you to combine photos, add textures, and edit individual elements separately. You can adjust a layer’s opacity or blending mode to help it sit naturally within the image.
Crucially, the workflow is non-destructive. This means you can revisit earlier edits, change their settings, or remove an effect without starting again. It makes experimenting much easier.
GenErase, GenSwap, and GenExpand
Version 1.28 brings refinements to the generative AI tools, although results still depend on the complexity of the scene. I find they’re most convincing when the AI has plenty of surrounding detail to work from.
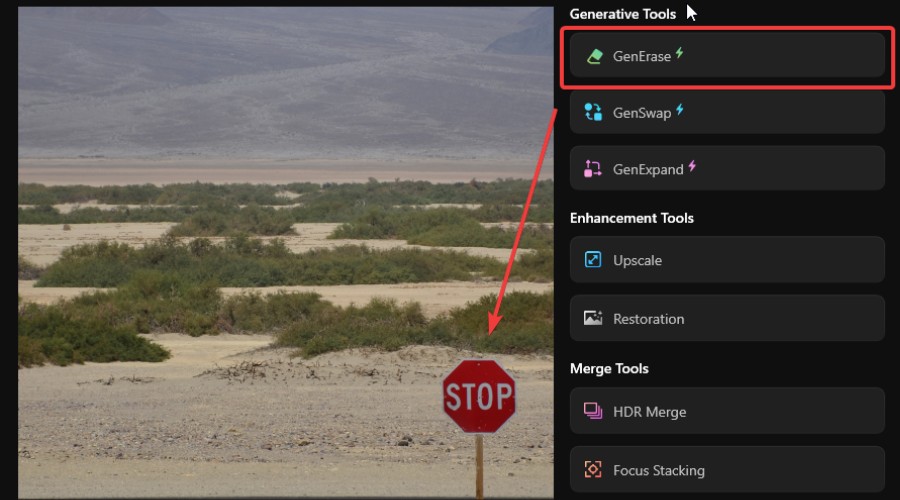
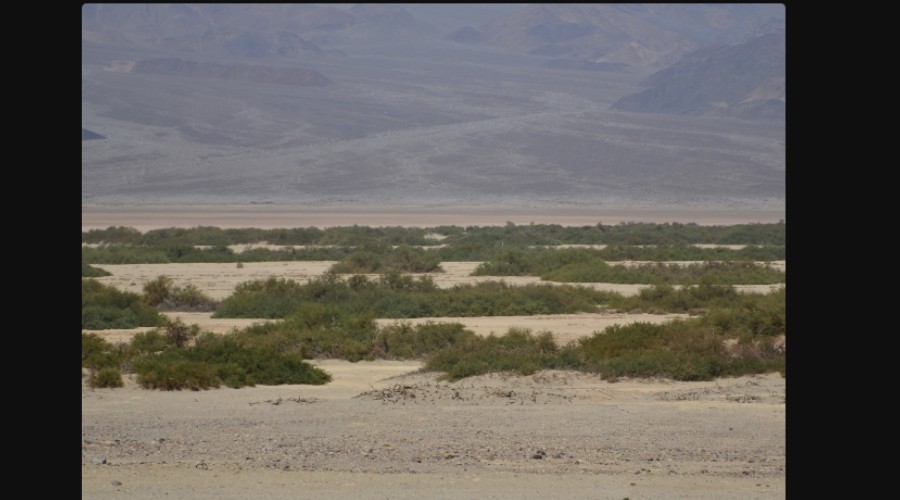
GenErase – Particularly useful for cleaning up otherwise great shots. Simply brush over an unwanted object, such as a passer-by or distracting sign, and Luminar removes it while generating a replacement background. Rather than leaving an obvious empty patch, it attempts to reconstruct what should be behind the object.
GenSwap – Select an area, describe what you want to see, and the AI generates a new element within the photo. You could replace an object or introduce something entirely new without having to find, cut out, and blend a separate image yourself.
GenExpand – Lets you extend the edges of a photo, with AI generating additional scenery to fill the new space. This can rescue an awkwardly cropped shot or give you more room to work with when changing its aspect ratio.
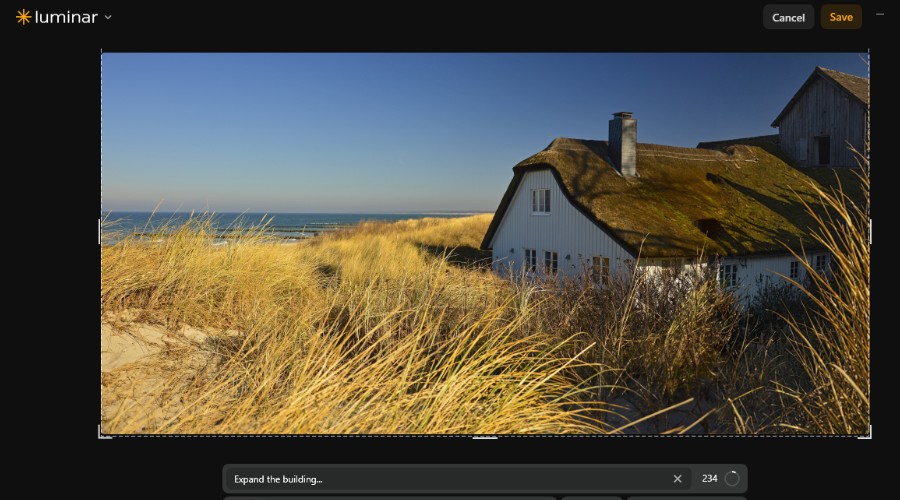
Erase (Regular Brush) – Not every unwanted object calls for generative AI. Luminar’s Erase tool lets you brush over distractions such as dust spots, stray objects, or small blemishes and remove them from the photo. It’s a straightforward option for tidying up an image without changing its overall composition.
Sky AI
The sky replacement tool applies similar logic but focuses solely on improving the sky in an image. It detects the area automatically, allowing you to replace it with one from Luminar’s library. You can choose anything from clear blue skies to dramatic sunsets, then adjust the replacement’s orientation and lighting to help it blend with the original scene.
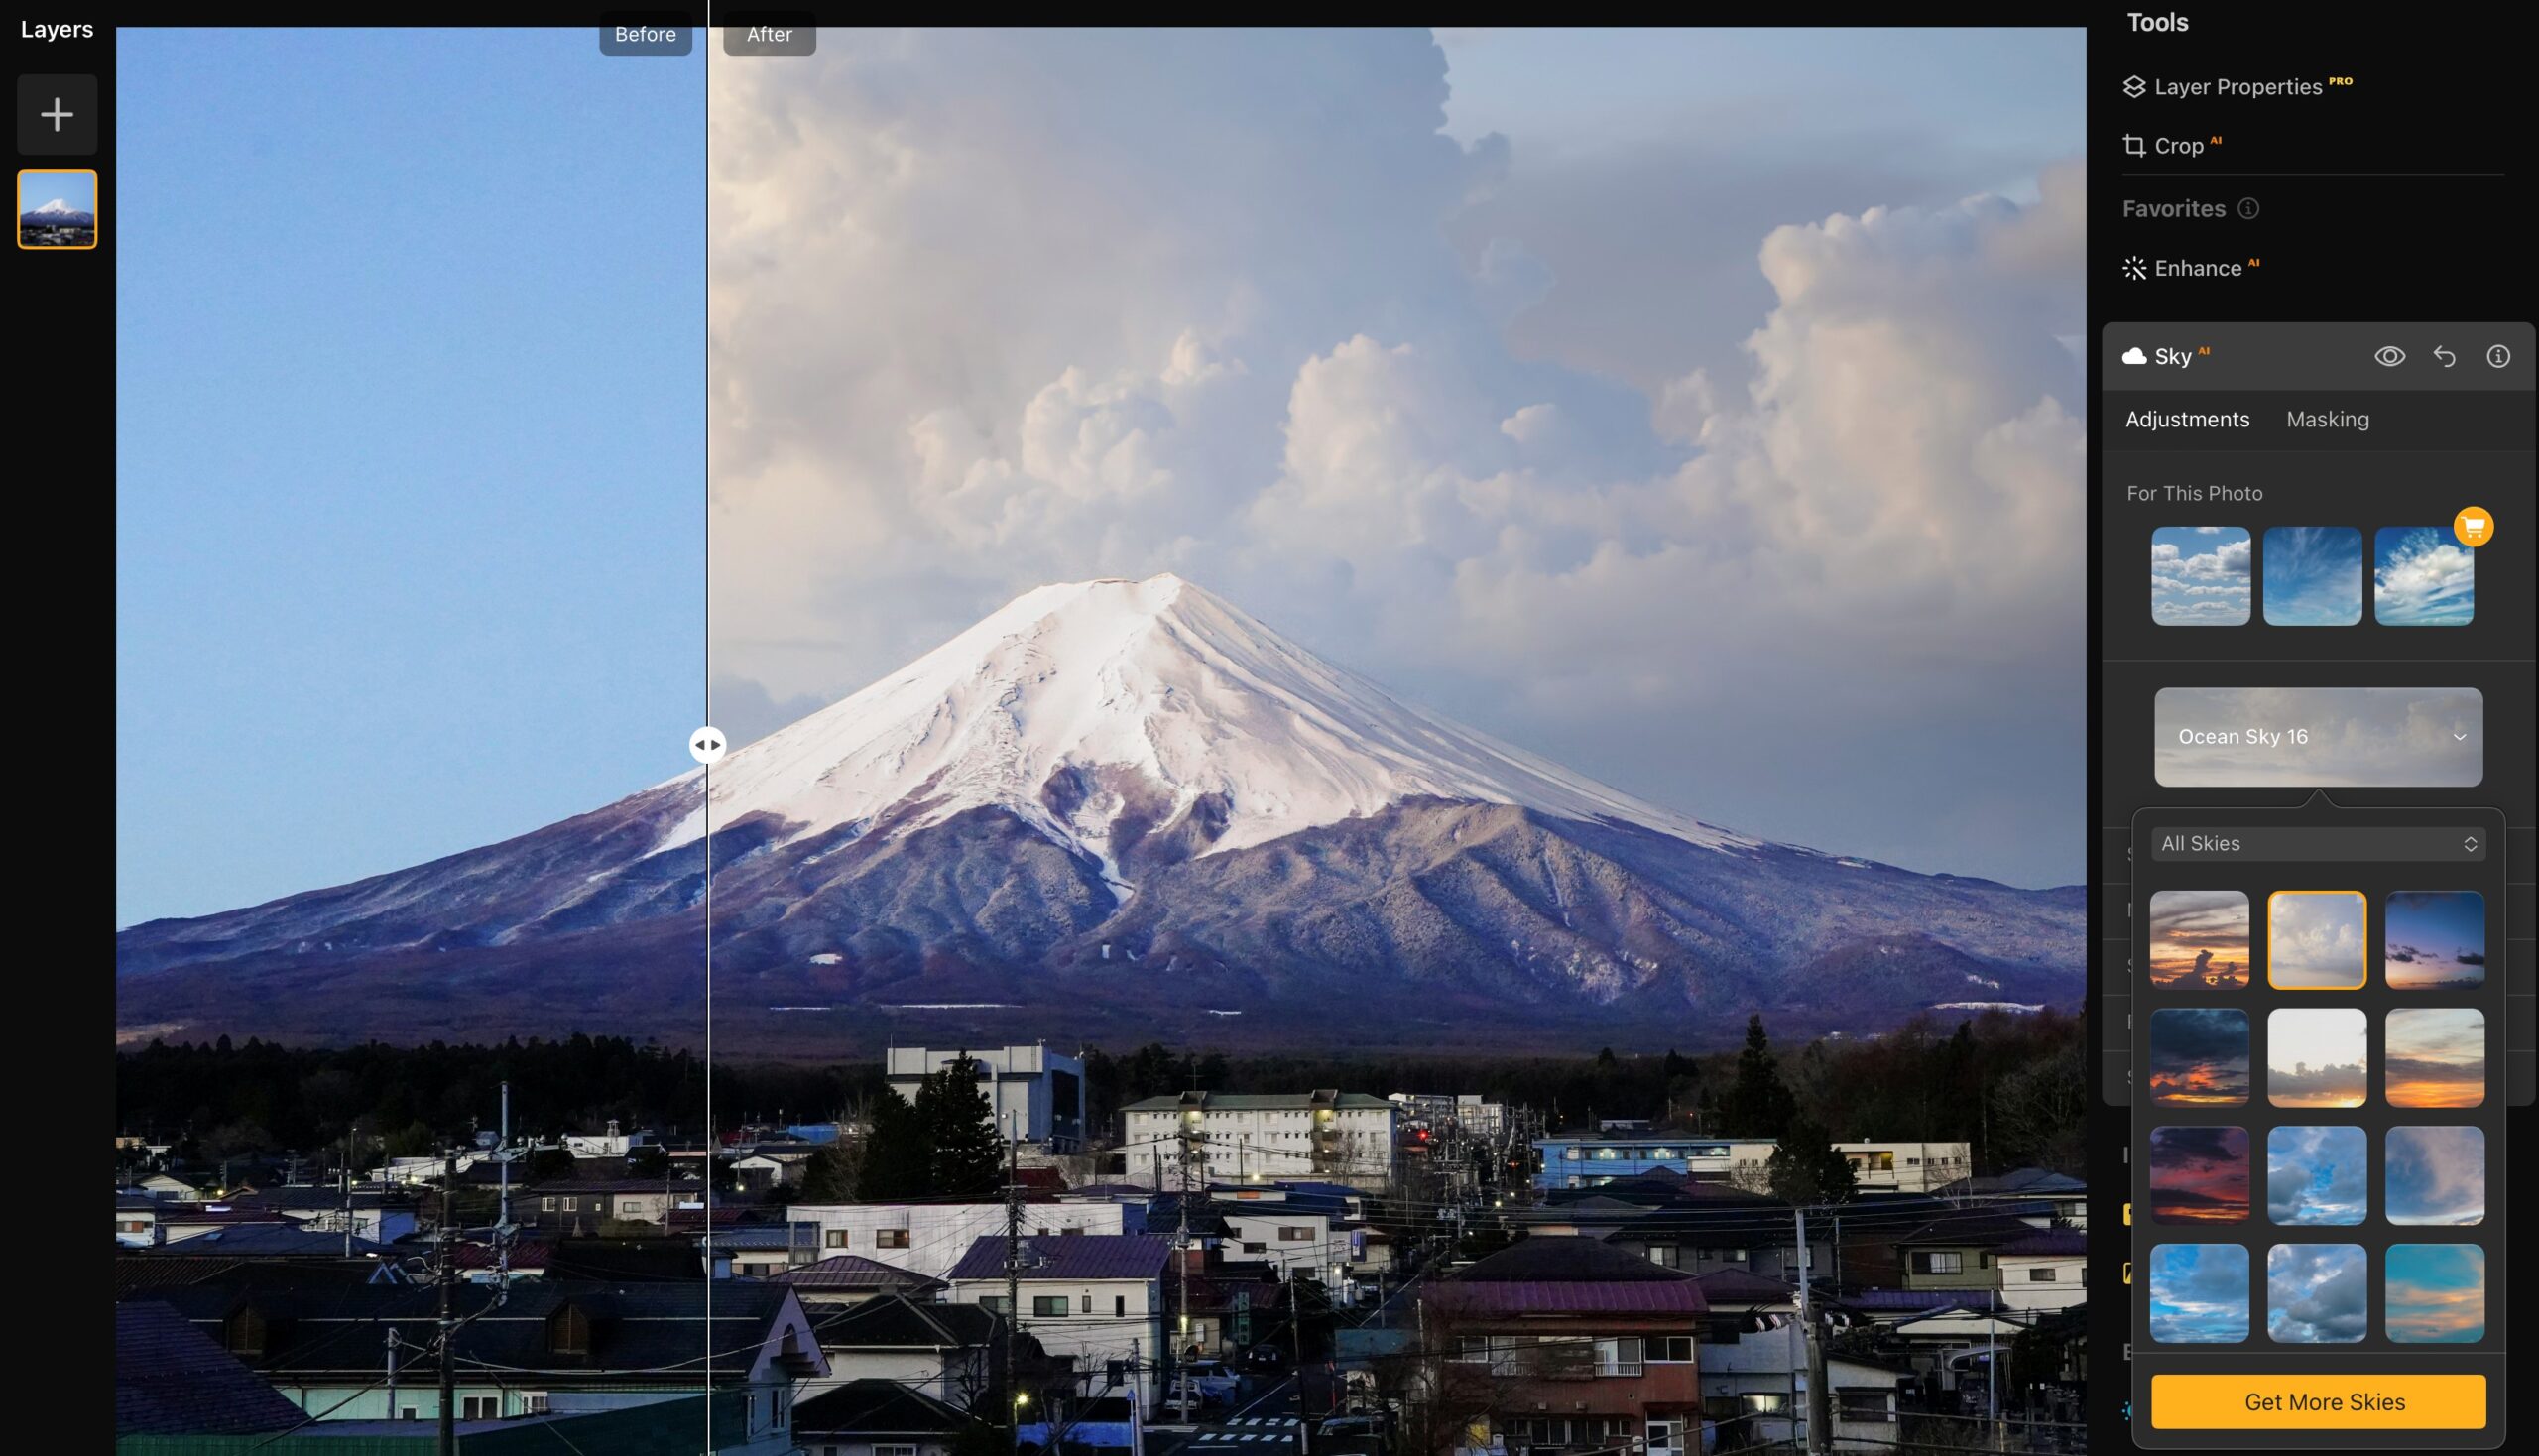
It’s an easy way to rescue an overcast shot or experiment with a completely different mood, without manually cutting around trees, buildings, or other foreground details.
Enhance AI
Enhance AI is one of Luminar’s easiest tools to use and a great starting point for almost any edit. Its Accent AI slider analyses the photo and adjusts elements such as exposure, contrast, colour, and detail together, saving you from having to fine-tune each setting individually.
There’s also a Sky Enhancer slider for bringing out more colour and definition in the sky without replacing it entirely.
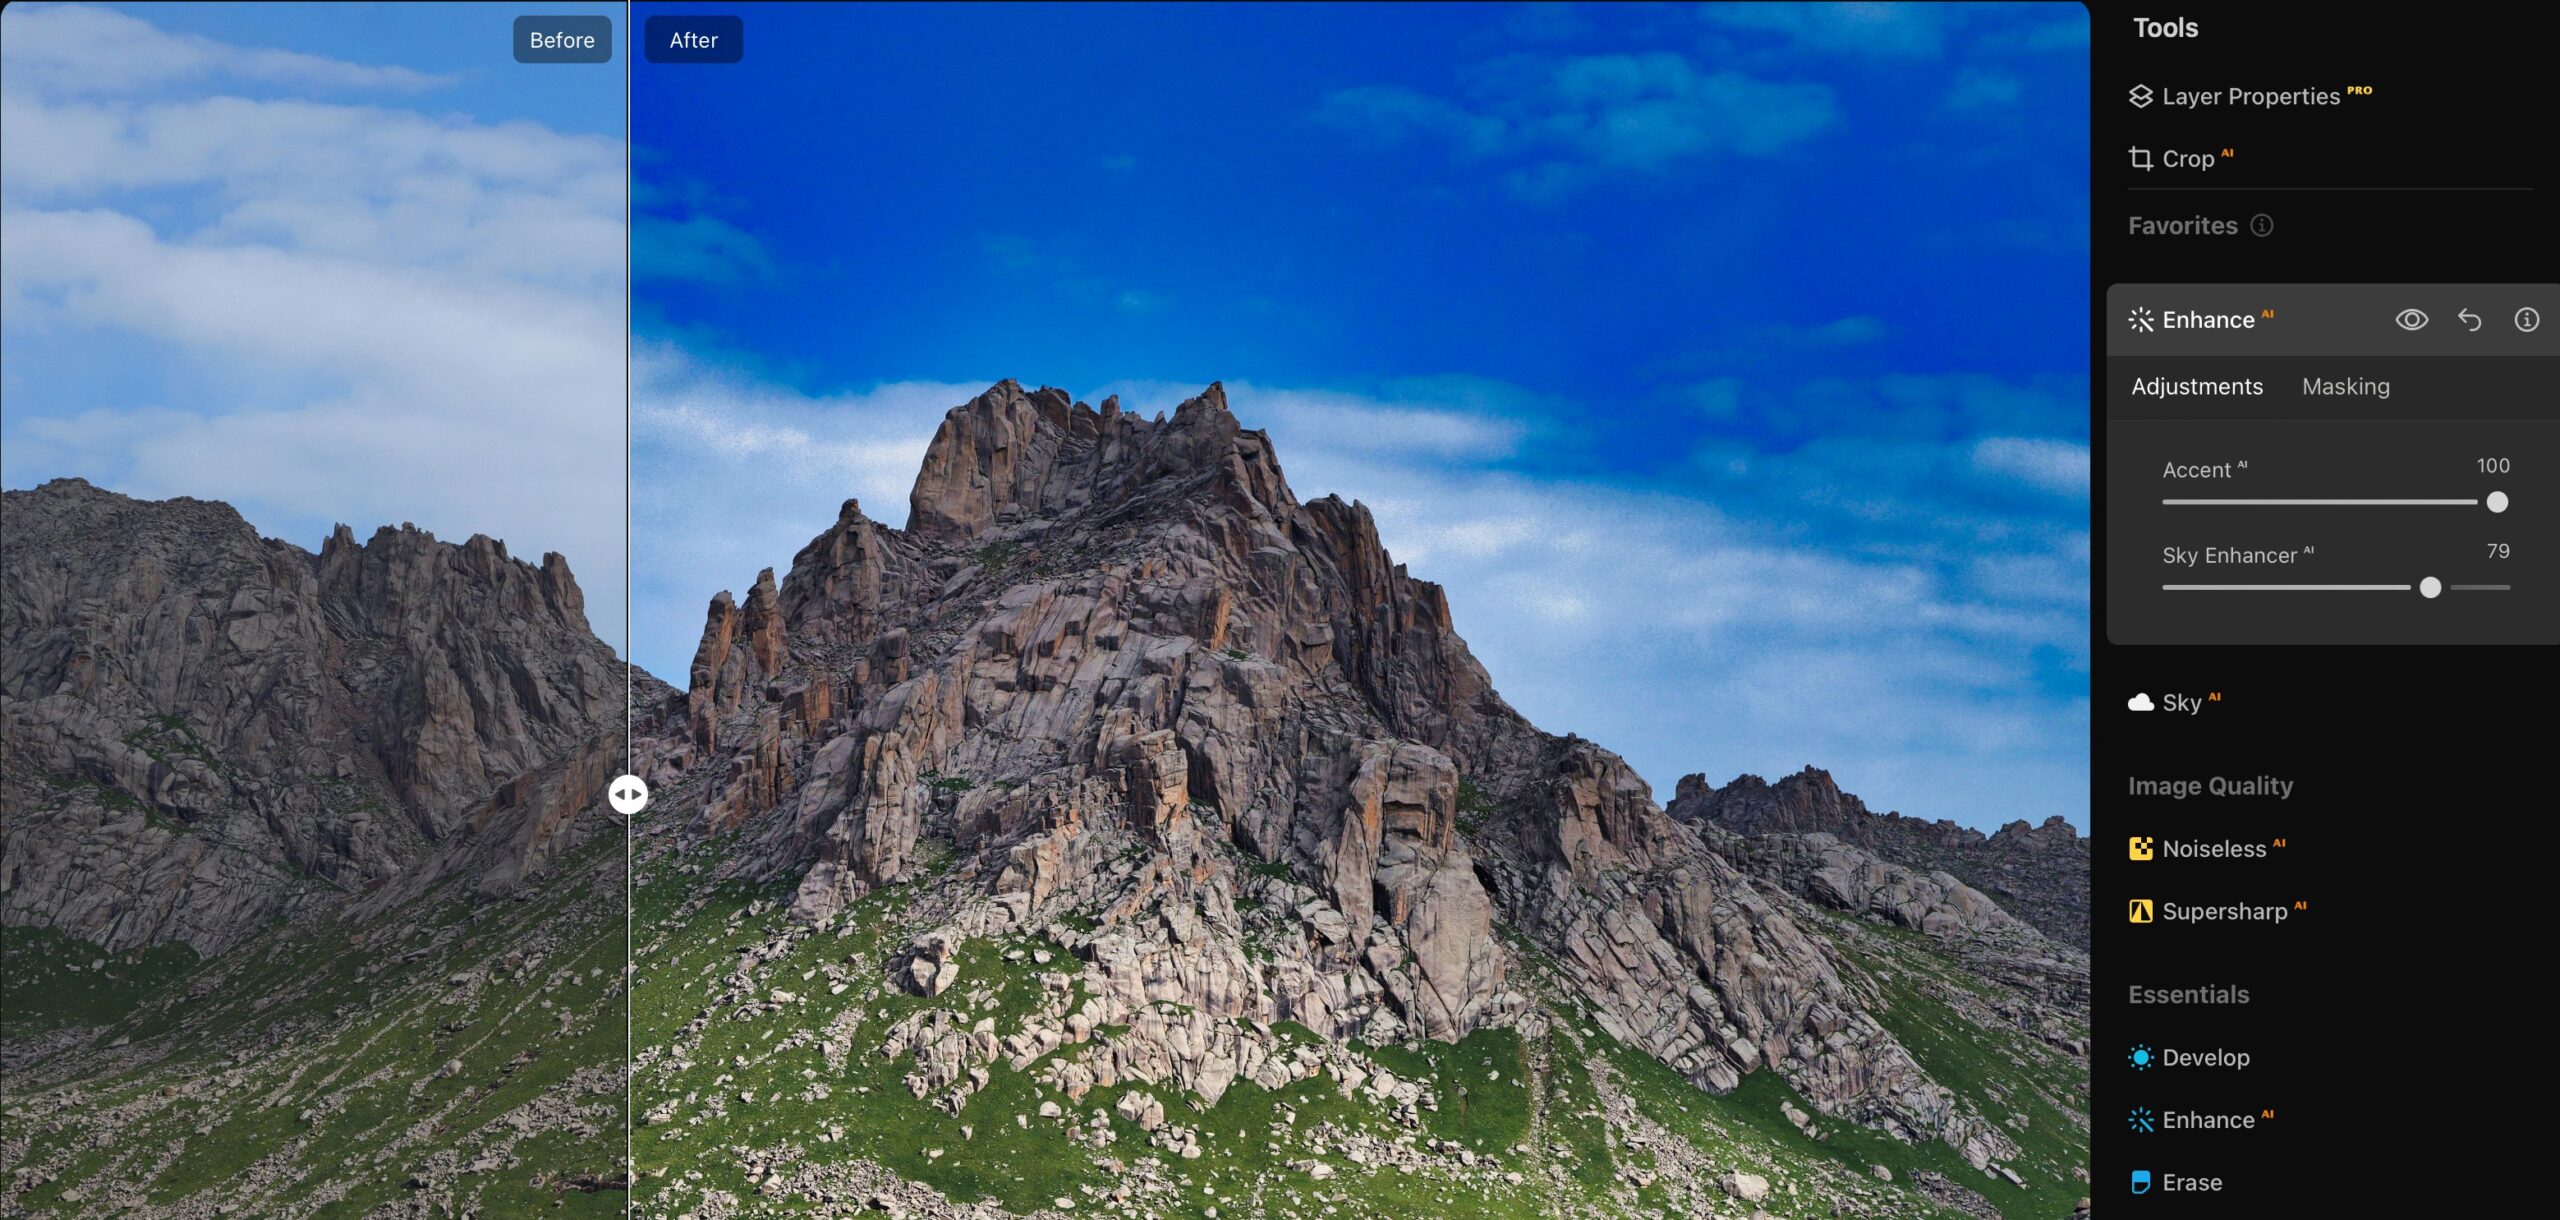
I like that Enhance AI gives you a quick improvement while leaving plenty of room for further adjustments. It’s especially useful when you have a batch of photos that need a little polish rather than a complete transformation.
Supersharp AI and Noiseless AI
Blurry details and unwanted noise can spoil an otherwise great photo, but Luminar has dedicated AI tools for tackling both problems.
Supersharp AI – Helps recover definition in photos affected by motion blur or a slightly missed focus. You can choose from different levels of sharpening and apply the effect to the whole image or a selected area.
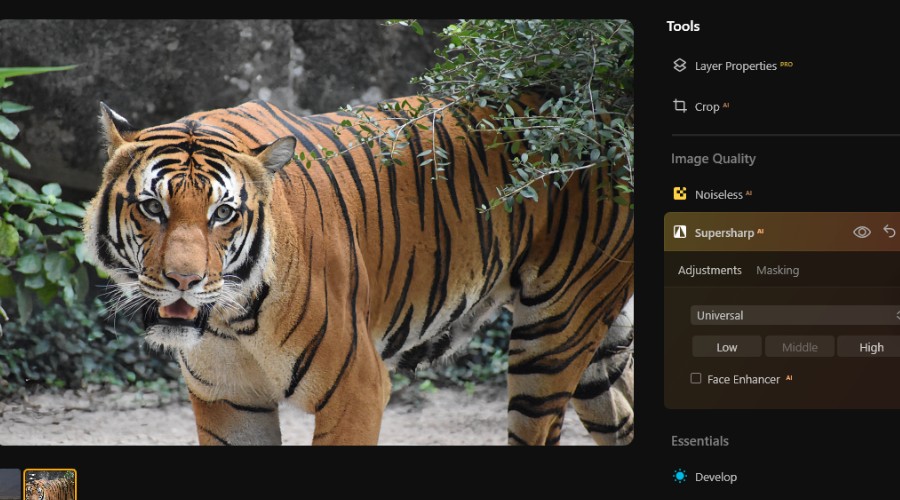
There’s also a Face Enhancer option for bringing out facial details. I find it particularly useful for wildlife shots, where even a small amount of movement can soften the result.
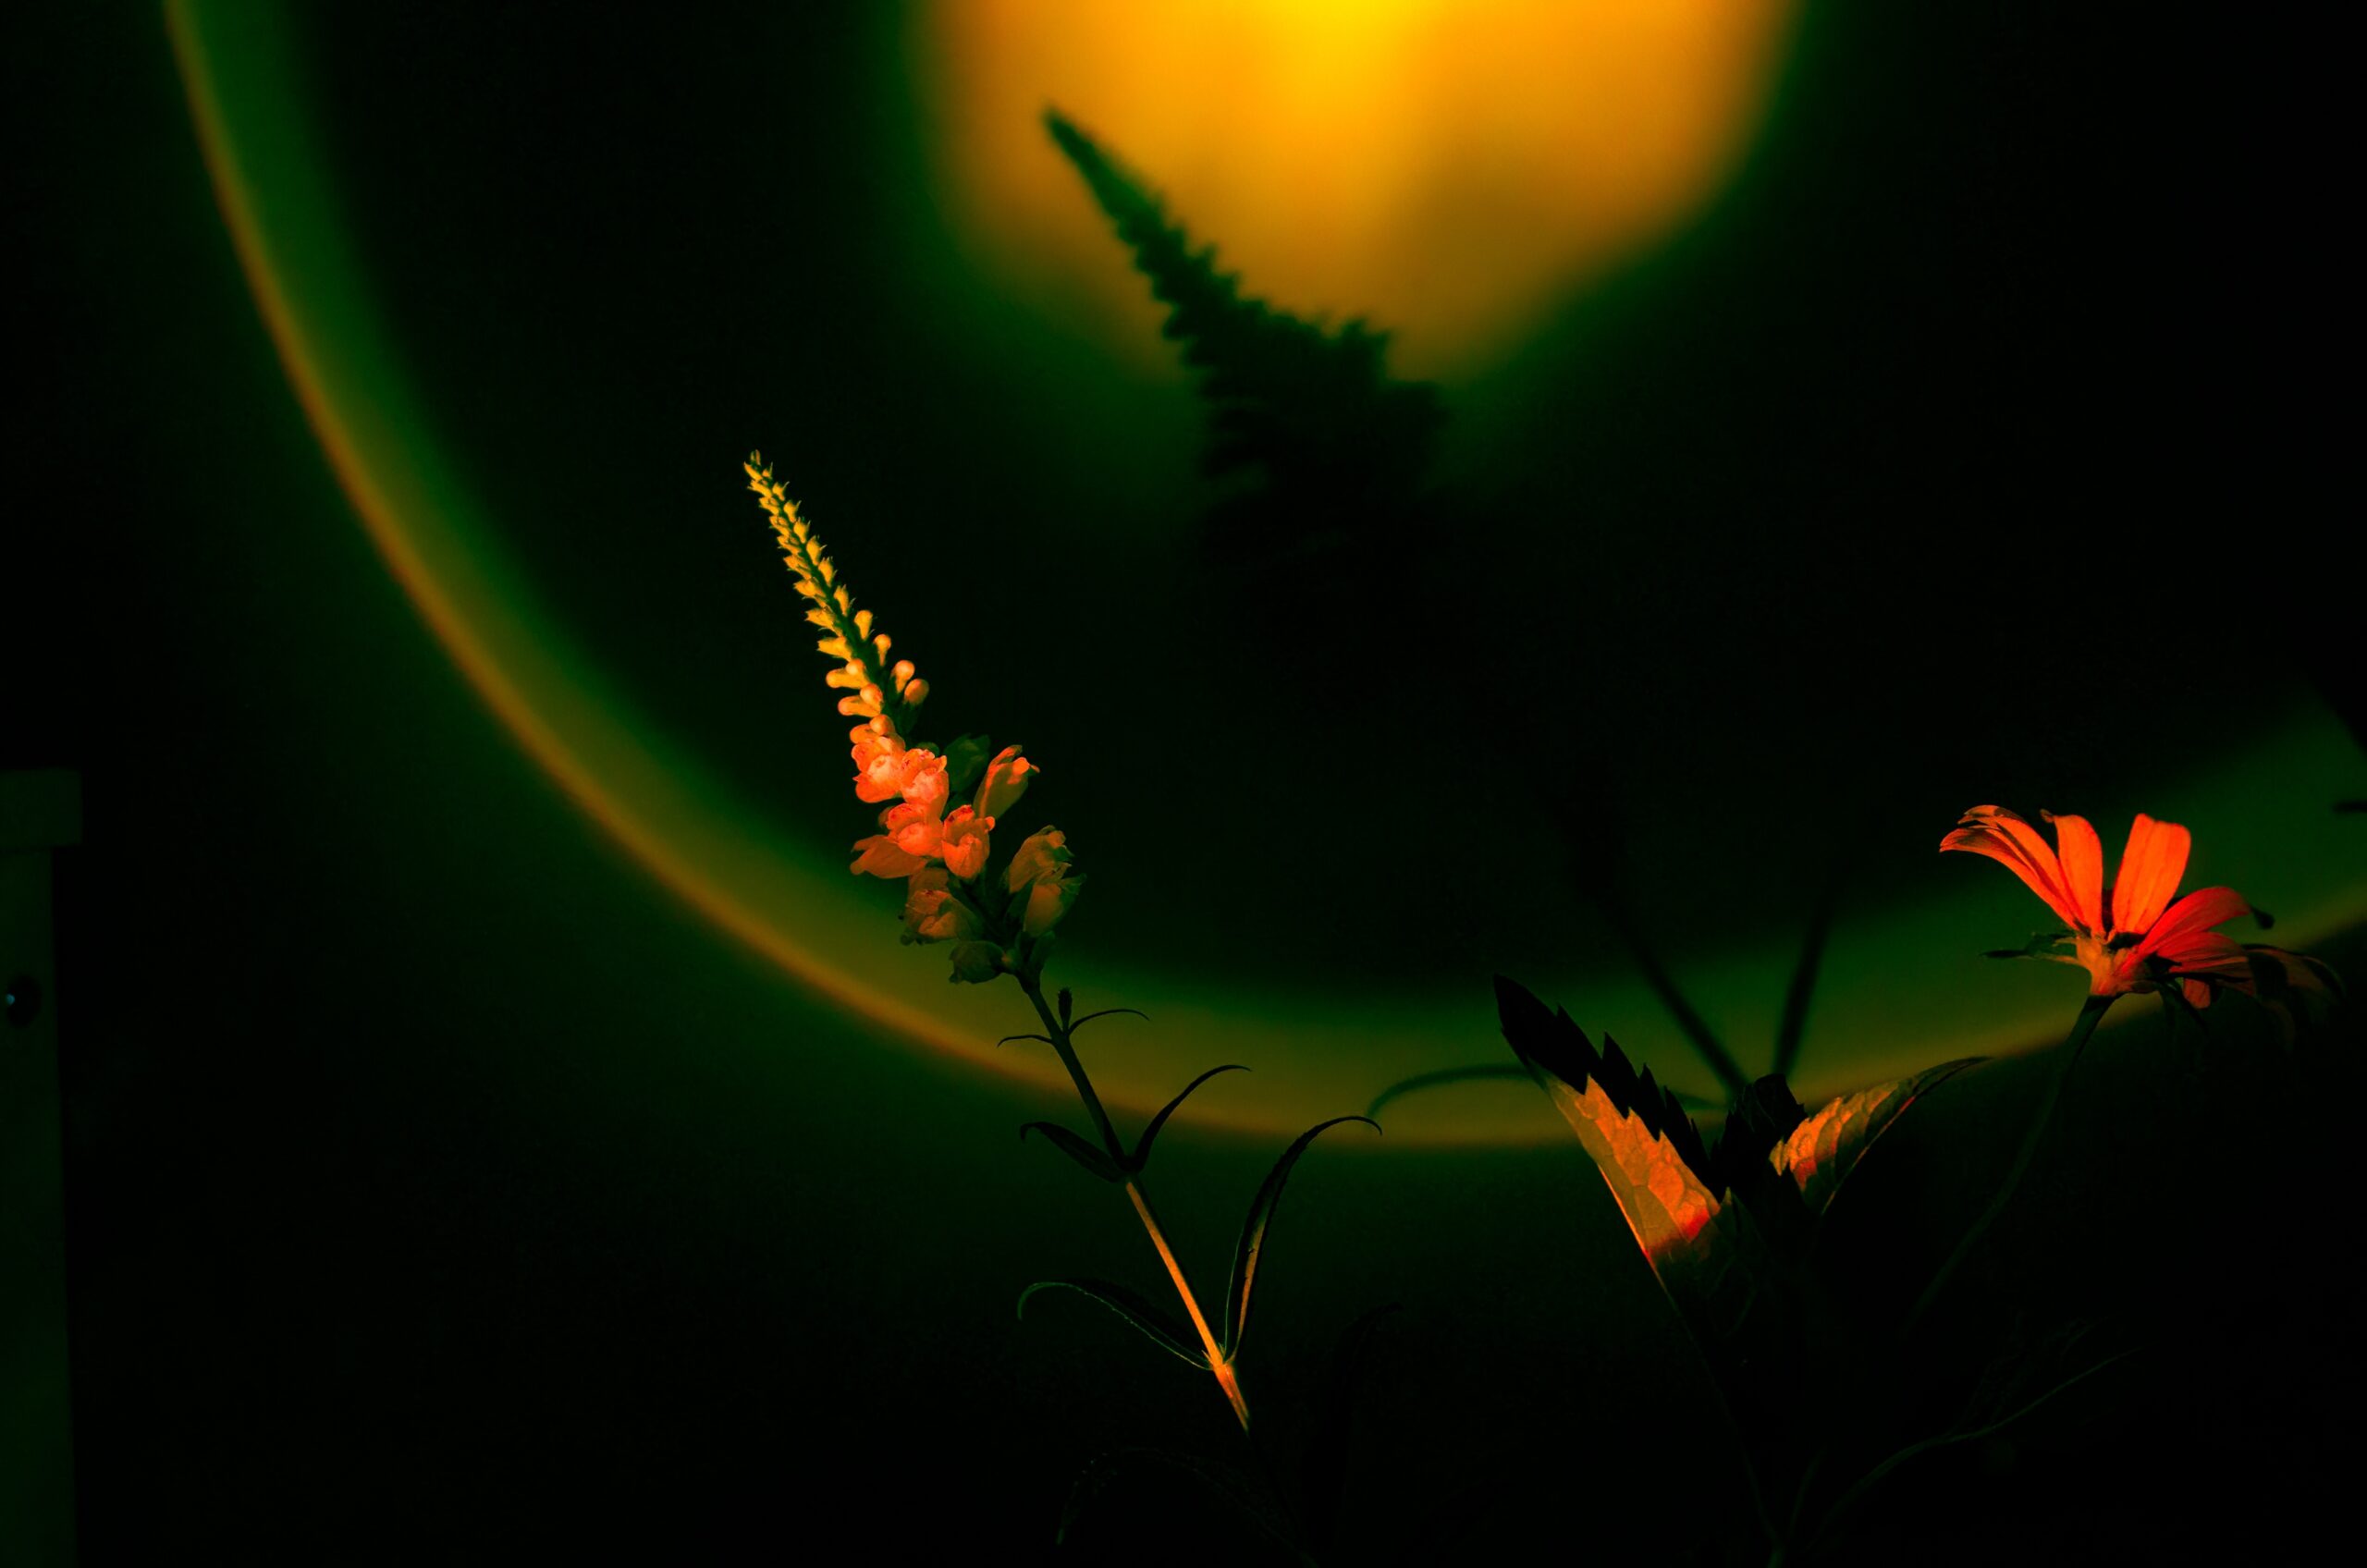
Noiseless AI – Tackles the grain and coloured speckles that often appear in photos taken in low light or at high ISO settings.
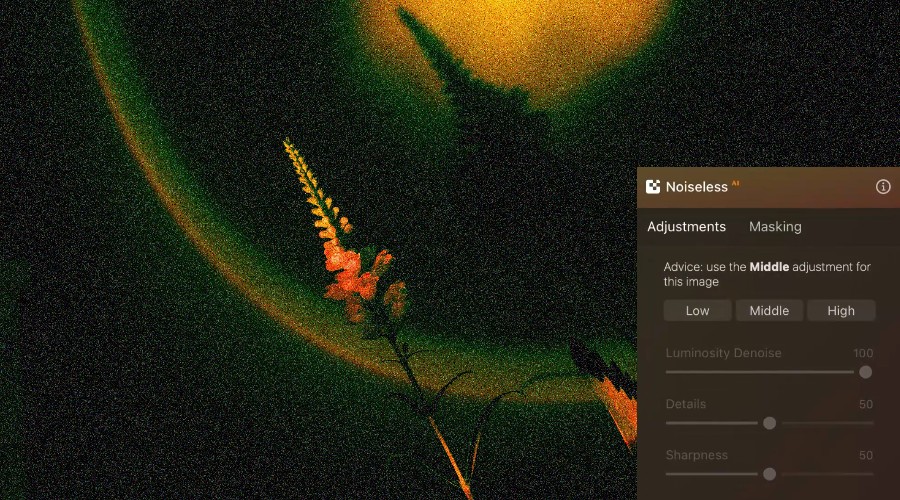
It analyses the image to reduce noise while preserving details such as hair, leaves, and textures.
You can adjust the strength yourself, which is handy when you want a cleaner image without making it look unnaturally smooth.
Atmosphere AI, Sunrays, and Landscape Tools
Luminar’s landscape tools let you change the mood of an outdoor photo without building effects from scratch.
Atmosphere AI – Adds fog, mist, or haze using the image’s depth information, helping the effect follow the contours of the scene.
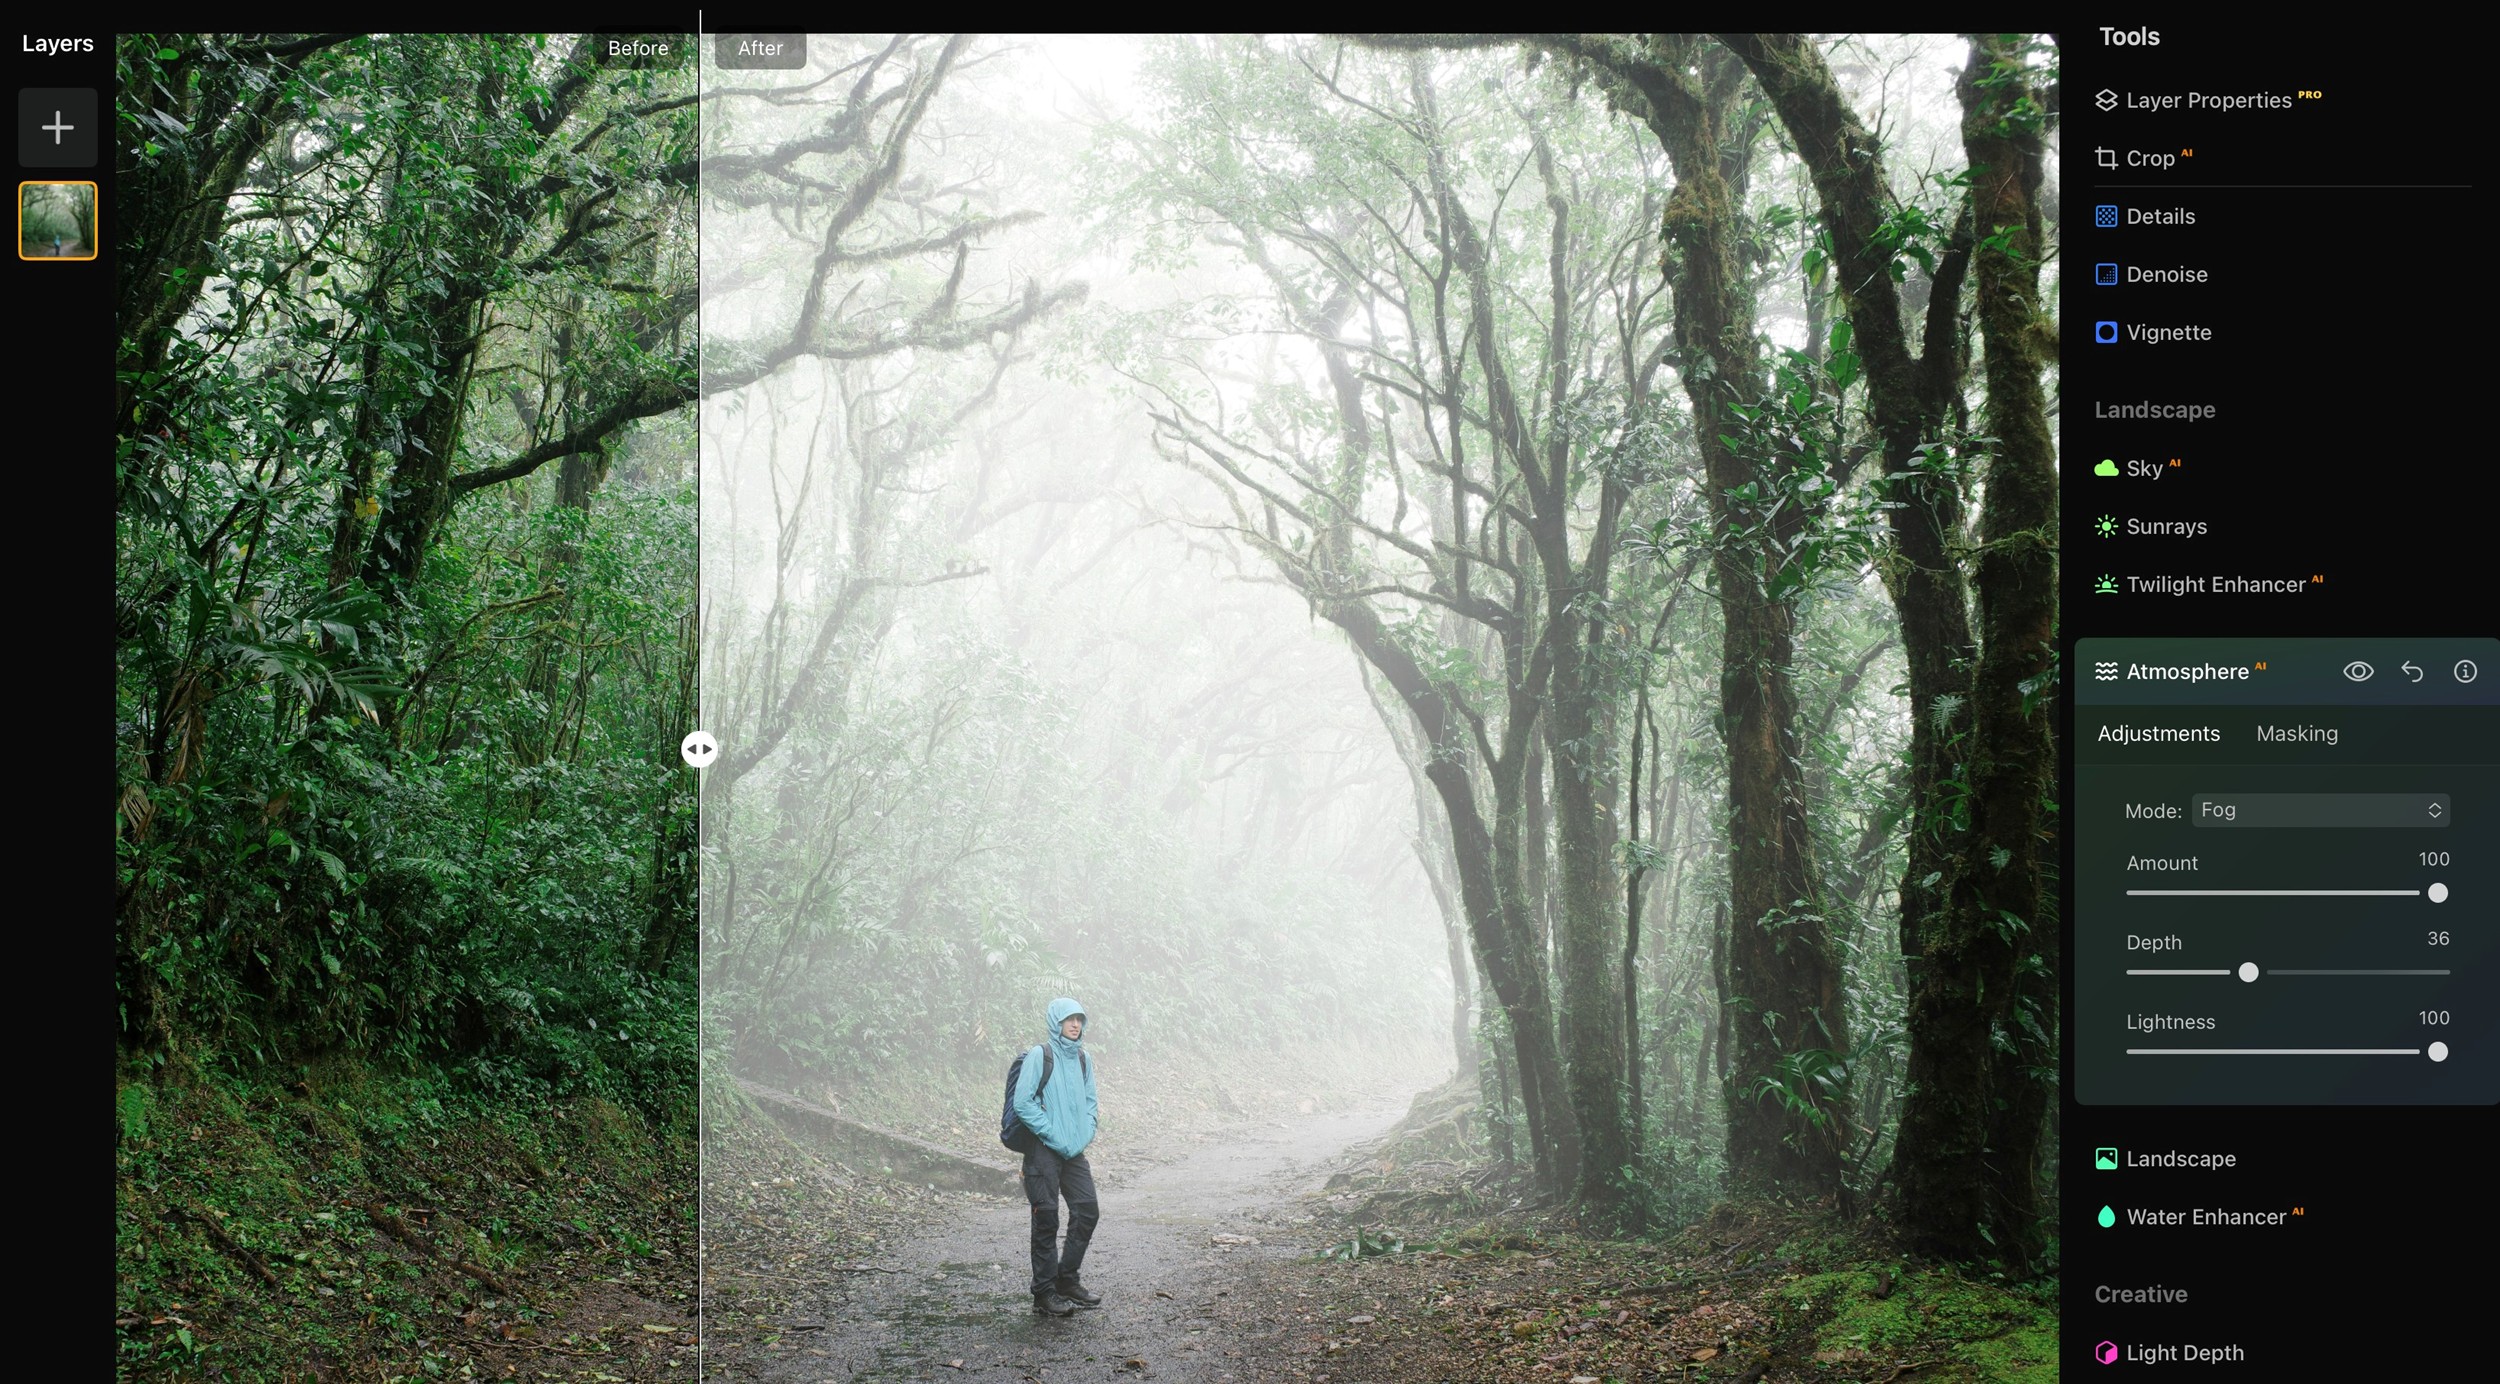
An upgraded Fog effect is coming this fall, which promises to respond more dynamically to the scene.
Sunrays – Lets you add beams of sunlight and position their source, with controls for their intensity and warmth. Alongside tools for enhancing foliage and adjusting landscape colours, these effects give you plenty of scope to improve a scene or take it in a more creative direction.
Structure AI and Supercontrast
Structure AI – Brings out texture and fine details without relying on traditional sharpening. It analyses the photo and selectively adjusts contrast in areas such as foliage, stonework, and architectural features, while avoiding an overly harsh look.
You can also reduce the effect for a softer finish, making it useful for more than just adding detail.
Supercontrast – Gives you finer control over the image’s overall depth. Rather than adjusting contrast across the entire photo, it lets you work separately with highlights, midtones, and shadows.
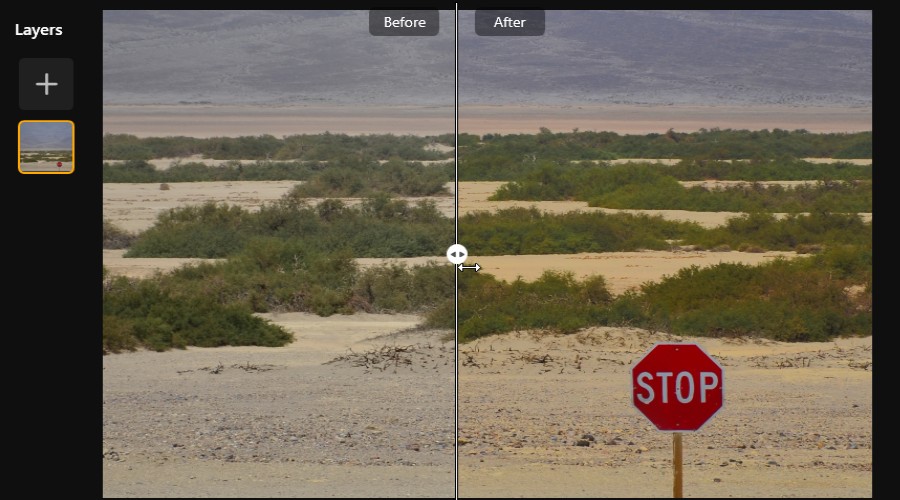
I find the two tools complement each other nicely: Structure AI adds definition to individual details, while Supercontrast helps balance the broader light and dark areas.
Portrait AI and Skin AI
Luminar’s portrait tools make it easy to retouch people without spending ages on detailed selections.
Portrait AI – Brings together adjustments for faces and bodies, including options to brighten eyes, reduce dark circles, subtly reshape facial features, and refine body proportions. The AI identifies the relevant areas automatically, leaving you to control how much of each effect to apply.

Skin AI – Focuses on smoothing skin, reducing shine, and removing blemishes while preserving natural texture.
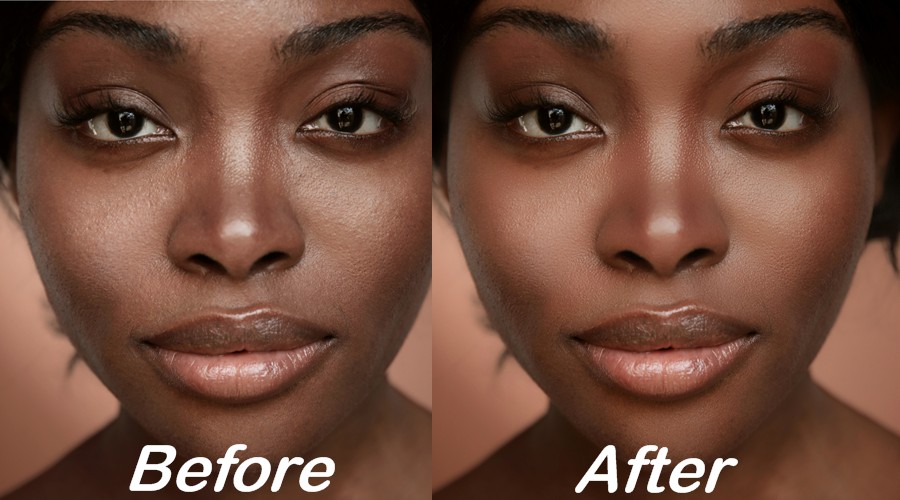
That last part is important. When you push the sliders too far, any portrait can start to look artificial. I prefer making small adjustments that leave the person looking like themselves, just with a little more polish.
Bokeh AI
Bokeh AI gives photos a professional-looking depth-of-field effect by blurring the background while keeping the subject in focus. Luminar automatically identifies the subject, so there’s no need to painstakingly cut it out before applying the effect.
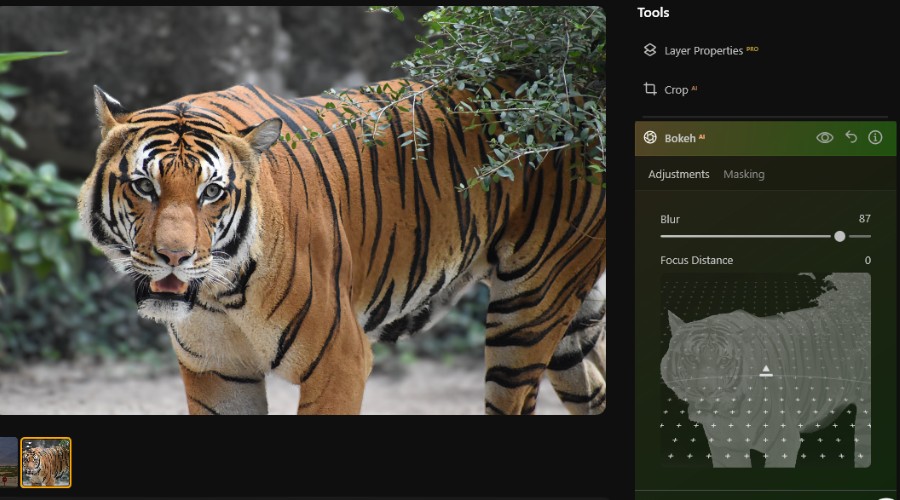
You can adjust the strength of the blur and refine the background’s appearance to suit the shot. I find it particularly useful for portraits taken on a phone or in busy surroundings, where softening distractions helps draw attention to the subject.
Studio Light
Studio Light lets you recreate the look of a professional photoshoot without setting up any lighting equipment. It uses AI to identify your subject and add a virtual light source, which you can reposition to illuminate the face from different angles.
You can adjust the light’s brightness, colour, and direction to soften shadows or give a portrait a more dramatic look. I particularly like how much control it offers after the initial one-click effect. A subtle adjustment can brighten a poorly lit face, while stronger settings let you experiment with more creative lighting.
Light Depth and Dodge & Burn
Light Depth – Helps correct uneven lighting by letting you adjust the brightness and warmth of the foreground and background separately. It’s particularly useful for backlit photos, where the subject looks too dark against a bright sky. You can bring out detail in the foreground without brightening the entire image or losing the atmosphere of the original shot.
Dodge & Burn – For more precise adjustments, this brings traditional darkroom techniques into Luminar. Use a brush to lighten or darken specific areas, then adjust its size, softness, and strength to control the effect. I find it useful for subtly brightening a face, deepening shadows, or drawing attention to a particular detail without making the edit obvious.
Color
Luminar offers plenty of ways to give a photo a distinctive look beyond basic exposure and contrast adjustments. Its Color tools lets you fine-tune saturation and vibrance, while HSL controls allow you to target individual colours. For example, you can deepen the blue of a sky without making the rest of the image overly saturated.
For a more stylised finish, Mood applies colour-grading looks using LUTs, which you can adjust to suit the photo.
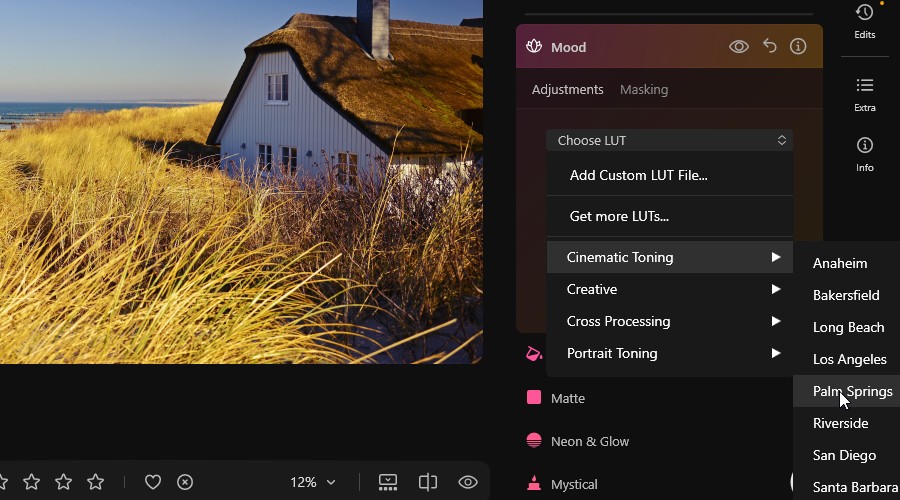
There are also tools for adding film grain, a soft glow, or a more dramatic lighting effect. I particularly like that these aren’t all-or-nothing filters: you can dial back their strength and combine them with other adjustments.
Whether you’re aiming for natural colours or something more cinematic, Luminar gives you room to experiment without needing to build every effect from scratch.
Restoration
Luminar’s Restoration tool gives old and damaged photos a new lease of life. It uses AI to improve faded colours, colourise black-and-white images, and repair scratches and other visible damage. Rather than working through each blemish with a brush, you can apply the corrections automatically and assess the results in seconds.
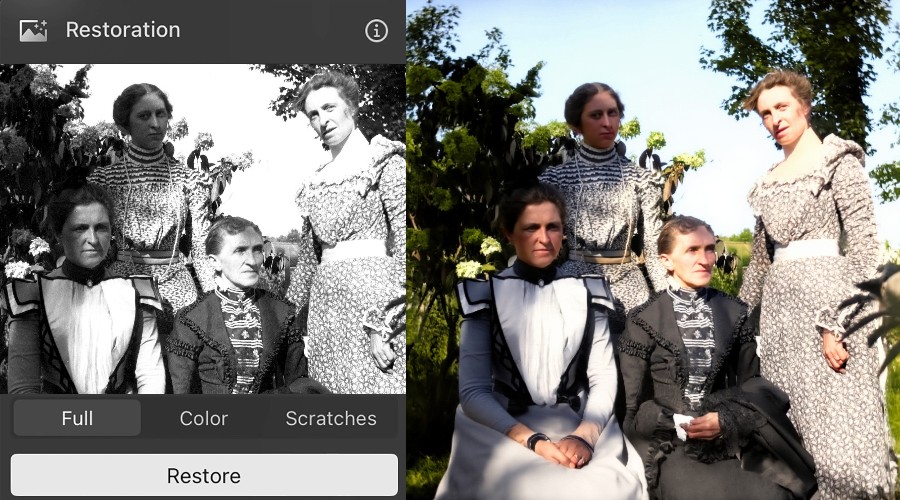
I particularly like how it can bring out details that have become difficult to see in an ageing photograph. It’s a useful starting point for digitising family albums, and you can follow up with Luminar’s other editing tools to fine-tune the colour, contrast, or sharpness. As with any AI restoration, it’s worth checking the repaired areas closely, especially when preserving the original photo’s details.
Develop and RAW Editing
The Develop tool gives you the hands-on controls you’d expect from a traditional photo editor. It’s particularly useful when working with RAW files, which retain more image information and give you greater flexibility when correcting exposure and colour.
You can choose a camera profile, adjust white balance, and fine-tune exposure, contrast, highlights, and shadows. Develop also includes practical corrections for issues such as lens distortion and perspective, making it a good place to get the fundamentals right before moving on to Luminar’s more creative AI tools.
I like having these manual controls alongside the one-click enhancements. AI can provide a quick starting point, but Develop lets you make deliberate adjustments when you know exactly how you want the finished photo to look.
Upscale AI
Upscale AI lets you enlarge low-resolution photos by up to six times their original size. Rather than simply stretching the existing pixels, it uses AI to generate additional detail, helping images stay clearer when enlarged.
User Interface, AI Assistant, and Cross-Device Ecosystem
Luminar makes it easy to get started, whether you’re importing a single photo or organising an entire collection. Its catalog lets you browse images and folders, while the editing interface keeps powerful tools within easy reach.
Version 1.28 brings Presets, Tools, and Edits together in one right-hand panel, making it simpler to try a look, fine-tune it, and revisit earlier adjustments without jumping between different parts of the software.
I also appreciate how approachable the controls are. Most AI tools give you an immediate result that you can refine with sliders, and the before-and-after preview makes it easy to judge whether an edit is actually improving the photo.
I was excited to see that the AI Assistant is now available, having arrived in version 1.26. All you have to do is open its chat panel and describe what you want to achieve. I.e., improving a photo’s lighting. It then analyses the image and offers up to three suggested edits with previews, which you can apply and then fine-tune yourself.
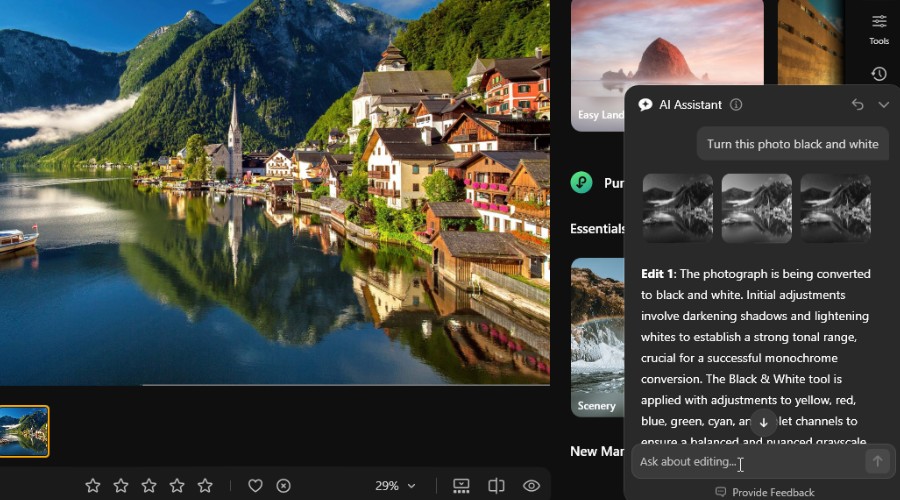
You can also ask how to achieve a particular effect, and it will guide you to the relevant tools.
It’s a useful way to discover features without hunting through menus, although it can’t carry out every editing task for you just yet.
This fall, Skylum plans to upgrade AI Assistant so you can describe your intended result and have it suggest and actually apply a combination of tools, while leaving you in control of the final image.
Luminar’s cross-device ecosystem extends the workflow beyond a Windows or Mac desktop. You can work on photos across supported mobile and other devices, with syncing designed to let you pick up an edit where you left off.
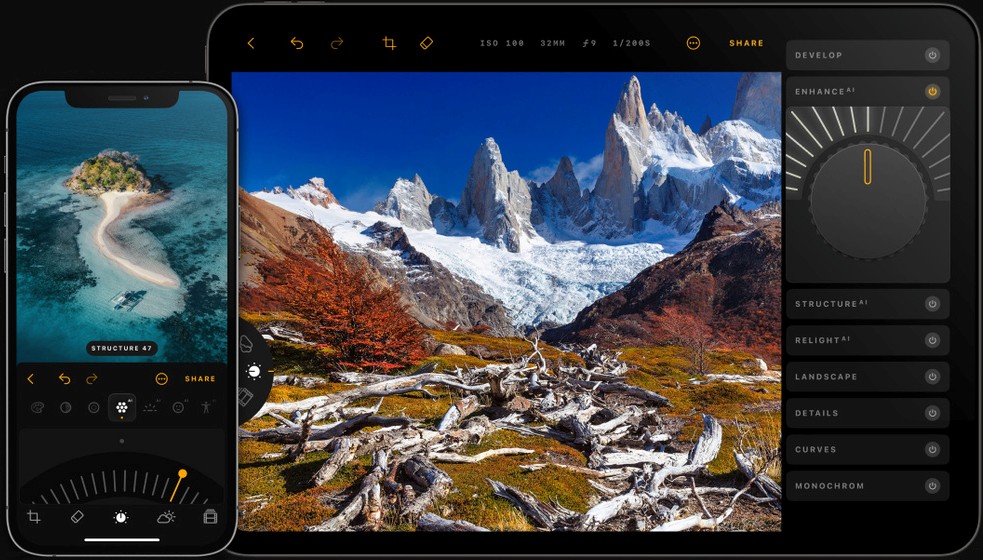
On desktop, Luminar can also run as a plugin for Adobe Photoshop and Lightroom, so you can use its AI tools without abandoning an established editing workflow.
Pricing
Skylum offers three perpetual Luminar licences, so you can pay once and keep using the software rather than committing to a subscription. All three include the Fall 2026 upgrade, a 30-day money-back guarantee, and 24/7 chat support.
- Desktop Only ($129 one-time): Luminar for Windows or macOS, with activation on two computers. Includes one year of access to AI tools such as GenErase, Restoration, and AI Assistant.
- All Platforms ($159): Adds Luminar Mobile, cross-device editing, Spaces web galleries, and Luminar Web when it launches this fall.
- Max ($199): Includes everything in All Platforms, plus one year of Luminar Prime, which provides access to new features and a large library of presets, LUTs, skies, overlays, and courses.
Luminar Review – Final Verdict
Luminar continues to strike a great balance between quick AI enhancements and hands-on creative control. Version 1.28 makes the editing experience even smoother, with a more convenient interface and better performance.
The upcoming fall upgrade promises to make the AI even more useful, especially with the advancement of the AI Assistant.
Overall, Luminar remains one of my favourite photo editors for making ambitious edits easily.


Read our disclosure page to find out how can you help Windows Report sustain the editorial team. Read more



Improve this guide




User forum
0 messages