Fix: Windows 10 Volume Keeps Going Up Automatically
4 min. read
Updated on
Read our disclosure page to find out how can you help Windows Report sustain the editorial team. Read more
Key notes
- The volume increasing automatically on your Windows 10 device indicates some settings errors.
- In this article, we're guiding you to check various options to restore the sound options.
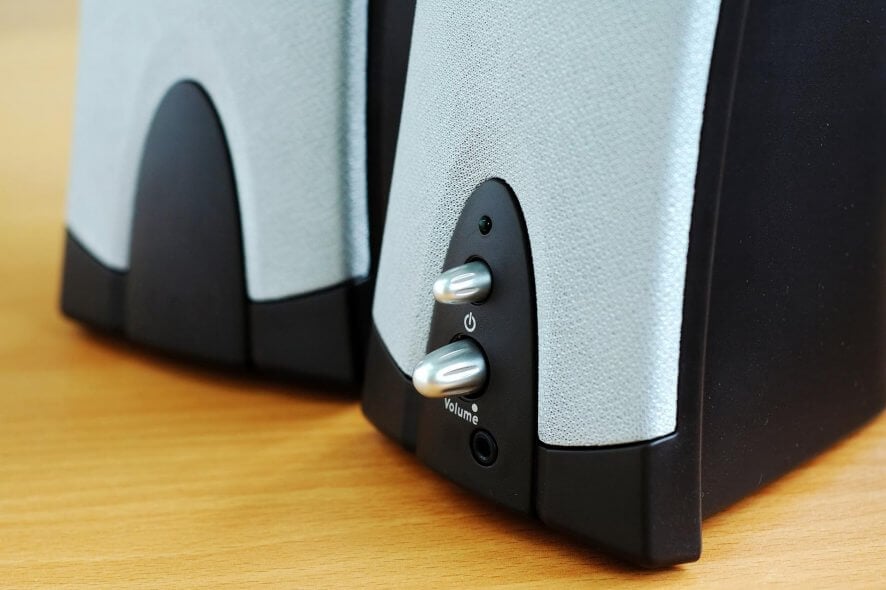
When the volume increases automatically on your Windows 10 device, the problem could either be software or hardware related, such as mic/headset settings, or sound/audio drivers which bring it up.
No matter the cause, this article should help you resolve the sound issue even if you’re not a tech expert.
Before we jump into the solutions, make sure you perform these preliminary checks:
- check your speaker and headphone connections for loose cables or the wrong jack;
- check your power and volume levels, and try turning all the volume controls up;
- some speakers and apps have their own volume controls, check them all;
- try connecting using a different USB port.
If you’ve already gone through all of these, but none helped, move on to the steps below.
What can I do if the sound goes automatically up on my PC?
1. Update sound driver
- Right-click Start and select Device Manager
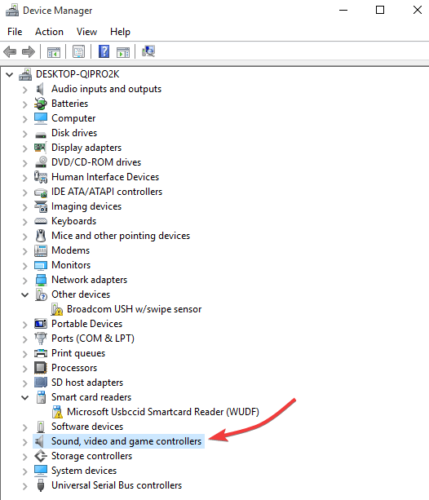
- Expand Sound, video, and game controllers
- Select your Sound card and open it
- Go to the Driver tab
- Select Update driver. If Windows doesn’t find a new driver, look for one on the device manufacturer’s website and follow their instructions.
Alternatively, uninstall your audio driver from Device Manager, by right-clicking on it and selecting Uninstall. Restart your device and Windows will attempt to reinstall the driver.
You can also use the generic audio driver that comes with Windows from Device Manager.
- Right-click your audio driver
- Click on Update driver software
- Choose Browse my computer for driver software
- Select Let me pick from a list of device drivers on my computer
- Then select High Definition Audio Device, click Next, and follow the instructions to install it.
We also strongly recommend Outbyte Driver Updater to automatically download all the outdated drivers on your PC. This tool will keep your system safe as you can manually download and install the wrong driver version.
Outbyte Driver Updater fully scans your system not just for outdated audio drivers, but for any driver that is out of date. It then recommends the compatible software for your device.
The best thing is that you can use Outbyte Driver Updater whenever you suspect that there’s a similar problem with your device.
2. Run the Audio troubleshooter
- Open the search bar and type troubleshooting then press enter.
- Click Hardware and sound
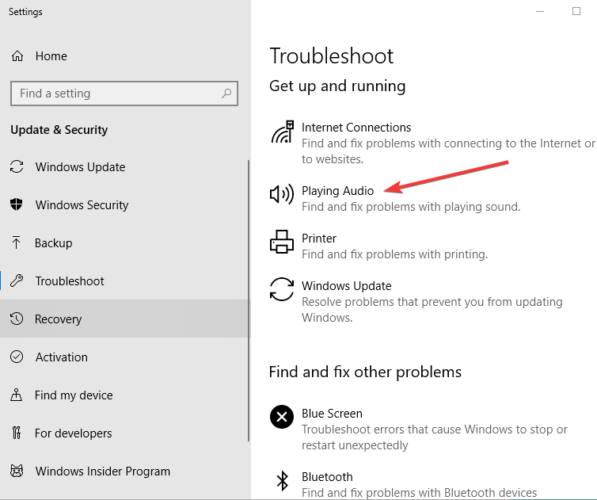
- Click Playing Audio and then click Next
- The troubleshooter will search for any issues and give feedback on the next steps.
3. Run hardware and device troubleshooter
- Click Start and type Troubleshooting in the search box to open the troubleshooter.
- Select Hardware and sound
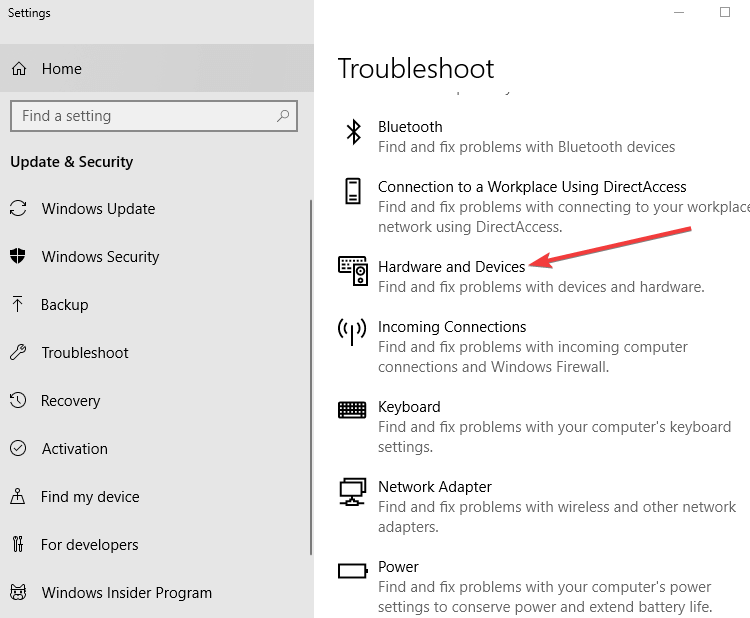
- Click Hardware and Devices then click Next to start the process and find out what could be the issue – either mic or headset.
4. Check sound settings
- Right-click on the speaker icon on the toolbar
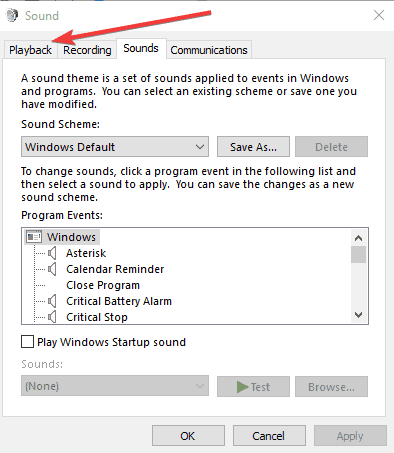
- Click Sounds
- Go to the Playback tab
- Right-click your speaker and select Properties
- Under General tab, select Properties again
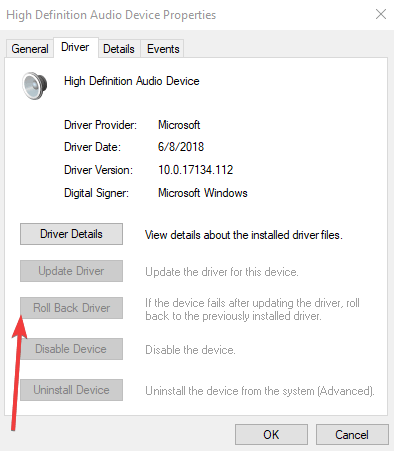
- Go to the Driver tab
- Click Roll Back driver.
Note: If the Roll Back Driver option is grayed out, it means that your system is running the default and standard sound driver.
You can download the most current audio driver directly from the Realtek website or your device manufacturer’s website, then install it.
5. Disable sound effects
- Click start and type sound to open the Sound window. (You can also right-click on the sound icon in the tray area and select Sounds.)
- Select the Playback tab
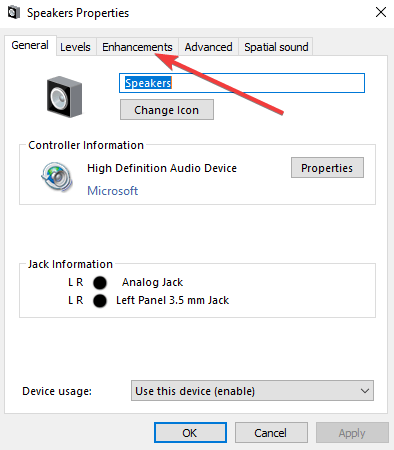
- Right-click on Speakers and select Properties
- Go to the Enhancements tab
- Uncheck Disable all sound effects (or any similar option you see there)
- Restart your computer and see if it works better now.
6. Try different audio formats
- Go to Start, type Sound, and press enter
- Select Sound Control Panel from the list of results
- Go to the Playback tab
- Right-click the Default Device and select Properties
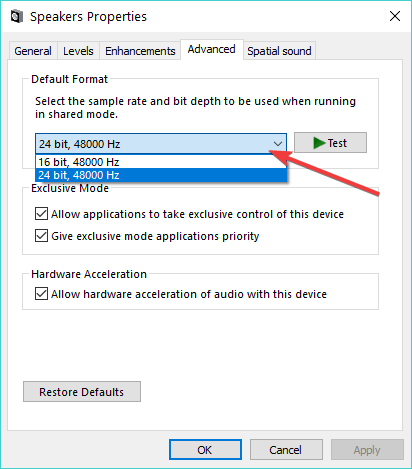
- On the Advanced tab, under Default Format, change the setting
- Retest the sound. If that doesn’t work, try changing the setting again.
7. Set default audio device from USB or HDMI
- Click Start and type Sound
- Select Sound from the list of search results
- Go to the Playback tab
- Select a device and then Set Default.
8. Uncheck Loudness Equalization
- Right-click the speaker icon on your taskbar
- Select Open your playback device (the one that is actually playing)
- Click Properties and go to Enhancements
- Uncheck Loudness Equalization
Were you able to fix Windows 10 sound increases automatically using any of these fixes? Let us know in the comments section below.



User forum
1 messages