Windows 10/11 installation error 0x800700d [Easy Solutions]
3 min. read
Updated on
Read our disclosure page to find out how can you help Windows Report sustain the editorial team. Read more
Key notes
- Windows 10 error 0x800700d occurs while upgrading Windows, or when trying to activate the OS.
- The first thing that we recommend is trying to run the Windows Update troubleshooter. Read our step-by-step guide to know how to do this.
- If you encounter any other problems while installing Windows, take a look at our Windows Installation Errors section.
- Do you want to know how to fix Windows 10 errors? We've got a huge Windows 10 Errors Hub filled with solutions.

Although upgrading to Windows 10 might not seem like a hard task to complete, many users reported issues through the process.
Windows 10 error 0x800700d is the cause of users not being able to use their OS. The error occurs while upgrading Windows, or when trying to activate the OS.
To fix this issue, we’ll offer you a series of fixes that you can try out. These fixes that should allow you to use the upgraded Windows version without any problems.
How can I fix Windows 10 error 0x800700d?
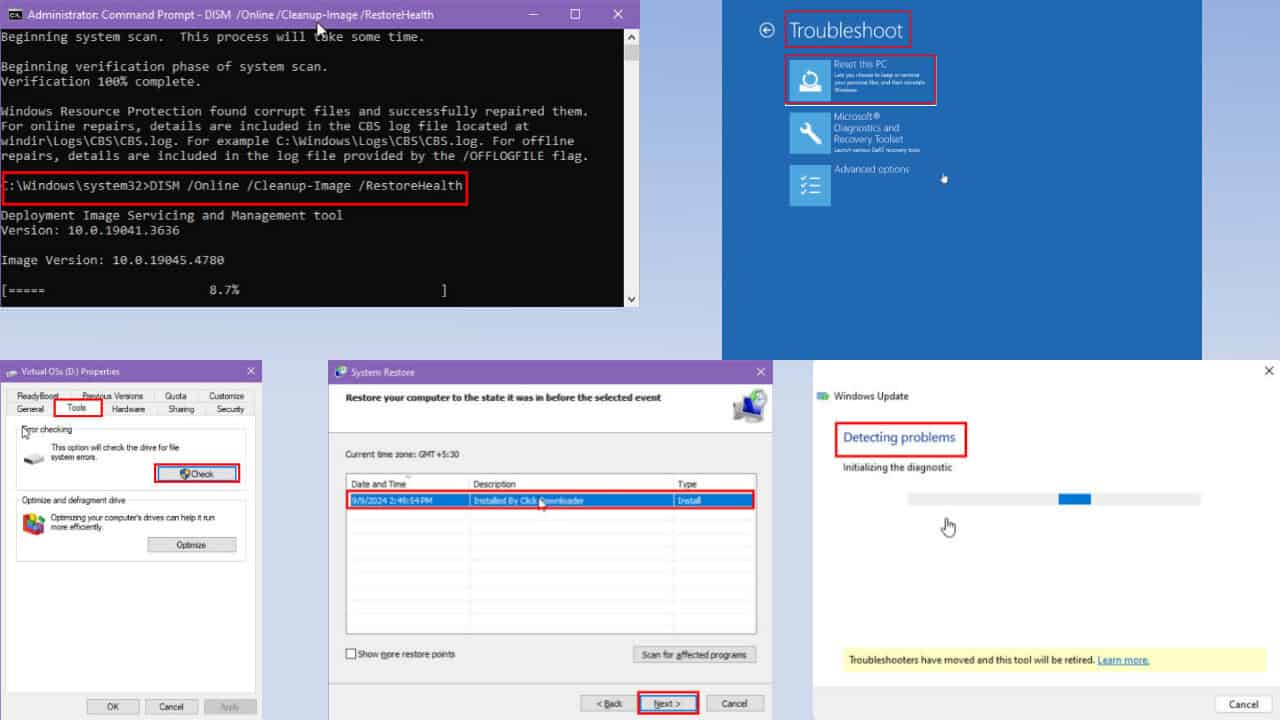
- Run Windows Update troubleshooter
- Run System File Checker
- Try the DISM tool
- Change the language settings
- Clear the SoftwareDistribution folder
- Use Group Policy Editor
1. Run the Windows Update troubleshooter
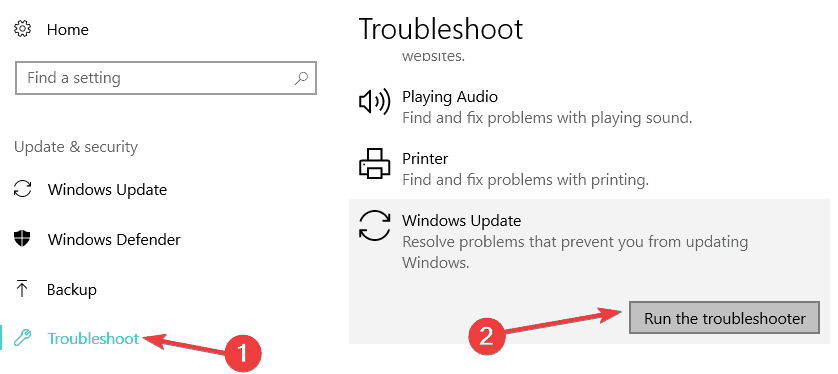
The first thing that we recommend is trying to run the Windows Update troubleshooter. This simple task is performed by doing the following steps:
- Press the Start button, type troubleshoot in the search bar and hit the Enter button on the keyboard
- Look for Windows Update and click Run the troubleshooter
After completing this task, try updating Windows again.
2. Run System File Checker
Running the System File Checker requires you to do the following steps:
- Open Command Prompt by typing cmd in the Windows search bar and hit Enter
- Right click on the first result and choose Run as administrator
- Next, you will need to input the following command and then hit Enter:
- Restart your computer after finishing this process
3. Try the DISM tool
Open the Command Prompt, as described earlier, using the administrator rights.
Enter the commands listed below, hitting Enter after each one:
- DISM.exe /Online /Cleanup-image /Scanhealth
- DISM.exe /Online /Cleanup-image /Restorehealth
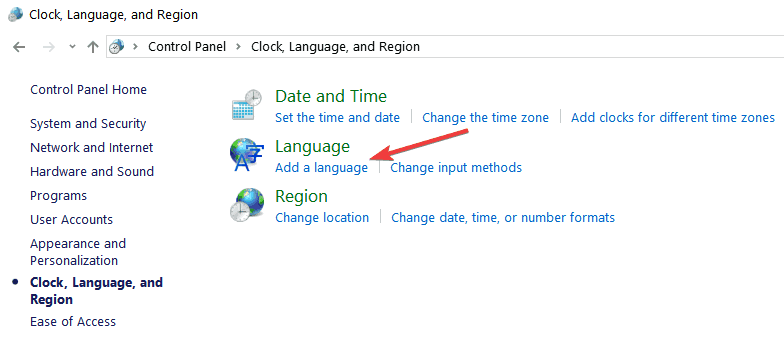
4. Change the language settings
The OS language and the keyboard language need to be in sync. To make sure that this is the case, you need to go to the Control Panel and click Language.
If the languages do not match, make sure to adjust them accordingly and apply the new changes.
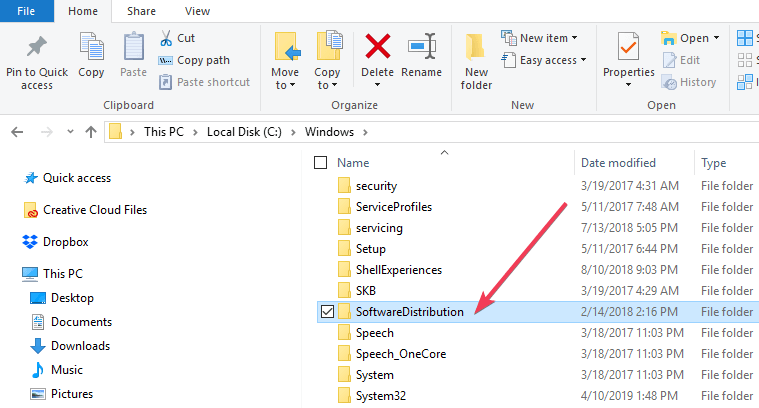
5. Clear the SoftwareDistribution folder
Clearing the SoftwareDistribution folder requires you to do the following:
- Open the Command Prompt
- Type in services.msc and press Enter
- Next you have to right-click the Windows Update Service and then press Stop
- Delete all the files and folders in the WindowsSoftwareDistribution directory
- After completing all these steps you can start the Windows Service Update and try to update again
6. Use Group Policy Editor
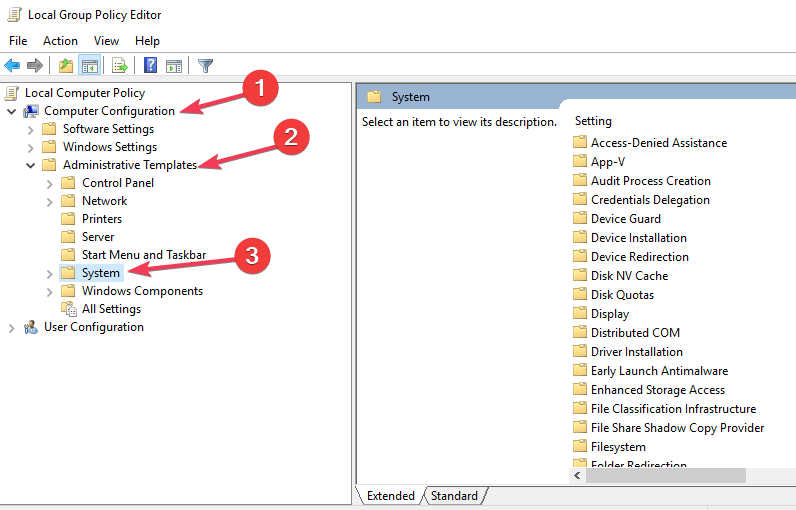
Using the Group Policy Editor requires you to open the Run box, by pressing the Windows button + R on the keyboard
- Type in gpedit.msc and hit Enter
- Select Computer Configuration > Administrative Templates and then select System
- Next you have to double click Specify settings for optional component installation and component repair
- Then select Enabled and Contact Windows Update directly…
- Click OK and then restart the update
Be very careful when typing the commands in the Command Prompt. A simple mistake can bring a whole different outcome.
We hope our solutions helped you out. If you have any suggestions or ideas, leave them in the comment section below.
[wl_navigator]




User forum
1 messages