How to Install Windows 11 on a HDD
4 min. read
Updated on
Read our disclosure page to find out how can you help Windows Report sustain the editorial team. Read more
Key notes
- The procedure is the same whether you're installing Windows 11 on an HDD or an SSD.
- To use a flash drive to install Windows 11, first, download the ISO file and then create a bootable file.
- Then, in the BIOS, set the boot order to removable devices. Up next, simply start the installation process.
Installing Windows 11 on a solid-state drive (SSD) is no different than installing it on a hard-disk drive (HDD).
First, we should mention that SSDs are preferred over hard drives for installing operating systems because they are faster.
But, since you’ve made up your mind, we’ll walk you through the process of installing Windows 11 on a hard drive.
The procedure is straightforward: first, download the Windows 11 ISO file and then use the Rufus application to create a bootable file that can be installed using a flash drive.
Before stepping into installing Windows 11 on HDD, let’s check out how long it takes to install it.
How long does it take to install Windows 11 on HDD?
To answer this question, it depends on a few factors, such as the HDD model and computer performance.
It goes without saying that if you have an older HDD, the time it takes to install Windows 11 will be longer compared to newer models with a higher RPM.
To give you an estimate of how long it will take to install Windows 11, it will take about 45 minutes.
When calculating the time it takes to download then install Windows 11, you should also consider the internet speed. The download and installation of Windows normally take an hour and thirty minutes.
System requirements for installing Windows 11 on HDD
- 4 Gigabyte of RAM
- A Dual processor (1 gigahertz (GHz) or faster)
- 64 Gigabyte of storage
- A compatible graphic card with DirectX 12 or later
- An HD display (720p) or higher
After checking your system requirements, it’s time to install the OS on your HDD. The first step is to download the Windows 11 ISO file.
How can I install Windows 11 on HDD?
1. Download Windows 11 ISO file
- Visit the official Windows 11 download page.
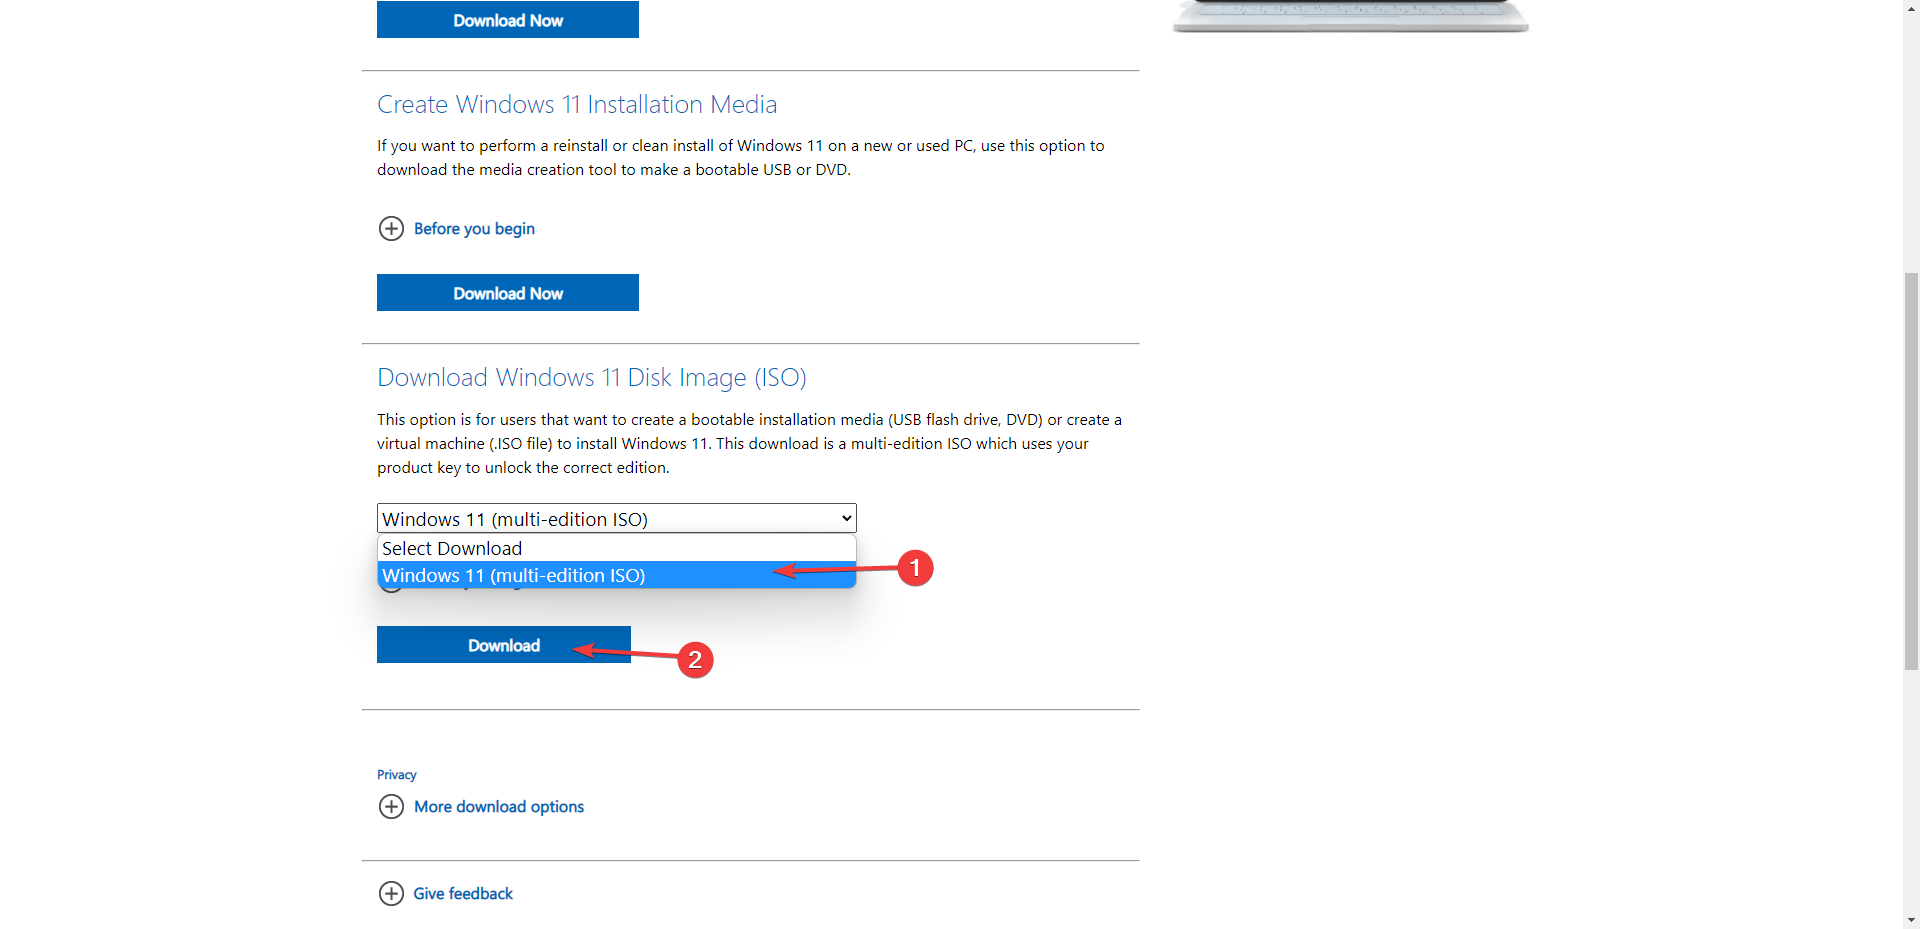
- Scroll down to Download Windows 11 Disk Image (ISO) and select Windows 11 (multi-edition ISO) from the drop-down menu, then click the Download button.
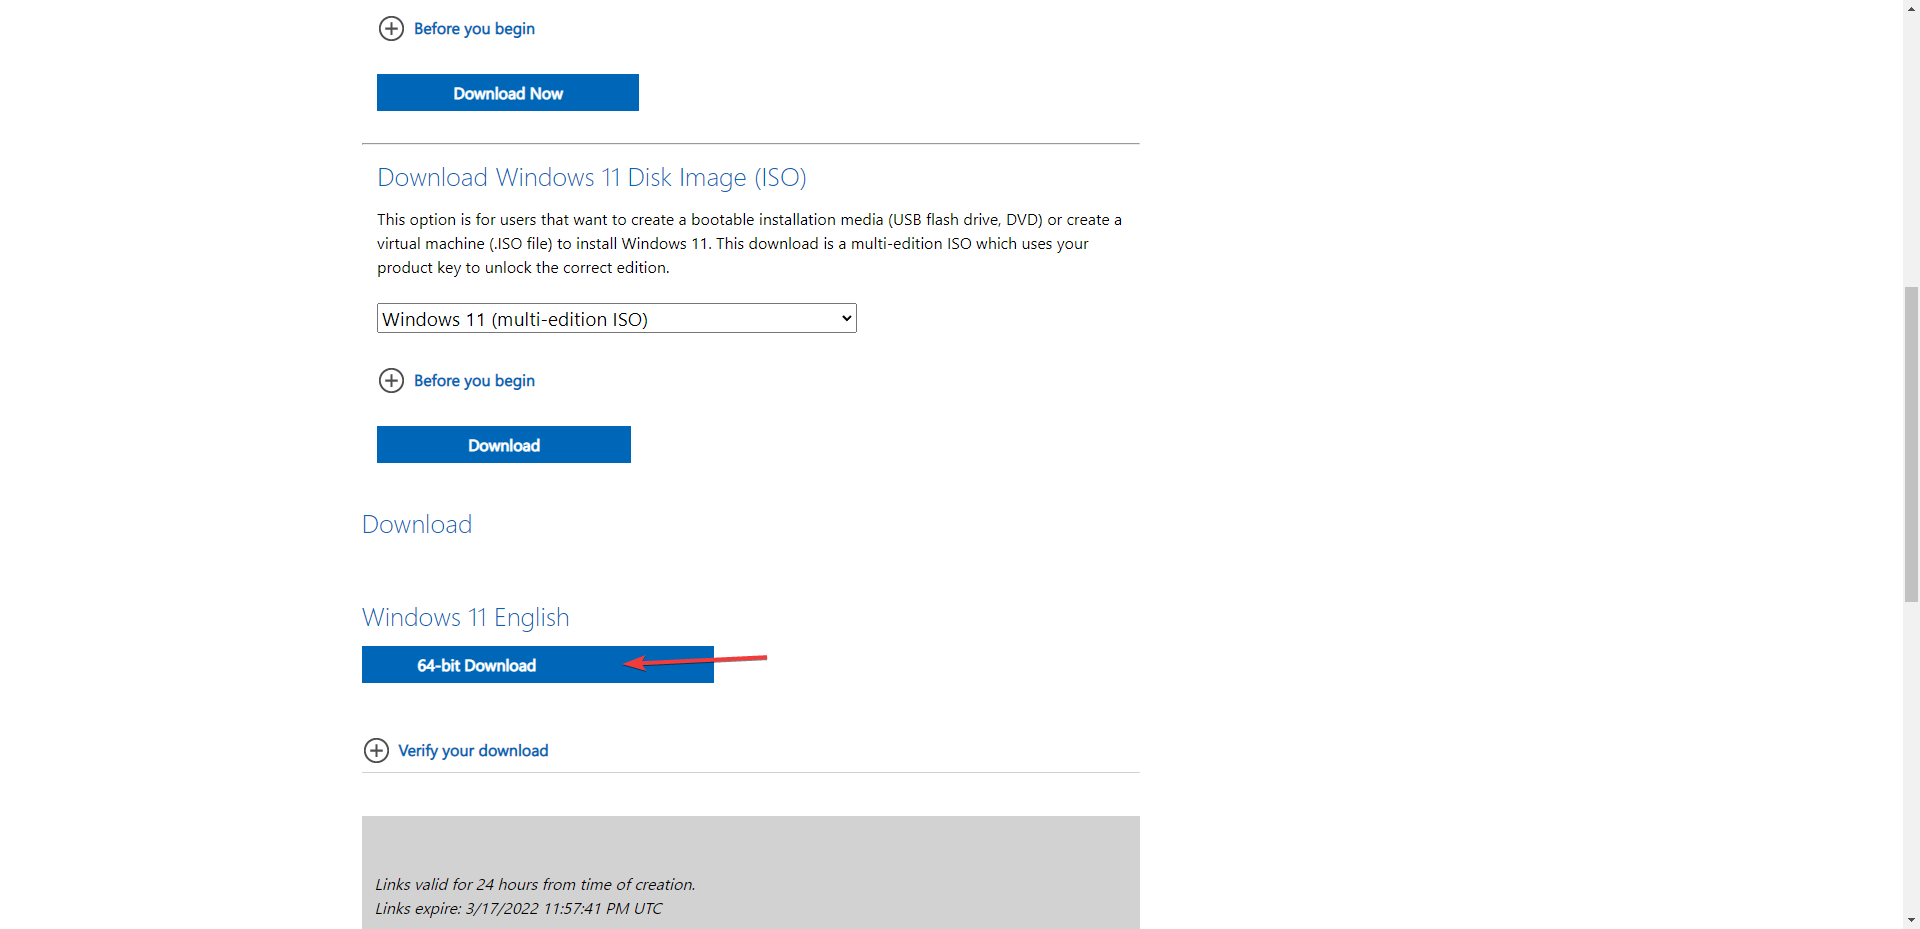
- After that, select Language.
- To begin the download, select the 64-bit Download option.
2. Create a bootable Windows 11
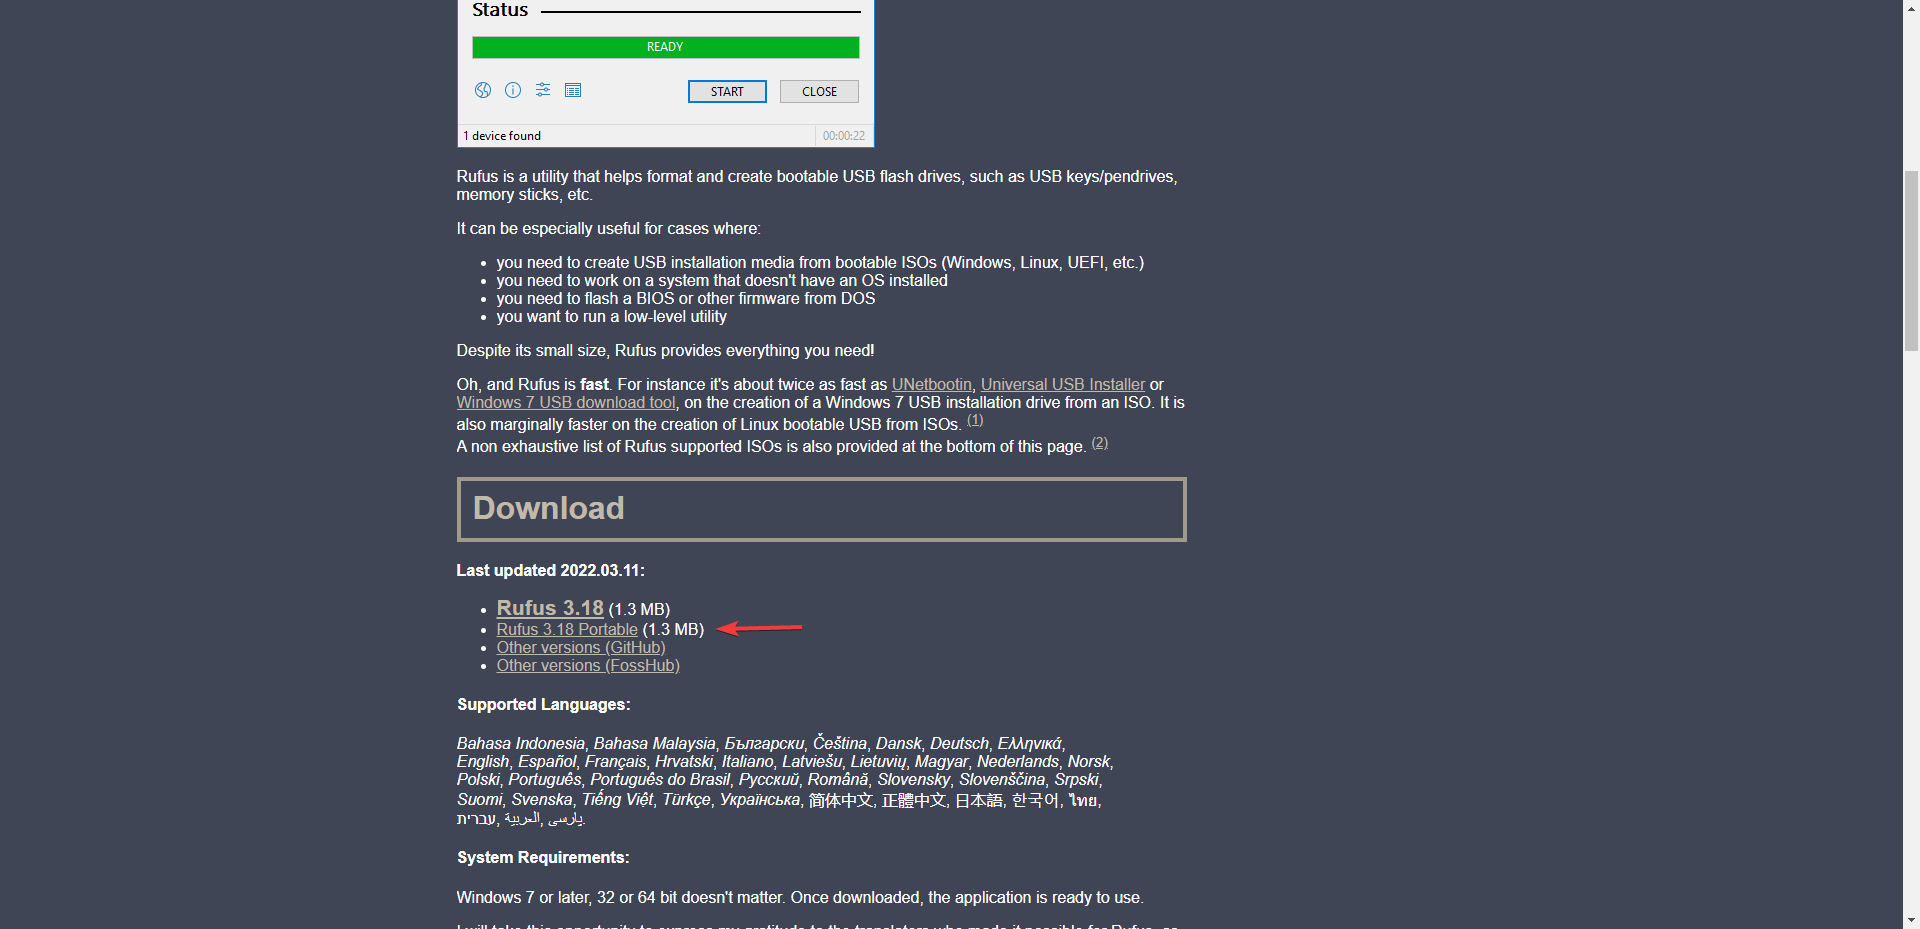
- Go to Rufus website.
- Download portable Rufus.
- Plug in your flash drive.
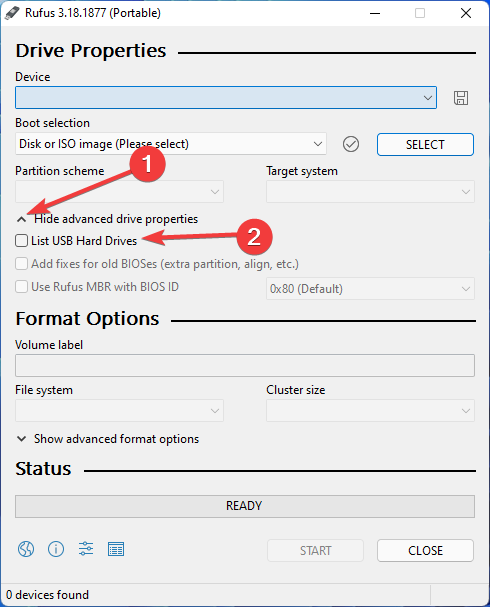
- Launch Rufus app. Then, on Device section, select your flash drive.
- Then, click on the SELECT option to choose the ISO file.
- expand Show advanced drive properties, then select the list USB Hard Drives check box.
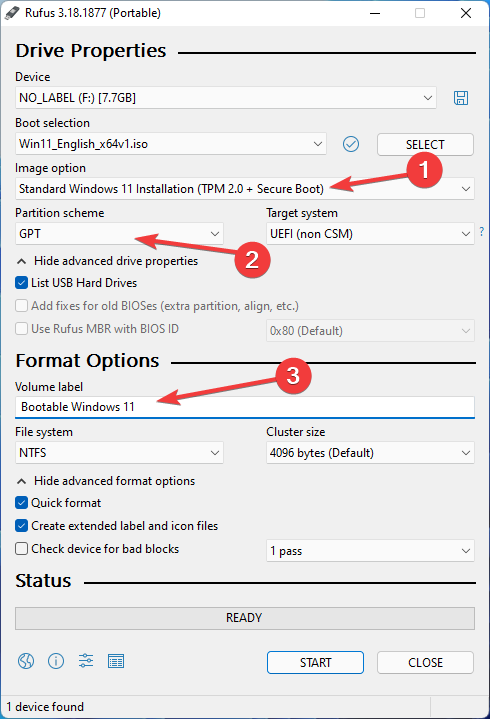
- Select Standard Windows 11 Installation (TPM 2.0 + Secure Boot) from the Image option.
- Choose GPT as the Partition Scheme and type a name for the file in the Volume Label field.
- Click START.
- Then, a warning message says that All of your data on the device will be removed, so make sure to back up your flash drive before clicking on OK.
- Close the window once the process is completed.
We must make the Windows 11 ISO file bootable in order to install Windows 11 using a flash drive. Rufus can be used for this purpose.
3. Change boot order
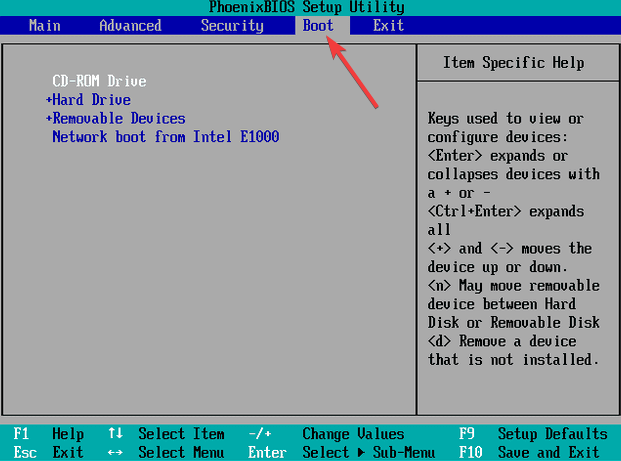
- Turn on your computer, then press the BIOS key while it is booting up. F10, F2, F12, F1, or DEL could be the BIOS key.
- Then, go to Boot tab.
- Change the boot order to Removable devices.
- Following that, save the changes and exit.
To install Windows 11 using a flash drive, you must first change the target computer’s boot option to removable devices.
4. Install Windows 11
- When your computer boots up, you’ll notice a message that says, Press any key to continue. You must press a key on your keyboard as requested in this step.
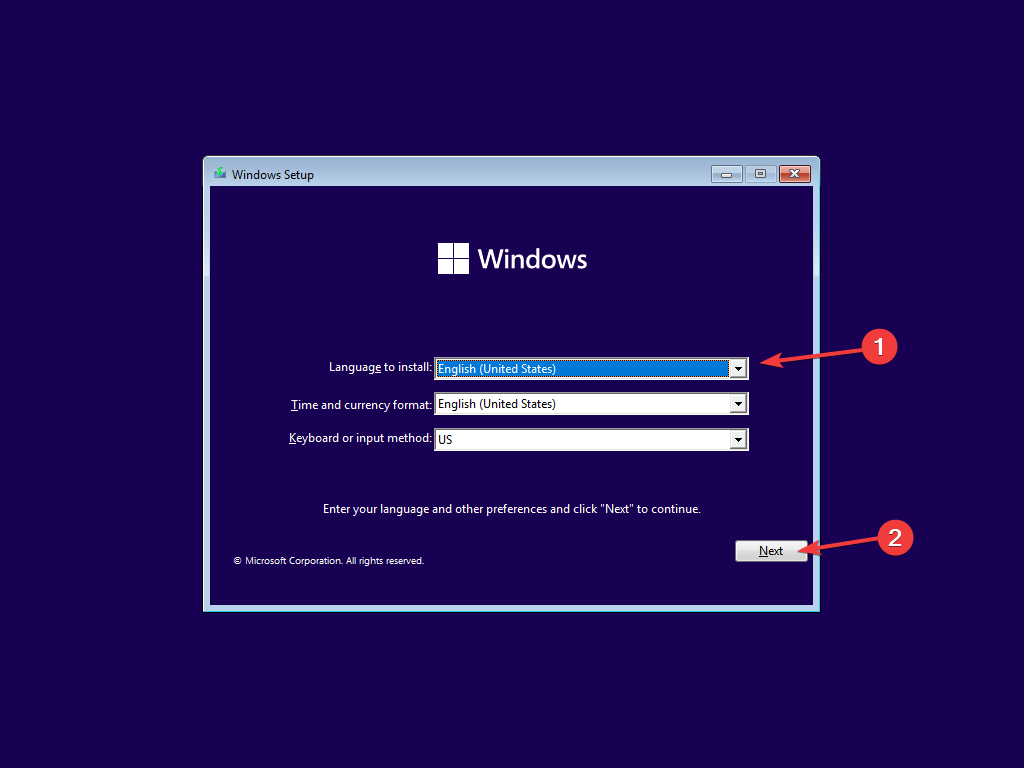
- Select a Language then click the Next button to proceed.
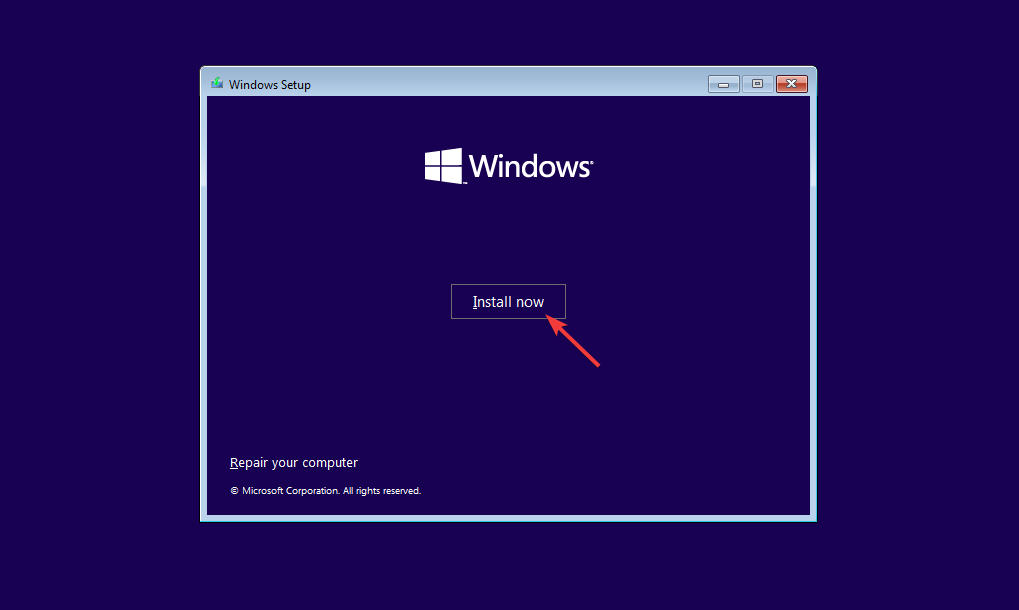
- Click Install now.
- Input the product key or select the I don’t have a product key option in the next step.
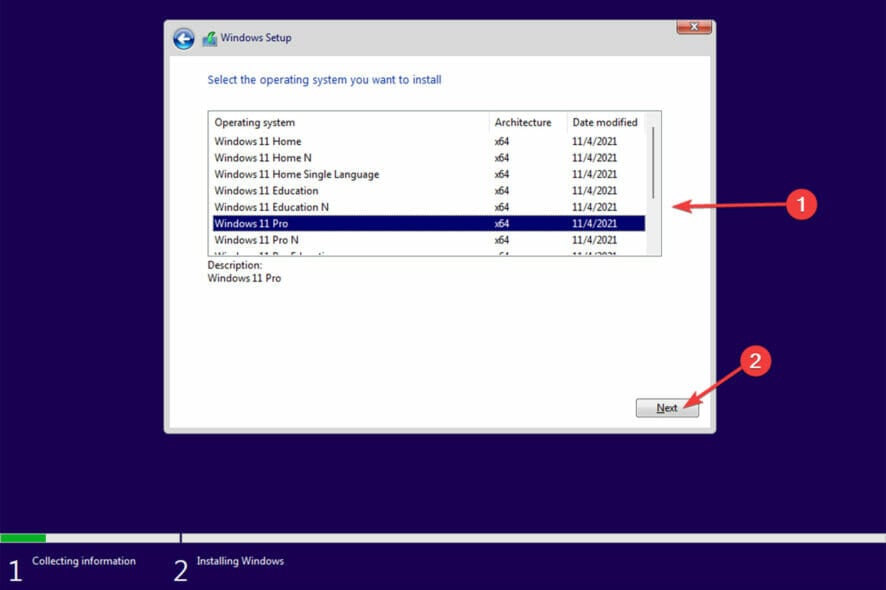
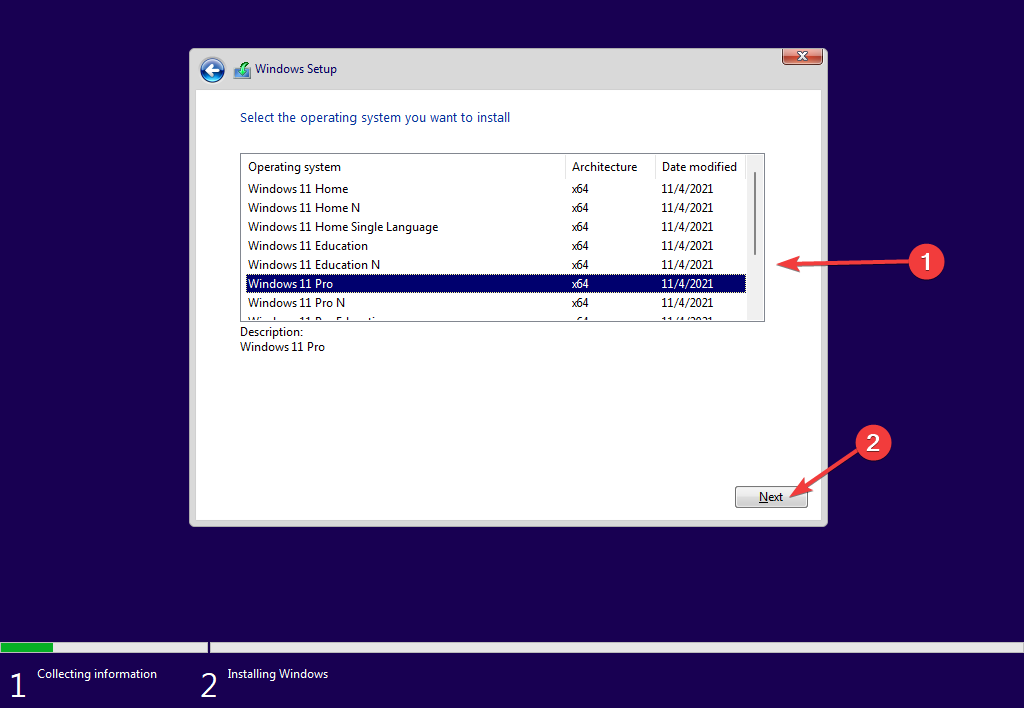
- Select the Windows version you want to install, then click Next.
- After that, to complete the installation, follow the on-screen instructions.
The process is the same whether you are installing Windows 11 on a hard drive (HDD) or a solid-state drive (SSD). So, if you’re wondering what the difference is, it’s actually their overall performance.
As a result, we recommend that you always install operating systems on SSDs if it is possible for you to do so.
Make sure your computer meets the system requirements before installing Windows 11. If it doesn’t, you won’t be able to install the operating system.
Have you succesfuly completed the above procedure? Let us know in the comments area below.


User forum
0 messages