Diagnosing Your PC: How to Get Out of This Error Loop
Corrupted system files could be the reason
Key notes
- This error loop could have been caused due to insufficient disk space, corrupted system files, or corrupted BCD data.
- This guide will help you with the solutions to come out of the error loop.

If your computer is stuck in diagnosing your PC screen, then this guide can help! Your PC is stuck in the loop either due to corrupted BCD data, missing system files, or insufficient disk space.
In this guide, we will discuss some of the available methods to fix the issue right after talking about the potential causes of the issue. Let’s start!
Why is the computer stuck on diagnosing your PC screen?
The diagnosing your PC error loop could stem from various factors; some of the common ones are listed here:
- Damaged system files – If your Windows system files are missing or damaged, your computer might get stuck in a loop. You need to run a system repair command to fix the issue.
- Insufficient disk space – Insufficient disk space can cause many issues, including this one. You need to retrieve space on your computer to resolve this issue.
- A glitch in Automatic Repair utility – If there are system drive issues, Automatic Repair utility will try to open at startup. However, if it will not be able to find the culprit, your computer will be stuck in a loop. To fix it, you need to disable the utility using an elevated Command Prompt.
- BCD data corrupted – If the booting data is corrupted, then it could prevent the startup from getting completed. Therefore you get stuck on the screen. You need to refresh the Windows component by doing a clean install.
What can I do if the computer is stuck in the diagnosing your PC screen?
1. Run the Disk Cleanup tool
- Restart your computer and press F8 repeatedly until you get Advanced Boot options
- Use the arrow keys to select Safe Mode or press F4 to enter Safe mode.

- Wait until the booting sequence is complete, and press Windows + R to open the Run dialog box.
- Type cleanmgr and click OK to open Disk Cleanup.

- On the Disk Cleanup: Drive Selection window, select the drive and click OK.

- On the next window, click Clean up System files.

- Again on the Disk Cleanup: Drive Selection window, select the drive and click OK.
- Select the files under the Files to delete, and click OK.

- Next, click Delete Files.

- Once completed, restart your computer and check if the computer starts normally.
2. Use Command Prompt to run SFC & DISM command
2.1 Create an installation media
- On another device, go to Windows 11 website.
- Go to the installation media, click Download, and double-click to run the tool.

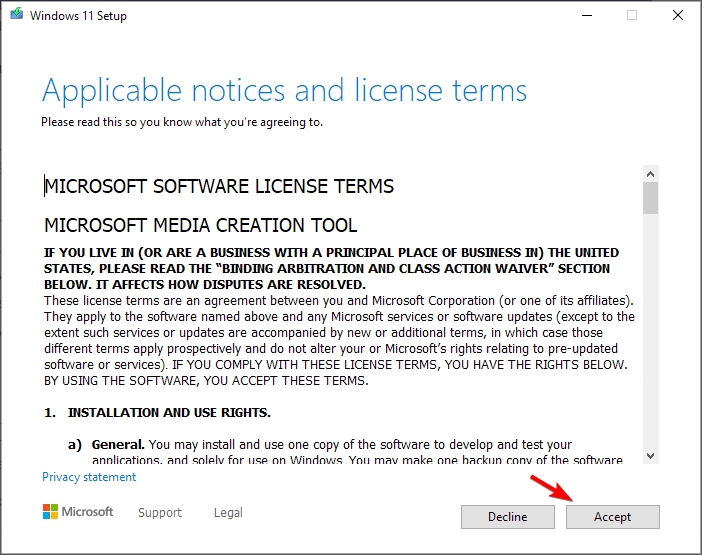
- On the Windows setup window, click Accept.

- Select language and edition and click Next.

- Now on Choose which media to use window, select the USB flash drive option, and click Next.

- Select your USB drive on the next screen and click Next.
- Once the installation media is ready click Finish to close the wizard.
2.2 Repair your computer
- Insert the installation media and restart your computer. Now press any key to boot from the installation media.
- On the installation media window, click Repair your computer.

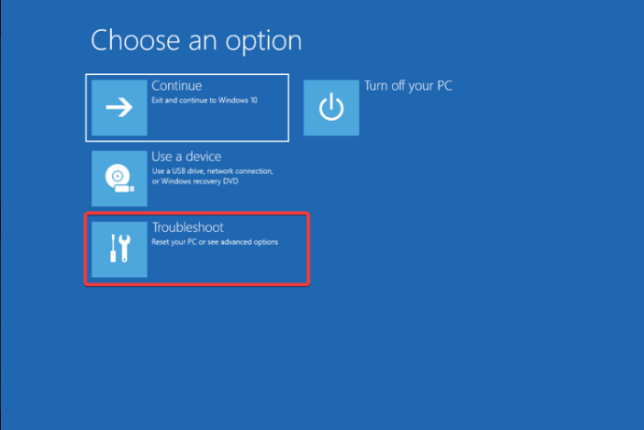
- On the Choose an option screen, click Troubleshoot.
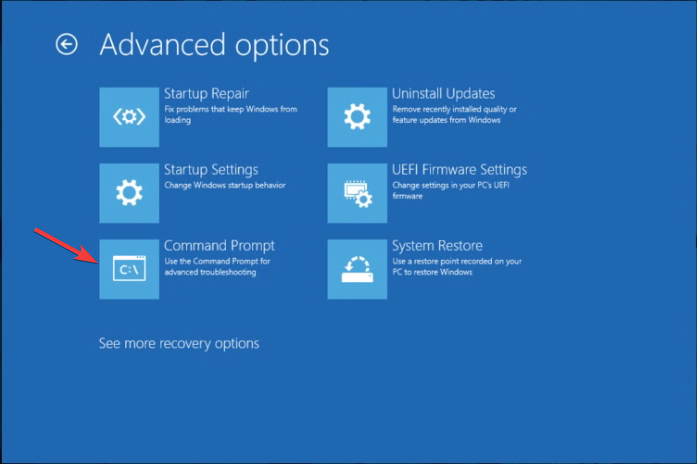
- Now select Advanced options.

- Click Command Prompt from the Advanced options screen.
- On the Command Prompt window, type the following command and press Enter:
sfc/scannow - Copy and paste the following commands one by one and press Enter after every command:
Dism /Online /Cleanup-Image /CheckHealthDism /Online /Cleanup-Image /ScanHealthDism /Online /Cleanup-Image /RestoreHealth
- Restart your computer once the process is complete.
3. Restore your computer to the previous version
- Create an installation media using the steps in method 2, insert it in the USB slot on your computer, and restart it.
- On the installation screen, click the Repair your computer option.
- Go to Troubleshoot, then click Advanced options.
- Under Advanced options, select Command Prompt.
- Once the Command Prompt window is up, type the following command to open the System Restore window and press Enter:
rstrui
- On the System Restore window, either choose Recommended restore or click on Choose a different restore point option and click Next.

- Select the restore point and click Next.

- Click Finish to close the window.

- Restart your computer to see if the computer boots normally.
4. Disable the Automatic Repair utility
- Restart your computer and press F8 repeatedly until you see the initial screen. You will get the Advanced Boot options screen.
- On the Advanced Boot options screen, select Safe mode with networking using arrow keys or press F5.

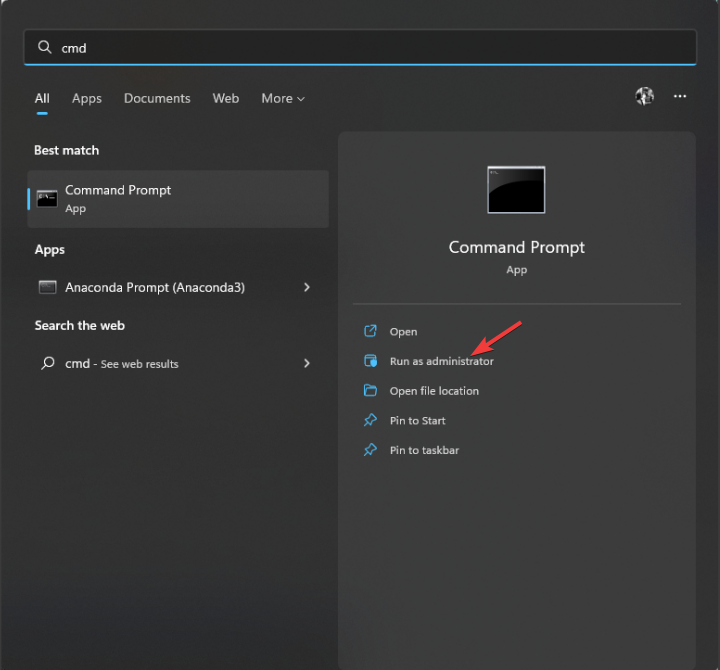
- Once in Safe mode, press the Windows key, type CMD, and click Run as administrator.
- Type the following command to disable Automatic Repair Utility and press Enter:
bcdedit /set recoveryenabled NO - Restart your computer and check if it starts normally.
5. Perform a clean installation
- Restart your computer and press F2, F10, or the designated by your device manufacturer to enter BIOS mode.
- Go to the Boot menu, click Change the boot order, and select the USB drive from the options to start using the USB to boot your computer.

- Insert the installation media and restart your computer. Upon restarting, press any key to continue.
- On the setup wizard, click Next.

- Click the Install button.

- Now click the I don’t have a product key option if you are reinstalling Windows.
- Select the version that you want to install and click Next.

- Click Accept on the Applicable notices and license terms page.
- Click Next.
- Choose Custom Install.

- Create partition in the hard drive.
- Choose the hard drive Partition on which you want to install Windows 11.
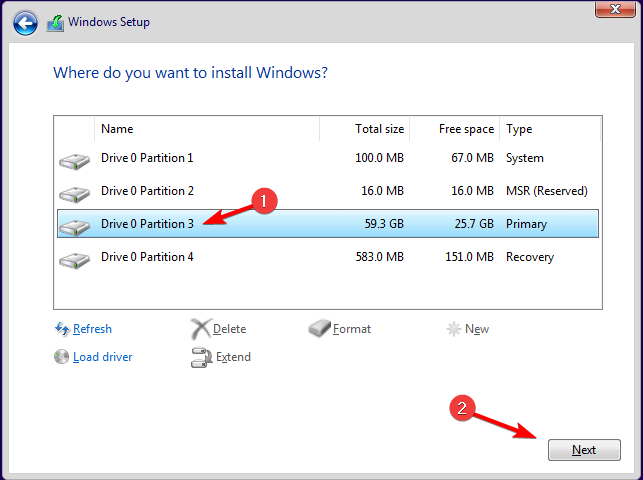
- Click Next.
- Now follow all the onscreen instructions to complete the process.
So, these are the methods that you can follow to get rid of diagnosing your PC screen. Try them and let us know what worked for you in the comments section.
Read our disclosure page to find out how can you help Windows Report sustain the editorial team. Read more


Improve this guide


User forum
0 messages