Disable IPv6 Windows 11: Why & How to Change It
Edit the Registry to disable the IPV6 protocol
5 min. read
Updated on
Read our disclosure page to find out how can you help Windows Report sustain the editorial team. Read more
Key notes
- The IPV6 protocol is still fairly new to many users, so some may prefer to disable it on their Windows 11 PCs.
- It does require certain hardware specifications so if your device is not up for the task, here's how to easily switch it off.

IPv6 stands for internet protocol version 6, the next generation of internet addressing. It was developed to replace the current Internet Protocol (IPv4). IPv6 is integral to networks because it provides many benefits over its predecessor.
Not every user has warmed up to IPV6, given how long its adoption took. Even though Windows 11 comes with new features that make it ideal for the IPV6 protocol, some still prefer to disable it. If you’re one of them, we show you how to go about it.
Should you disable IPv6 Windows 11?
In the world of the internet, such as gaming and streaming, IPv6 is necessary for the smooth running of a website or application. However, there are some applications where IPv6 is unnecessary, so disabling it can improve your internet speed and security.
It all depends on your hardware and what you need it for. Some advantages of using IPV6 include:
- Increased security and privacy – IPv6 provides increased protection against many network attacks.
- Better efficiency – The routing tables in IPv4 are very large and thus inefficient, increasing the overhead required for each packet. In contrast, routing tables in IPv6 are much more compact and, thus, more efficient.
- Improved management of traffic – IPv6 allows for more control over access to the Internet. This can be used for improved quality of service, such as faster website response times or better bandwidth allocation to specific users.
IPV6 has its disadvantages as well:
- Limited availability – The first disadvantage is that IPV6 is not widely used. It’s still considered an experimental protocol by most countries.
- Lack of interoperability with older systems and protocols – To support the new version of the Internet Protocol (IP) standard, many older applications and devices must be modified or replaced.
- Hardware limitations – Not all routers support IPv6, so you won’t be able to use these devices with IPv6 addresses. You must buy new hardware to use IPv6 on your network.
How do I change IPv6 on Windows 11?
1. Use the Control Panel
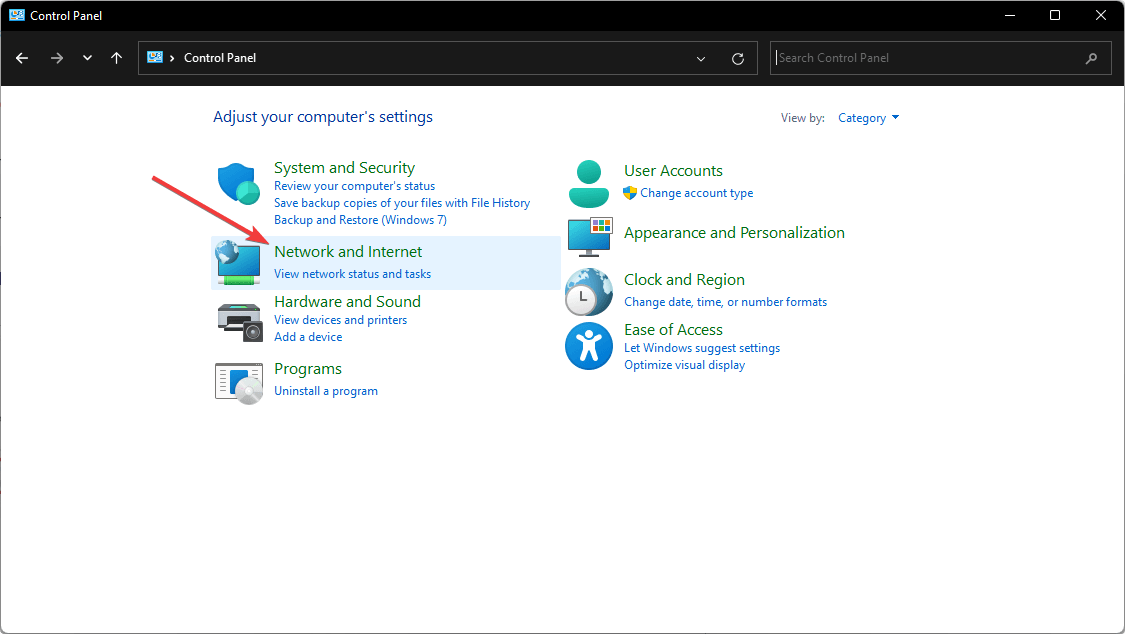
- Hit the Windows key, type Control Panel in the search bar, and click Open.
- Click on Network and Internet.
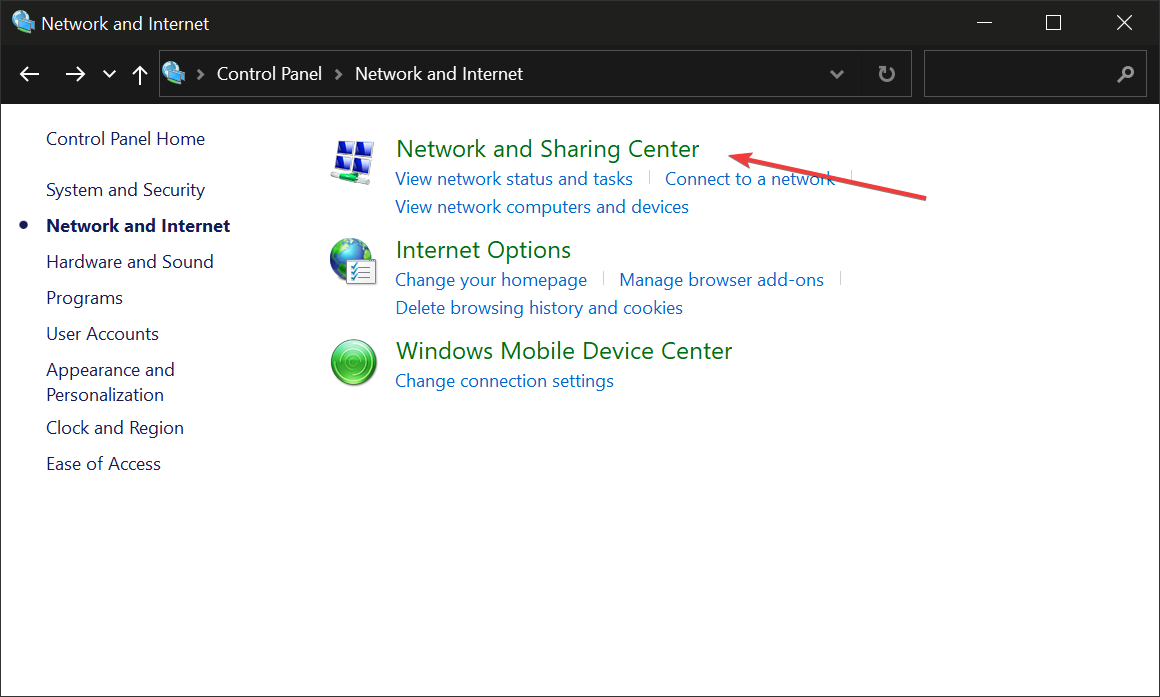
- Navigate to Network and Sharing Center.
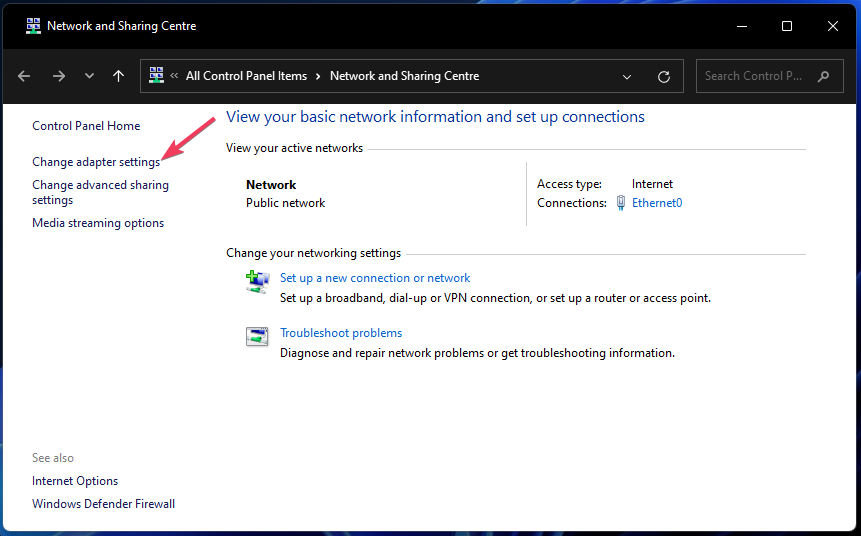
- Select Change adapter settings.
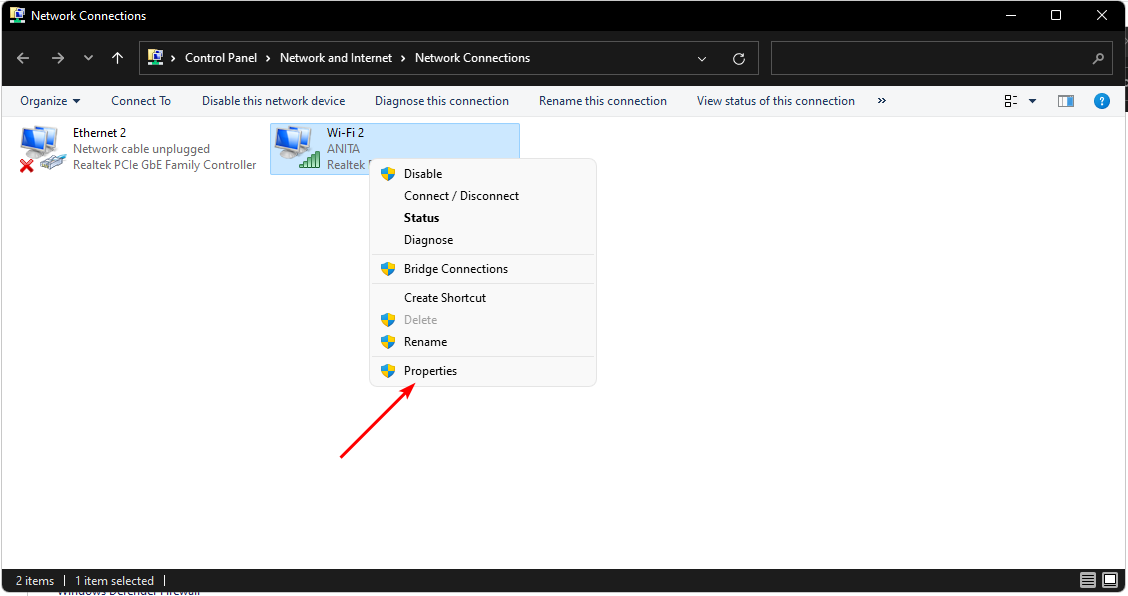
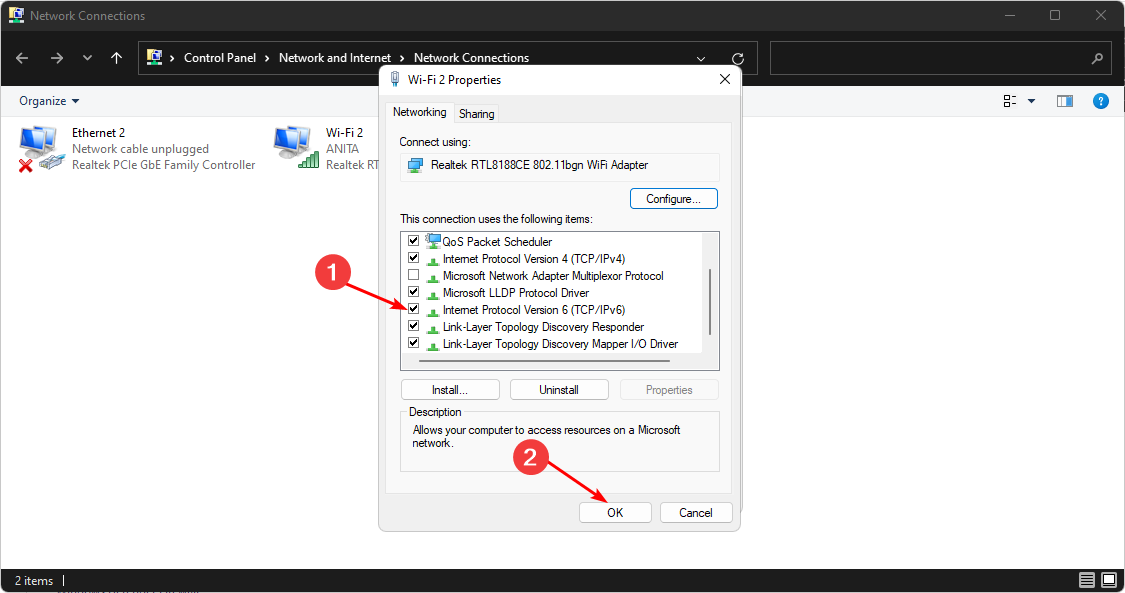
- Right-click on the connection you wish to disable IPV6 and select Properties.
- On the Network properties dialog that pops up, uncheck the box beside Internet Protocol Version 6 (TCP/IPv6), then click OK.
2. Use the Command Prompt
- Hit the Windows key, type cmd in the search bar, and click Run as administrator.
- Type the following commands and press Enter after each one:
netsh interface teredo set state disablednetsh interface ipv6 6to4 set state state=disabled undoonstop=disablednetsh interface ipv6 isatap set state state=disabled
3. Use Powershell
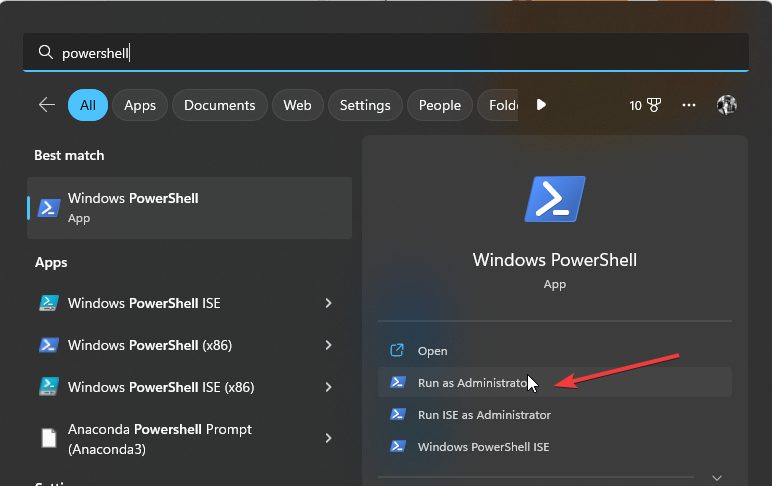
- Hit the Windows key, type Powershell in the search bar, and click Run as administrator.
- Type the following commands and press Enter:
Get-NetAdapterBinding -ComponentID ms_tcpip6 - Take note of the network adapter you wish to disable in 2 above. Next, type the following command and hit Enter. Remember to replace Ethernet with the name noted in 2:
Disable-NetAdapterBinding -Name "Ethernet" -ComponentID ms_tcpip6 - If you’d like to confirm whether the command was successful, type the following command. The corresponding entry should be False:
Get-NetAdapterBinding -ComponentID ms_tcpip6
4. Use the Registry Editor
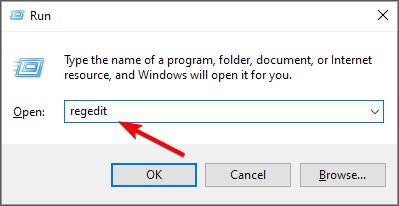
- Hit the Windows + R keys to open the Run command.
- Type regedit in the dialog box, then hit Enter to open the Registry Editor.
- Navigate to the following location:
HKEY_Local_Machine\SYSTEM\CurrentControlSet\services\TCPIP6\Parameters - Right-click on an empty space on the right pane, select New DWORD (32-bit) Value, and rename it as DisabledComponents.
- Double-click on DisabledComponents and enter FFFFFFFF as Value data, then click OK.
- Exit the Registry Editor and restart your PC. IPv6 will be disabled.
Don’t forget to create a restore point before you edit the registry so that you can always roll back to a previous point in case an error happens.
How do I know if IPv6 is enabled in Windows 11?
IPV6 comes enabled by default in Windows 11, but if you want to make sure of its status, you can do so by following the steps below:
- Hit the Windows key, type Powershell in the search bar, and click Run as administrator.
- Type the following command and press Enter:
Get-NetAdapterBinding -ComponentID ms_tcpip6 - If the corresponding entry next to your Wi-Fi connection is True, then IPV6 is enabled.
Although IPv6 offers much more robust security features such as authentication, privacy, and security, it’s still not widely accepted. It’s great, but if you don’t have the requisite hardware to accommodate it, you’ll experience various problems.
If you are encountering issues like IPv6 no internet access, check out this guide to find quick solutions.
The most common one is that your router cannot handle a load of routing packets from all the devices on your home network. When this happens, some of your devices will become unreachable, and others will have intermittent connectivity issues.
For more on IPV6, check out our exciting article on how you can enable IPV6 on your Xbox One.
Have you enabled IPV6 on your Windows 11? If so, we’d love to know your experience thus far. Drop us a comment down below.









User forum
0 messages