How to create a custom video, speaker, and audio setup in Microsoft Teams
4 min. read
Published on
Read our disclosure page to find out how can you help Windows Report sustain the editorial team. Read more

There comes a time where the webcam, speakers, or microphone on your PC might not be good enough for your conference calls. Your microphone might not be of good quality, your speakers might sound horrible, or you might just want to use a microphone that will better highlight your voice. In these cases, you might end up plugging in an external peripheral to your PC via USB or Bluetooth.
In some cases when you want this, you might still want to hear the audio from a meeting on your PC speakers, but use your microphone on your headset — or vice versa. To get this working right, you’ll need to head into Teams and pick and choose your audio, video, and speaker settings to create a custom setup.
The process is relatively easy, and in this guide, we’ll explain how you can go about doing that.
Before a call

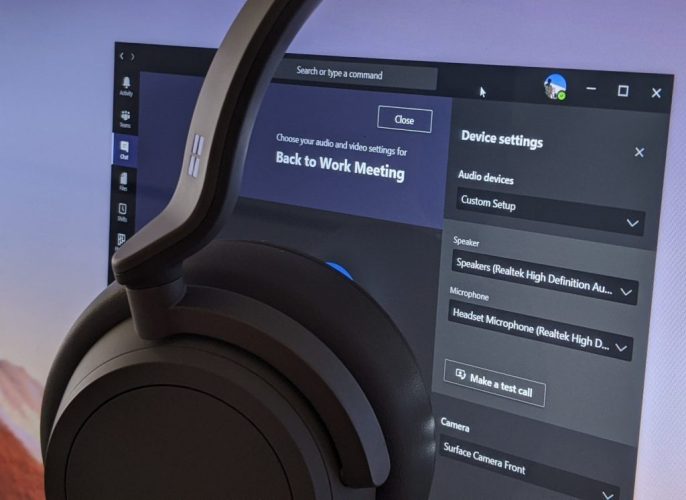
To create a custom setup before a call or as you join the call, you’ll want to click the PC Mic and Speakers settings cog under your video feed. After you click that, you’ll see an option for Audio Devices. Click the down arrow box in this field, and then choose Custom Setup. This will switch away from using your PC’s microphone and speakers and pick and choose your own setup.
Next, head to the fields underneath. In the Speaker box, click the down arrow and choose the device or peripheral you want to use for your speaker. In our case, we’re keeping the default Realtek speakers for our Surface. After that, you can head to the Microphone box, click the down arrow, and choose the microphone you want to use. We’ll be using our Headset. You also can change the webcam by clicking the down arrow next to Camera and choosing another camera, too.
When satisfied, you can test out your setup to see if it works for you. Simply click the Make a test call button. This will call Microsoft’s Teams Echo service, where you can say a message and have it played back to you to see if everything works. At the end of the call, you’ll get a list of your call results, showing a list of everything you choose, and if it worked.
During a call

You not only can create a custom setup before a call, but you also can do it during the call too. This might be a case where you want to switch things up after you realize your call isn’t sounding or going the way you want.
To do this, simply hover your mouse over the middle of the screen, and then click the . . . more actions option. From there, click the Show device settings option, and then choose Custom Setup from the drop-down box under Audio Devices. You can then choose the speaker and microphone or webcam you want to use in the boxes that show up under that.
You’ll be able to see feedback from your microphone, to see if it works. Try increasing the volume on your PC or Mac to test that, too. When satisfied, click the (X) next to Device Settings to close the window, and join your call.
Other ways to change settings
These are just two ways to create a custom setup in Microsoft Teams. You also can change the settings before any calls by heading to your profile icon, clicking the Settings option, then choosing Devices. From here, under Audio Devices choose Custom Setup and then pick your speaker, microphone, and camera as we explained above.
As we always remind you, this is just our latest Microsoft Teams guide. We’ve extensively covered the topic over the past few months, and have tips about chats, search, and so much more. Check out our news hub for all the latest Microsoft Teams and Microsoft 365 news and information.


User forum
0 messages