Come Aggiungere QT TabBar a Esplora File di Windows 11
7 min. read
Published on
Key notes
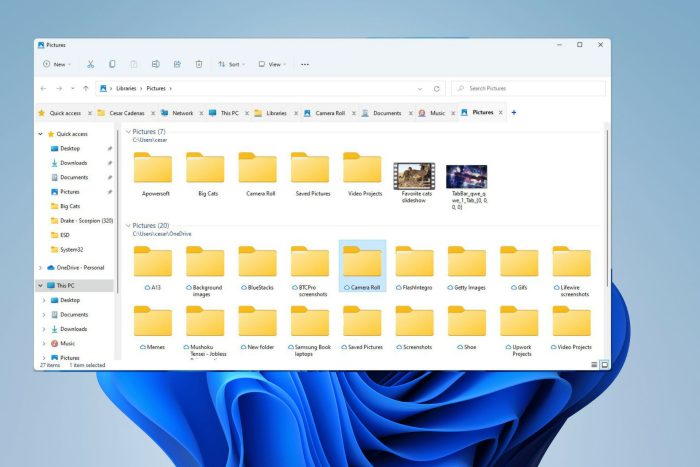
- QT TabBar è un software di terze parti che consente l’utilizzo delle schede su Esplora file per Windows 11.
- Avere la possibilità di avere più schede aperte su Esplora file è un’ottima aggiunta alla qualità della vita e rende la navigazione più piacevole.
- Questa guida ti mostrerà come scaricare, installare e configurare (in una certa misura) QT Tab Bar su Windows 11.
Windows 11 ha apportato molti grandi cambiamenti quando è stato rilasciato per la prima volta e ha semplificato molti dei menu per rendere l’intero sistema più accessibile e user-friendly. Tuttavia, certi aspetti del sistema operativo rimangono nel passato e questo è il caso dell’Esplora file.
L’Esplora file è il gestore di file predefinito del sistema che, in passato, era piuttosto confusionario da utilizzare. Questo è cambiato con il rilascio di Windows 11, che ha reso l’app molto più semplice e facile da usare.
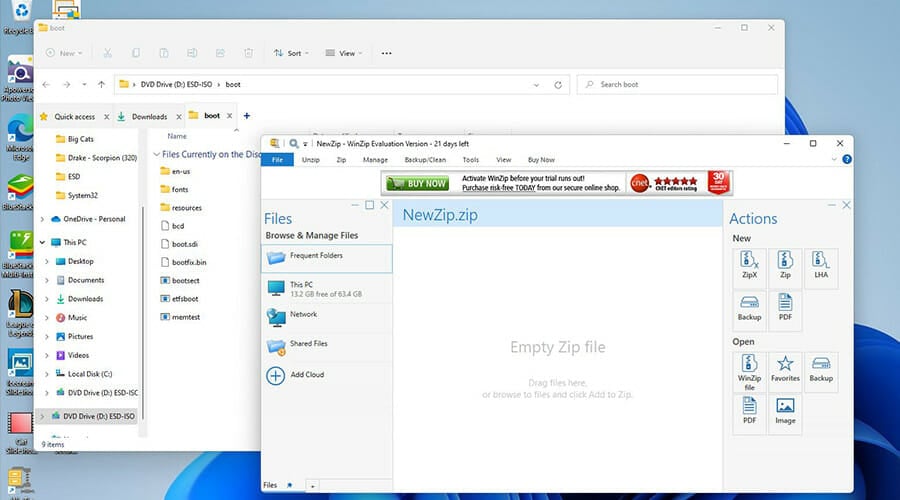
Tuttavia, ancora oggi ti obbliga ad aprire due finestre separate anziché una scheda se vuoi navigare, e questo può essere un po’ fastidioso.
Viviamo in un mondo in cui i nostri browser web preferiti come Firefox, Chrome e Edge ci consentono di navigare in internet con più schede aperte senza dover passare tra due finestre separate.
Le schede multiple sono così diffuse che è difficile immaginare un’applicazione di navigazione senza questa funzionalità.
Fortunatamente, c’è un modo per aggiungere la funzionalità di schede multiple all’Esplora file, e questo avviene scaricando QT TabBar. È il modo migliore per ottenere le schede multiple su Windows 11.
Cos’è QT TabBar?
Si tratta di un software di terze parti che si integra nell’Esplora file e consente di aprire contemporaneamente più schede.
Questo potrebbe non sembrare una grande novità dato che è così diffuso su un browser web, ma quando manca, risulta molto evidente e rende l’utilizzo dell’applicazione meno intuitivo.
Al momento non è noto se Microsoft abbia intenzione di includere questa funzionalità in una versione futura di Windows 11. È certamente possibile poiché l’Esplora file di Windows 10 aveva la funzionalità di schede multiple.
È interamente nelle mani di Microsoft aggiungere questa funzione, ma non è stato detto nulla di ufficiale.
L’installazione e la configurazione di QT TabBar possono essere un po’ complicate. Questa guida ti mostrerà come scaricare e configurare QT TabBar in modo da poter personalizzare l’applicazione secondo le tue esigenze. App come WinRar o 7Zip, che gestiscono i file zip, sono necessarie per QT TabBar.
How do I enable QT TabBar in Windows 11?
1. Downloading QT TabBar
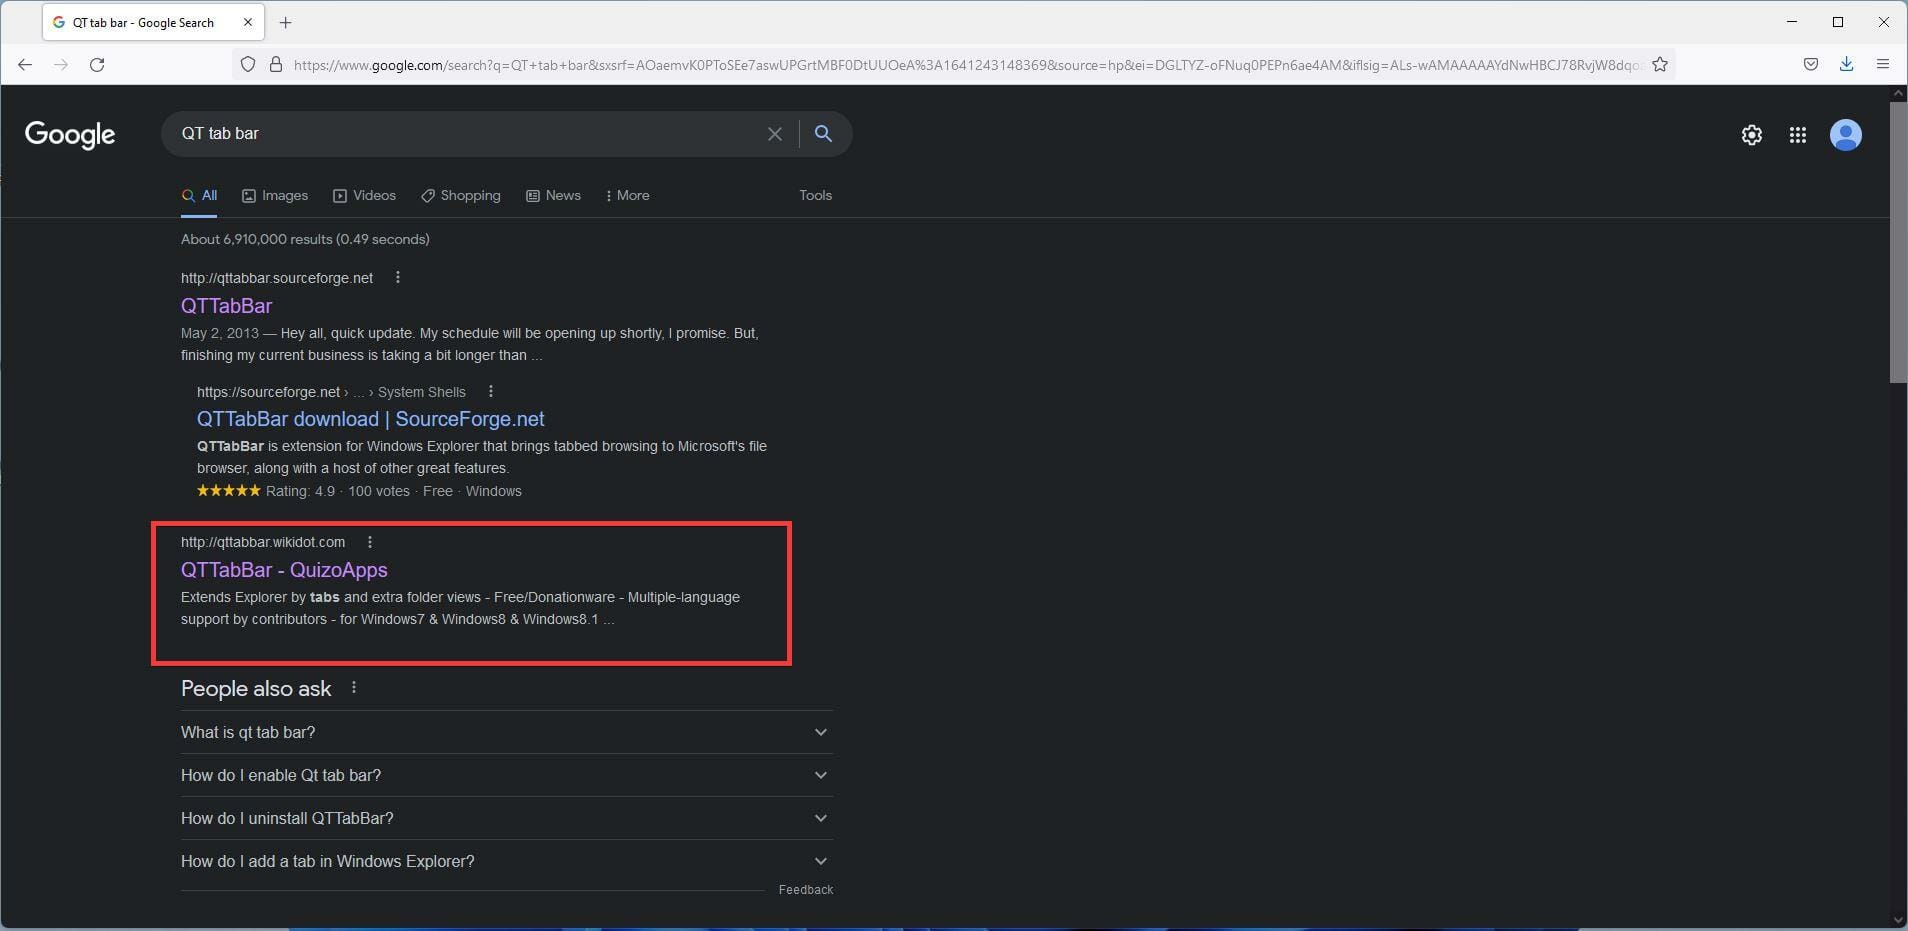
- In a search bar, search for QT TabBar.
- Locate and click the QuizoApps entry.
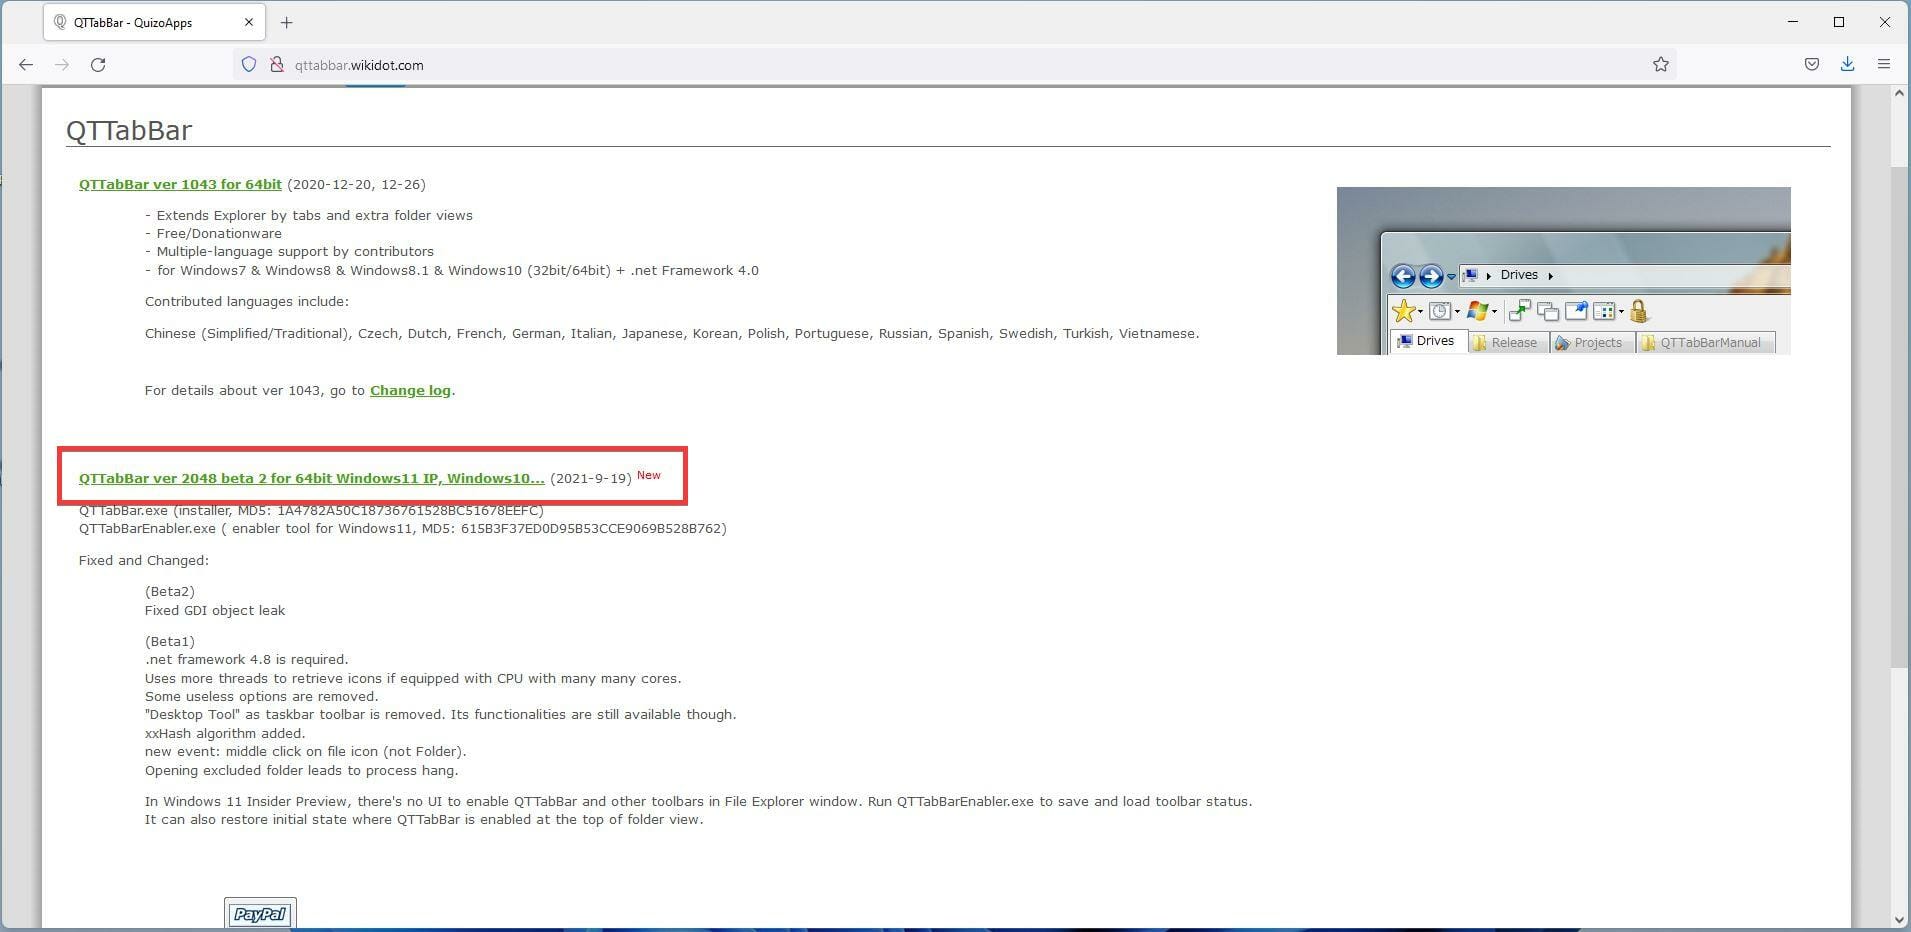
- Click on the QT TabBar for Windows 11 hyperlink. This will begin the download.
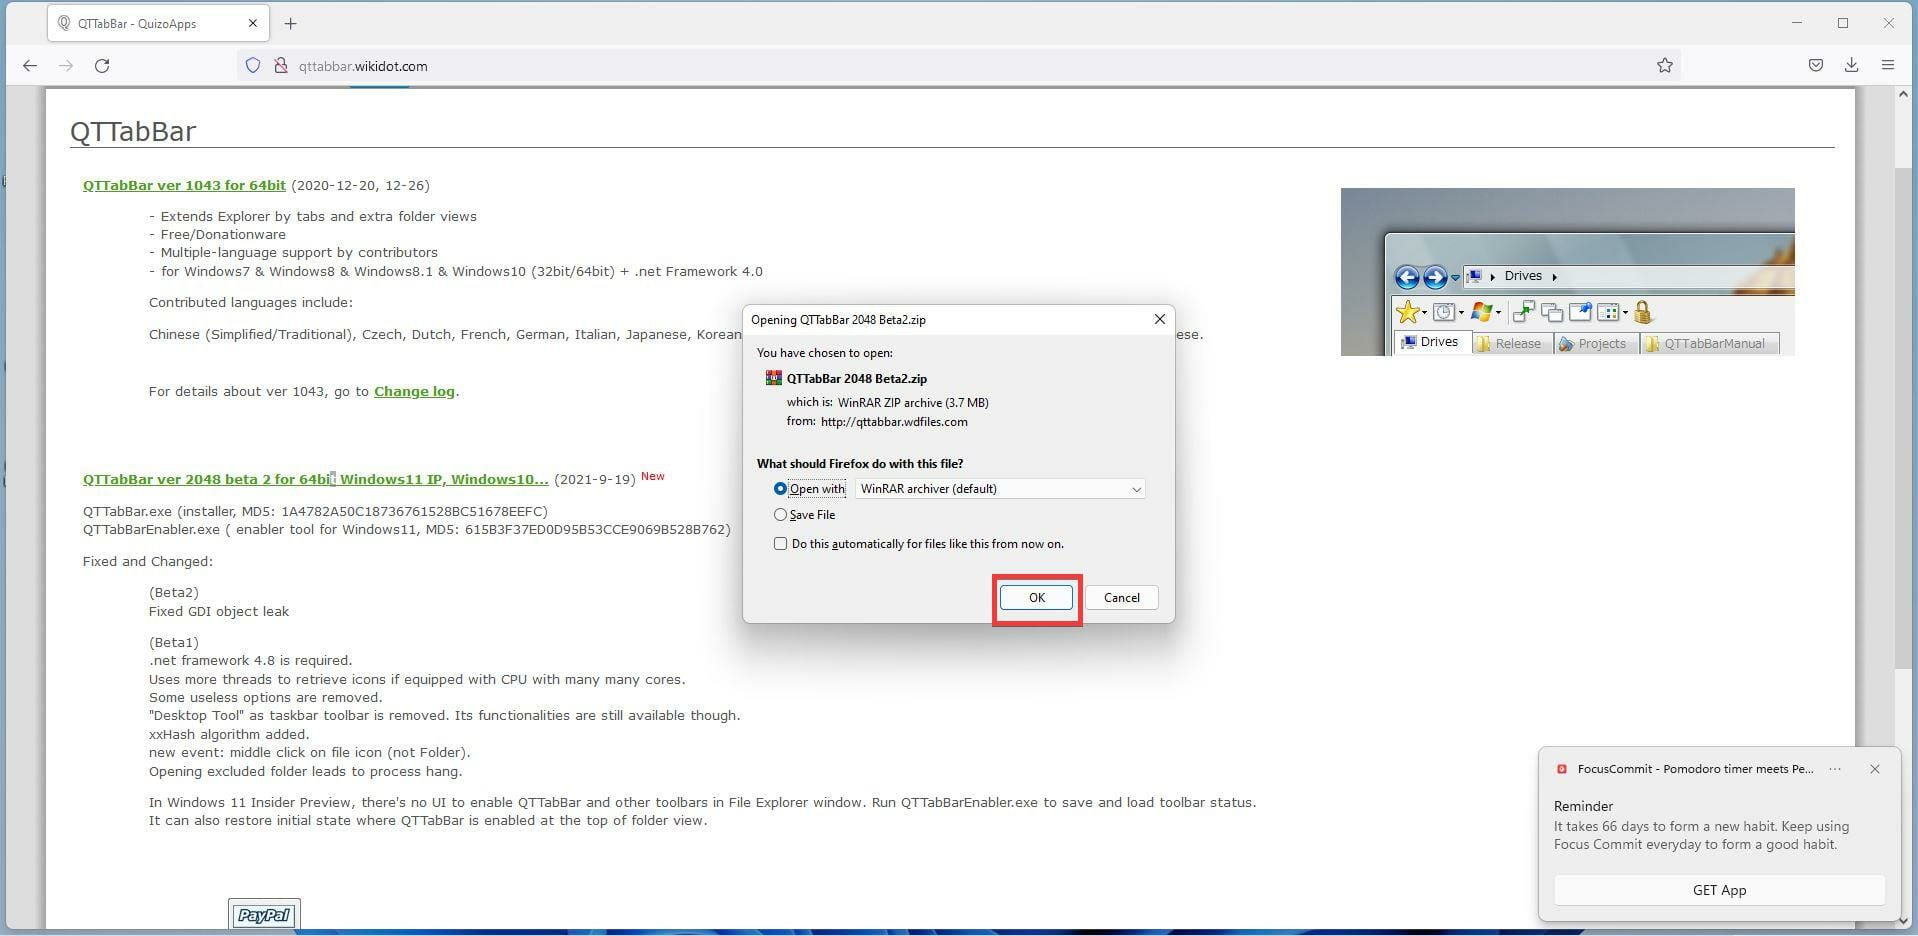
- A small may appear asking you what you want to do with the file. Click on Open with and select your Zip file opener app.
- Conversely, you can save the file and hold it for later until you have an app to open it.
- Once you’ve made your selection, click Ok.
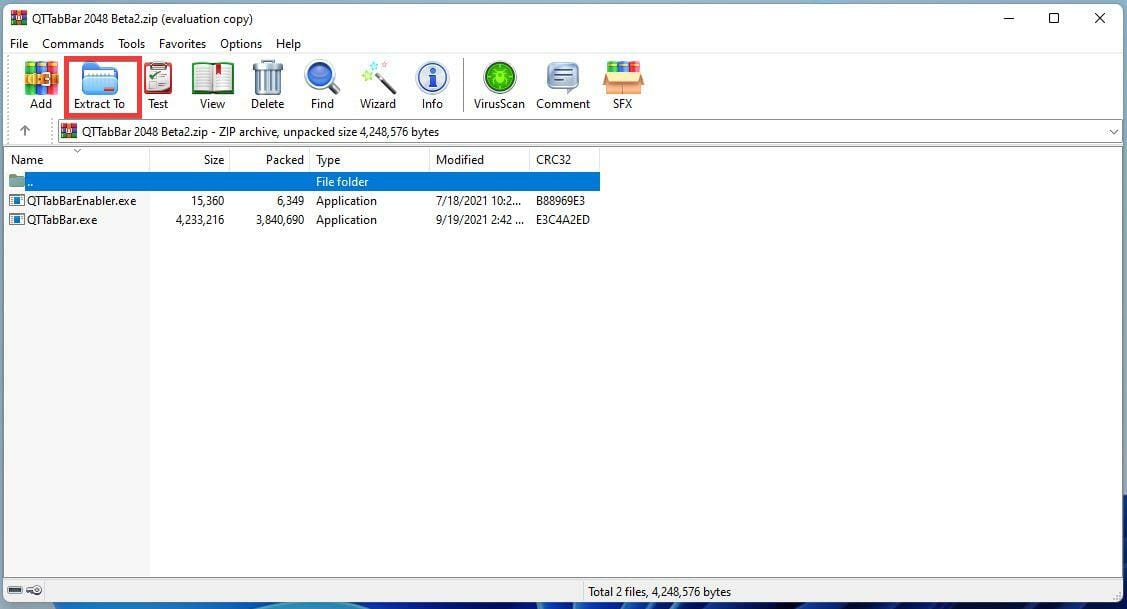
- After downloading, the Zip file app will open.
- Click on the folder and select Extract To on the top bar.
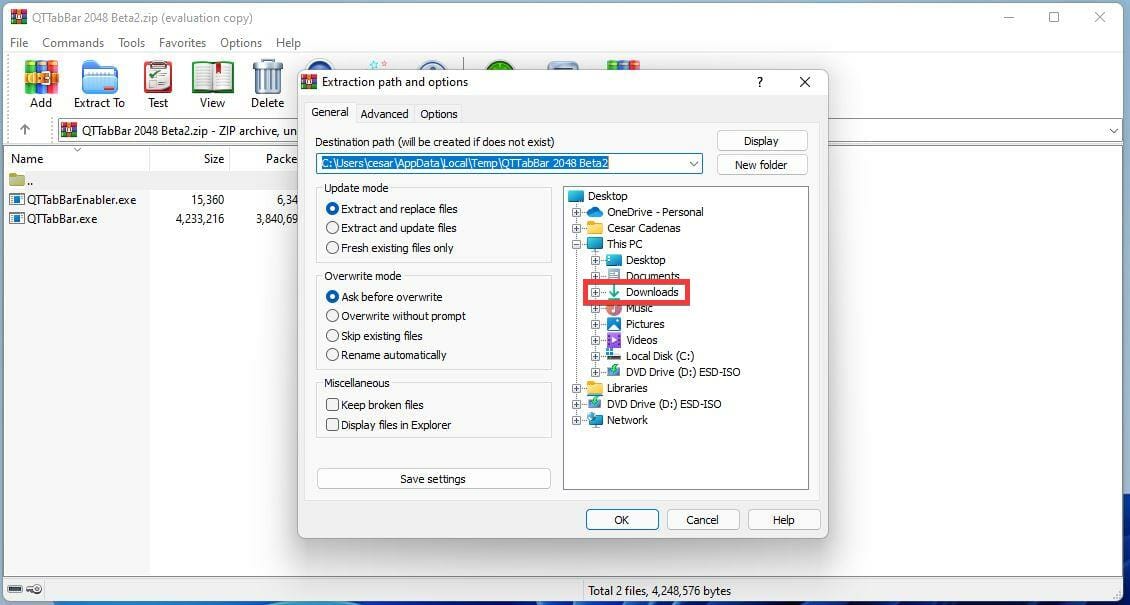
- Select where you want to extract the file to. As an example, this will choose Downloads.
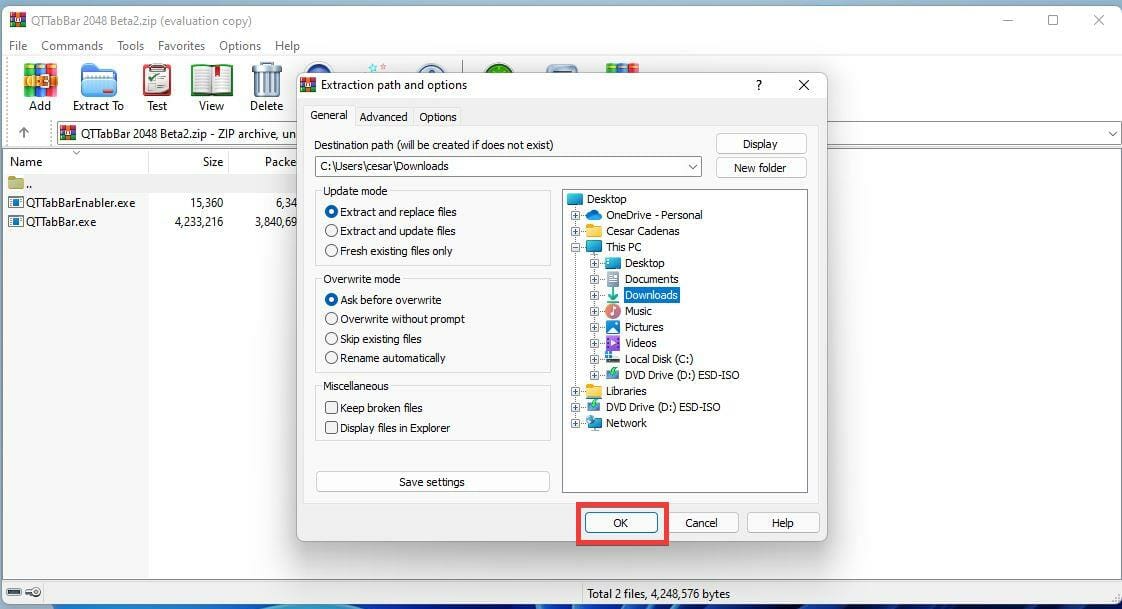
- Click OK.
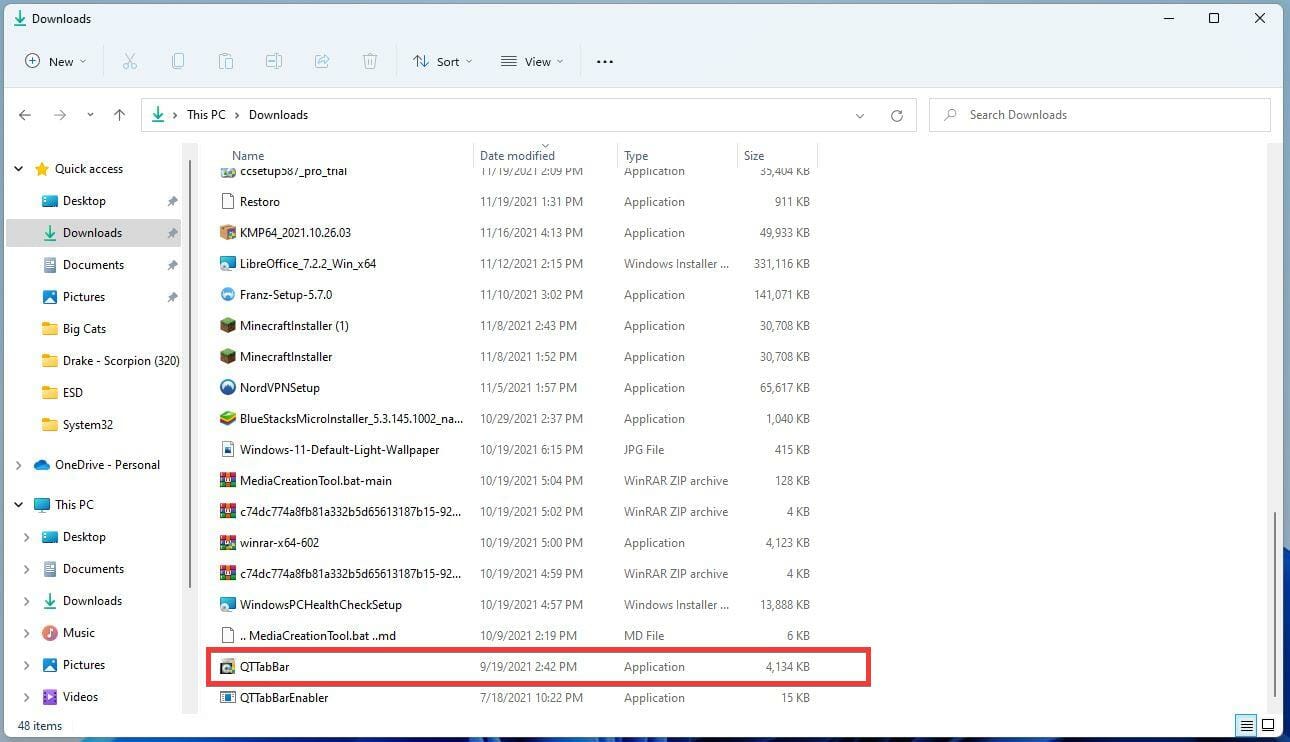
- Go to the destination where the files were extract to.
- Locate and double-click the installation file.
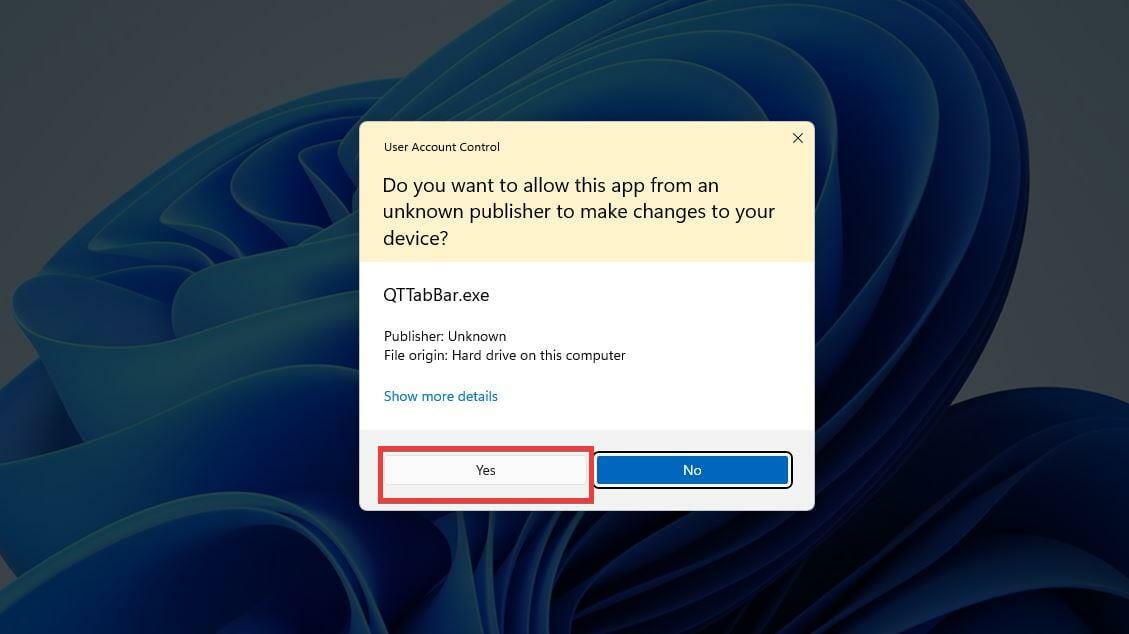
- A small window will appear asking if you want to make changes. Select Yes.
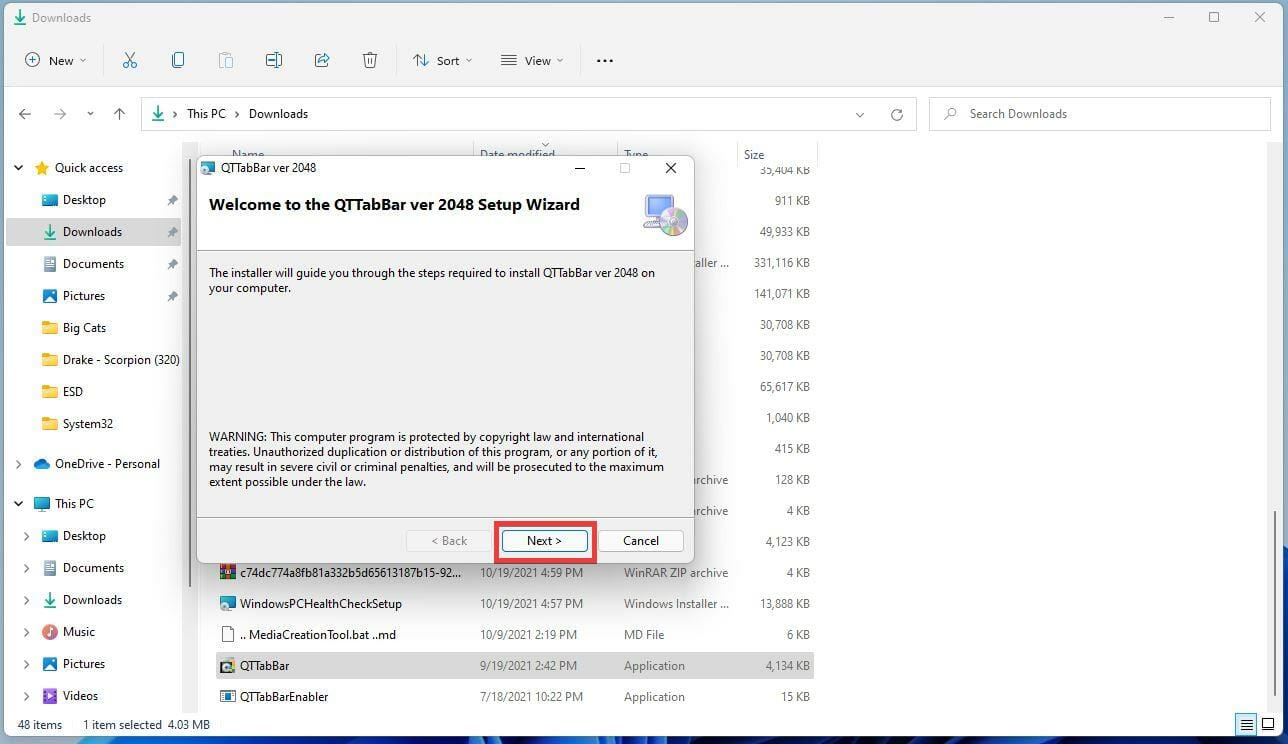
- The QT TabBar Setup Wizard will appear. Select Next.
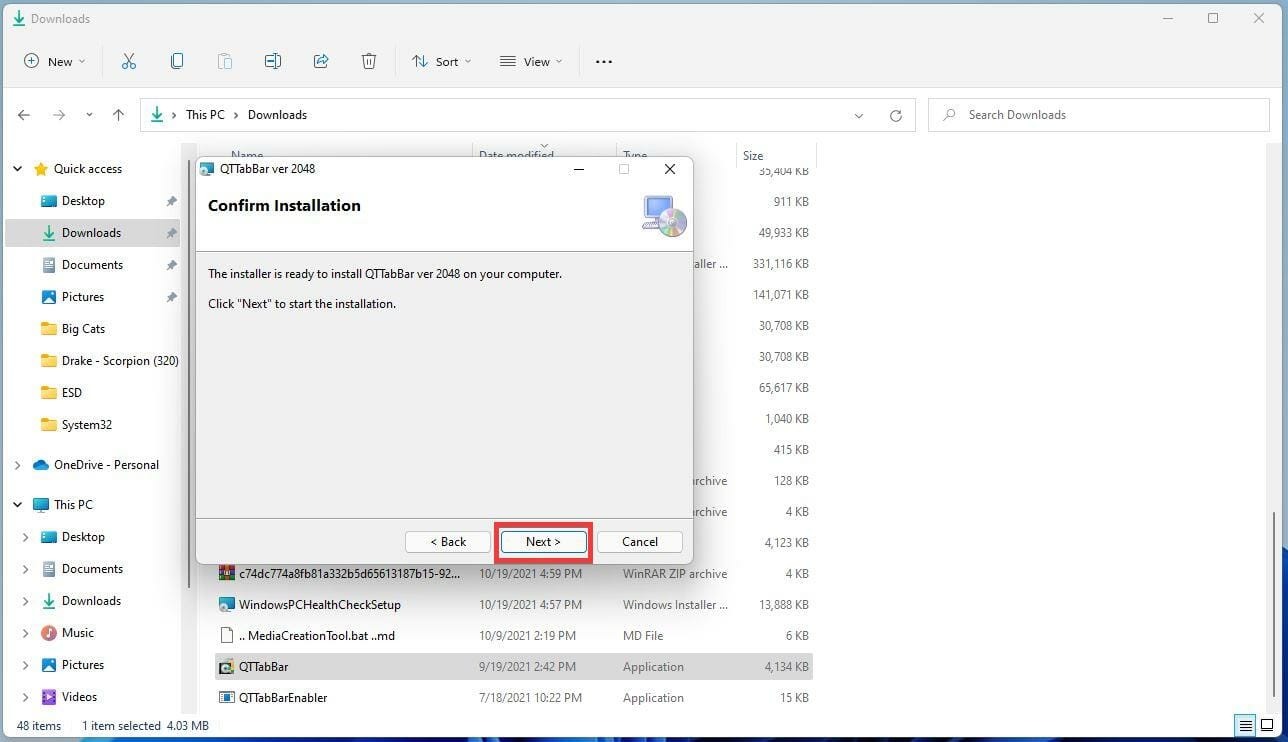
- In the next window, select Next to start the installation.
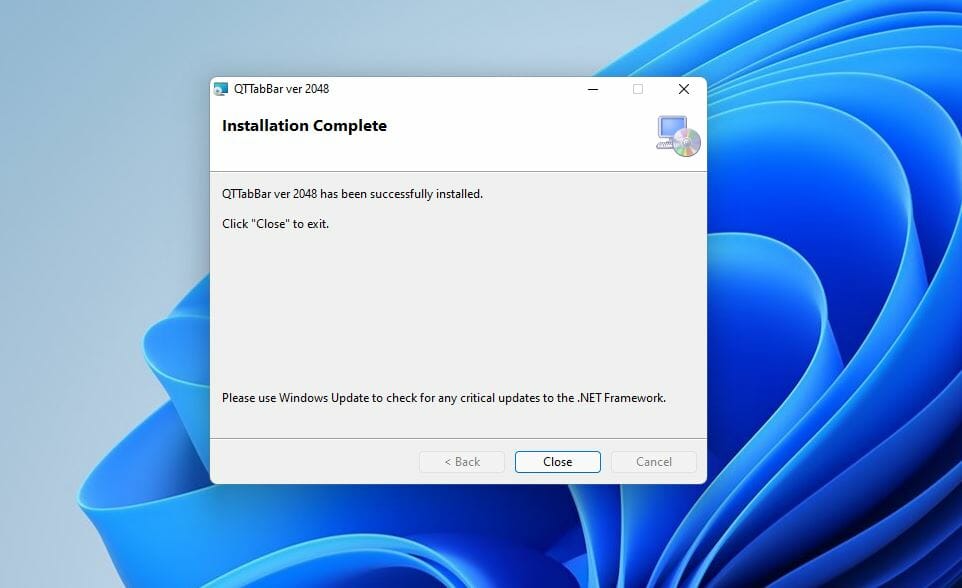
- After installation, the QT TabBar will automatically be installed onto File Explorer.
- To add tabs, click on the Plus sign in the top bar.
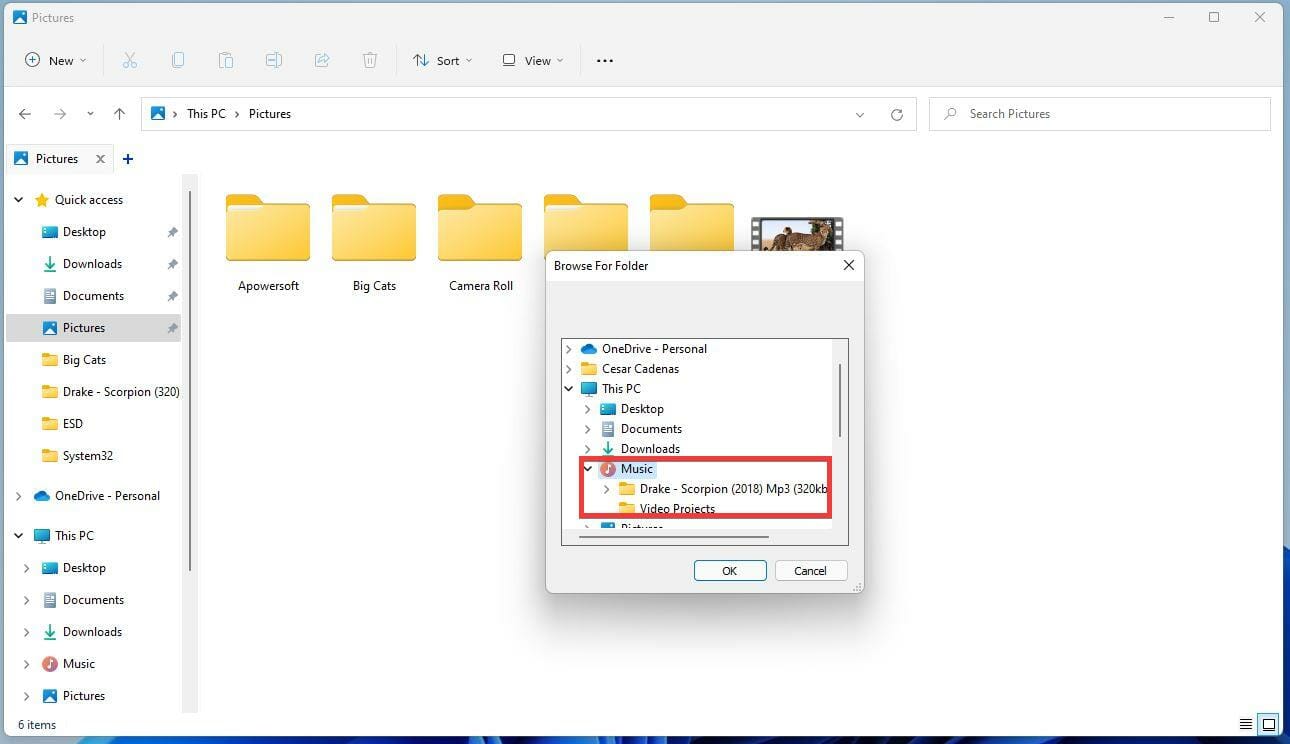
- A small window will appear where you can select what you want to open from a folder to a section of the computer.
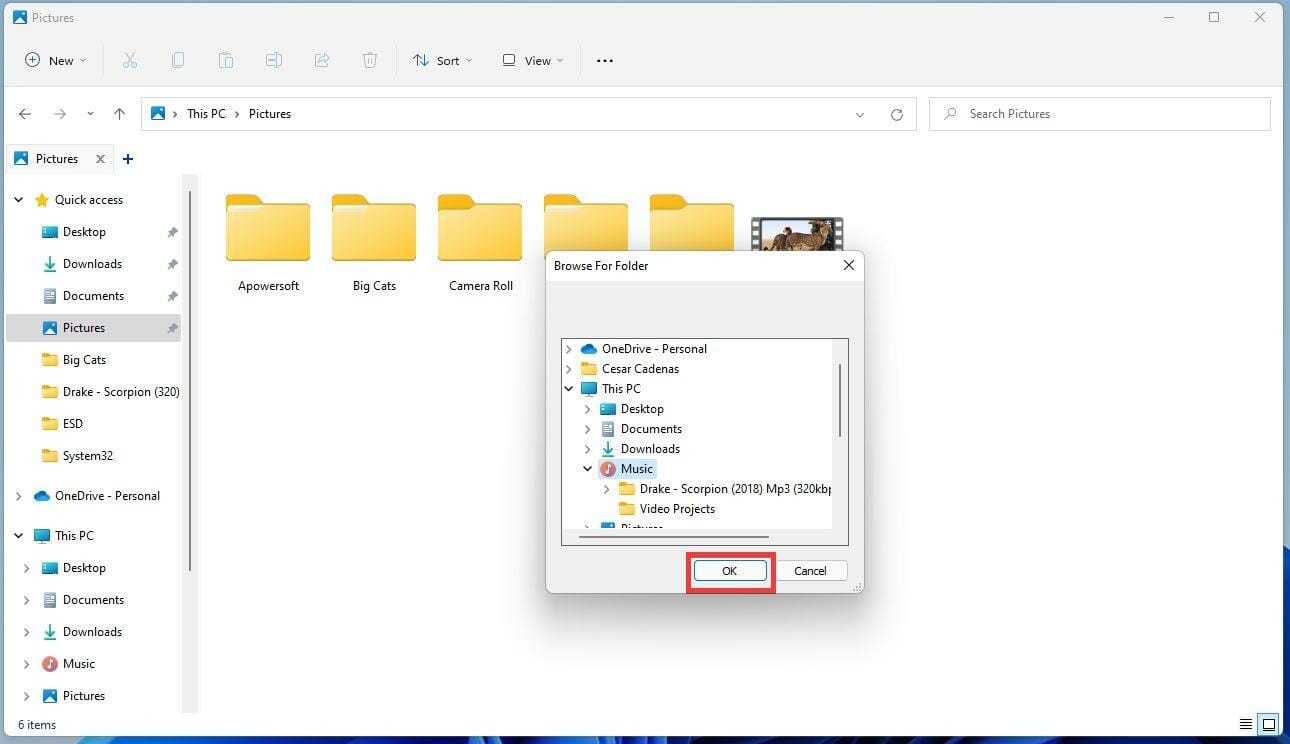
- Once you’ve made your selection, click OK.
2. Configuring QT TabBar
- To change and configure the settings of QT TabBar, first open the File Explorer.
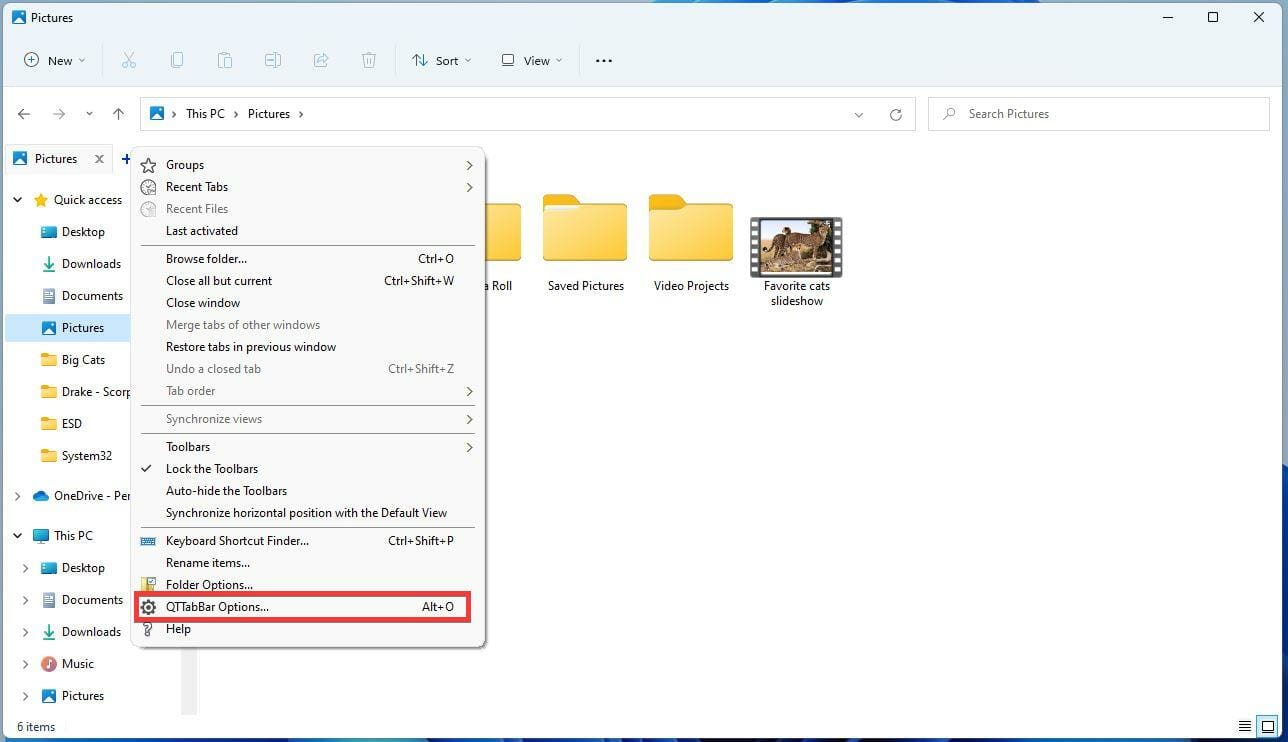
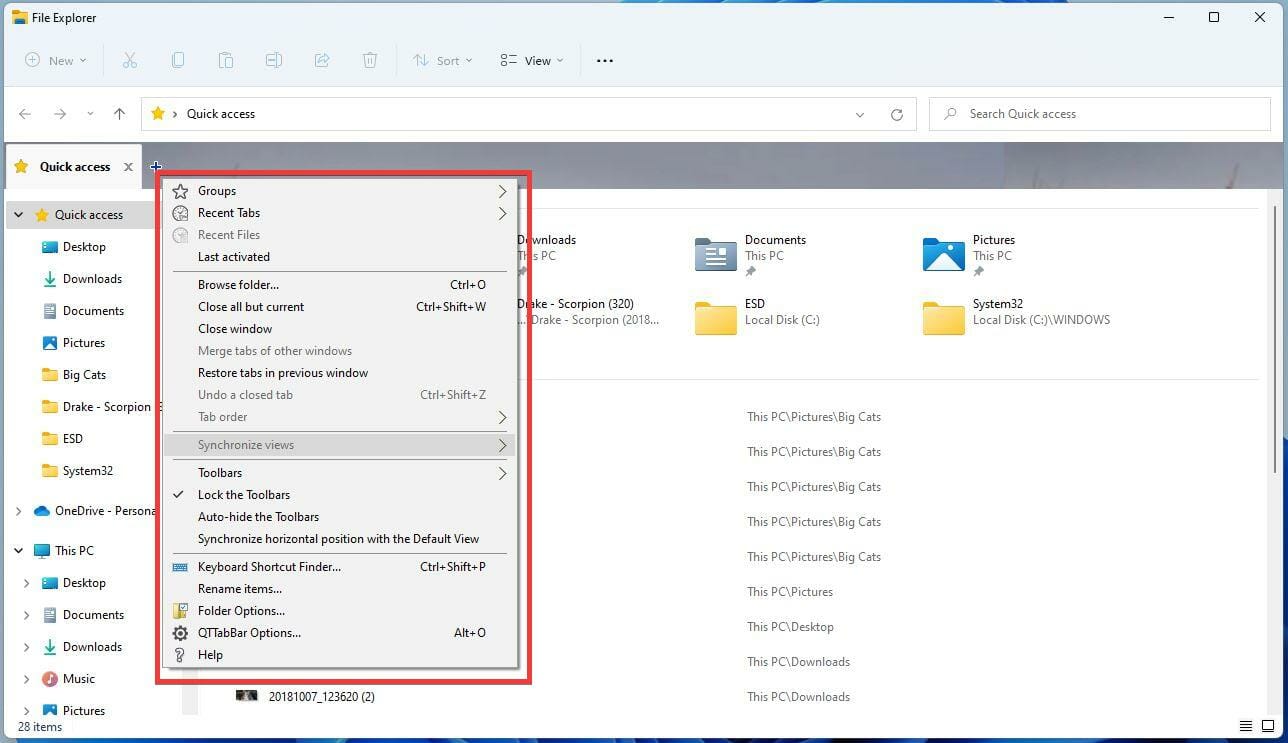
- Hover over the Plus sign next to the tab and right-click it.
- Scroll down and click QTTabBar Options….
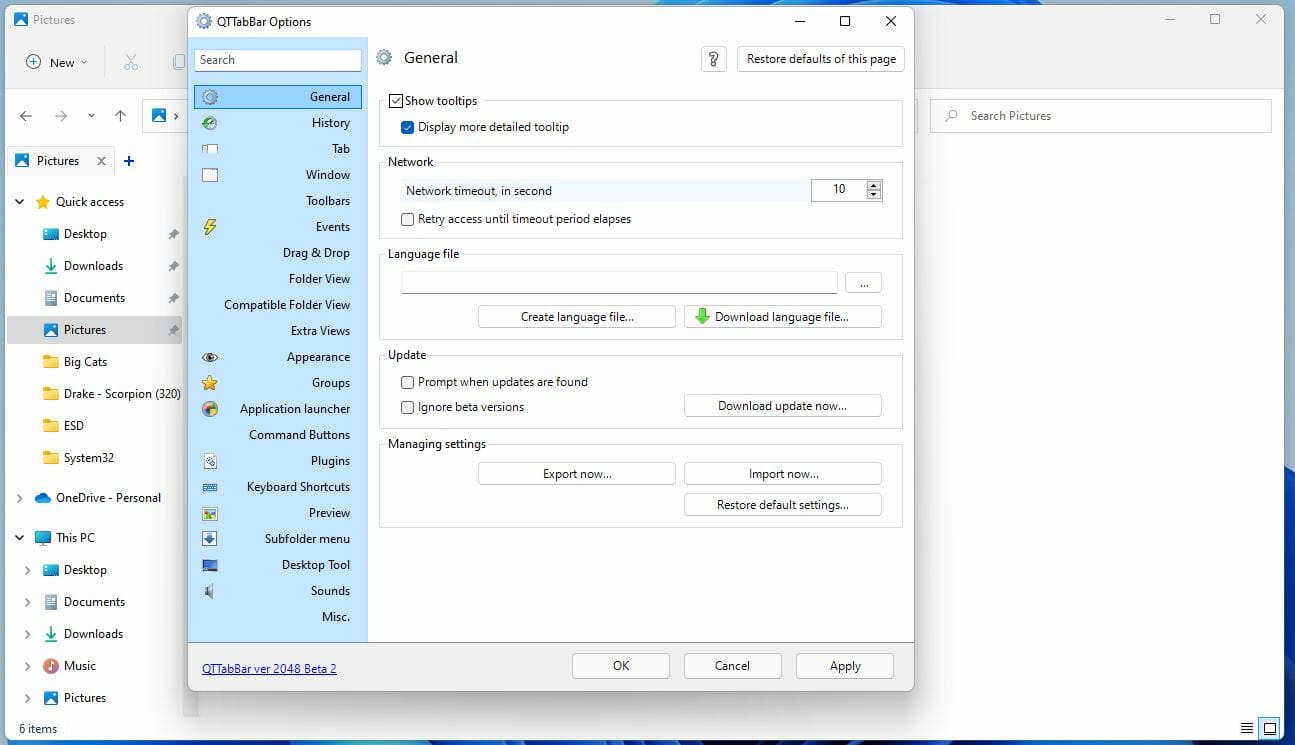
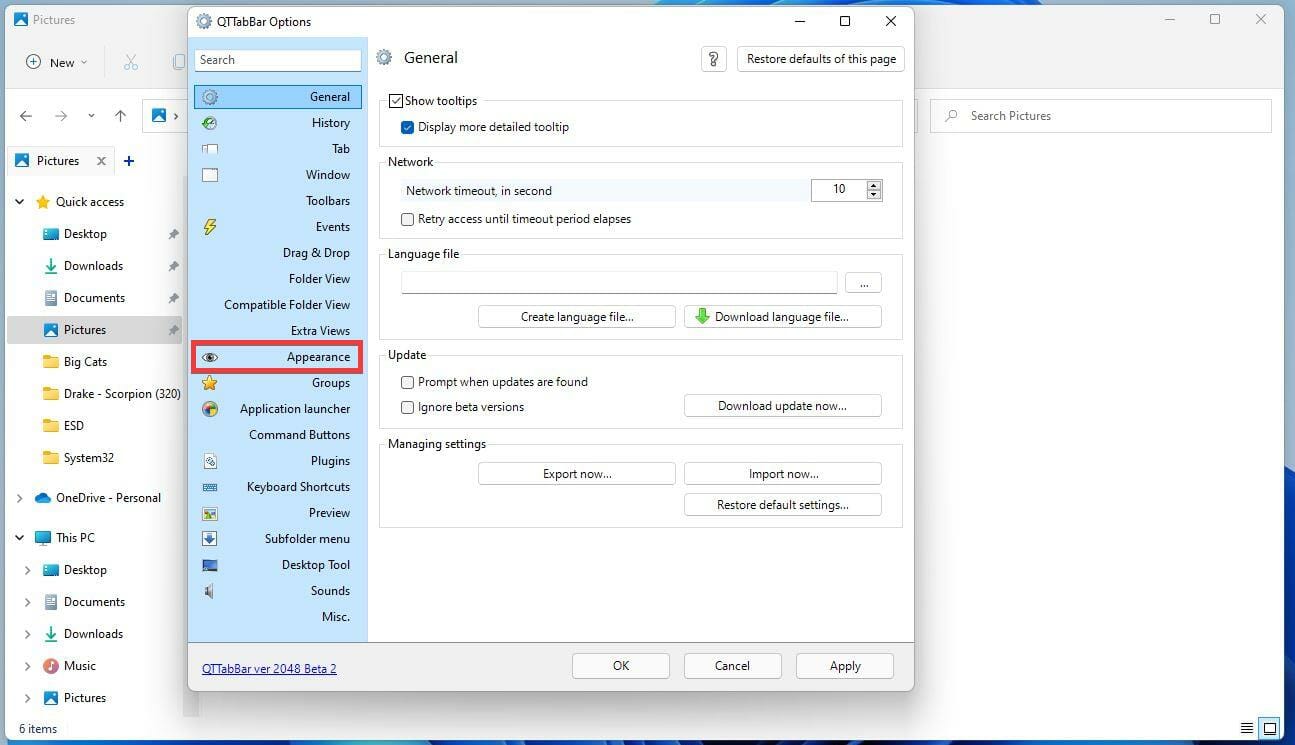
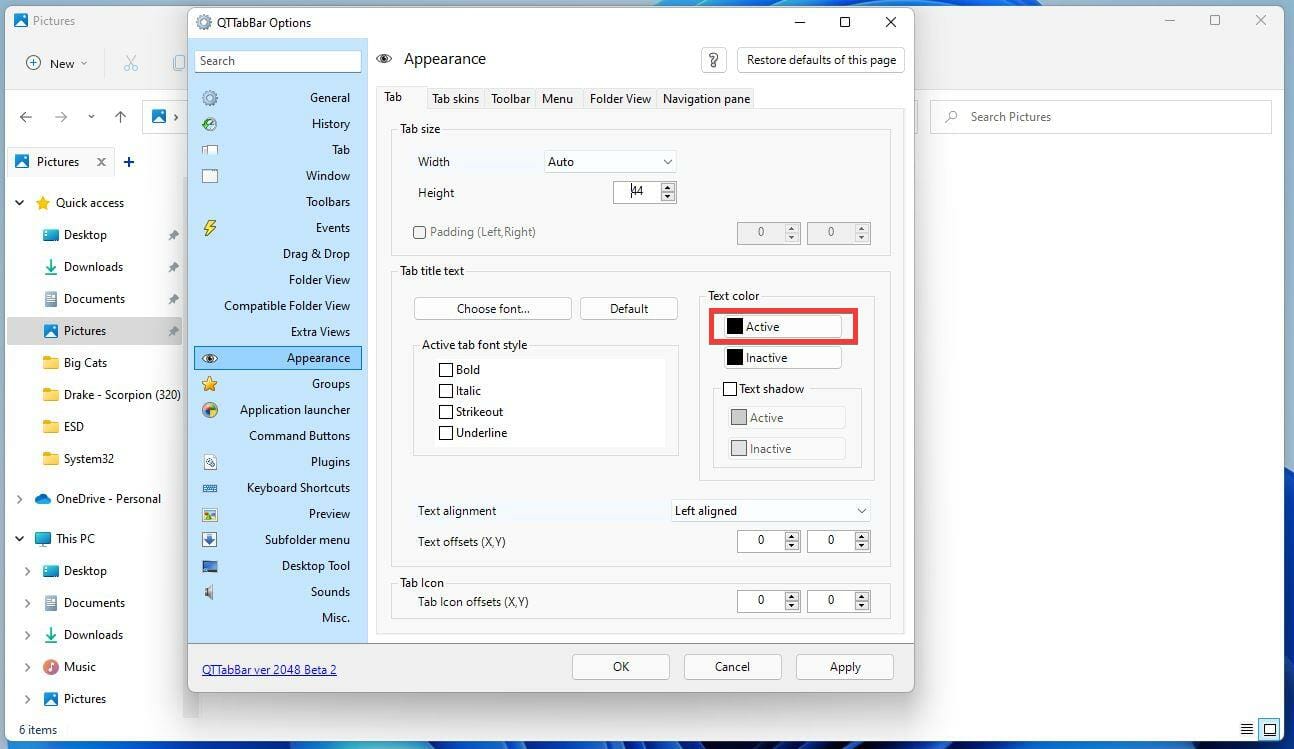
- The QTTabBar Options window will open allow you to configure the tabs as you see fit.
- The General tab allows you to change the language file for File Explorer if you have one and you can even select if you want to be notified of any updates.
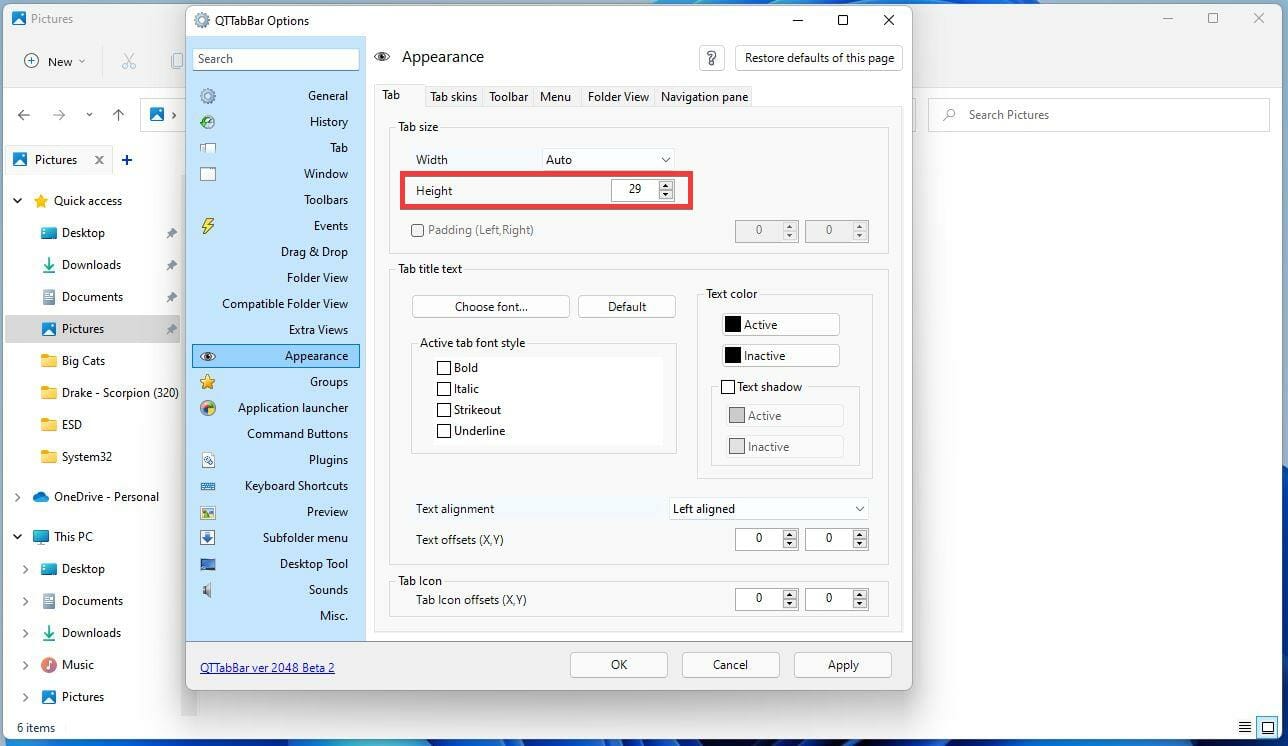
- If you want to change how the tabs look, click on the Appearance tab on the left.
- To change the appearance of the Tab size, adjust the number of the tab’s Height.
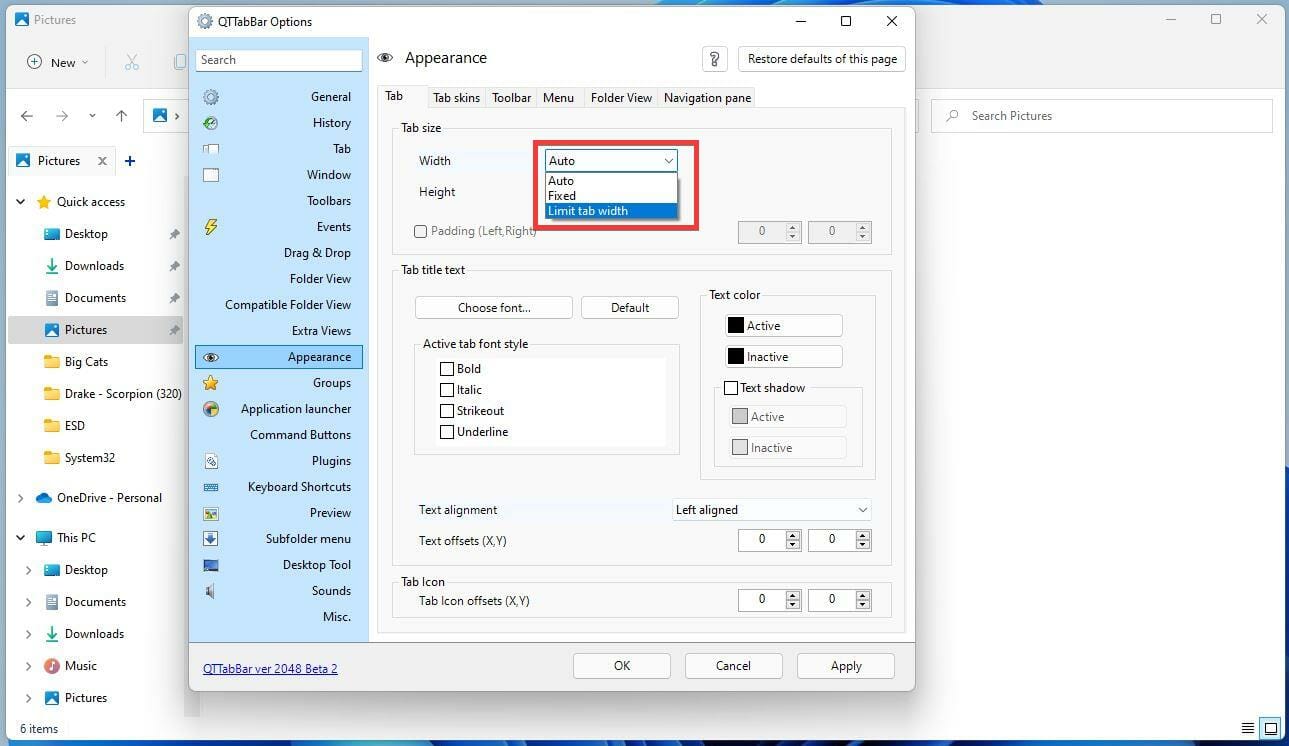
- To change the width, click on the drop down menu for Width and select an option.
- Auto adjusts the width in accordance with the height, Fixed allows you set the size manuall, and Limit tab width adds a limit to how big the tabs can be.
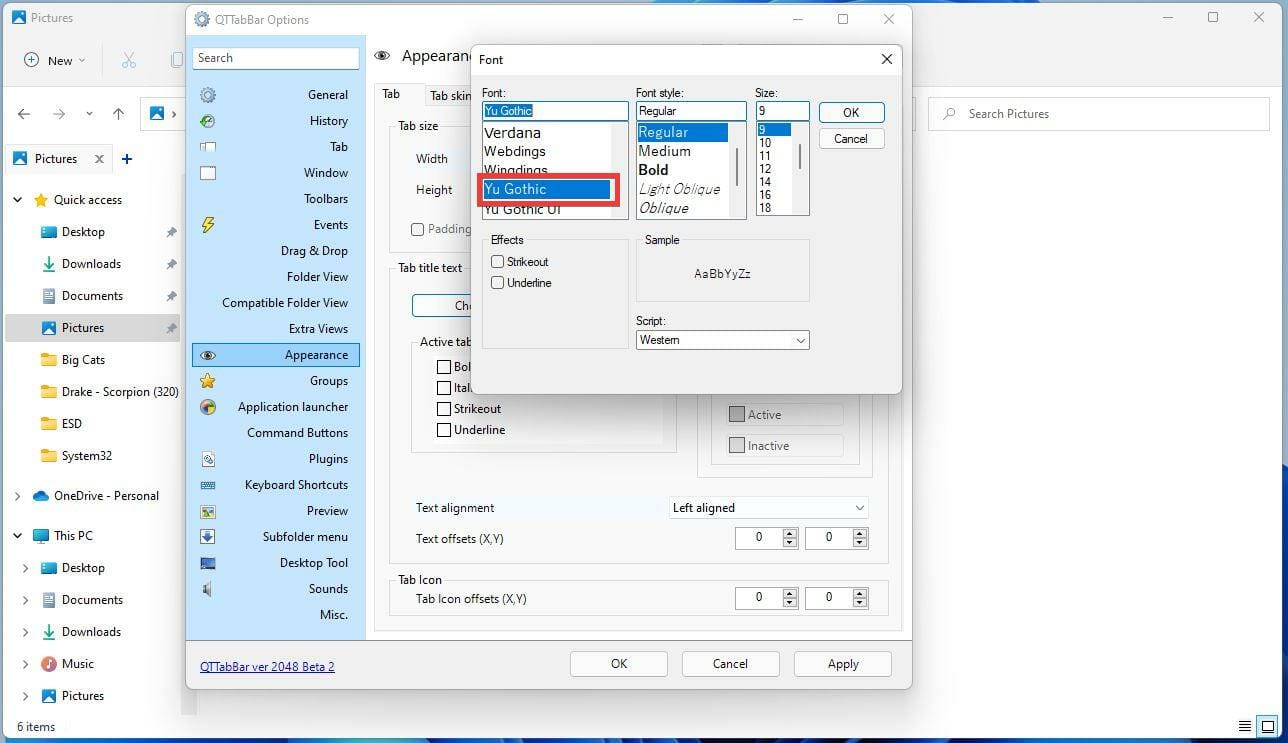
- You can change the tab’s font by pressing the Choose font button and making a selection.
- Change the font and select OK.
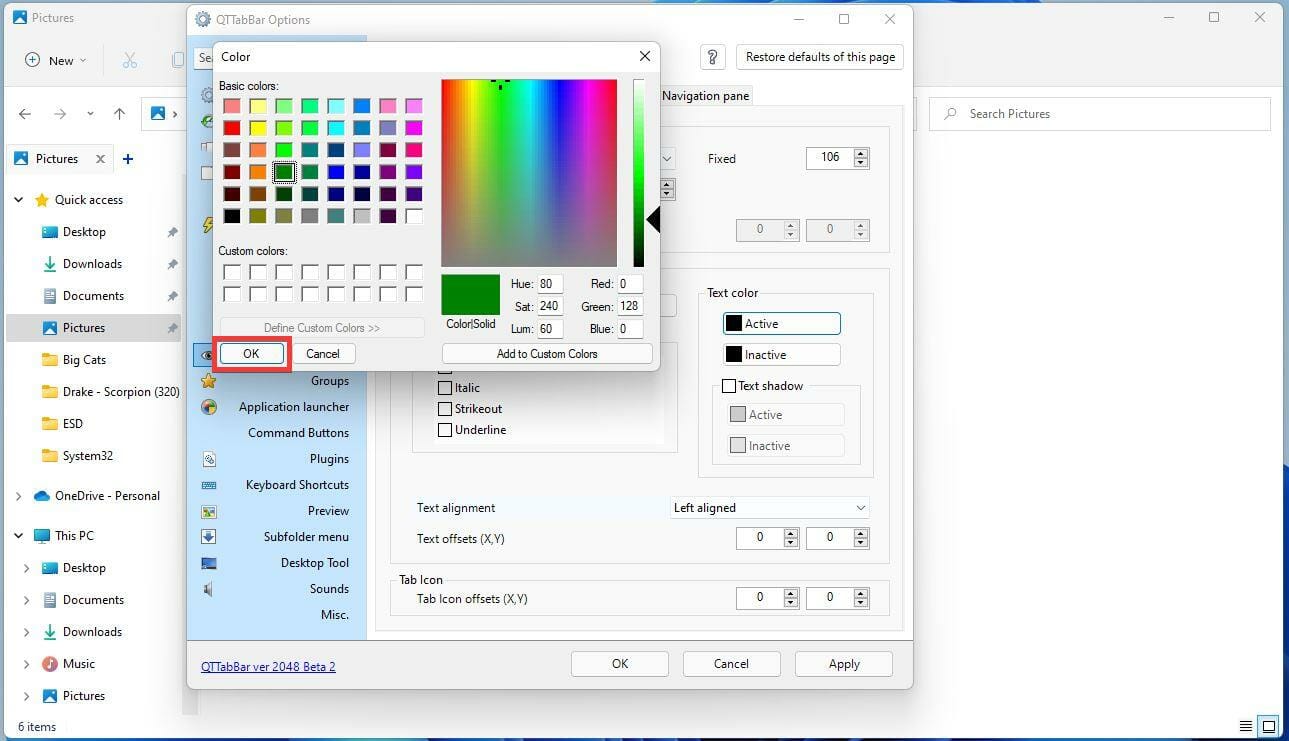
- Change the color by selecting Active in the Text color section.
- Pick a color and then click OK.
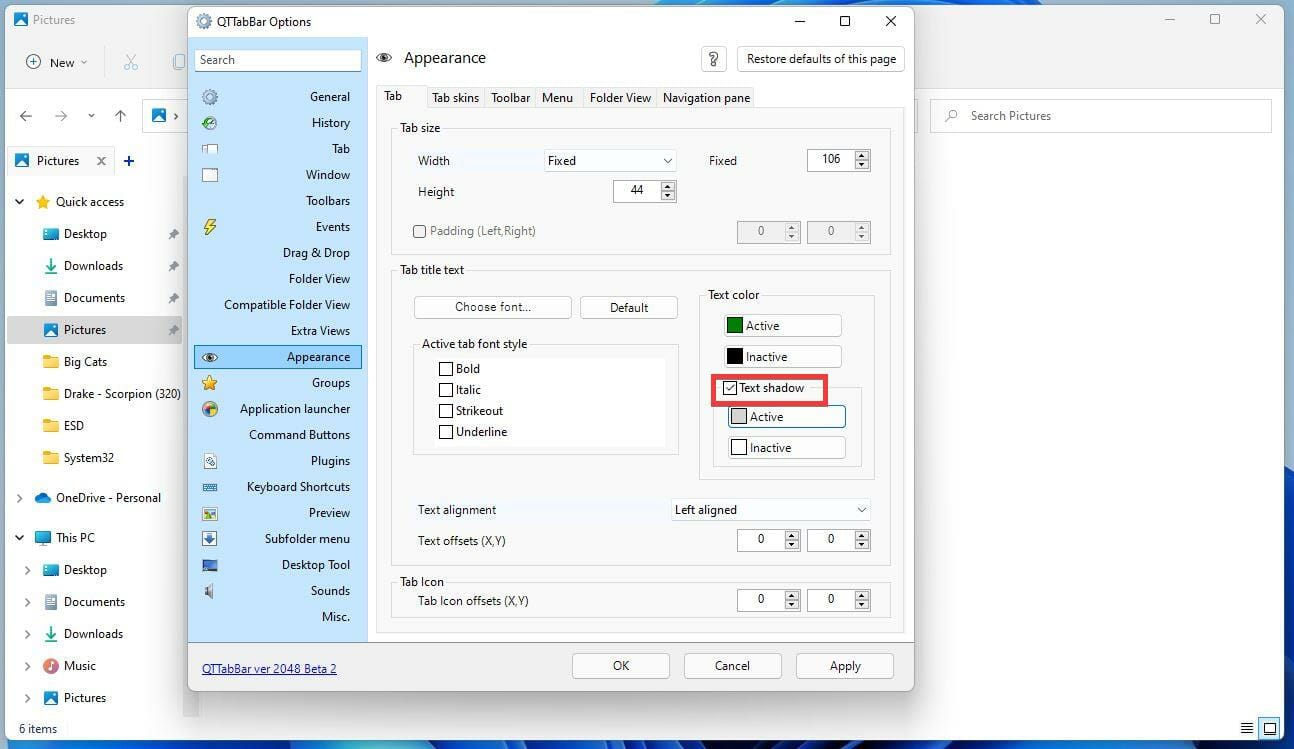
- Clicking on Text Shadow will add a backdrop to the text to make it stand out.
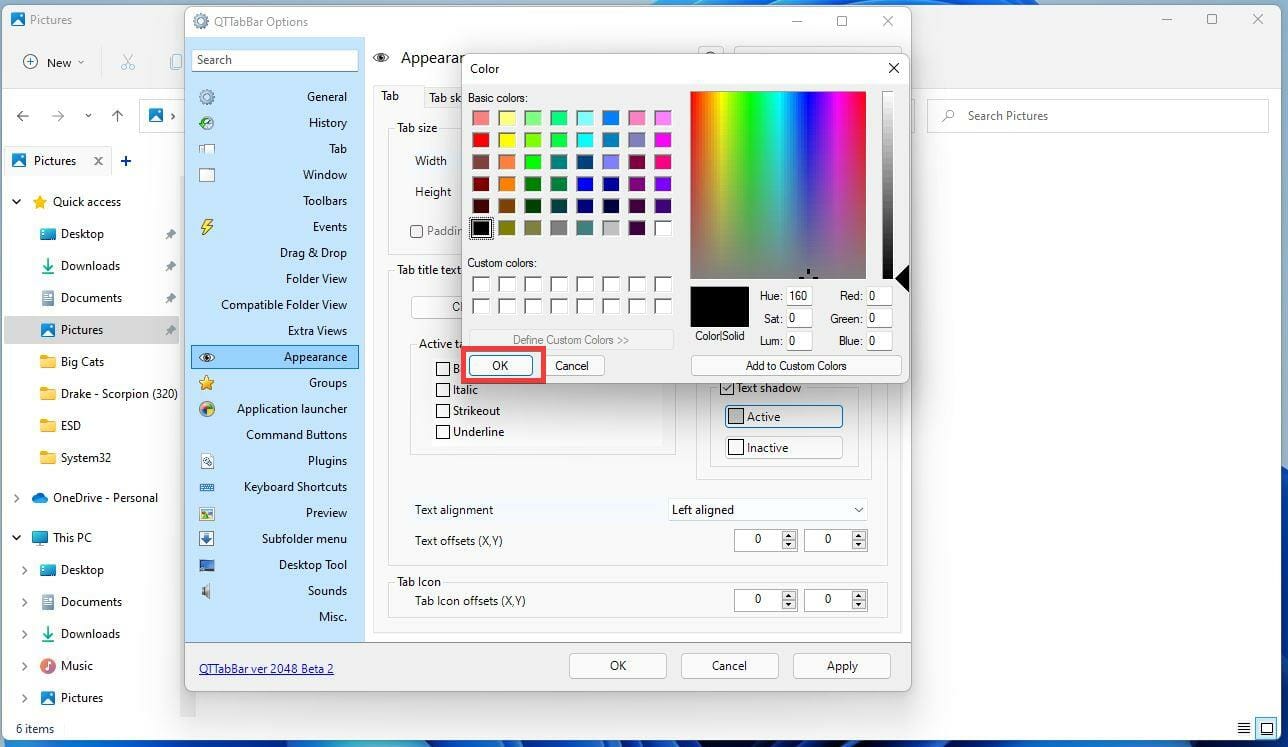
- Here, click on Active again. and then choose a color to serve as the shadow.
- Choose a color to serve as the shadow. Click OK.
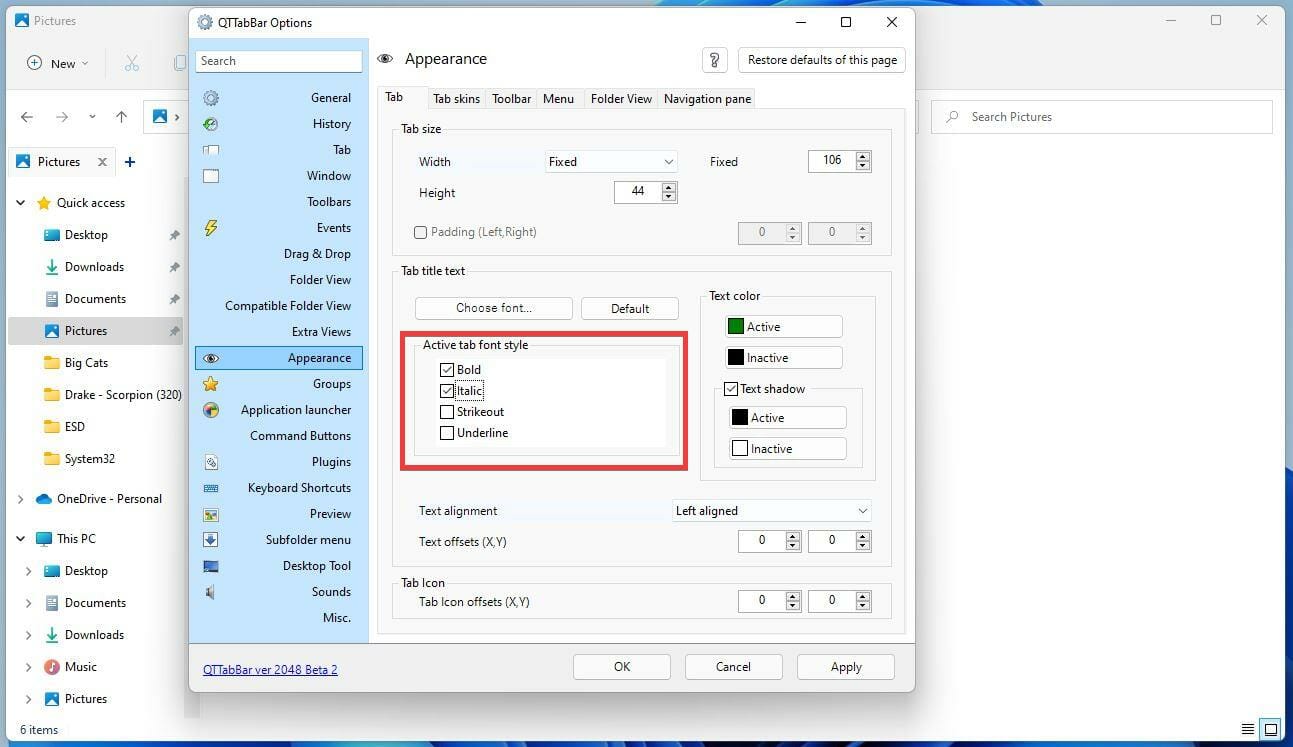
- Change the font style by choosing the options on the left hand side.
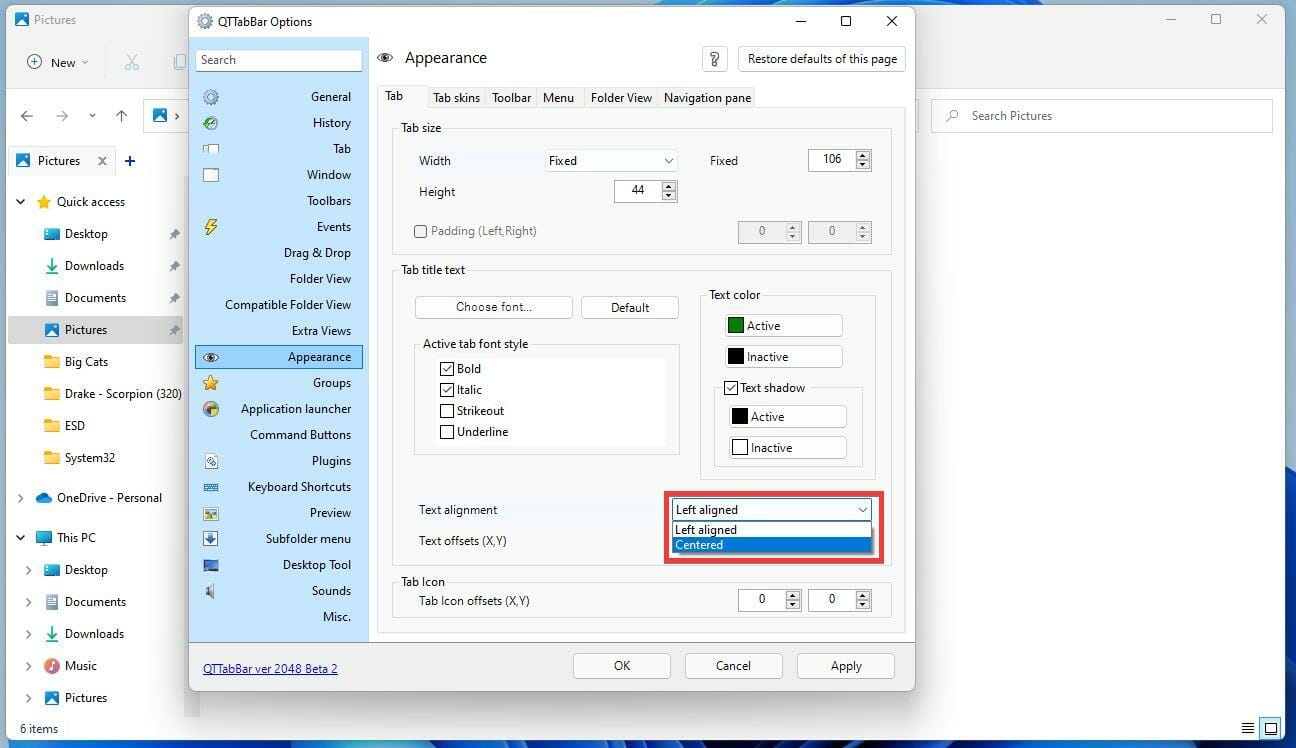
- The drop down menu next to Text alignment changes where the text is placed in a tab.
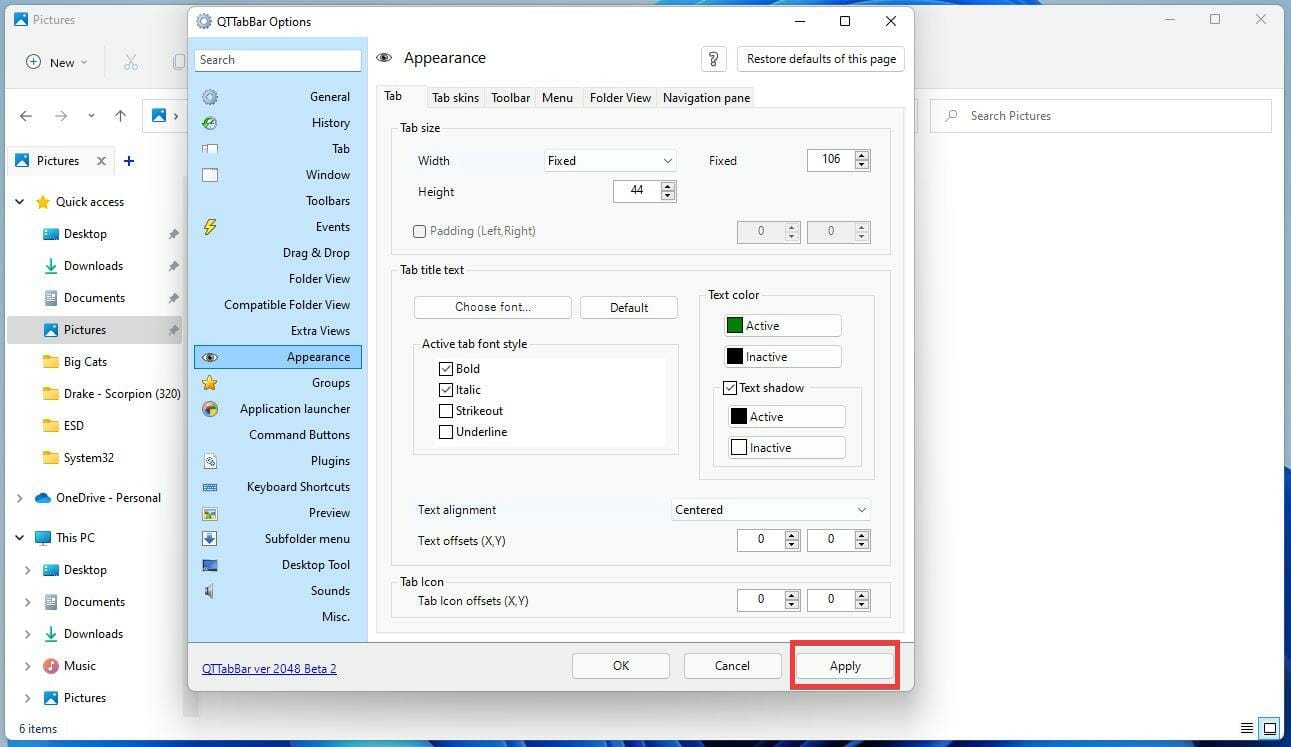
- Once you’ve done the changes you want to make, click Apply on the bottom.
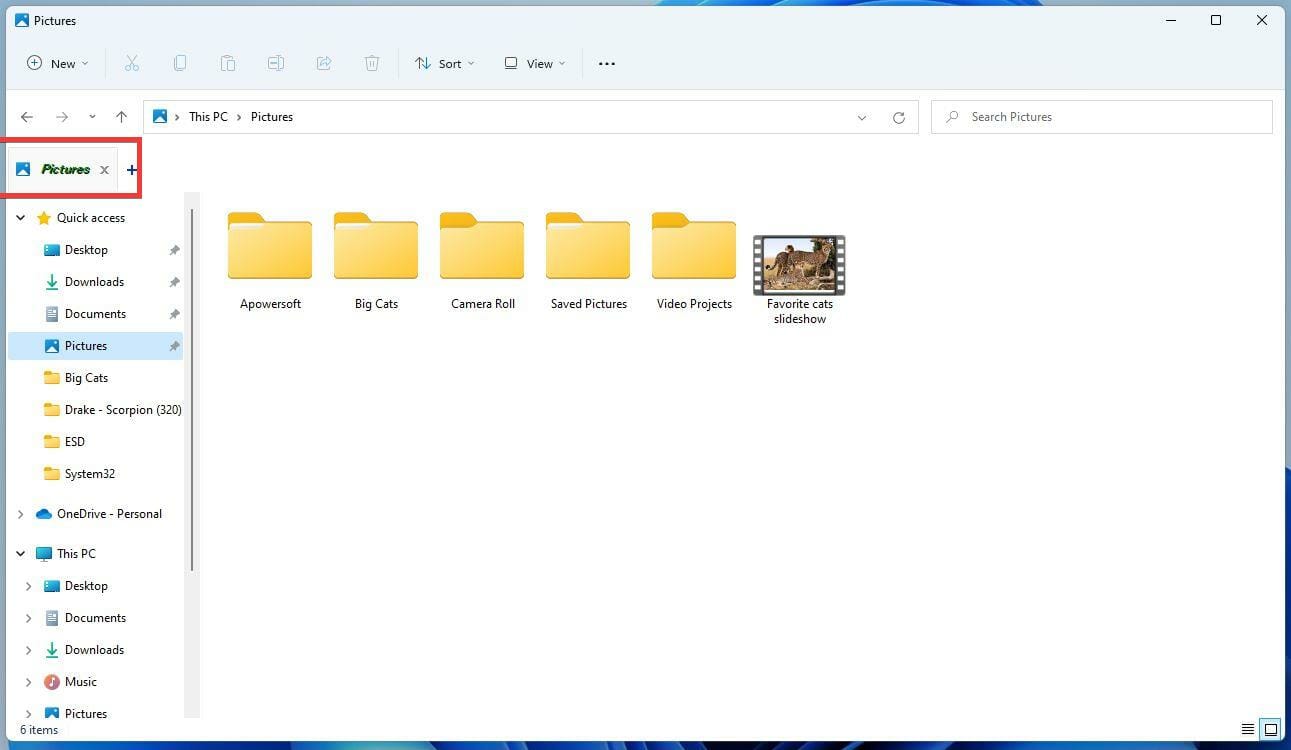
- Click OK to close the window and see the changes.
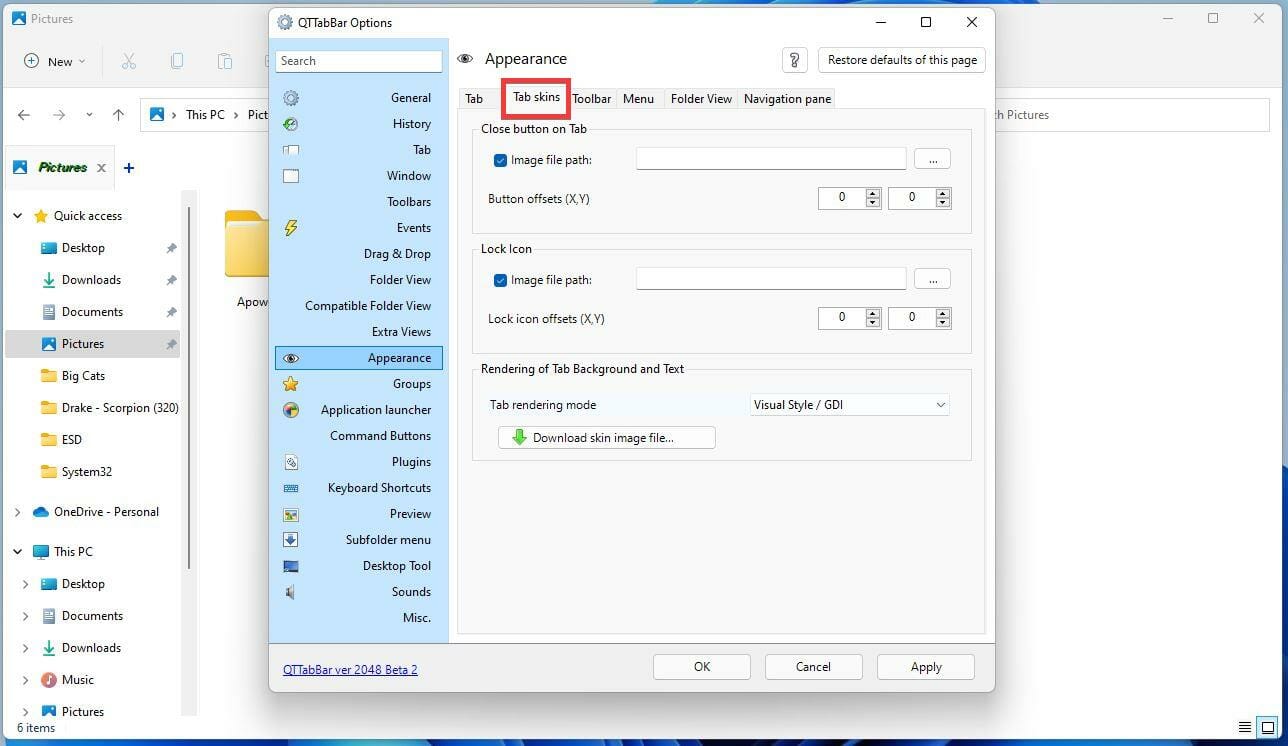
- You can also change the tabs’ skin by going to the Tab skins tab at the top.
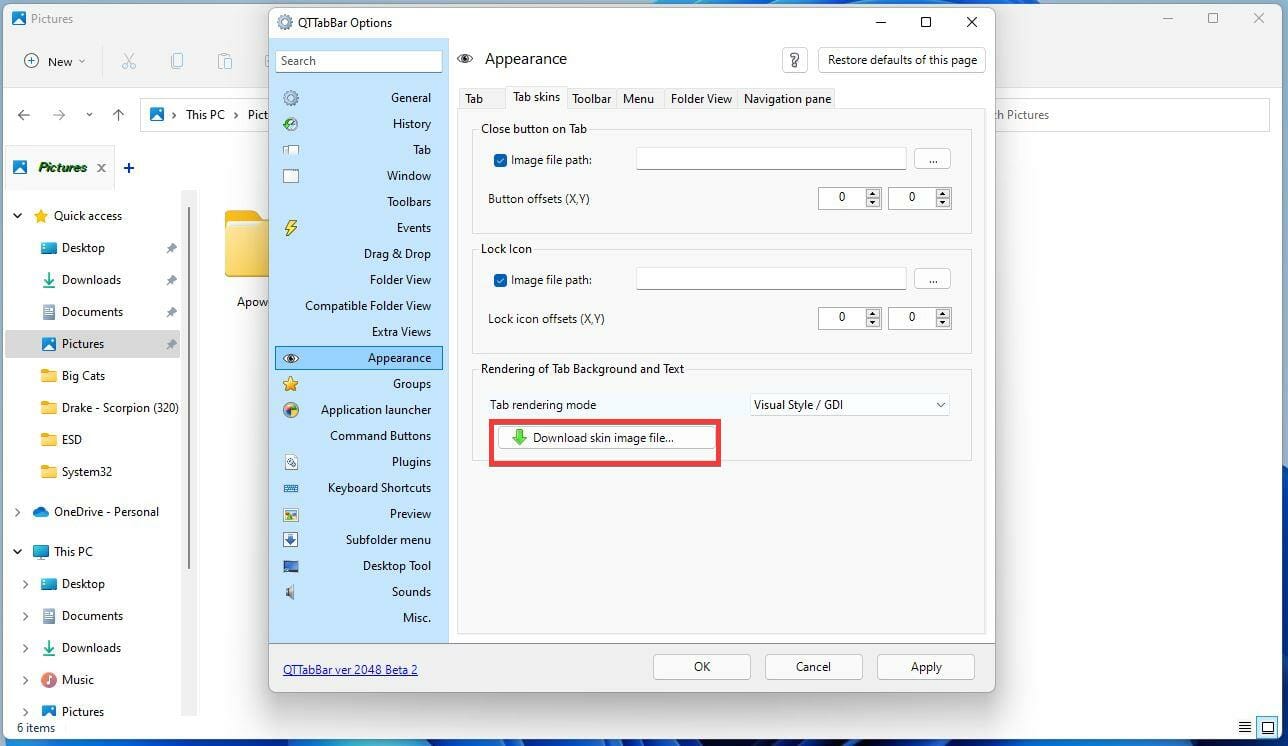
- Click the Download skin image file… in the Rendering of Tab Background and Text section.
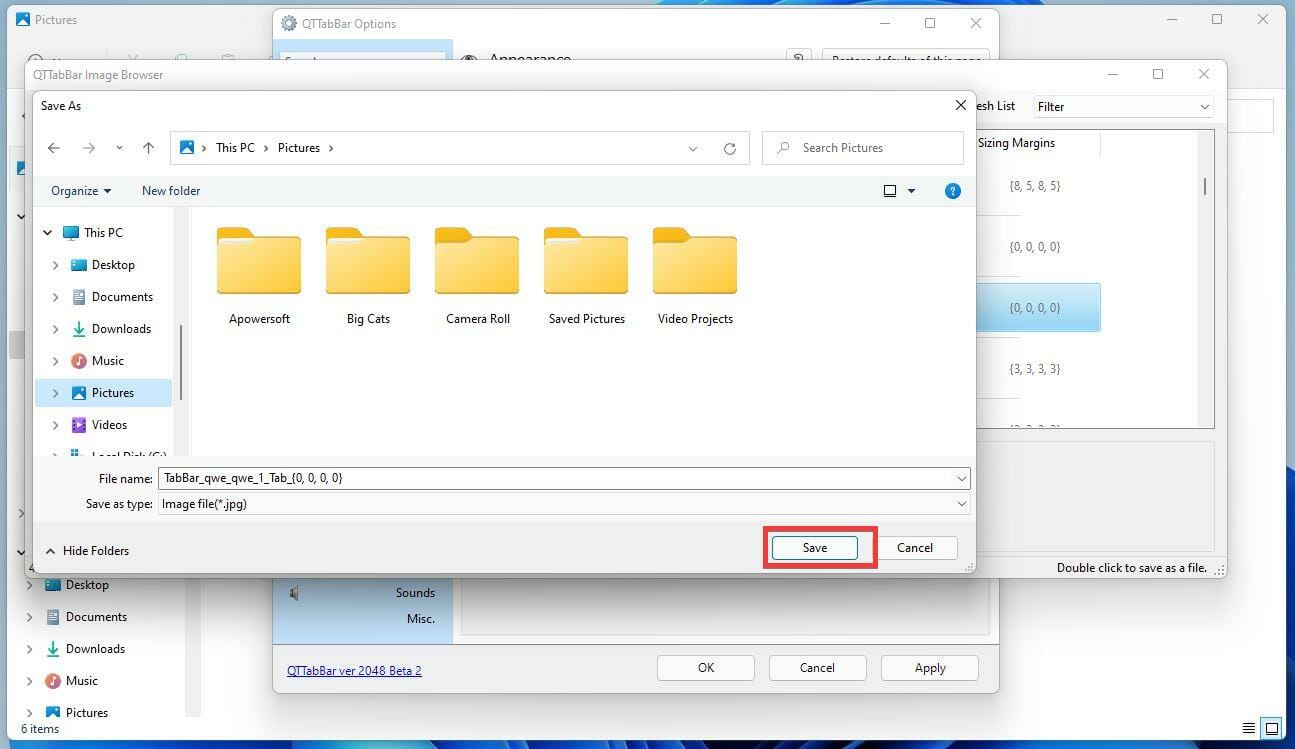
- In the QT TabBar Image Browser, scroll and find an image you want to be the tab’s background.
- Double click it to save the file.
- This will open the file explorer. Select a location where to save the image.
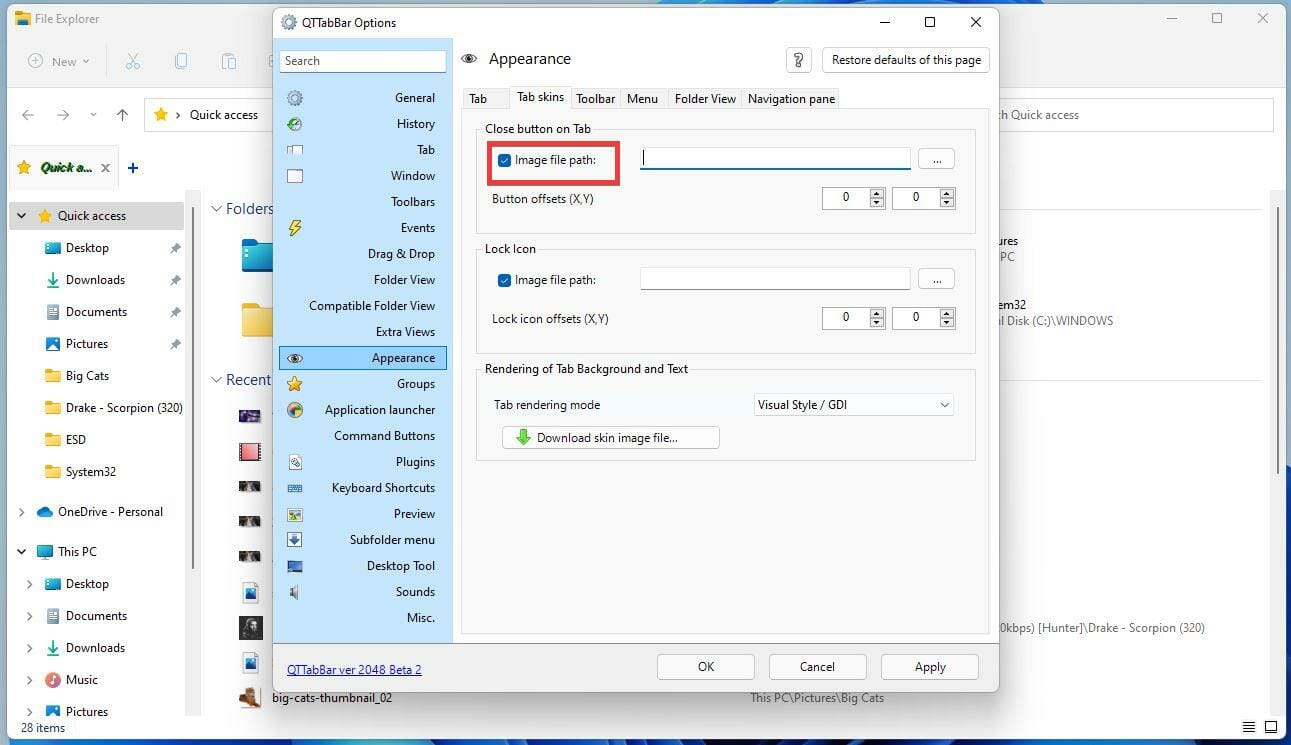
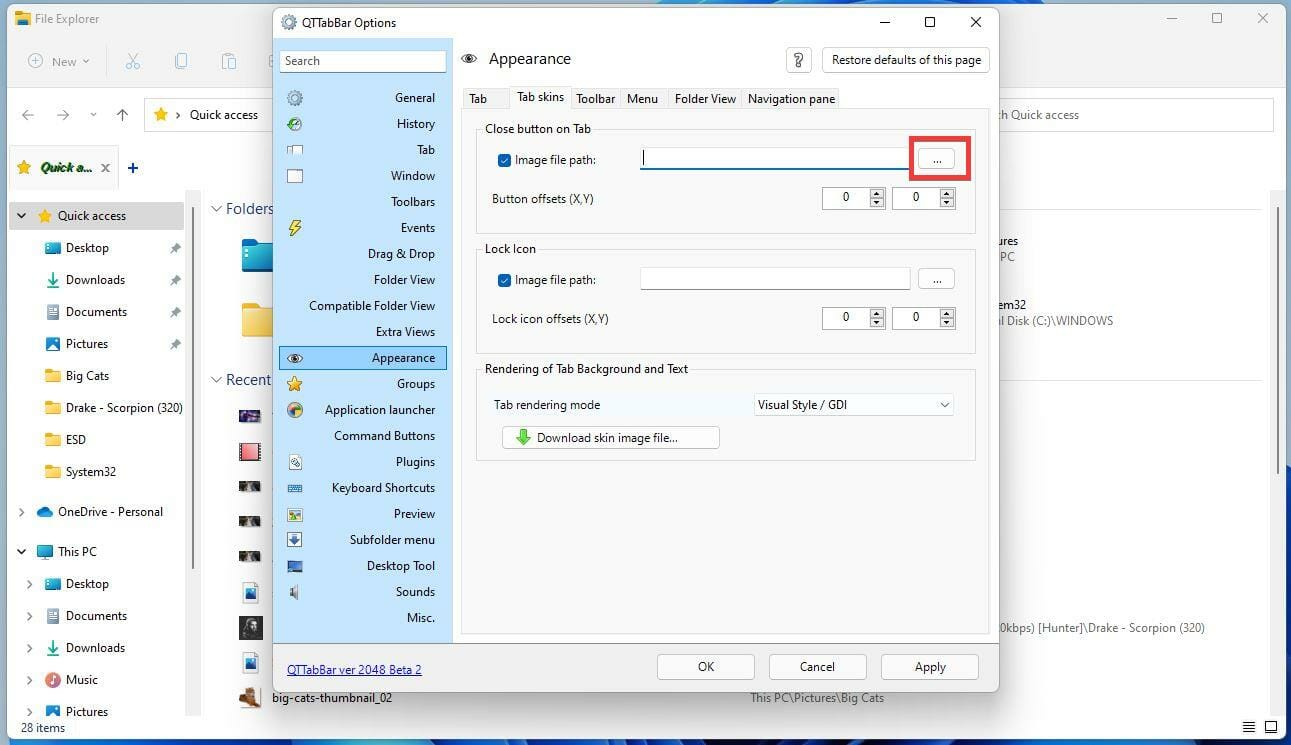
- Going back to the Tab skins window, select Image file path underneath Close button on Tab.
- Click on the button with the three dots and search for the previously saved image.
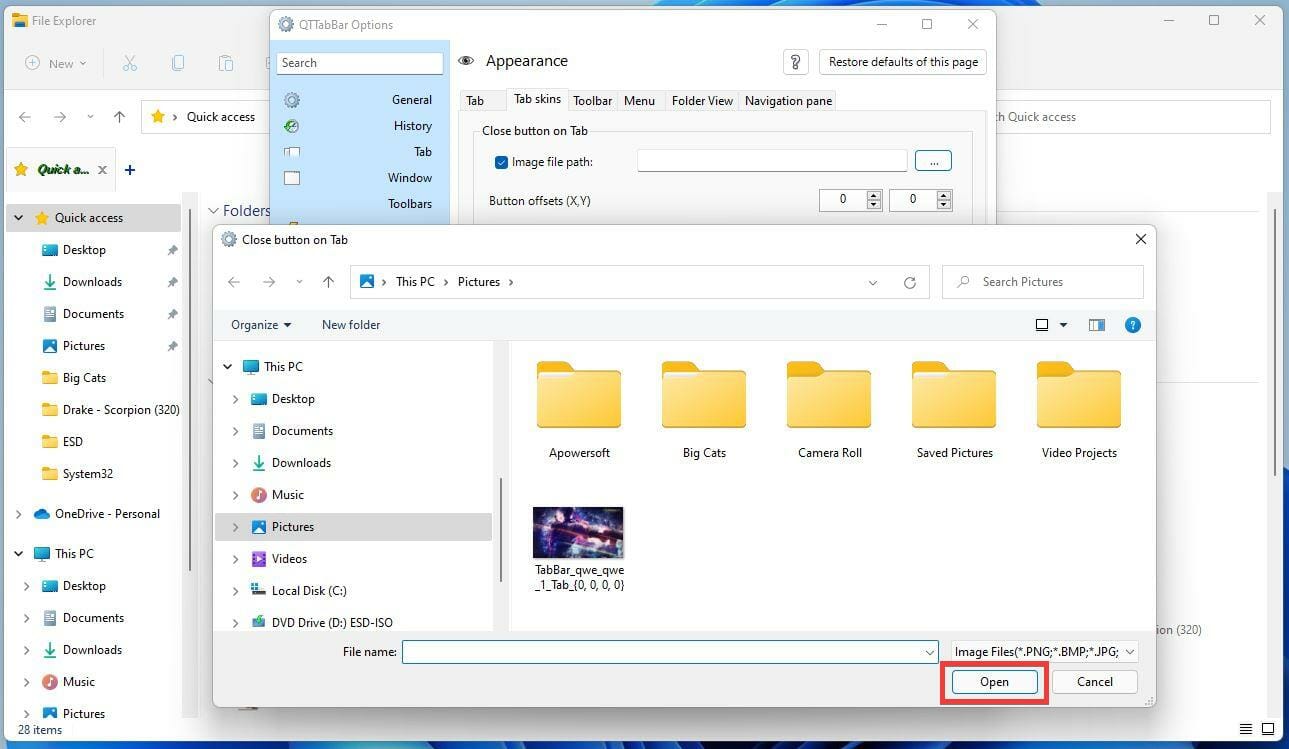
- Find the image, click it, and then press Open.
- Click Apply then OK.
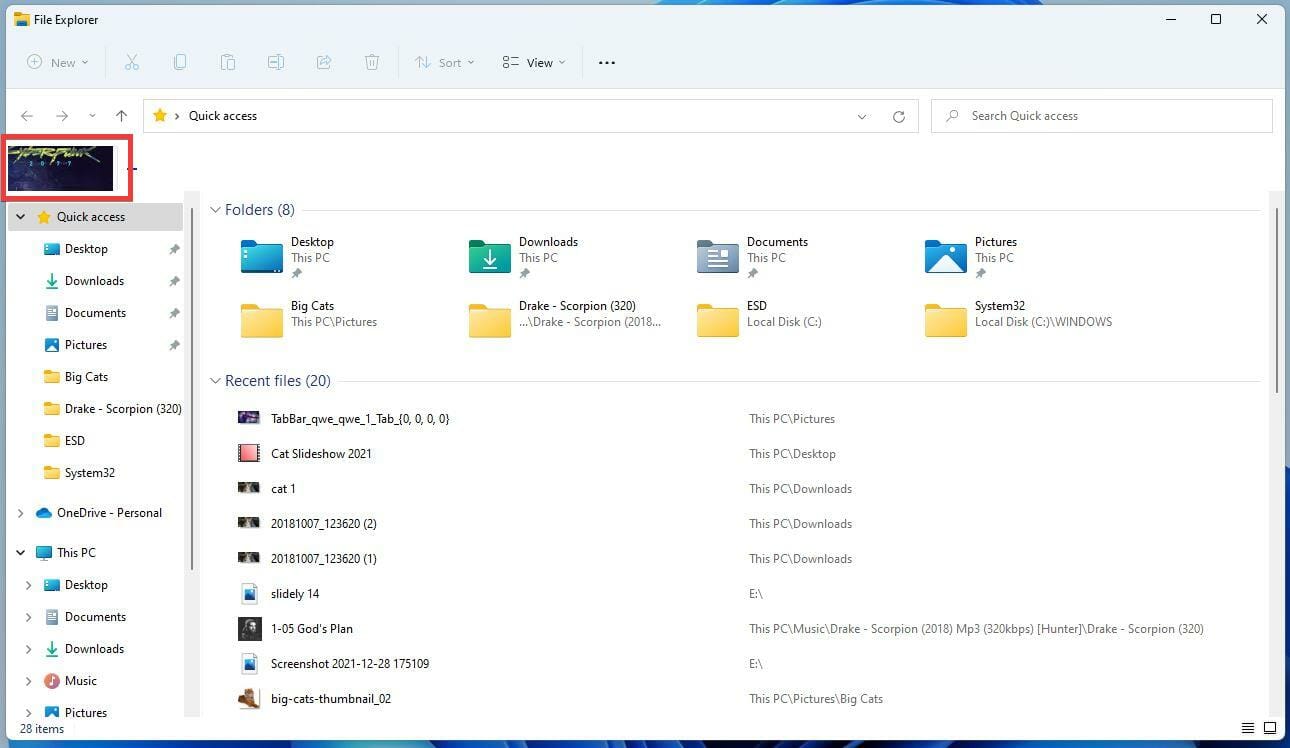
- You can now see the tab now has the image you downloaded and selected from the library.
3. Changing Tool Bar Design
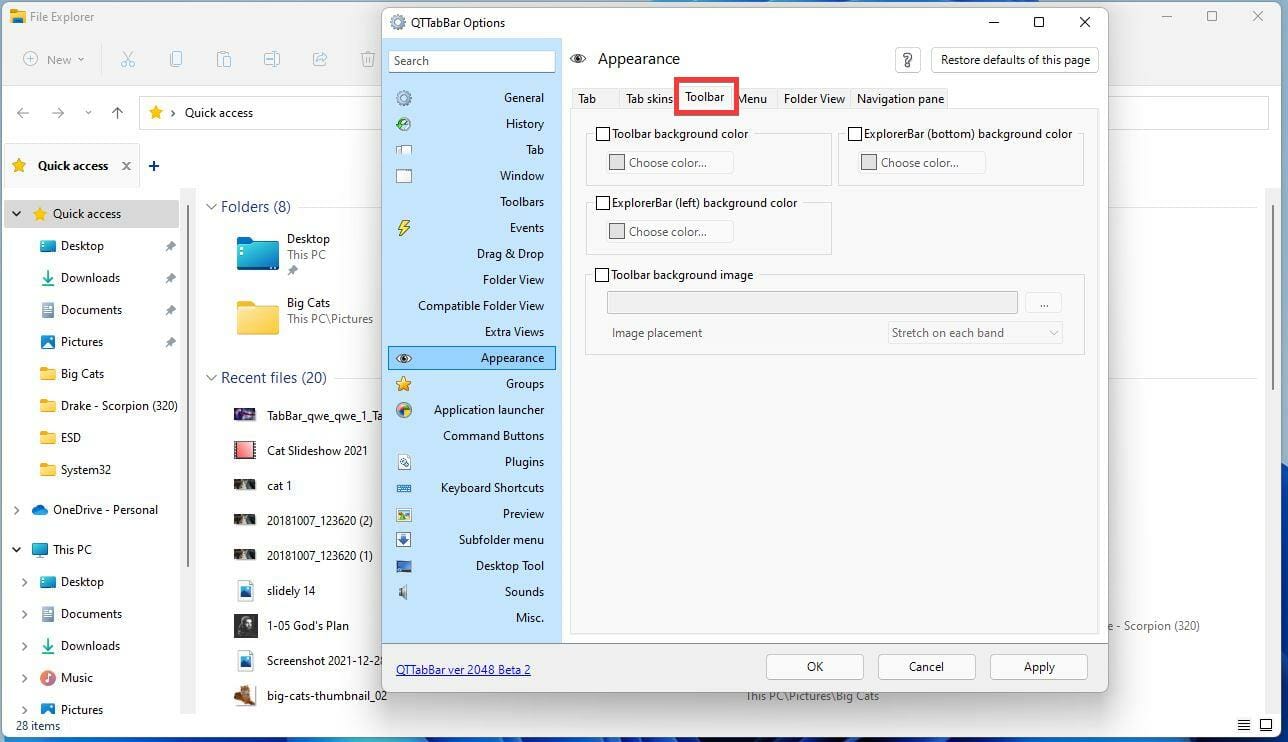
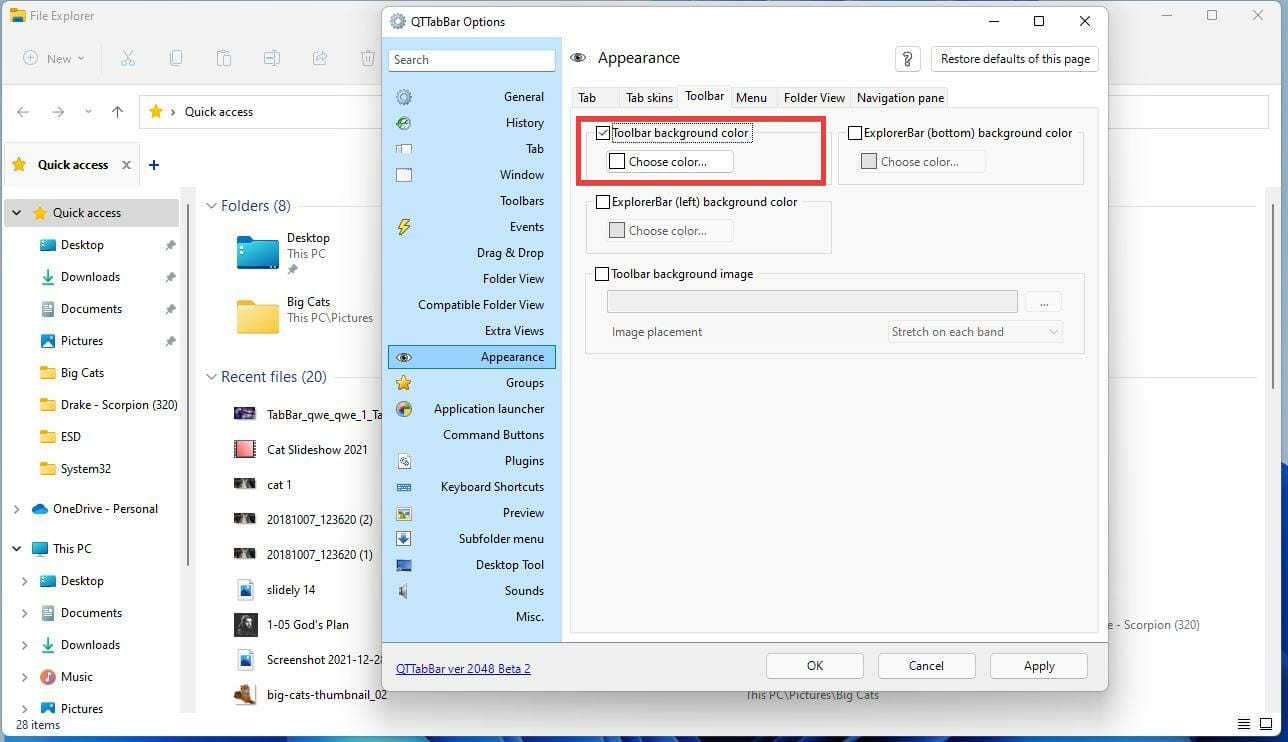
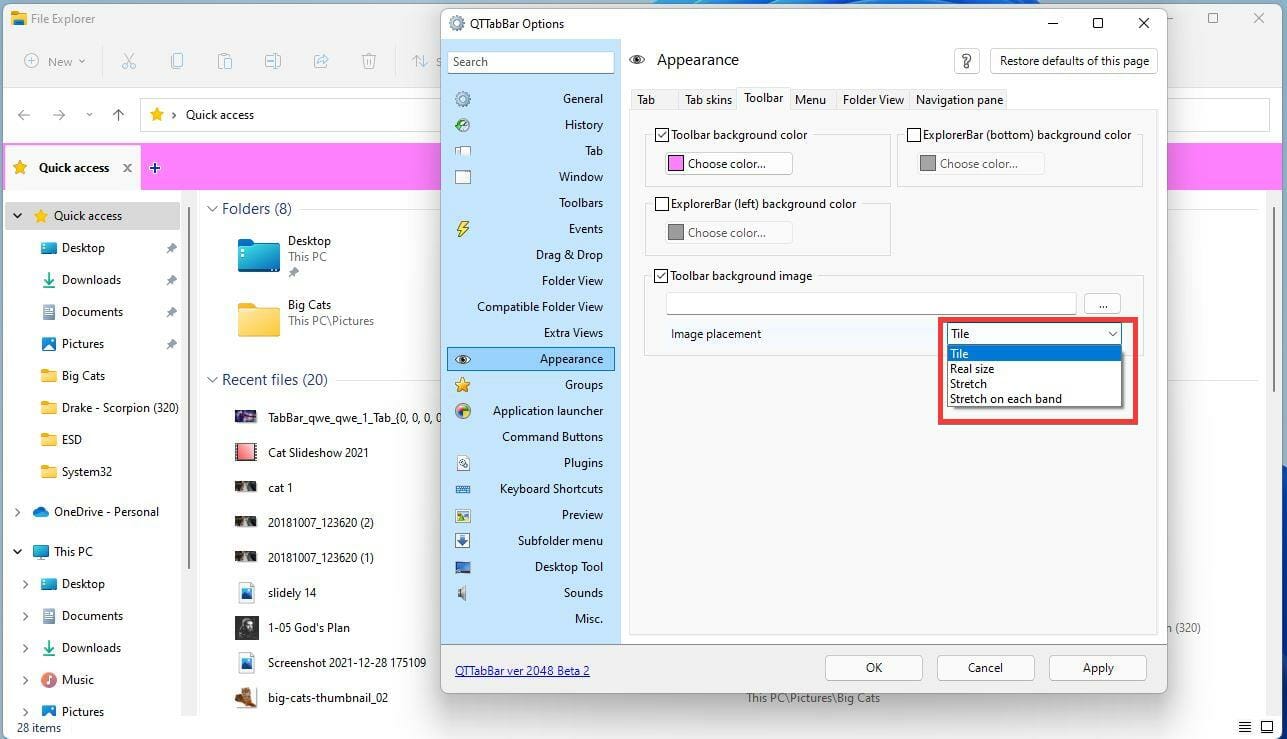
- You can further change the Toolbar’s design by first going to the Toolbar tab in the QT TabBar Options.
- Click Toolbar background color to change its color.
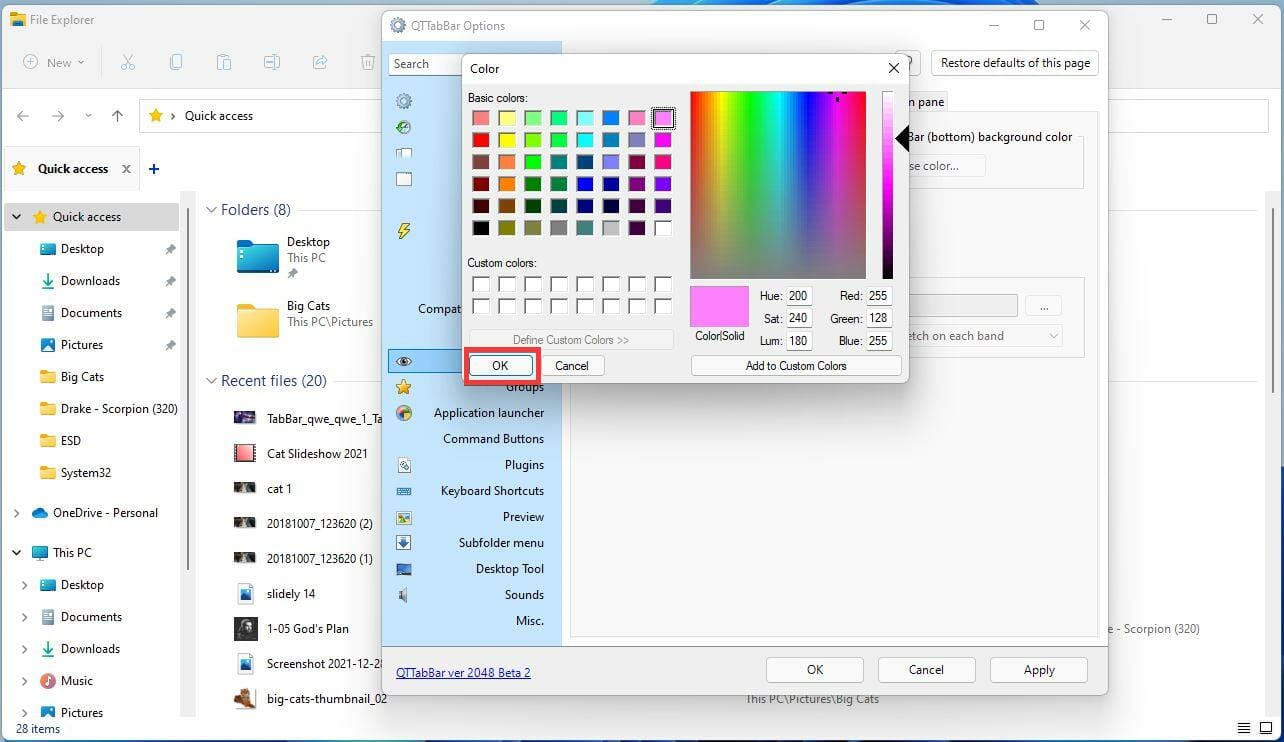
- Click Choose color…
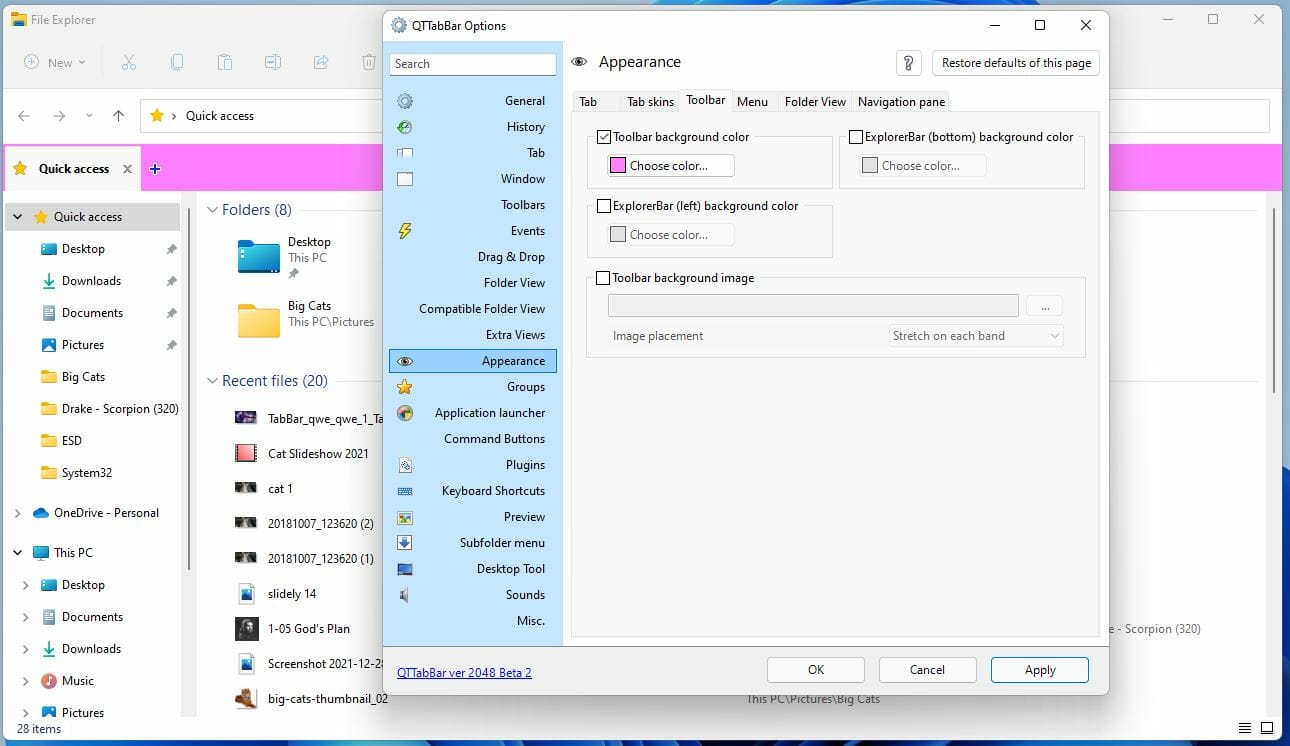
- Select a color, then click OK.
- Click Apply to change the color.
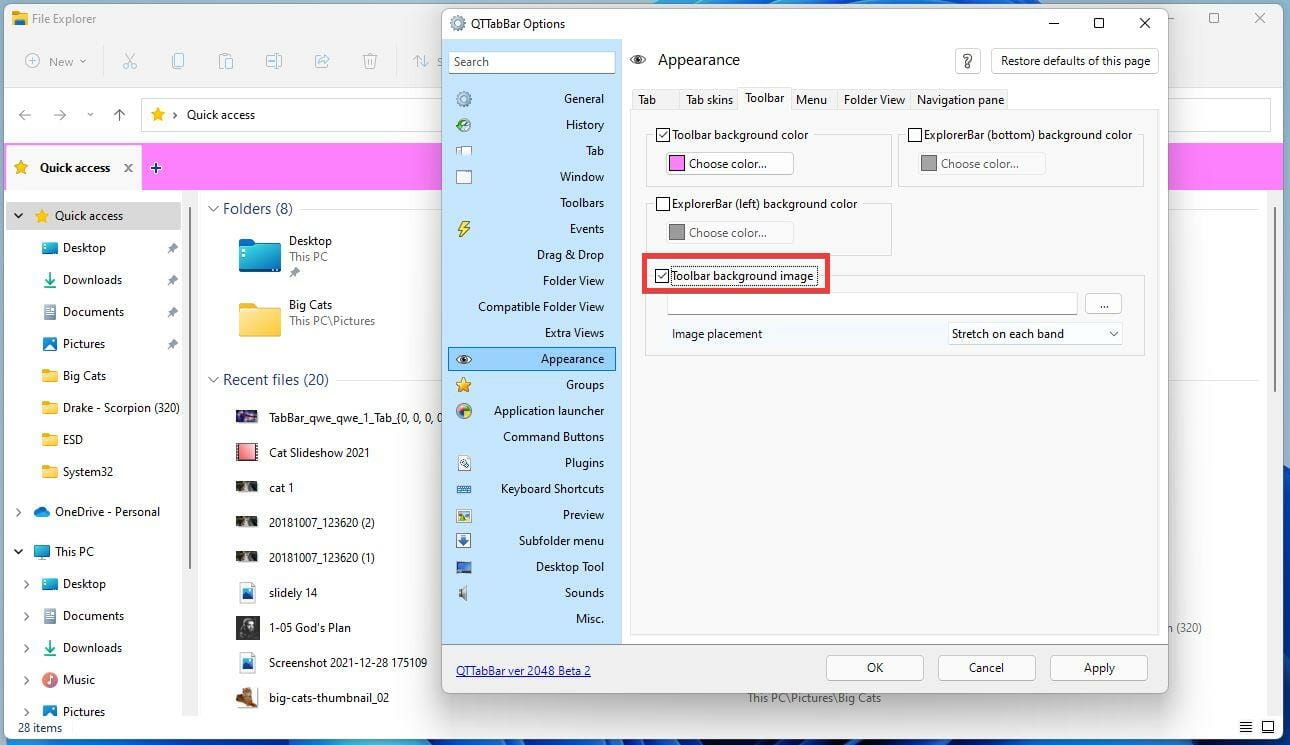
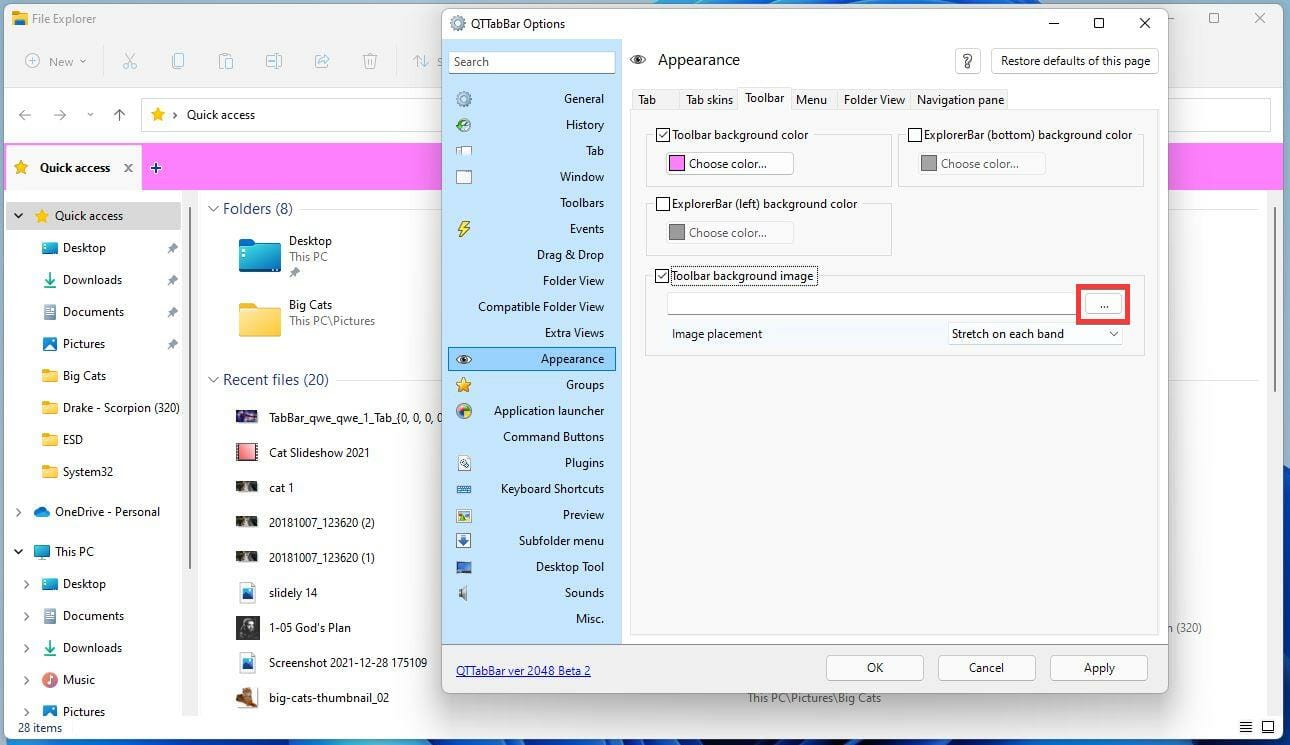
- You can change the background image by first clicking Toolbar background image.
- Click on the drop-down menu next to Image placement to change how the image will look on the tool bar.
- Click on the three dots above image placement.
- Click on the image you want to place in the tool bar, then click Open.
- Click Apply then OK to close the window to see the changes.
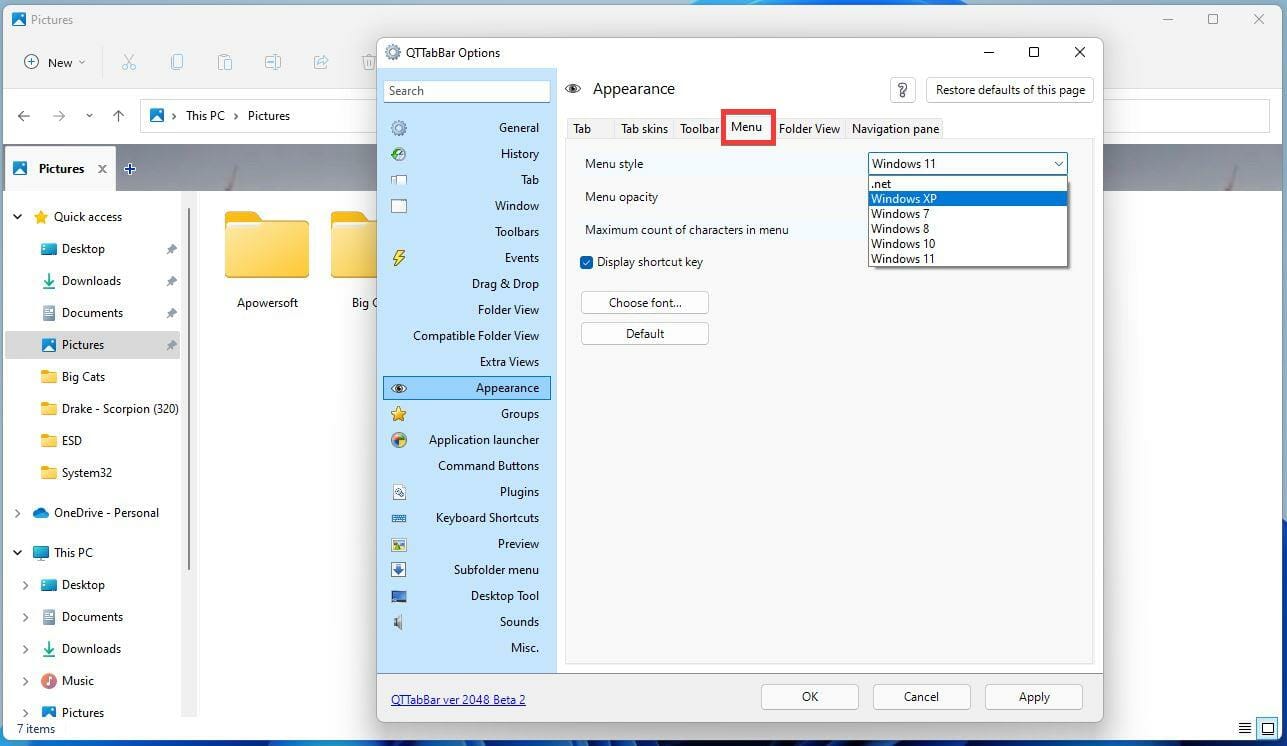
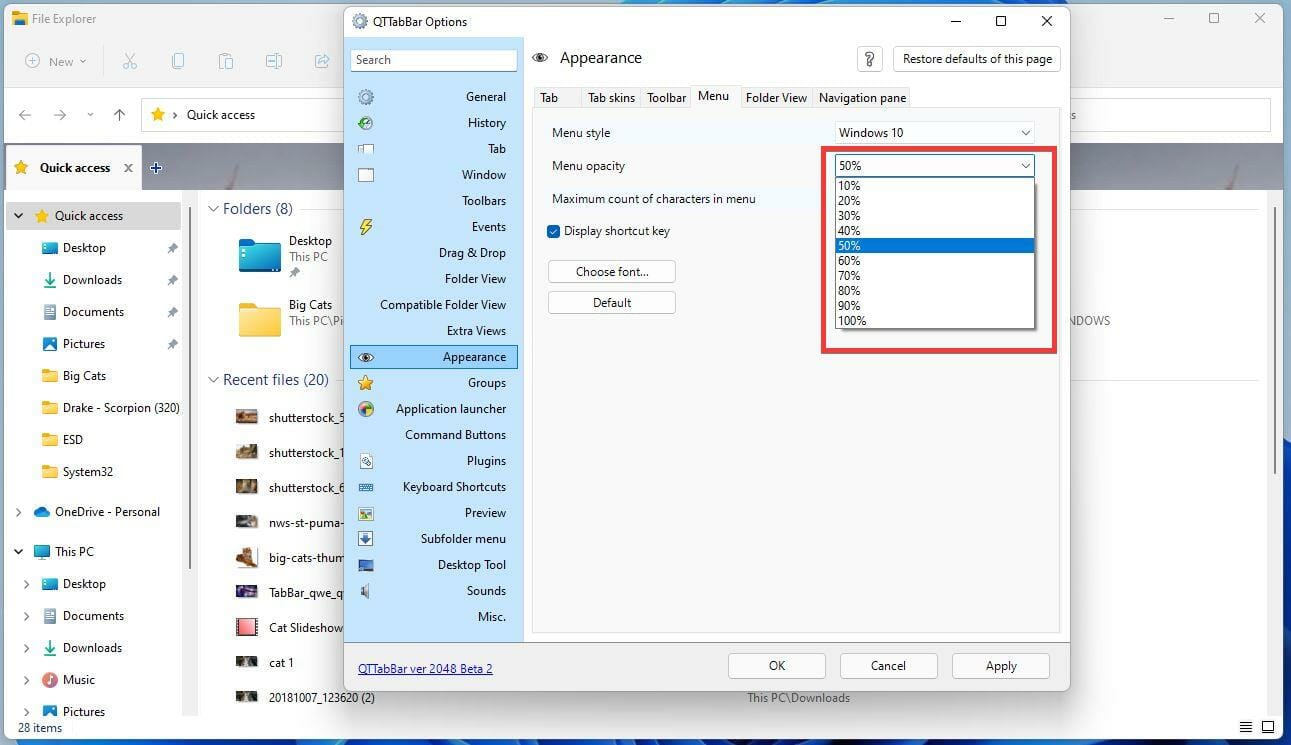
- It’s worth pointing out how to change the Menu’s apperance by going to the Menu tab.
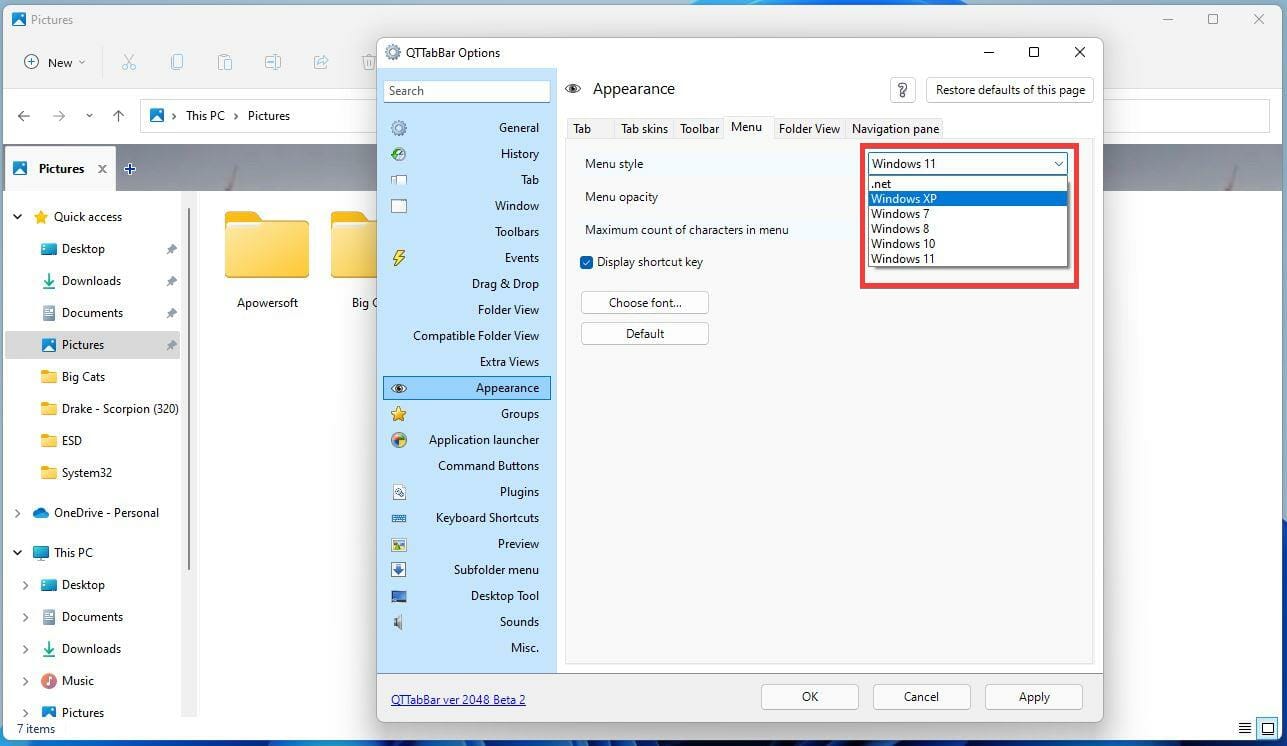
- You can change the style of the File Explorer by clicking on the Menu style down drop list to change how it long.
- You can select the Windows 10 style or the Windows XP style, for example.
- The menu’s opacity can be changed by clicking the drop down menu and changing the amount.
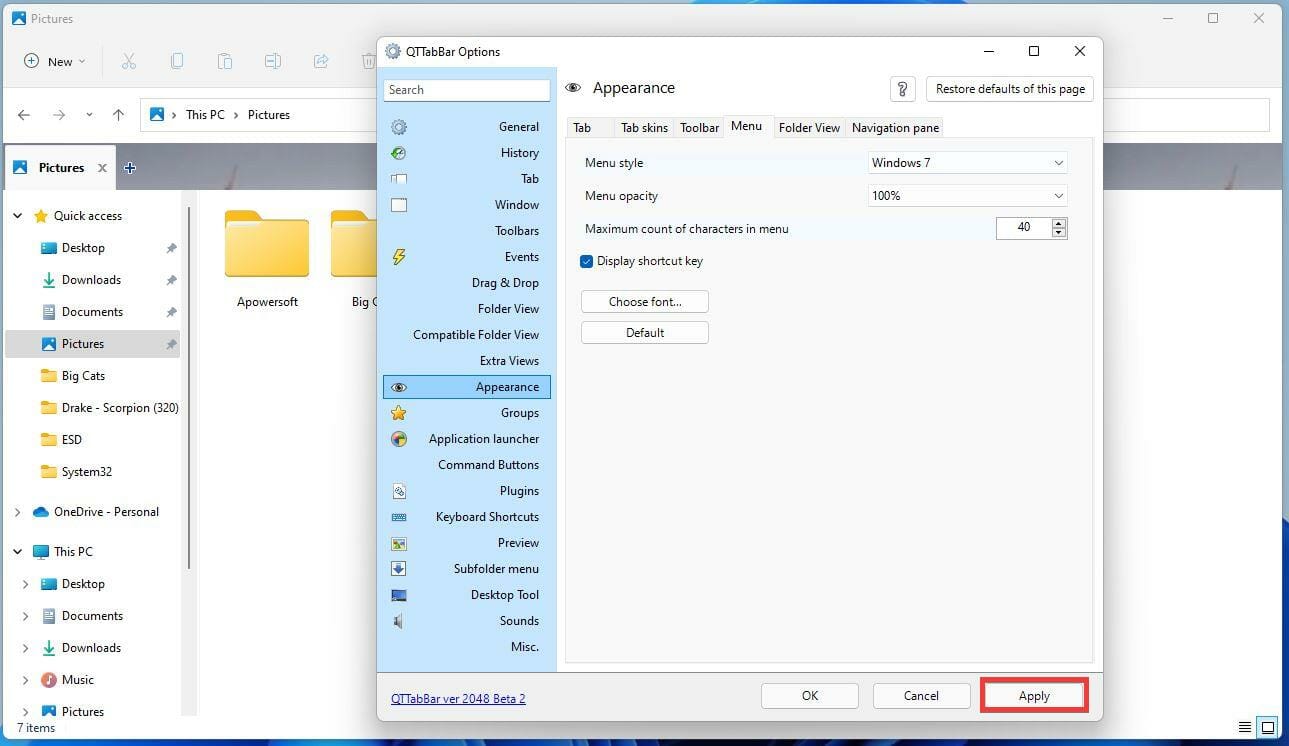
- Click Apply then OK.
- As seen in this image, the Menu has taken on the Windows 10 style with its rigid box design.
Ci sono modi per migliorare la mia esperienza con Windows 11?
Ci sono molti modi per migliorare la tua esperienza con Windows 11. Ci sono molti suggerimenti e trucchi interessanti che puoi adottare, come ridimensionare la barra delle applicazioni e imparare nuove scorciatoie da tastiera. Il mio preferito è premere il tasto Windows + A per visualizzare le Impostazioni rapide.
Inoltre, dovresti imparare come risolvere i problemi del tuo computer con Windows 11 se continua a bloccarsi casualmente. La memoria di sistema limitata è un fattore importante dietro molti blocchi del computer, così come l’incompatibilità con la GPU. L’aggiornamento a Windows 11 potrebbe causare questo problema se il tuo vecchio driver non si integra bene con il nuovo sistema.
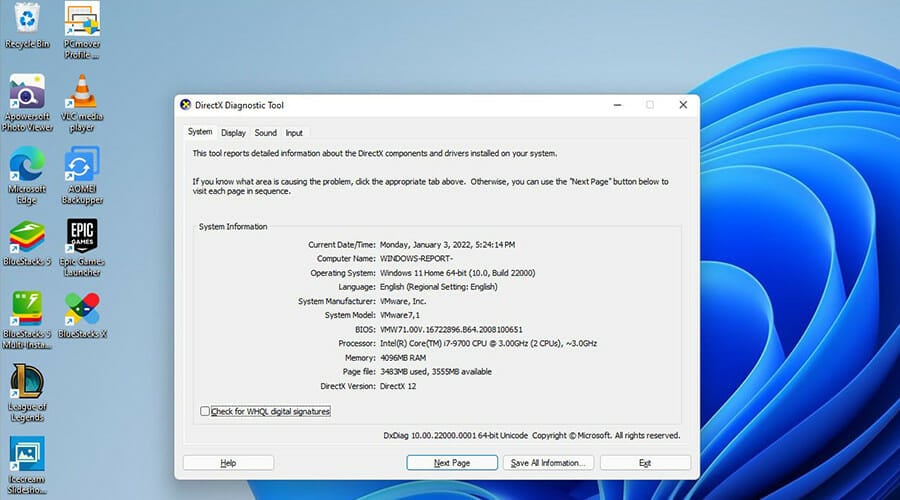
Parlando di errori, possono comparire anche problemi legati a DirectX sui computer con Windows 11. DirectX è una libreria di API fondamentale per i computer Windows per la visualizzazione di video, audio e videogiochi.
Per la maggior parte, DirectX viene aggiornato automaticamente e quindi non dovrebbero esserci problemi, ma ci sono sempre quei casi strani in cui qualcosa semplicemente non funziona.

