Solved: Lenovo Vantage Hybrid Mode Not Showing
Prioritize your discrete GPU for best results
4 min. read
Updated on
Read our disclosure page to find out how can you help Windows Report sustain the editorial team. Read more
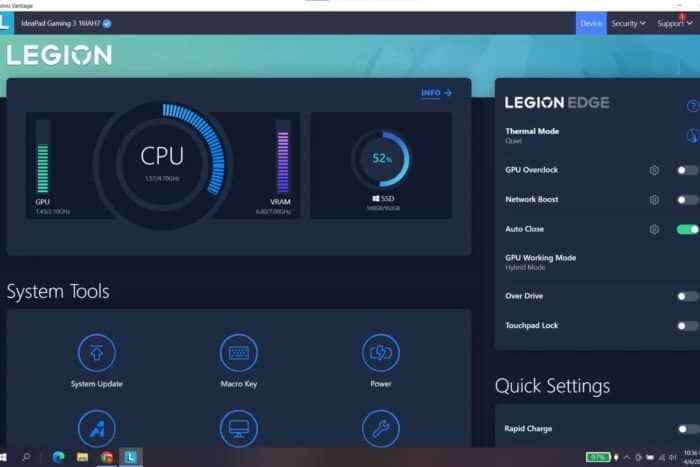
Your GPU can get overwhelmed by performing resource-intensive tasks so turning on the Lenovo Vantage hybrid mode comes in handy to optimize its performance but sometimes, it is not showing. Usually, a restart should restore it but if not, we have more advanced troubleshooting.
While the hybrid mode is a great feature, it is unavailable on all Lenovo devices, particularly the older or lower-end models. The feature also requires your device to have an integrated and discrete GPU so if you only have one, it will be unavailable.
Aside from device limitations, the hybrid mode not showing could be because of an outdated Lenovo Vantage app, incompatible or missing drivers, outdated BIOS or incorrect GPU settings. Once you’ve verified your device meets the requirements and you’ve updated your Vantage app, proceed.
What can I do if the Lenovo Vantage hybrid mode is not showing?
1. Update and enable your discrete GPU drivers
1.1 Update GPU drivers
1. Navigate to the official website for your specific GPU (in this case NVIDIA) and click on the Manual Driver Search option.
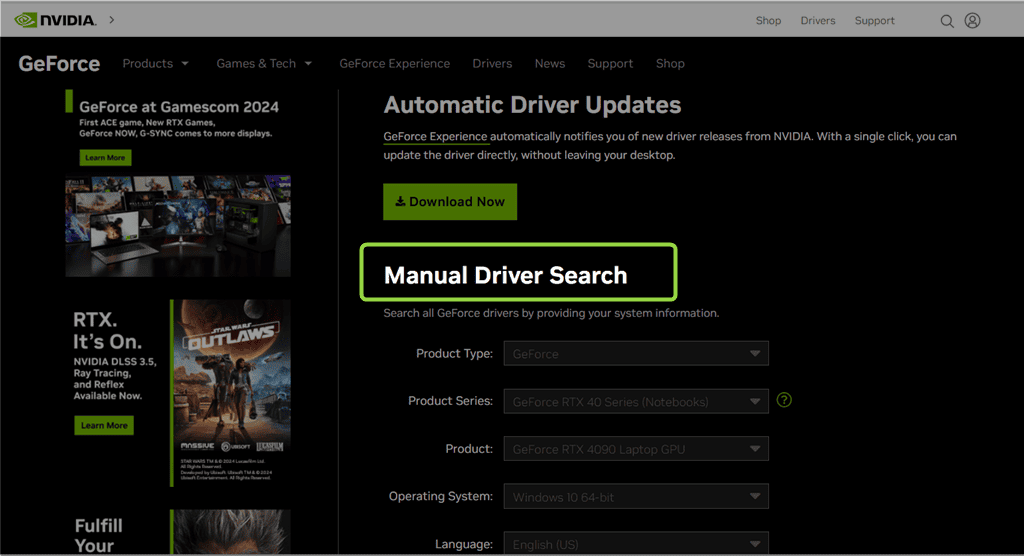
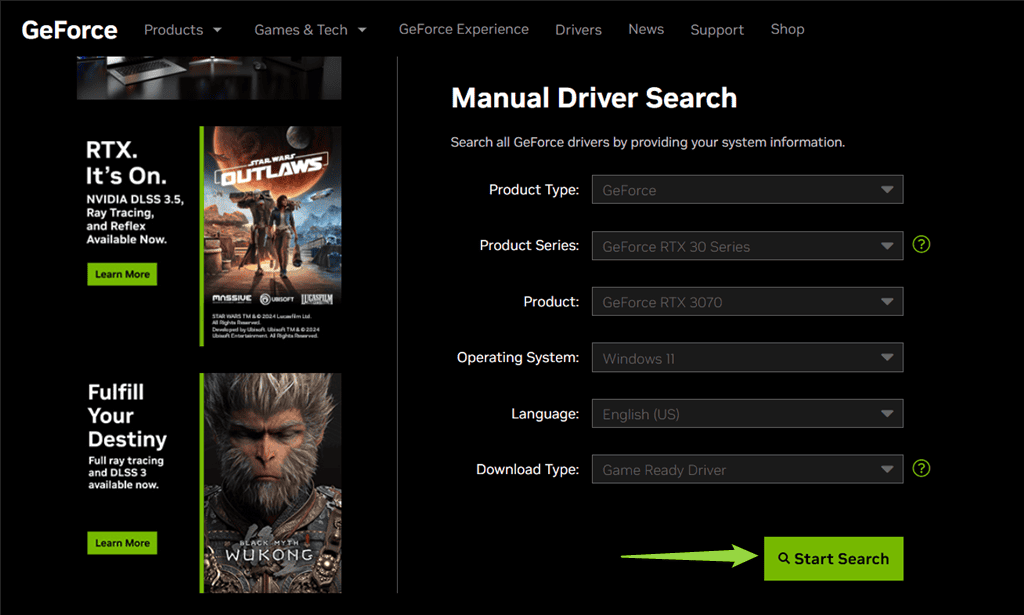
2. Now, enter information regarding your NVIDIA driver, which includes:
- Product Type
- Product Series
- Product
- Operating System
- Language
- Download Type, etc.
Then, click on Start Search.
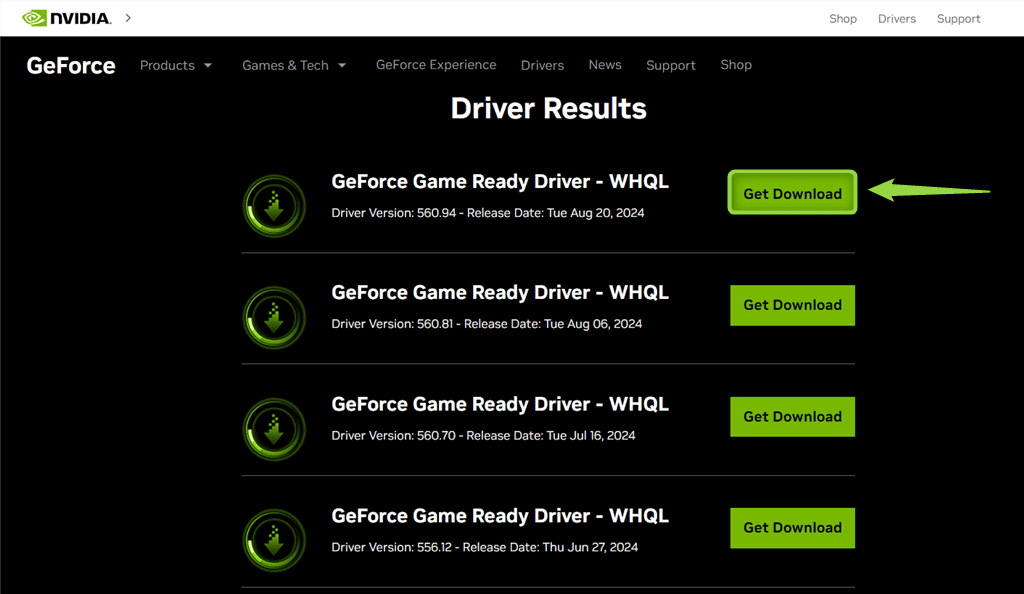
3. Select the latest version of your NVIDIA driver and click Get Download.
4. Next, hit the Download Now button.
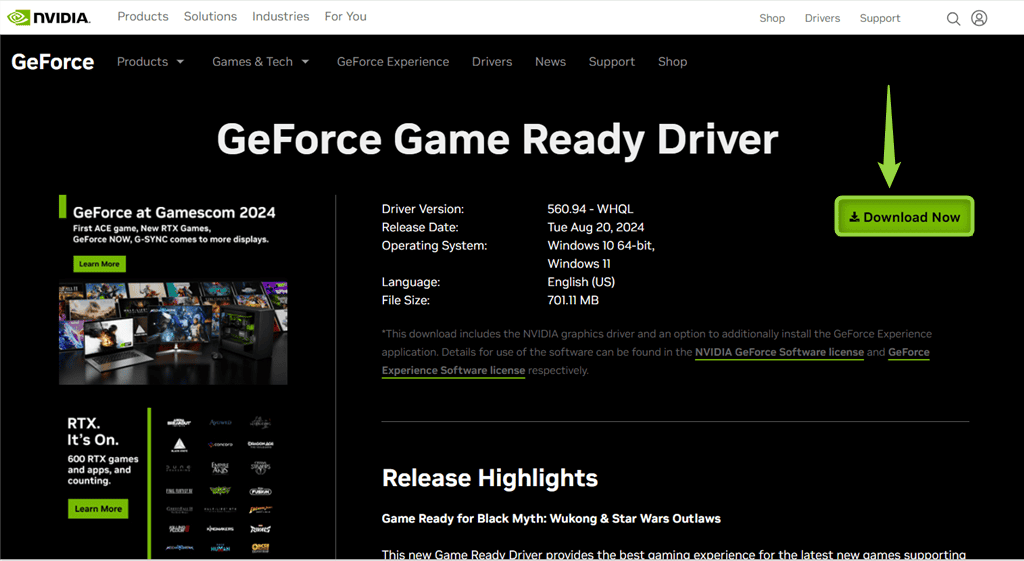
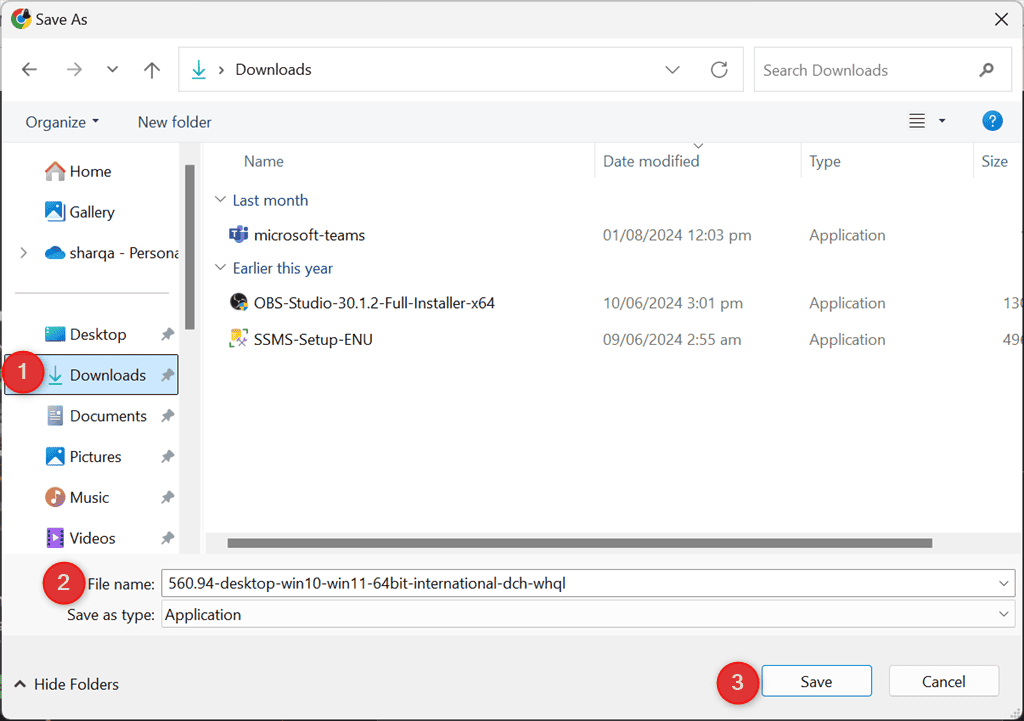
5. Choose the destination folder for the selected NVIDIA driver updater app and click Save.
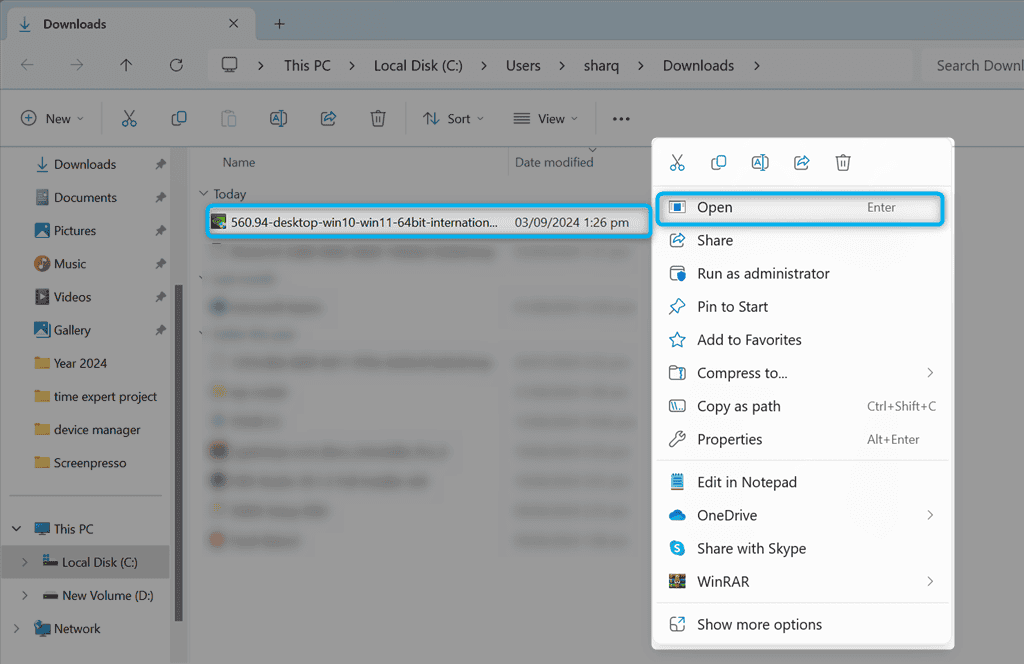
6. After a successful download, open the updater app.
7. Specify the extraction path or folder where you need to save the NVIDIA driver files.
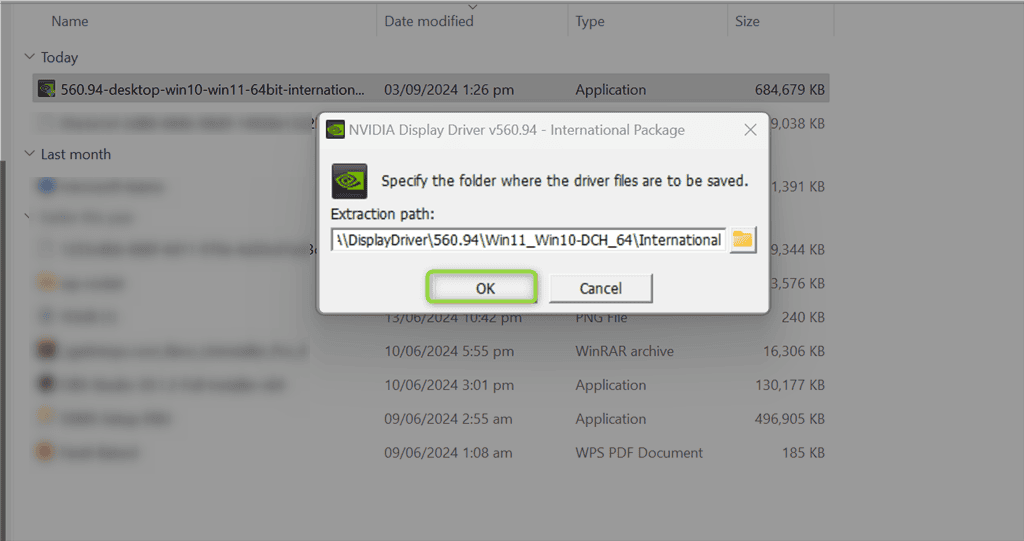
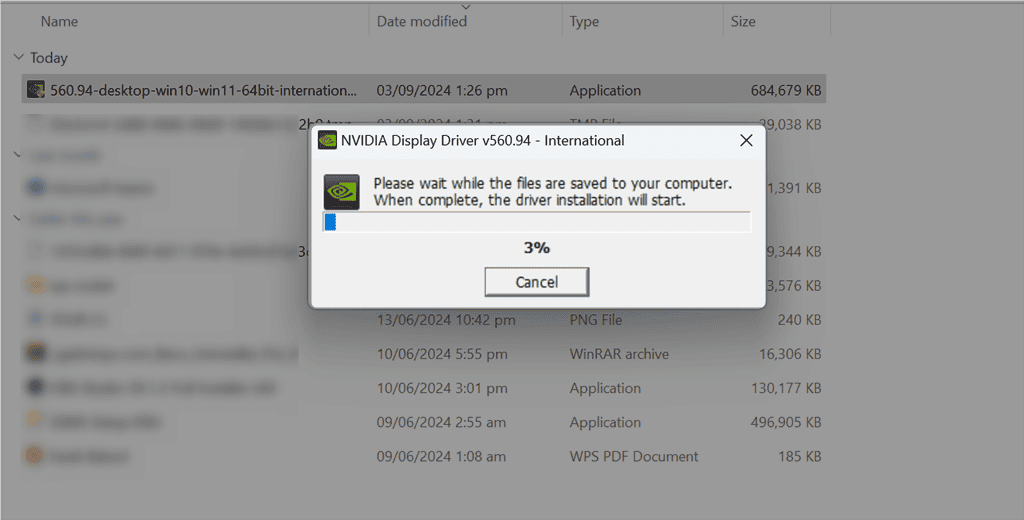
8. Wait for a few minutes while the files are saved to the system.
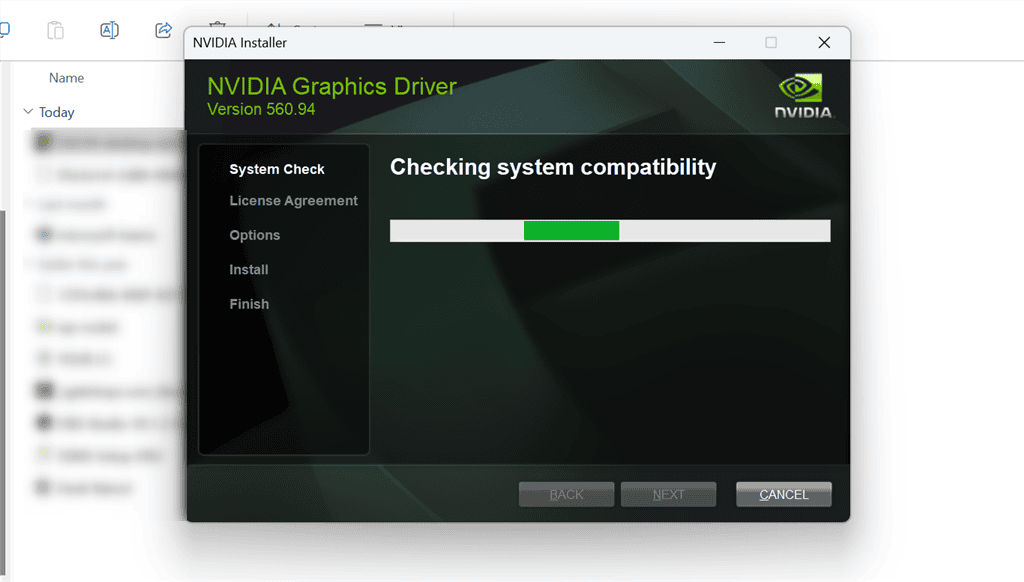
9. As soon as the NVIDIA driver updater launches, it checks for system compatibility.
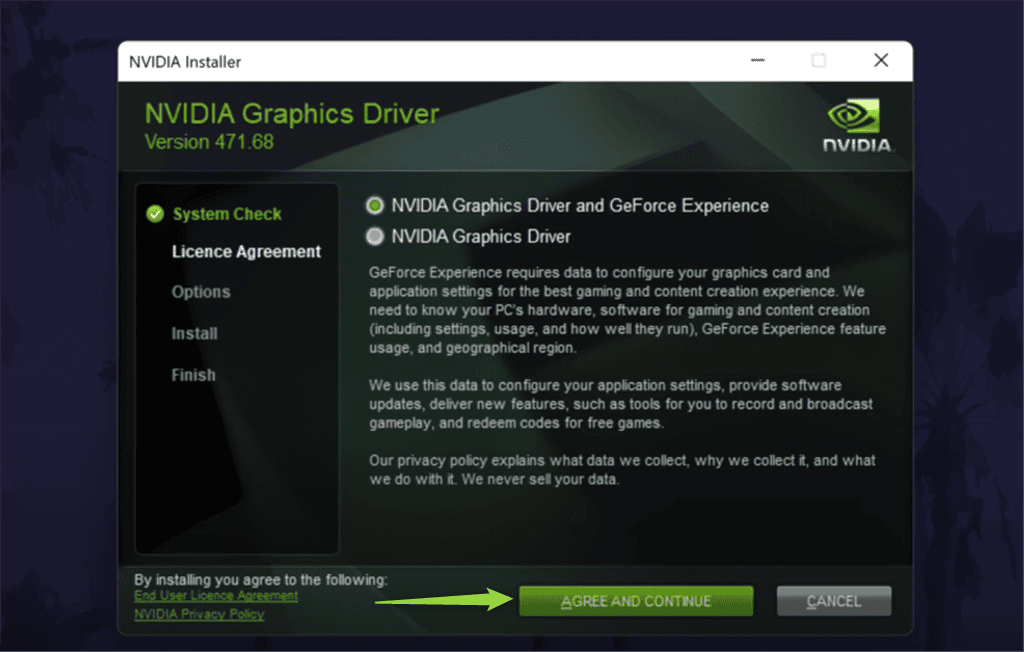
10. Select the NVIDIA Graphics Driver and GeForce Experience option and click AGREE AND CONTINUE.
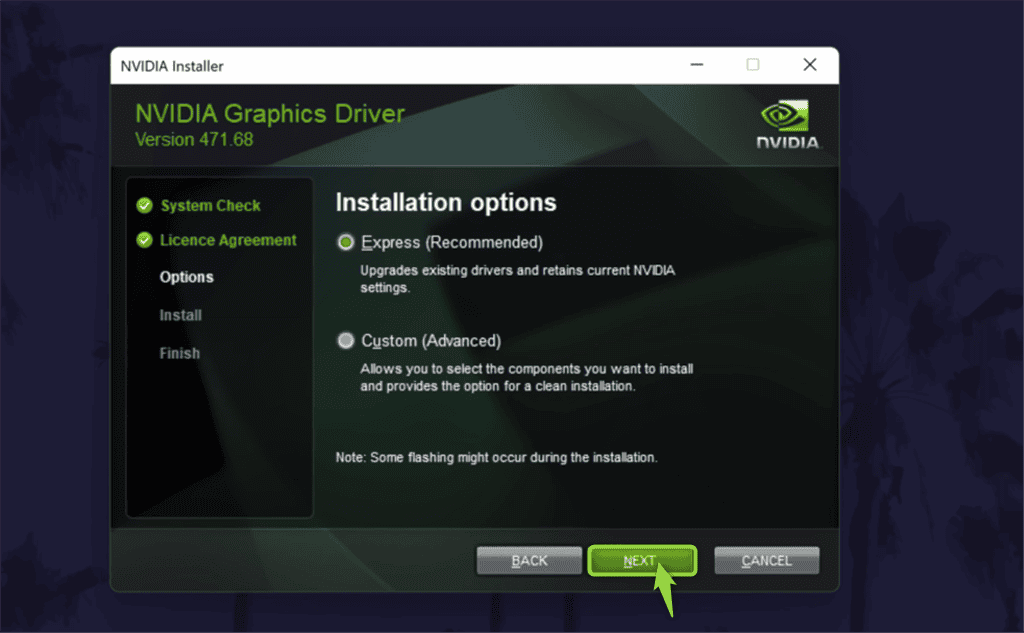
11. Choose the Express (Recommended) installation option and click NEXT.
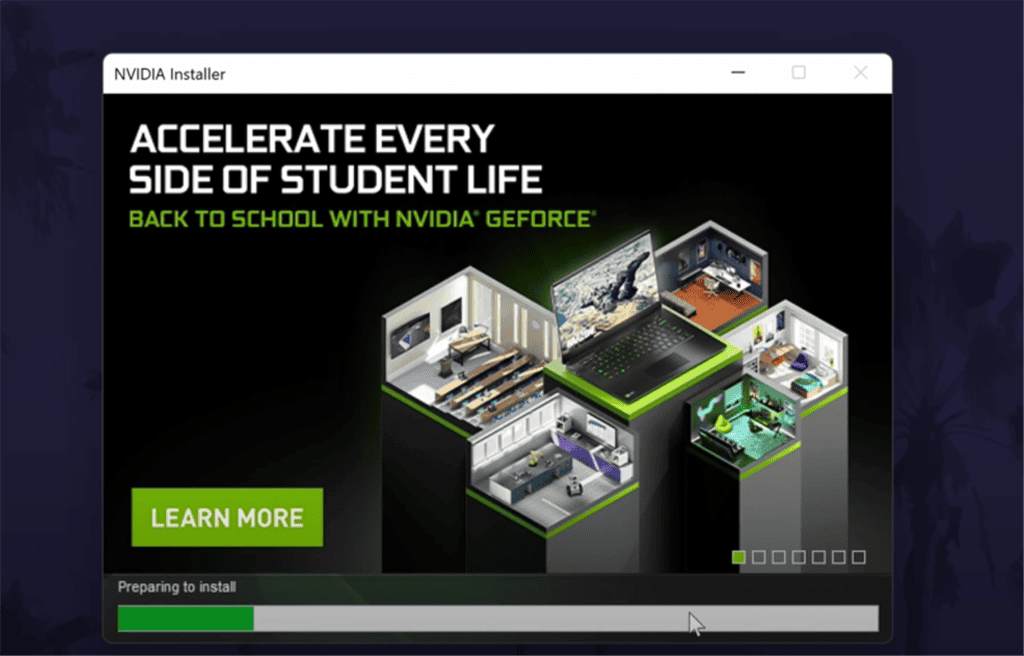
12. As a result, the NVIDIA Installer prepares to update the relevant driver on your system.
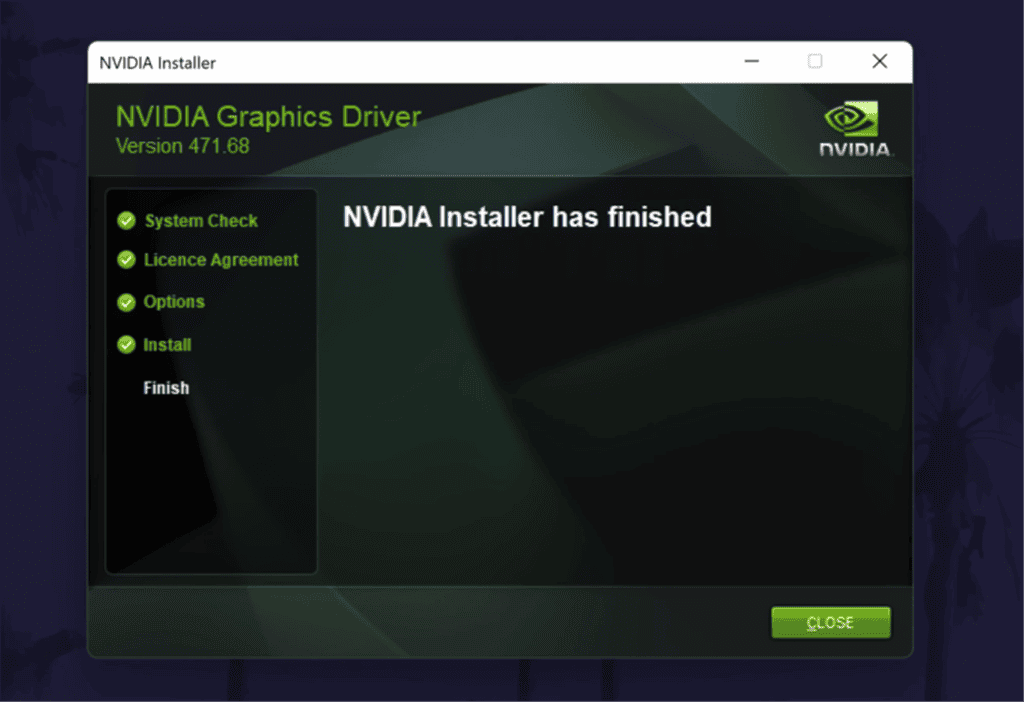
13. Click CLOSE.
1.2 Enable discrete GPU
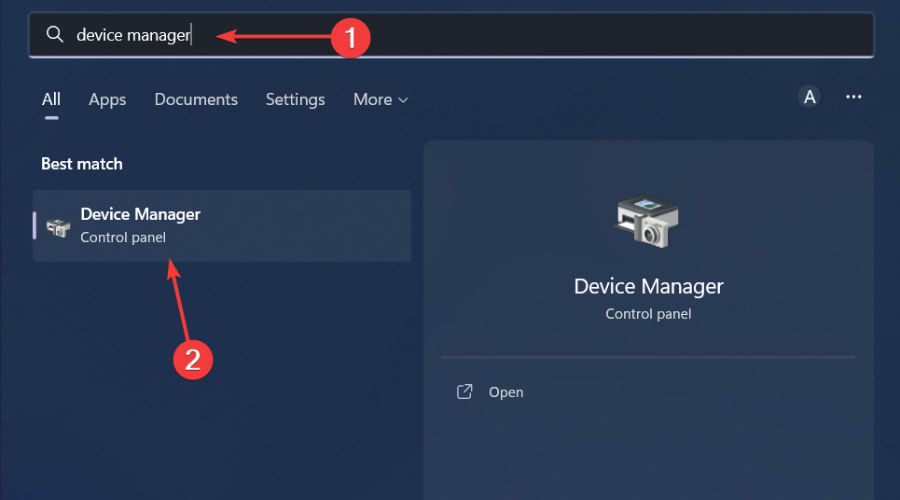
- Click on the Start Menu icon, type Device Manager in the search bar, and click Open.
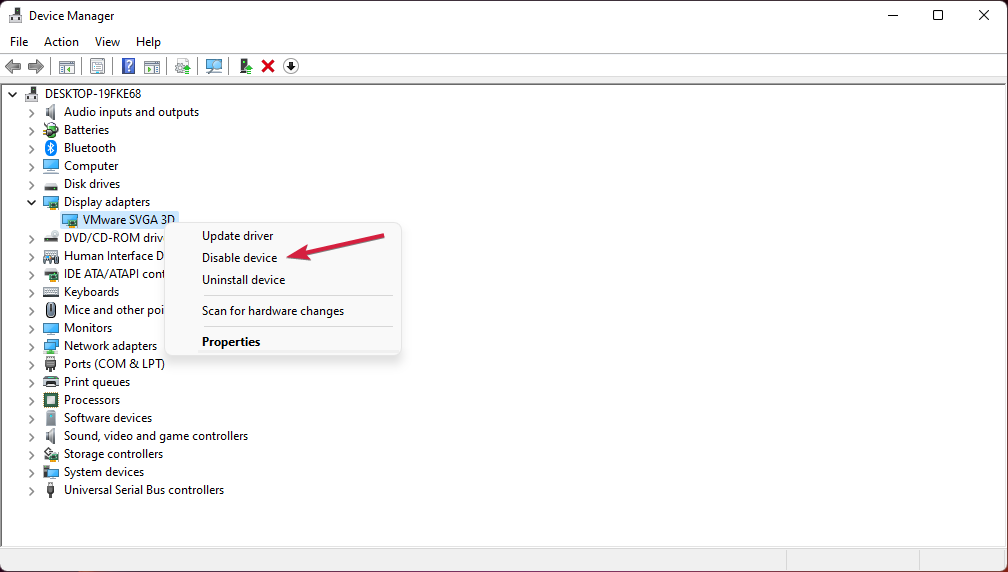
- Navigate to Display adapters to expand, right-click on your graphics card, and select Disable device.
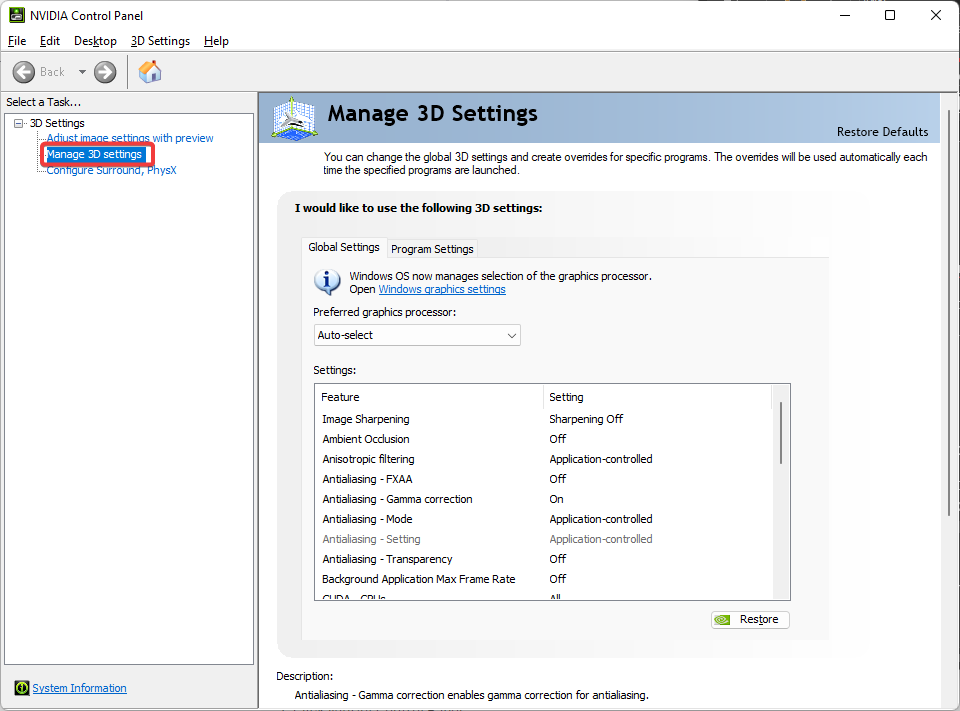
- Next, launch your dedicated graphics card control panel (In this case, Nvidia Control Panel).
- Select Manage 3D settings from the navigation pane on the left.
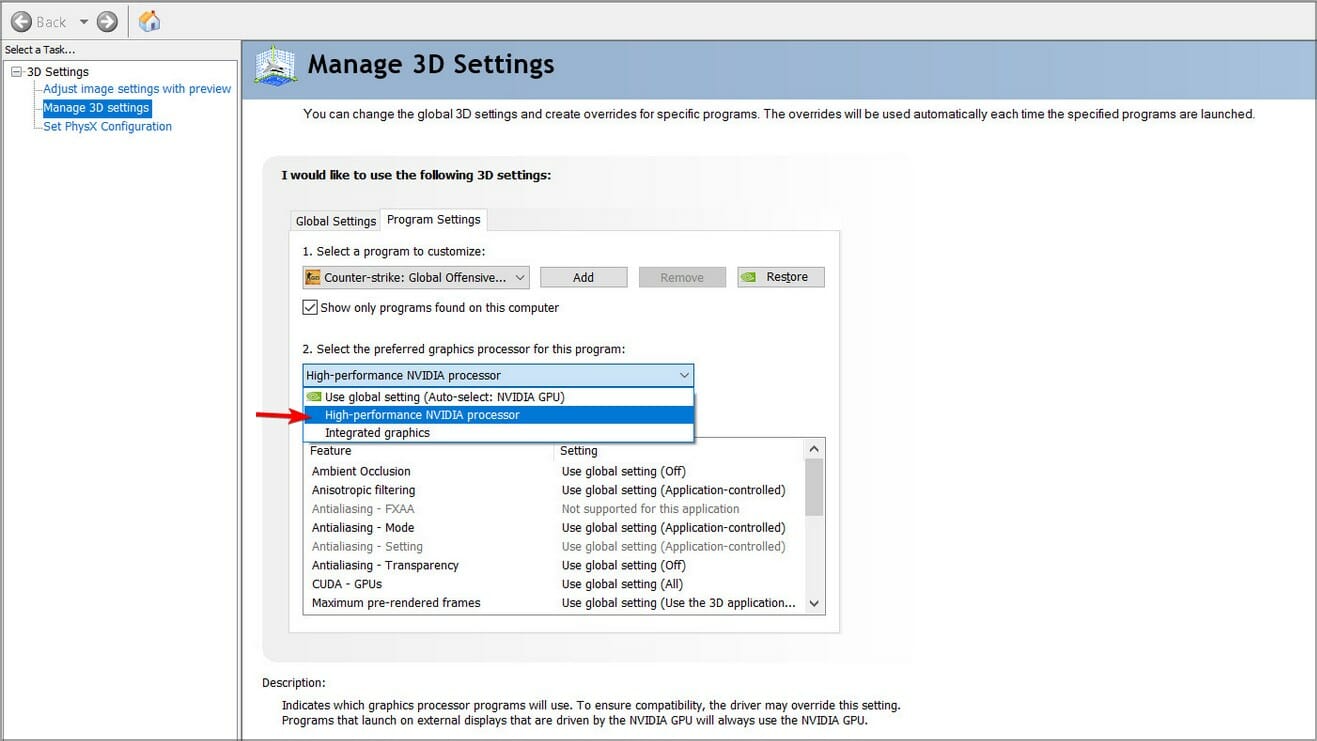
- Choose a High-performance NVIDIA processor from the Preferred graphics processor dropdown menu.
2. Restart the System Interface Foundation (SIF) service
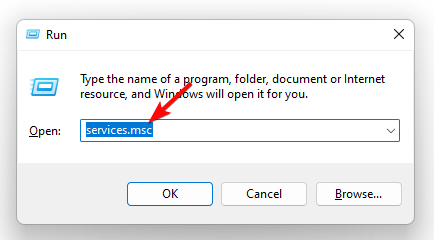
- Hit the Windows + R keys to open the Run command.
- Type services.msc and hit Enter.
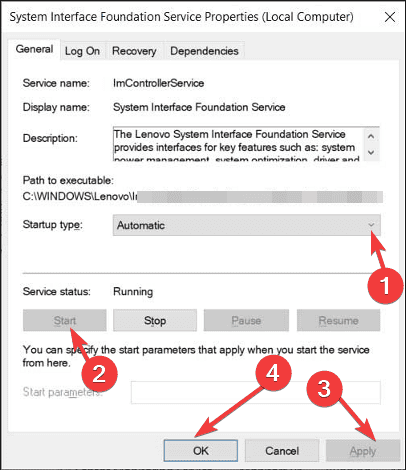
- Locate System Interface Foundation (SIF) service, right-click on it, and select Properties.
- Navigate to the General tab, under Startup type, select Automatic from the drop-down options, and click on the Start button.
- Next, click Apply and then OK.
The SIF service facilitates communication between the Lenovo Vantage tool and your hardware. Restarting it will re-establish the connection in case it was interrupted or stopped abruptly.
3. Repair/reset the Lenovo Vantage app
- Hit the Windows key and click on Settings.
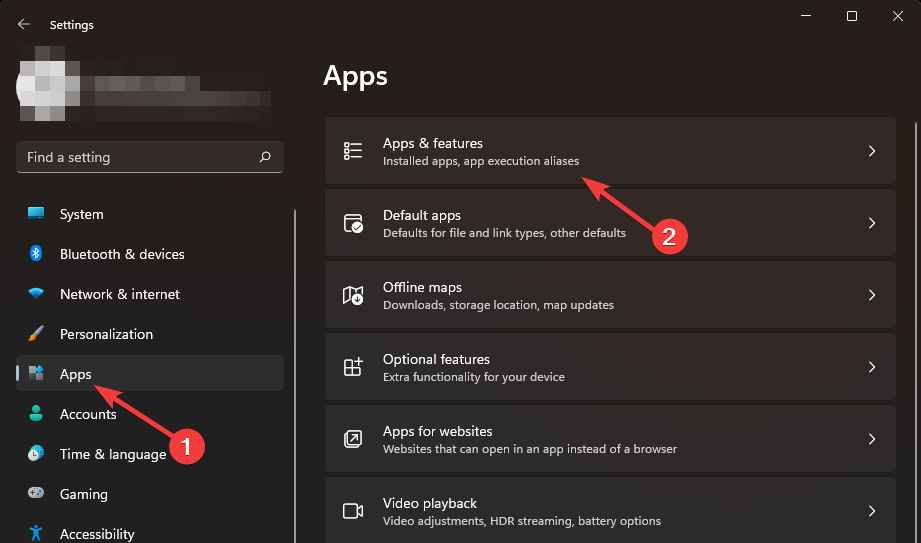
- Click on Apps on the left pane then Apps & features on the right pane.
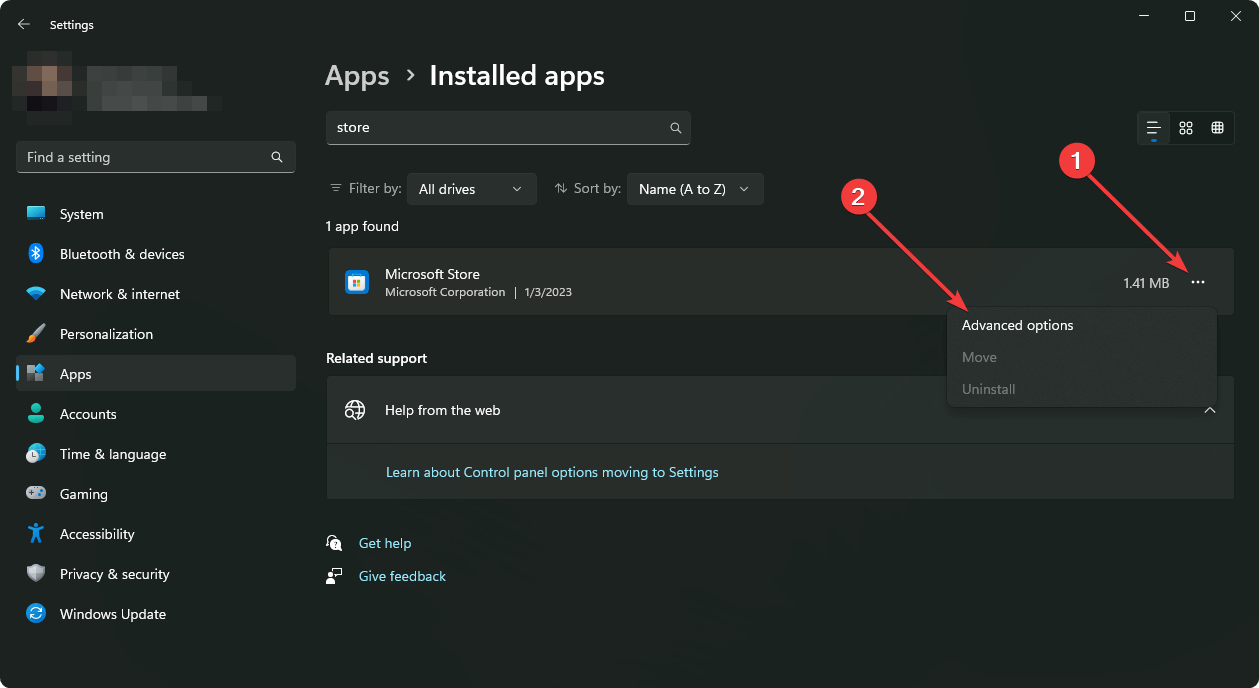
- Locate the Lenovo Vantage app click on the three vertical ellipses, and select Advanced options.
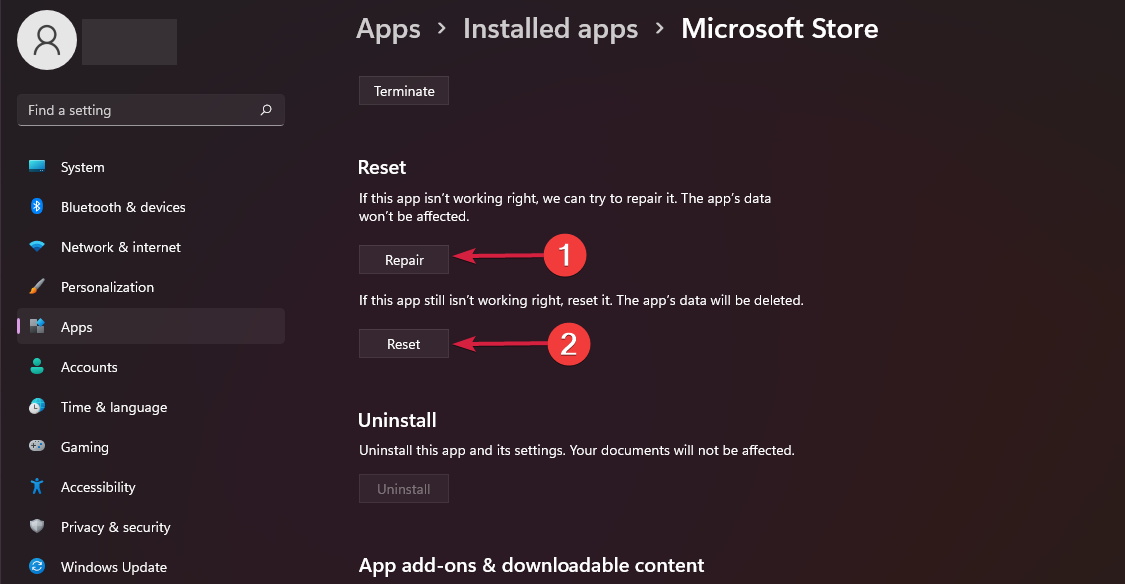
- Click on Repair.
- Go back and click on Reset if the repair option fails.
4. Update the BIOS with Lenovo Vantage
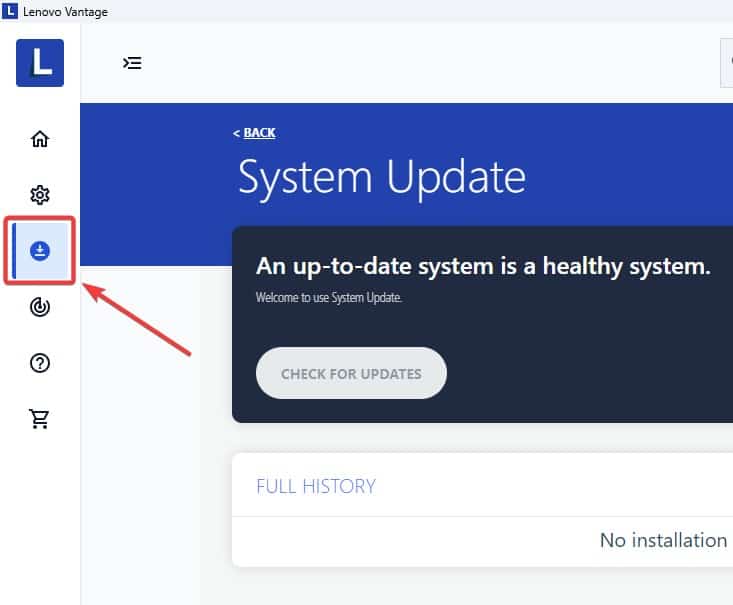
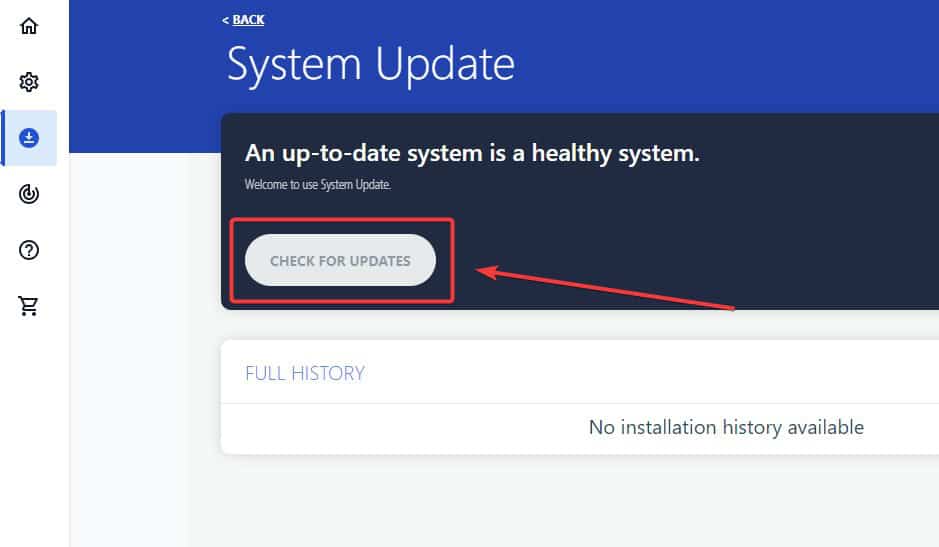
- Open the Lenovo Vantage app and go to the System Update tab.
- Click on the Check for Updates button.
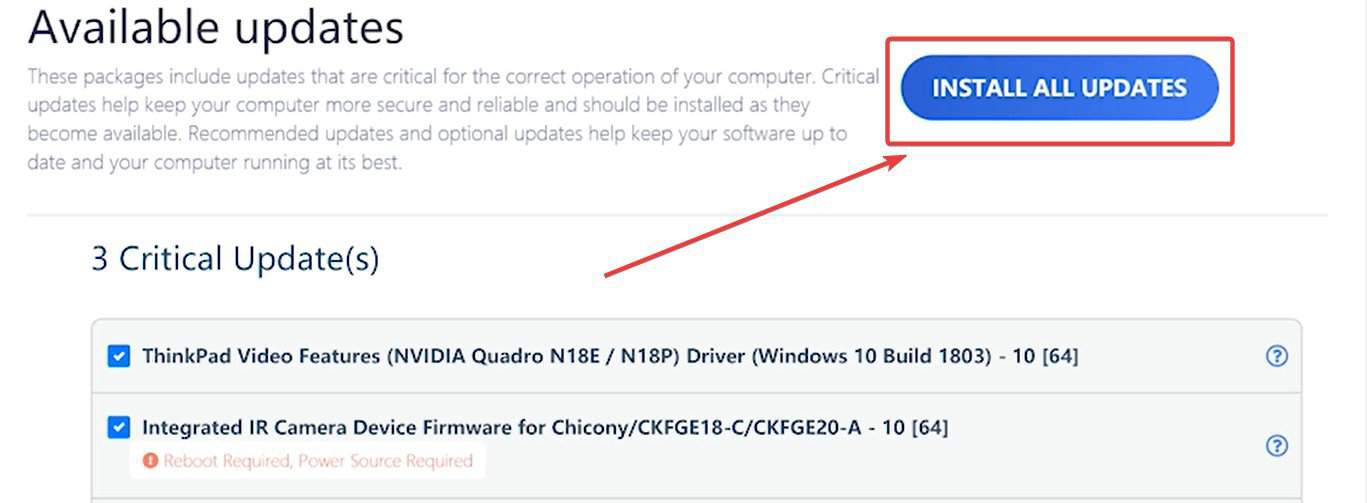
- This will prompt Lenovo Vantage to find all the possible drivers for your device, including the latest BIOS update.
- Click on Install All Updates.
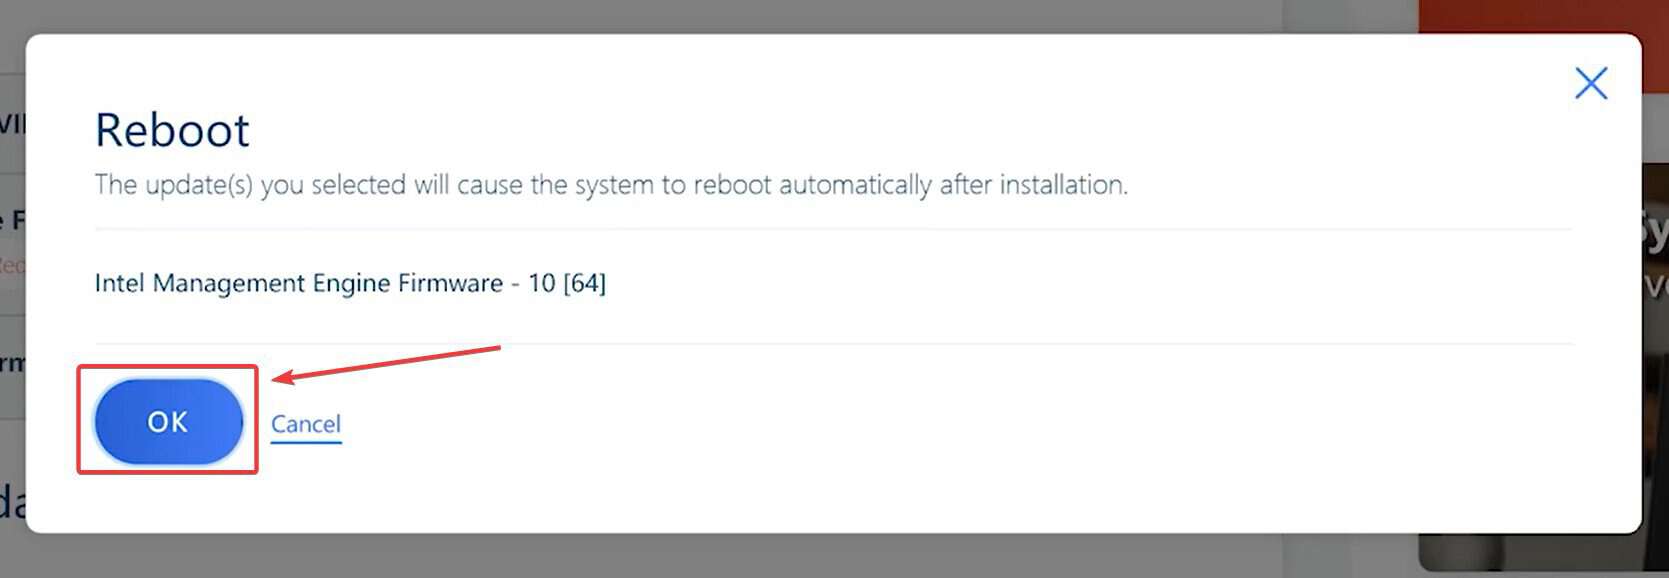
- Lenovo Vantage will let you know it will reboot the system; click OK.
- Wait for the installation process to be finished; your device will restart.
5. Reinstall the Lenovo Vantage app
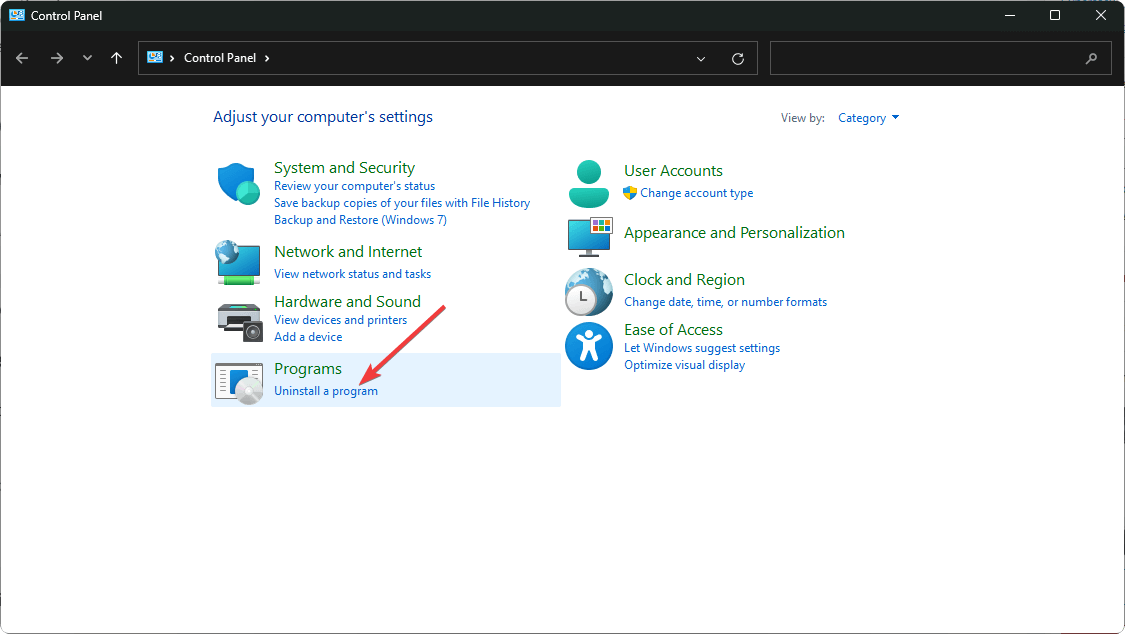
- Click on the Start Menu icon, type Control Panel on the search bar, and click Open.
- Select Uninstall a Program under Programs.
- Find the Lenovo Vantage app, click on it, and select Uninstall.
- Confirm uninstallation in the next pop-up.
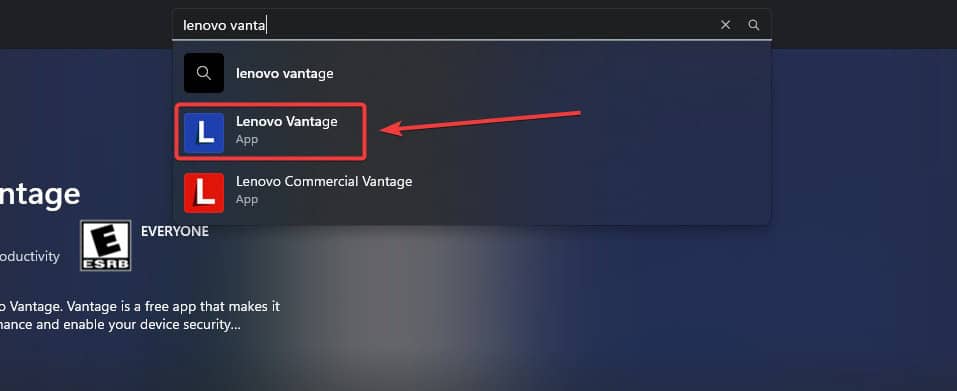
- Next, launch the Microsoft Store on your Windows device, type in Lenovo Vantage, and click on the result.
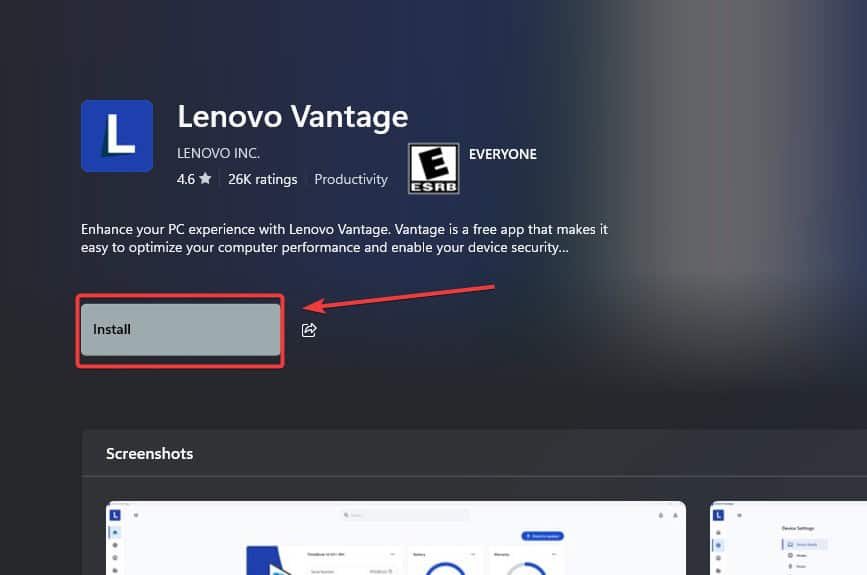
- Click on Get/Install, and wait for the installation process to be finished.
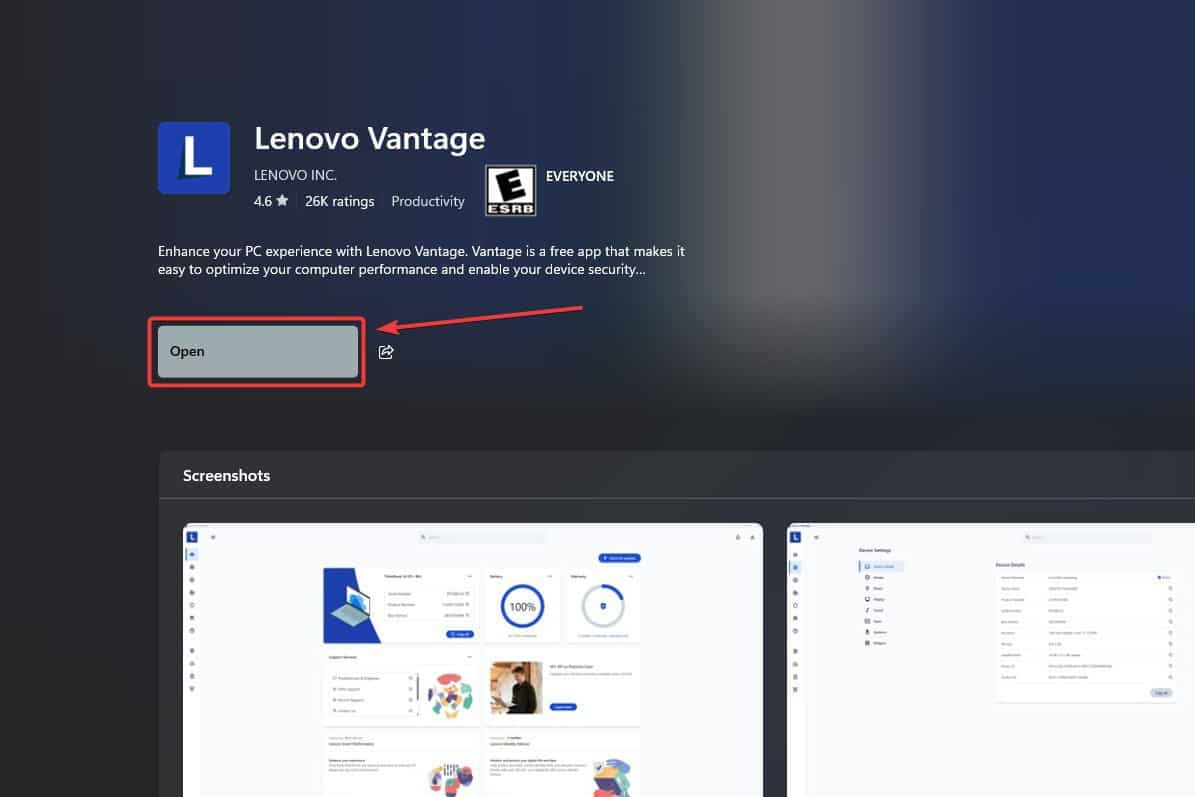
- Click on Open to access the app.
- Wait for the app to initiate the opening process.
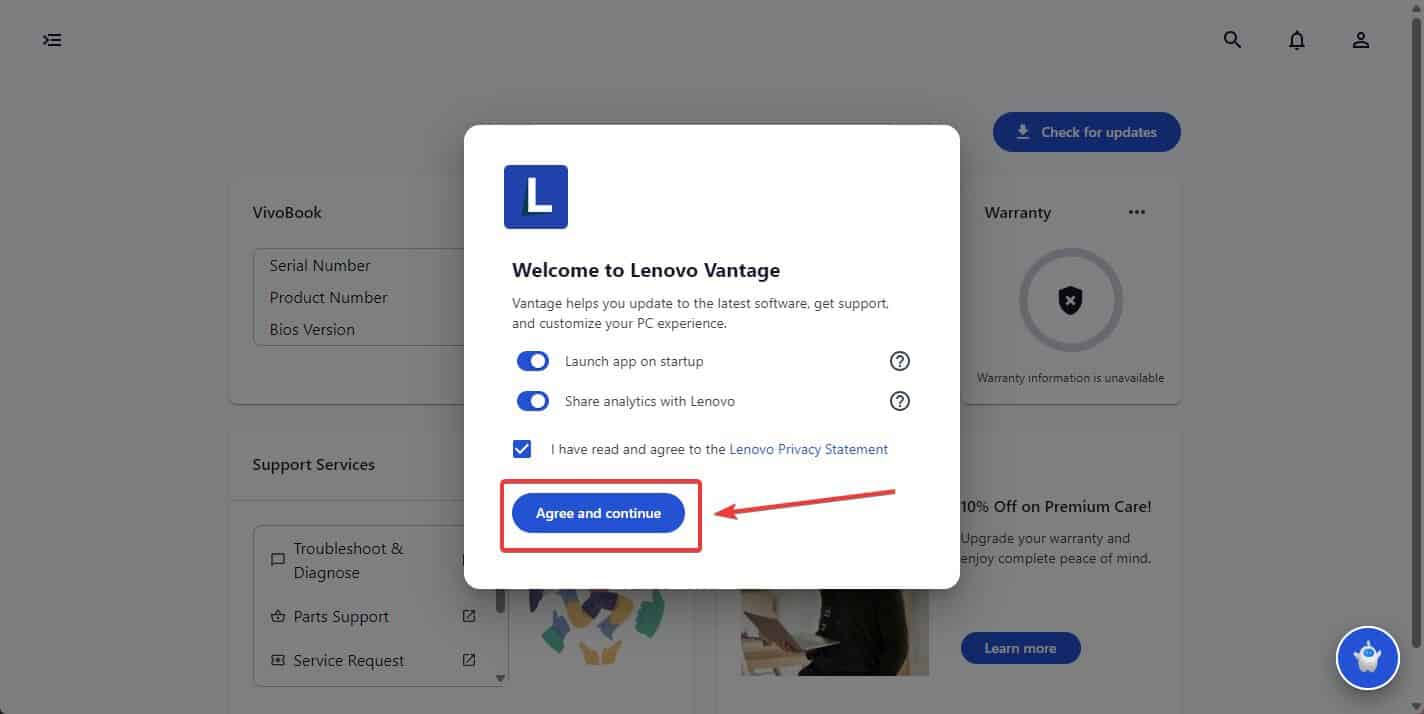
- Agree to the Terms and Conditions, and you’re good to go.
Once you recover this feature, it is also important to know the appropriate time to turn the hybrid mode on or off.
Elsewhere, if your Lenovo Vantage gets stuck mid-scan or keeps crashing, check out our comprehensive article on how to fix it.
For any additional thoughts or comments, leave a comment down below.







User forum
0 messages